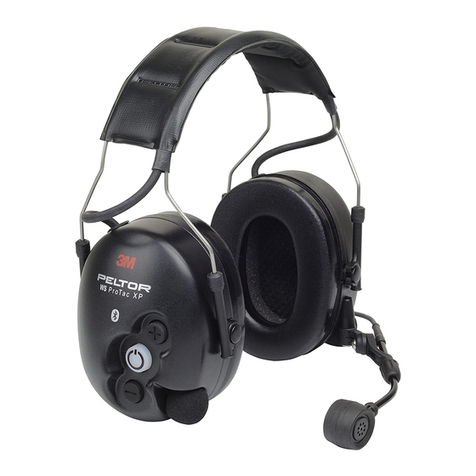
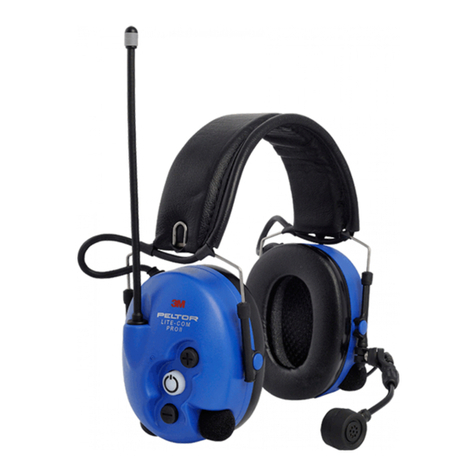
3M PELTOR HT 79 Series User manual

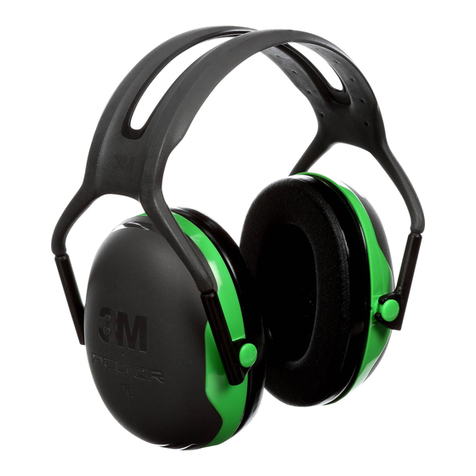
3M™PELTOR™ Headset (Listen Only)
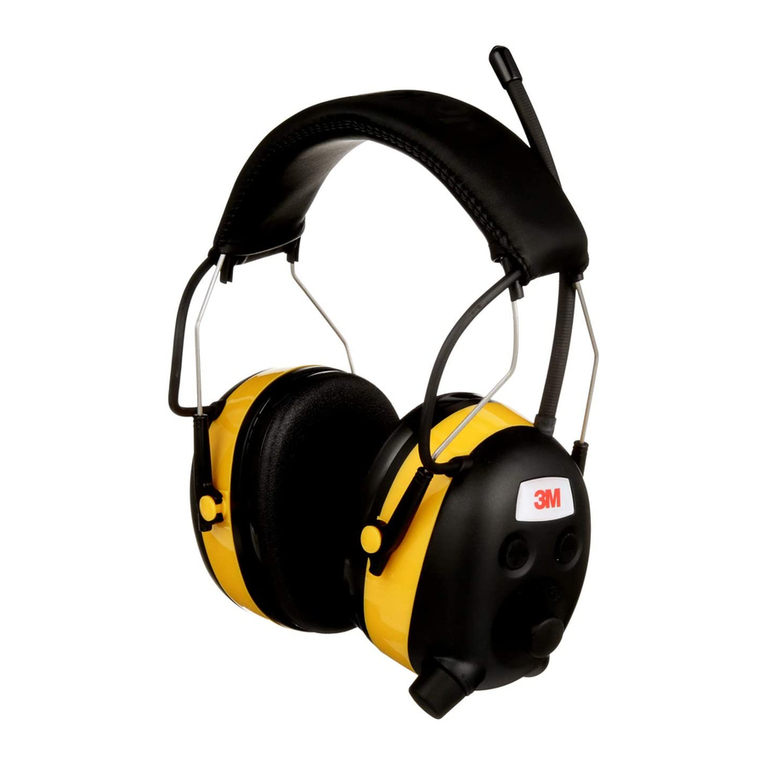
3M™PELTOR™ Headset
3M™PELTOR™ Twin Cup™Headset
The Sound Solution
HT*79* Series
MT7H79* Series
MT7*H540

(A) EN 352-1:2002 / EN 352-3:2002
MT7H79A*, MT7H79B*, MT7H79F*, HT*79A*, HT*79F*, HT*79B* EN 352-1:2002
A:1 Frequency (Hz) 125 250 500 1000 2000 4000 8000 SNR
A:2 Mean attenuation (dB) 17,7 27,1 33,8 38,1 36,2 33,6 37,1
33
A:3 Standard deviation (dB) 2,9 2,1 2,4 2,6 2,3 2,5 2,2
A:4 APV (dB) 14,8 25,0 31,4 35,5 33,9 31,1 34,9
H = 33 dB, M = 32 dB, L = 24 dB
MT7H79P3E*, HT*79P3* EN 352-1:2002
A:1 Frequency (Hz) 125 250 500 1000 2000 4000 8000 SNR
A:2 Mean attenuation (dB) 17,2 26,4 33,9 37,2 35,4 33,2 37,0
32
A:3 Standard deviation (dB) 3,1 2,5 2,7 2,3 2,6 2,4 2,0
A:4 APV (dB) 14,1 23,9 31,2 34,9 32,8 30,8 35,0
H =33 dB, M = 31 dB, L = 23 dB
MT7*H540F* EN 352-1:2002
A:1 Frequency (Hz) 125 250 500 1000 2000 4000 8000 SNR
A:2 Mean attenuation (dB) 18,9 24,4 32,7 35,3 33,3 41,0 49,4
33
A:3 Standard deviation (dB) 2,3 1,8 1,7 2,6 2,7 3,0 3,2
A:4 APV (dB) 16,6 22,6 31,0 32,7 30,6 38,1 36,2
H =33 dB, M = 31 dB, L = 24 dB
MT7*H540P3E* EN 352-3:2002
A:1 Frequency (Hz) 125 250 500 1000 2000 4000 8000 SNR
A:2 Mean attenuation (dB) 17,9 23,3 34,0 35,8 31,5 40,5 36,5
31
A:3 Standard deviation (dB) 3,3 3,6 4,2 2,9 3,0 4,7 4,0
A:4 APV (dB) 14,6 19,7 29,8 32,9 28,5 35,8 32,5
H =31 dB, M = 29 dB, L = 21 dB
(B) ANSI S3.19-1974
MT7*H540P3E* ANSI S3.19-1974
B:1 Test Frequency (Hz) 125 250 500 1000 2000 3150 4000 6300 8000 NRR CSA
Class
B:2 Mean attenuation (dB) 16.7 22.0 31.7 36.3 33.7 34.1 34.0 33.5 35.6
25
B:3 Standard deviation (dB) 2.7 2.3 2.6 2.3 2.1 2.1 2.9 3.2 3.7 B
MT7H79AB* ANSI S3.19-1974
B:1 Test Frequency (Hz) 125 250 500 1000 2000 3150 4000 6300 8000 NRR CSA
Class
B:2 Mean attenuation (dB) 16.2 23.0 31.8 38.4 34.4 31.4 33.4 34.2 35.6
24
B:3 Standard deviation (dB) 3.1 2.5 3.0 3.8 3.3 3.3 2.3 3.3 2.7 B
MT7H79P3E* ANSI S3.19-1974
B:1 Test Frequency (Hz) 125 250 500 1000 2000 3150 4000 6300 8000 NRR CSA
Class
B:2 Mean attenuation (dB) 16.5 22.0 28.6 34.9 32.0 28.7 31.2 32.5 32.5
21
B:3 Standard deviation (dB) 3.7 3.2 3.6 4.4 3.5 2.9 3.2 3.4 4.1 B
MT7H79F* ANSI S3.19-1974
B:1 Test Frequency (Hz) 125 250 500 1000 2000 3150 4000 6300 8000 NRR CSA
Class
B:2 Mean attenuation (dB) 17.9 23.9 34.4 40.3 36.1 31.3 33.1 32.5 35.4
25
B:3 Standard deviation (dB) 3.1 3.6 3.2 2.8 2.5 2.8 2.6 3.1 2.4 B
The Sound Solution

(C) AS/NZS 1270:2002
MT7H79A*, HT*79A* AS/NZS 1270:2002
C:1 Test Frequency (Hz) 125 250 500 1000 2000 4000 8000 SLC80 Class Clamping
Force (N)
C:2 Mean attenuation (dB) 16.9 23.7 33.7 38.0 33.9 33.4 35.8
31 5
C:3 Standard deviation (dB) 3.9 3.4 4.2 4.2 3.7 3.0 3.8
9.3
C:4 Mean minus SD 13.0 20.3 29.5 33.8 30.2 30.4 32.0
MT7H79B*, HT*79B* AS/NZS 1270:2002
C:1 Test Frequency (Hz) 125 250 500 1000 2000 4000 8000 SLC80 Class Clamping
Force (N)
C:2 Mean attenuation (dB) 10.7 17.1 27.5 32.6 33.4 33.2 35.3
26 5
C:3 Standard deviation (dB) 3.8 4.6 4.6 3.8 4.2 3.3 3.0
10.2
C:4 Mean minus SD 6.9 12.5 22.9 28.8 29.2 29.9 32.3
MT7H79P3E*, HT*79P3* AS/NZS 1270:2002
C:1 Test Frequency (Hz) 125 250 500 1000 2000 4000 8000 SLC80 Class Clamping
Force (N)
C:2 Mean attenuation (dB) 15.4 21.2 31.3 37.6 31.8 32.7 35.3
29 5
C:3 Standard deviation (dB) 3.1 4.7 3.9 3.6 2.8 3.1 3.6
9.5
C:4 Mean minus SD 12.3 16.5 27.4 34.0 29.0 29.6 31.7
MT7H79F*, HT*79F AS/NZS 1270:2002
C:1 Test Frequency (Hz) 125 250 500 1000 2000 4000 8000 SLC80 Class Clamping
Force (N)
C:2 Mean attenuation (dB) 19.7 22.5 32.0 37.8 34.6 31.7 31.9
30.8 5
C:3 Standard deviation (dB) 4.3 2.9 3.6 2.5 2.7 1.9 4.0
11.1
C:4 Mean minus SD 15.4 19.6 28.4 35.3 31.9 29.8 27.9
(D) COMPATIBLE INDUSTRIAL SAFETY HELMETS
D:1 Helmet Manufacturer D:2 Helmet model D:3 Attachment D:4 Head Size
3M Airstream AH1, AH4 P3AE L
3M Airstream AH7 P3AE L
3M Airstream HT-701, HT- 702, HT-705 P3AE L
3M Airstream HT-707 P3AE L
3M Versao M-106, M-107 P3AE M L
3M Versao M-306, M-307 P3AE M L
3M (PELTOR) G2000 P3K, P3E S M L
3M (PELTOR) G22 (BASIC SET) P3E S M L
3M (PELTOR) G3000 P3E S M L
Auboueix Brennus P3F S M L
Auboueix Fondelec P3F S M L
Auboueix Iris P3E M L
Auboueix Iris 2 P3E M L
Sofop Taliaplast Oceanic P3E M L
Sofop Taliaplast Opus P3E M L

Berendsen Safety Balance HD P3N S M L
Centurion 1125/ARCO plus P3H S M L
Centurion 1100/ARCO type 2 P3H S M L
Centurion 1540/ARCO P3A M L
Evert Larsson Robust P3E S M L
Evert Larsson Balance P3E M L
Evert Larsson Balance AC/3M 1465 P3E M L
Kemira Top Cap P3A S M L
LAS LP2002 P3E S M L
LAS LP2006 P3E S M L
MSA Super V-Gard II P3E S M L
MSA V-Gard P3E S M L
Petzl Vertex P3E S M L
Pfanner Protos Integral Mod. P2 S M L
Protector Style 300 P3E S M L
Protector Style 600 P3G S M L
Protector Tuffmaster II P3E, P3G M L
Römer Bravo 2 Nomaz P3B S M L
Römer Marcus Top 2 Atlas Nomaz P3B S M L
Römer N2 Atlas Nomaz P3BB S M L
Römer Pro Expo P3E S M L
Römer Pro Nomaz P3E S M L
Römer Top Expo Atlas P3B S M L
Schuberth BEN P3BB S M L
Schuberth BER80/WPC80 P3EA S M L
Schuberth BER S P3E S M L
Schuberth BOP R P3B S M L
Schuberth PIONIER P3B S M L
Schuberth SH 91/WPL 91 P3EB S M L
Schuberth SW1 P3EB M L
UVEX Airwing P3E S M L
Voss Inap 88 P3E S M L
Voss Inap Master P3E M L
Voss Inap Star P3E M L
Voss Inap PCG P3G M L
For more information about 3MTM Safety Helmets, visit www.3M.com

(E) External audio input levels
E:1 Model
HTR-32 B HTS-330 HTR-230 HTZ
E:2 Voltage input
for 82 dB (mV) 104 mV 451 mV 270 mV 91 mV
E:1 Model
HTRL HTS-230 HTAC-220
E:2 Voltage input
for 82 dB (mV) 198 370 147

1
3M™ PELTOR™ Headset
MT7H79* Series
HT*79* Series
TwinCup™ MT7*H540*
INTRODUCTION
Congratulations and thank you for choosing the 3M™ PEL-
TOR™ Headset for your hearing protection and communica-
tion needs. Welcome to the next generation of protective
communication!
SAFETY INFORMATION
Please read, understand, and follow all safety information in
these instructions prior to using the communication headset.
Retain these instructions for future reference.
WARNING:
• If the information and recommendations contained herein
are not adhered to, the protection afforded by the earmuffs
will be severely impaired.
• This hearing protector helps reduce exposure to hazardous
noise and other loud sounds. Misuse or failure to wear
hearing protectors at all times that you are exposed to
hazardous noise may result in hearing loss or injury.
For proper use, see supervisor, user instructions, or contact
3M Technical Support.
• The output of the electrical audio circuit of this hearing
protector may exceed the daily limit sound level.
• Specic models are designated as Intrinsically Safe. See
separate reference document for more information.
CAUTION:
• Ensure the headset is tted, adjusted and maintained in
accordance with these user instructions. Improper t of
this device will reduce its effectiveness in attenuating
noise. Consult the enclosed instructions for proper t.
• Hearing protectors must be worn at all times in noisy sur-
roundings for proper protection.
• Although hearing protectors can be recommended for pro-
tection against the harmful effects of impulsive noise, the
Noise Reduction Rating (NRR) is based on the attenuation
of continuous noise and may not be an accurate indicator
of the protection attainable against impulsive noise such as
gunre (wording required by EPA).
• The noise reduction may be lower when eyeglasses,
goggles or respirator straps are worn between the sealing
surface of the earmuff cushions and the sides of the
wearer’s head. For best noise reduction, select eyeglasses
or goggles that have thin, at temples or straps which will
minimize interference with the seal of the earmuff cushions.
Pull long hair back to the extent possible and remove other
items that may degrade the earmuff seal such as pencils,
hats, jewelry or earbuds. Do not bend and reshape the
headband as this will cause a loose t and allow sound
leakage.
• When worn according to the User Instructions, this hearing
protector helps reduce exposure to both continuous
noises, such as industrial noises and noises from vehicles
and aircraft, as well as very loud impulse noises, such as
gunre. It is difcult to predict the required and/or actual
hearing protection obtained during exposure to impulse
noises. For gunre, the weapon type, number of rounds
red, proper selection, t and use of hearing protection,
proper care of hearing protection, and other variables
will impact performance. If your hearing seems dulled or
you hear a ringing or buzzing during or after any noise
exposure (including gunre), or for any other reason you
suspect a hearing problem, your hearing may be at risk. To
learn more about hearing protection for impulse noise, visit
www.3M.com/hearing.
NOTE:
• This earmuff is provided with electrical audio input. The
wearer should check correct operation before use. If distor-
tion or failure is detected, the wearer should refer to the
manufacturer’s advice.
• This product may be adversely affected by certain chemical
substances. Further information should be sought from the
manufacturer.
• Earmuffs, and in particular cushions, may deteriorate
with use and should be examined at frequent intervals for
cracking and leakage, for example.
• The tting of hygiene covers to the cushions may affect the
acoustic performance of the earmuffs.
• In Canada, users of hard hats combined with earmuffs
must refer to CSA Standard Z94.1 on industrial protective
headwear.
• Operating and storage temperature: -4°F (-20°C) to 131°F
(55°C).
• Weight of hearing protector:
o MT7H79A*, MT7H79B* and MT7H79F*: 381g
o MT7H79P3E: 320g
o HT*79A*, HT*79B* and HT*79F*: 381g
o HT*79P3E: 320g
o MT7*H540F*: 428g
o MT7*H540P3E: 345g
• 3M Svenska AB hereby declares that this 3M™ PELTOR™
Headset is in compliance with the essential requirements
and other provisions set out in the PPE Directive (89/686/
EEC) and other appropriate Directives. The product has
been tested and approved in accordance with EN 352-
1:2002, EN 352-3:2002 and EN 352-6:2002 as well as
other appropriate harmonic standards. Thereby they full
the requirements for CE marking.
• Specic models are also in conformance with the ATEX
Directive, see separate folder. A copy of the declaration
of conformity and additional information required in the
Directives can be obtained by contacting 3M in the country
of purchase. For contact information, see last pages of this
user instruction.
This product contains electrical and electronic com-
ponents and must not be disposed of using standard
refuse collection. Please consult local directives for
disposal of electrical and electronic equipment.
GB

2
LABORATORY ATTENUATION
Explanation of the attenuation data tables
(A) EN 352-1:2002 / EN 352-6:2002
A:1 Frequency (Hz)
A:2 Mean attenuation (dB)
A:3 Standard deviation (dB)
A:4 Assumed protection value, APV (dB)
H = Hearing protection estimation for high frequency sounds
(ƒ ≥ 2000Hz).
M = Hearing protection estimation for medium frequency
sounds (500Hz < ƒ < 2000Hz).
L = Hearing protection estimation for Low frequency sounds
(ƒ ≤ 500Hz).
(B) ANSI S3.19-1974
B:1 Test Frequency (Hz)
B:2 Mean Attenuation (dB)
B:3 Standard Deviation (dB)
The level of noise entering a person’s ear, when hearing
protector is worn as directed, is closely approximated by the
difference between the A-weighted environmental noise level
and the NRR.
Example
1. The environmental noise level as measured at the ear is
92 dBA.
2. The NRR is 21 decibels (dB).
3. The level of noise entering the ear is approximately equal
to 71 dB(A).
CAUTION: For noise environments dominated by frequencies
below 500 Hz the C-weighted environmental noise level
should be used.
(C) AS/NZS 1270:2002
C:1 Test Frequency
C:2 Mean Attenuation
C:3 Standard Deviation
C:4 Mean minus SD
(D) Compatible Industrial Safety Helmets
These earmuffs should be tted to, and used only with, the
industrial safety helmets listed in Table D. These earmuffs
were tested in combination with the following industrial safety
helmets, and may give different levels of protection if tted to
different helmets.
Explanation of the industrial safety helmet attachment table:
D:1 Helmet manufacturer
D:2 Helmet model
D:3 Helmet attachment
D:4 Head size: S = small, M = medium, L = large
(E) External Audio Input Levels
Table E lists the various types of PELTOR headset speakers
and the corresponding voltage level that generates a sound
pressure level of 82 dB(A) in the headset. To identify the
speaker model in your headset, remove the hygiene kit
compare the speaker to the pictures and colors described in
Table E.
E:1 Model, color ( grey black blue)
E:2 The voltage input that generates 82 dB(A)
(F) COMPONENTS
F:1 Headband (PVC or leather)
F:2 Headband wire (stainless steel)
F:3 Two-point fasteners (POM)
F:4 Connection cord with Nexus TP-120 plug (PUR)
F:5 Speech microphone (PUR)
F:6 Ear cushion (PVC foil, PUR foam)
F:7 Push-to-talk button (only some models)
F:8 Cup
F:9 Foldable headband (stainless steel, TPE or leather)
F:10 Neckband (stainless steel, PO)
F:11 Helmet attachment (stainless steel, POM)
GB
F:9
F:10
F:11
F:1
F:6
F:8
F:4
F:2
F:5
F:7
F:3

3
(G) FITTING THE HEADSET
Headband and foldable headband
G:1 G:3
G:2
G:1 Slide out the cups and tilt the top of the shell out, as the
cable must be on the outside of the headband.
G:2 Adjust the height of the cups by sliding them up or down
while holding the headband in place.
G:3 The headband should be positioned across the top of
your head as shown and should support the weight of the
headset.
Neckband
G:4 G:5 G:6
G:4 Place the cups in position over the ears.
G:5 Keep the cups in position, place the head strap on top of
your head and lock it tight in position.
G:6 The head strap should be positioned across the top of
your head and should support the weight of the headset.
Helmet attachment
G:7 G:8 G:9
G:10 G:11
G:7 Insert the helmet attachment in the slot on the helmet
and snap it into place (G:8).
G:9 Work mode. Make sure that the cups and the headband
wires do not press on the edge of the helmet when in work
mode as this can cause noise leakage.
G:10 Ventilation mode. To switch the unit from work mode to
ventilation mode, pull outward on the ear cups until you hear
a click. Avoid placing the cups against the helmet (G:11) as
this prevents ventilation.
Microphone
C:1 C:2
To maintain noise cancelling performance, the speech
microphone should be positioned very close to your mouth
(less than 3 mm or 1/8 inch).
(H) CLEANING AND MAINTENANCE
Use a cloth wetted with soap and warm water to clean the
outer shells, headband and ear cushions.
NOTE: Do NOT immerse the hearing protector in water.
If the hearing protector gets wet from rain or sweat, turn the
earmuffs outwards, remove the ear cushions and foam liners,
and allow to dry before reassembly.
The ear cushions and foam liners may deteriorate with use
and should be examined at regular intervals for cracking and
leakage. When used regularly, 3M recommends replacing
the foam liners and ear cushions at least twice a year to
maintain consistent attenuation, hygiene, and comfort. If an
ear cushion is damaged, it should be replaced. See Spare
Parts Section below.
REMOVING AND REPLACING THE EAR CUSHIONS
H:1
H:2
H:3
H:1 To remove the ear cushion, slide your
ngers under the edge of the ear cushion and rmly pull
straight out.
H:2 Insert the foam liner.
H:3 Then, t one side of the ear cushion into the groove of
the earcup and then press on the opposite side until ear
cushion snaps in place.
REPLACING THE HELMET ATTACHMENT PLATE
H:4 H:5
For proper tting on different industrial safety helmets, the
helmet attachment plate may need to be replaced. Find the
recommended attachment in Table D. Plates for P3K attach-
ment are included on delivery. Other plates can be obtained
from your dealer. A screwdriver is needed.
H:4 Loosen the screw holding the plate.
H:5 Replace the plate, ensure the plate is positioned correctly
and tighten the screw.
GB

4
SPARE PARTS AND ACCESSORIES
Throat microphone: MT9
Microphone protector: HYM1000
A moisture-resistant, wind-resistant and hygienic protec-
tor that effectively protects and prolongs the life of the
microphone. Supplied in 5-meter pack, enough for about 50
applications.
Wind shield for MT7N microphone: M40/1
Effective protection against wind noise. Protects the microp-
hone and extends its life. Pack contains one wind shield.
Clean disposable cover: HY100A
Hygienic disposable cover that is easily tted over cushions.
Supplied in pack of 100 pairs.
Clip: TKFL01
Can be used as required to secure connecting cable to
clothing.
Storage bag for headset: FP9007
Protects your headset during transport and storage.
Hygiene kit: HY79
Easy to replace hygiene kit consisting of two foam liners and
snap-in ear cushions.
Microphone: MT7N
Complete microphone boom with dynamic microphone.
WARRANTY AND LIMITATION OF LIABILITY
NOTE: The following statements do not apply in Australia
and New Zealand. Consumers should rely on their statutory
rights.
WARRANTY: In the event any 3M Personal Safety Division
product is found to be defective in material, workmanship, or
not in conformity with any express warranty for a specic pur-
pose, 3M’s only obligation and your exclusive remedy shall
be at 3M’s option, to repair, replace or refund the purchase
price of such parts or products upon timely notication of the
issue by you and substantiation that the product has been
stored, maintained and used in accordance with 3M’s written
instructions. EXCEPT WHERE PROHIBITED BY LAW,
THIS WARRANTY IS EXCLUSIVE AND IS IN LIEU OF ANY
EXPRESS OR IMPLIED WARRANTY OF MERCHANTABI-
LITY, FITNESS FOR A PARTICULAR PURPOSE OR OTHER
WARRANTY OF QUALITY, OR THOSE ARISING FROM A
COURSE OF DEALING, CUSTOM OR USAGE OF TRADE,
EXCEPT OF TITLE AND AGAINST PATENT INFRINGE-
MENT. 3M has no obligation under this warranty with respect
to any product that has failed due to inadequate or improper
storage, handling, or maintenance; failure to follow product
instructions; or alteration or damage to the product caused
by accident, neglect, or misuse. LIMITATION OF LIABILITY:
EXCEPT WHERE PROHIBITED BY LAW, IN NO EVENT
SHALL 3M BE LIABLE FOR ANY DIRECT, INDIRECT,
SPECIAL, INCIDENTAL OR CONSEQUENTIAL LOSS OR
DAMAGES (INCLUDING LOST PROFITS) ARISING FROM
THIS PRODUCT, REGARDLESS OF THE LEGAL THEORY
ASSERTED. THE REMEDIES SET FORTH HEREIN ARE
EXCLUSIVE.
NO MODIFICATION: Modications to this device shall not
be made without the written consent of 3M Company. Unaut-
horized modications may void the warranty and the user’s
authority to operate the device.
GB

5
FR
3M™ PELTOR™ Headset
Série MT7H79*
Série HT*79*
TwinCup™ MT7*H540*
INTRODUCTION
Félicitations et merci d’avoir choisi le casque 3M™
PELTOR™ Headset pour votre protection auditive et vos
besoins de communication. Découvrez les protections
auditives communicantes de nouvelle génération !
INFORMATIONS RELATIVES À LA SÉCURITÉ
Veuillez lire, comprendre et observer toutes les informations
de sécurité gurant dans ces instructions avant d’utiliser le
casque de communication. Prière de conserver ces instruc-
tions en vue d’une utilisation future.
AVERTISSEMENT :
• Si les présentes informations et recommandations ne sont
pas observées, la protection fournie par le casque risque
d’être gravement compromise.
• Ces protections auditives permettent de limiter l’exposition
aux bruits dangereux et autres sons de forte intensité.
L’utilisation inappropriée ou la non-utilisation de
protections auditives lors de toute exposition à des
bruits dangereux peut provoquer une perte d’audition
ou des lésions auditives. Pour une utilisation adaptée,
contactez votre supérieur, lisez les instructions d’utilisation
ou appelez le support technique 3M.
• Le niveau de sortie du circuit audio électrique de cette pro-
tection auditive peut dépasser le niveau limite d’exposition
quotidienne.
• Les modèles spéciques sont dénis comme étant à
sécurité intrinsèque. Voir le document de référence séparé
pour plus d’informations.
ATTENTION :
• S’assurer que le casque est porté, ajusté et entretenu selon
les présentes instructions. Un port incorrect de ce dispo-
sitif réduira son efcacité pour l’atténuation du bruit.
Se reporter aux instructions d’utilisation ci-jointes,
indiquant comment le porter correctement.
• Les protections auditives doivent être portées en per-
manence dans des environnements bruyants pour une
protection adéquate.
• Bien que les protections auditives puissent être recom-
mandées pour la protection contre les effets nuisibles des
bruits impulsionnels, le niveau de réduction du bruit (NRR)
est basé sur l’atténuation du bruit continu et peut ne pas
représenter de façon adéquate la protection contre les
bruits impulsionnels comme les coups de feu (formulation
exigée par l’EPA).
• La réduction du bruit peut être inférieure lorsque des lunet-
tes classiques, des lunettes de protection ou des sangles
de respirateur sont portées entre la surface d’étanchéité
des coquilles et les côtés de la tête du porteur. Pour une
meilleure réduction du bruit, sélectionnez des lunettes qui
ont des branches nes et plates ou des sangles qui minimi-
sent l’interférence avec l’étanchéité des coquilles. Tirez les
cheveux longs en arrière le plus possible et retirez les ob-
jets qui peuvent gêner le montage du casque, comme les
crayons, chapeaux, bijoux ou écouteurs Ne tordez pas et
ne déformez pas le serre-tête, car cela rendra l’ajustement
plus lâche et entraînera une perte d’atténuation.
• Portées conformément aux instructions d’utilisation, ces
protections auditives contribuent à réduire l’exposition,
aussi bien aux bruits continus, tels que bruits industriels
et bruits provenant de véhicules et aéronefs, qu’aux bruits
impulsionnels très forts, tels que des coups de feu. Il est
difcile de prévoir la protection auditive requise et/ou réel-
lement obtenue durant l’exposition à des bruits impulsion-
nels. Pour les coups de feu, le type d’arme, le nombre de
salves tirées, le choix, l’ajustement et l’utilisation corrects
de la protection auditive, la manière dont on prend soin de
la protection auditive, ainsi que d’autres variables, auront
une incidence sur les performances. Si votre audition
semble diminuée ou si vous entendez une sonnerie ou
un bourdonnement durant ou après toute exposition à un
bruit (y compris à des coups de feu), ou si, pour toute autre
raison, vous suspectez un problème d’audition, votre ouïe
peut être exposée à des risques. Pour en savoir plus sur
la protection auditive adaptée à des bruits impulsionnels,
consulter le site www.3M.com/hearing.
REMARQUE :
• Cette protection auditive comporte une entrée audio
électrique. Il est recommandé à l’utilisateur de vérier le
bon fonctionnement du produit avant son utilisation. En cas
de distorsion ou de tout autre dysfonctionnement, suivez
les instructions du fabricant.
• Ce produit peut être endommagé par certaines substances
chimiques. Consulter le fabricant pour de plus amples
renseignements.
• Les coquilles, et en particulier les anneaux d’étanchéité,
peuvent se détériorer avec le temps et devront être
examinées fréquemment, an de détecter tout signe de
ssure ou de fuite.
• L’utilisation de kits d’hygiène sur les coussins peut modier
les performances des protections auditives.
• Au Canada, les utilisateurs de casques combinés avec des
protections auditives doivent se référer à la norme CSA
Z94.1 relative aux Casques de sécurité pour l’industrie.
• Température de stockage et d’utilisation : -4°F (-20°C) to
131°F (55°C).
• Poids de la protection auditive :
o MT7H79A*, MT7H79B* et MT7H79F*: 381 g
o MT7H79P3E: 320 g
o HT*79A*, HT*79B* et HT*79F*: 381 g
o HT*79P3E: 320 g
o MT7*H540F*: 428 g
o MT7*H540P3E: 345 g
• Par la présente, 3M Svenska AB déclare que ce casque
3M™ PELTOR™ Headset est conforme aux exigences
essentielles et aux autres dispositions pertinentes de la
directive PPE 89/89/CEE et à
6
FR
• d’autres directives pertinentes. Le produit a été testé et
approuvé selon les normes EN 352-1:2002, EN 352-3:2002
et EN 352-6:2002 ainsi que selon d’autres normes harmo-
nisées pertinentes. Ce faisant, il répond aux exigences de
marquage CE.
• Les modèles spéciques sont également conformes à la
directive ATEX, voir le dossier séparé. Une copie de la
déclaration de conformité, et les informations supplémen-
taires exigées par les Directives, peuvent être obtenues en
prenant contact avec 3M dans le pays d’achat. Pour obtenir
les coordonnées de contact, voir les dernières pages de ce
mode d’emploi.
Ce produit contient des composants électriques et
électroniques et ne doit pas être éliminé en ayant
recours au système de collecte habituel pour les
ordures ménagères. Prière de consulter les régle-
mentations locales concernant l’élimination des équipements
électriques et électroniques.
ATTÉNUATION DE LABORATOIRE
Explication des tableaux des données d’atténuation
(A) EN 352-1:2002 / EN 352-6:2002
A:1 Fréquence (Hz)
A:2 Atténuation moyenne (dB)
A:3 Écart type (dB)
A:4 Valeur de protection théorique APV (dB)
H = Valeur d’atténuation hautes fréquences (ƒ ≥ 2 000 Hz).
M = Valeur d’atténuation moyennes fréquences (500 Hz < ƒ
< 2 000 Hz).
L = Valeur d’atténuation basses fréquences (ƒ ≤ 500 Hz).
(B) ANSI S3.19-1974
B:1 Fréquence test (Hz)
B:2 Atténuation moyenne (dB)
B:3 Écart type (dB)
Le niveau de bruit auquel est exposée l’oreille d’une
personne portant une protection auditive conformément aux
instructions est sensiblement égal à la différence entre le
niveau de bruit ambiant pondéré A et le NRR.
Exemple
1. Le niveau de bruit ambiant mesuré à l’entrée de l’oreille
est de 92 dBA.
2. Le NRR est de 21 décibels (dB).
3. Le niveau de bruit entrant dans l’oreille est à peu près de
71 dB(A).
ATTENTION : pour les environnements bruyants dominés par
des fréquences inférieures à 500 Hz, c’est le niveau de bruit
ambiant pondéré C qui doit être utilisé.
(C) AS/NZS 1270:2002
C:1 Fréquence test (Hz)
C:2 Atténuation moyenne (dB)
C:3 Écart type (dB)
C:4 Moyenne moins SD
(D) Casques de sécurité industriels compatibles
Ces protections auditives doivent être montées et utilisées
uniquement avec les casques de sécurité industriels énu-
mérés dans le tableau D. Ces protections auditives ont
été testées en combinaison avec les casques de sécurité
industriels suivants, et peuvent offrir différents niveaux de
protection, en fonction des différents casques utilisés.
Explication du tableau des attaches pour casques de sécurité
industriels :
D:1 Fabricant du casque
D:2 Modèle de casque
D:3 Attaches pour casque
D:4 Taille du casque : S = small (petit), M = medium (moyen),
L = large (grand)
(E) Niveaux d’entrée audio externe
Le tableau E énumère les différents types de haut-parleurs
du casque PELTOR et le niveau de tension correspondante
qui génère un niveau de pression acoustique de 82 dB (A)
dans le casque. Pour identier le modèle de haut-parleur
dans votre casque, retirez le kit d’hygiène, puis comparez le
haut-parleur aux images et couleurs décrites dans le tableau
E.
E:1 Modèle, couleur ( gris noir bleu)
E:2 La tension d’entrée qui génère 82 dB(A)
(F) COMPOSANTS
F:1 Serre-tête (PVC ou cuir)
F:2 Arceau du serre-tête (acier inox)
F:3 Fixations bipoints (POM)
F:4 Cordon de raccordement avec connecteur Nexus TP-120
(PUR)
F:5 Microphone (PUR)
F:6 Anneau d’étanchéité (feuille PVC, mousse PUR)
F:7 Touche Pousser-pour-parler (PTT – Push-to-talk) (cer-
tains modèles seulement)
F:8 Coquille
F:9 Serre-tête pliable (acier inoxydable, TPE ou cuir)
F:10 Serre-nuque (acier inoxydable, PO)
F:11 Attaches pour casque (acier inoxydable, POM)
F:1
F:6
F:8
F:4
F:2
F:5
F:7
F:3

7
FR
(G) MONTAGE DU CASQUE
Serre-tête et serre-tête pliable
G:1 G:3
G:2
G:1 Faites glisser les coquilles vers l’extérieur en tournant
leur partie supérieure vers l’extérieur, le cordon devant être à
l’extérieur du serre-tête.
G:2 Réglez la hauteur des coquilles en les faisant glisser
vers le haut ou vers le bas, tout en maintenant le serre-tête
en place.
G:3 Le serre-tête doit être placé au-dessus de la tête, comme
illustré, et doit supporter le poids du casque.
Serre-nuque
G:4 G:5 G:6
G:4 Positionnez les coquilles sur les oreilles.
G:5 Maintenez les coquilles en position, placez la sangle sur
votre tête et xez-la bien.
G:6 La sangle doit être placée au-dessus de la tête, comme
illustré, et doit supporter le poids du casque.
Attaches pour casque
G:7 G:8 G:9
G:10 G:11
G:7 Montez les attaches pour casque sur la fente du casque
jusqu’à l’encliquetage (G:8).
G:9 Position de travail. Assurez-vous que les coquilles ou les
arceaux n’appuient pas sur le bord du casque, ce qui pourrait
provoquer une perte de l’atténuation.
G:10 Position de ventilation. Tirez les coquilles vers
l’extérieur jusqu’à ce que vous entendiez un clic, pour passer
de la position de travail à la position de ventilation. Évitez
de placer les coquilles contre votre casque (G:11) car cela
empêcherait une bonne ventilation.
Microphone
C:1 C:2
Pour conserver les performances de suppression des bruits,
le microphone doit être placé très près de la bouche (<3 mm
ou 1/8 po).
(H) NETTOYAGE ET ENTRETIEN
Nettoyez régulièrement les coquilles, le serre-tête et les an-
neaux d’étanchéité à l’aide de savon et d’eau chaude.
REMARQUE : NE PAS immerger les protections auditives
dans l’eau.
Si la protection auditive est mouillée par la pluie ou la
transpiration, tourner les coquilles vers l’extérieur, retirez les
coussinets et doublures en mousse, et laisser sécher avant
de les remonter.
Les coussinets et les doublures en mousse peuvent se
détériorer avec le temps et devront être examinés fréquem-
ment, an de détecter tout signe de ssure ou de fuite. 3M
recommande de remplacer les mousses et les anneaux
d’étanchéité au moins deux fois par an pour maintenir des
niveaux de réduction du bruit, d’hygiène et de confort unifor-
mes. Si un coussinet est endommagé, il devra être remplacé.
Voir la section Pièces de rechange ci-dessous.
F:9
F:10
F:11

8
FR
REMPLACEMENT DES COUSSINETS D’OREILLE
H:1
H:2
H:3
H:1 Pour retirer le coussinet d’oreille,
glissez vos doigts sous le bord du coussinet et tirez ferme-
ment droit vers vous.
H:2 Insérez la doublure en mousse.
H:3 Fixez ensuite un côté de l’anneau d’étanchéité dans
la rainure de la coquille, puis appuyez sur le côté opposé
jusqu’à ce que l’anneau se mette en place.
REMPLACEMENT DE LA PLAQUE DE FIXATION POUR
CASQUE
H:4 H:5
An de s’adapter correctement sur différents casques de
sécurité industriels, il peut être nécessaire de remplacer la
plaque de xation pour casque. Vous trouverez la plaque de
xation recommandée dans le tableau D. Les plaques de
xation P3K sont incluses dans la livraison. D’autres plaques
sont également disponibles auprès de votre revendeur. Un
tournevis est nécessaire.
H:4 Desserrez la vis qui maintient la plaque.
H:5 Remplacez la plaque, en veillant à ce qu’elle soit cor-
rectement positionnée, puis serrez la vis.
PIÈCE DE RECHANGE ET ACCESSOIRES
Laryngophone : MT9
Protection de microphone : HYM1000
Protection hygiénique étanche au vent et à l’humidité
qui protège efcacement et augmente la durée de vie du
microphone. Fourni en packs de 5 mètres, sufsant pour env.
50 applications.
Bonnette anti-vent pour microphone MT7N : M40/1
Protection efcace contre le sifement du vent. Protège le
microphone et augmente sa durée de vie. Le pack contient
une bonnette anti-vent.
Clean – protections à usage unique : HY100A
Protections à usage unique hygiéniques qui se montent
facilement sur des coussins. Fourni en pack de100 paires.
Clip pour câble : TKFL01
Clip pour câble à accrocher sur vêtement.
Sac de transport pour casque : FP9007
Sac de transport et de protection pour casque Headset.
Kit d’hygiène : HY79
Kit d’hygiène facilement remplaçable, composé de deux
mousses d’atténuation et d’anneaux d’étanchéité clipsables.
Microphone : MT7N
Microphone à bras complet avec micro dynamique.
GARANTIE ET LIMITE DE RESPONSABILITÉ
REMARQUE : Les énoncés suivants ne s’appliquent pas
en Australie et en Nouvelle-Zélande. Les consommateurs
doivent être conscients de leurs droits.
GARANTIE : Dans le cas où tout produit de 3M Division des
produits de protection individuelle est jugé défectueux en rai-
son d’un vice de matière ou de fabrication, ou non conforme
à toute garantie expresse concernant une utilisation spéci-
que, la seule obligation de 3M et votre seul recours exclusif
est, à la discrétion de 3M, la réparation, le remplacement ou
le remboursement du prix d’achat des pièces ou des produits
concernés, selon la notication effectuée par vous en temps
opportun et la justication que le produit a été stocké,
entretenu et utilisé conformément aux instructions écrites de
3M. SAUF SI LA LOI L’INTERDIT, CETTE GARANTIE EST
EXCLUSIVE ET TIENT LIEU DE TOUTE AUTRE GARANTIE
EXPRESSE OU IMPLICITE DE QUALITÉ MARCHANDE,
D’ADÉQUATION À UN USAGE PARTICULIER OU DÉ-
COULANT D’UNE TRANSACTION, D’UNE UTILISATION
OU D’UNE PRATIQUE COMMERCIALE, À L’EXCEPTION
DES DROITS DE PROPRIÉTÉ ET CONTRE LA VIOLA-
TION DU BREVET. Dans le cadre de cette garantie, 3M n’a
aucune obligation en cas de produits défectueux par suite
d’un stockage, d’une manipulation ou d’une maintenance
inadéquate ou inadaptée ; en cas de non-application des
instructions relatives aux produits ; de modication ou de
dommage causé au produit par accident, négligence ou mau-
vaise utilisation. LIMITATION DE RESPONSABILITÉ : SAUF
SI LA LOI L’INTERDIT, 3M NE SERA EN AUCUN CAS TENU
RESPONSABLE POUR LES PERTES OU DOMMAGES
DIRECTS, INDIRECTS, SPÉCIAUX OU CONSÉCUTIFS (Y
COMPRIS LES PERTES DE PROFITS) DU FAIT DU PRO-
DUIT, QUEL QUE SOIT L’ARGUMENT JURIDIQUE AVANCÉ.
LES RECOURS LÉGAUX DÉFINIS PAR LE PRÉSENT
DOCUMENT SONT EXCLUSIFS.
AUCUNE MODIFICATION : Les modications apportées à
cet appareil ne doivent pas être faites sans le consentement
écrit de 3M Company. Les modications non autorisées peu-
vent annuler l’autorisation accordée en vertu des règlements
sur la communication permettant le fonctionnement de ce
dispositif.

9
DE
3M™ PELTOR™ Headset
MT7H79*-Serie
HT*79*-Serie
TwinCup™ MT7*H540*
EINFÜHRUNG
Herzlichen Glückwunsch und vielen Dank, dass Sie sich für
Ihren Gehörschutz und für Ihre Kommunikationsanforderung-
en für das 3M™ PELTOR™ Headset entschieden haben.
Willkommen in der nächsten Generation der geschützten
Kommunikation!
SICHERHEITSINFORMATIONEN
Vor Gebrauch des Kommunikationsheadsets müssen alle
Sicherheitshinweise in dieser Anleitung gelesen, verstanden
und beachtet werden. Diese Anleitung ist für künftige Verwen-
dungen aufzubewahren.
WARNUNG:
• Wenn die hier enthaltenen Informationen und Emp-
fehlungen nicht befolgt werden, verschlechtert sich die
Schutzwirkung des Gehörschutzes erheblich.
• Dieser Gehörschutz trägt dazu bei, das Gehör vor gesund-
heitsschädlichem Lärm und lauten Geräuschen zu schüt-
zen. Ein unsachgemäßer oder nachlässiger, d. h. nicht
kontinuierlicher Gebrauch in lärmbelasteter Umgebung
kann zu Gehörschäden oder Verletzungen führen. Zum
korrekten Gebrauch befragen Sie Ihren Vorgesetzten, lesen
Sie die Gebrauchsanweisung oder wenden Sie sich an den
Technischen Support von 3M.
• Das Ausgangssignal vom elektrischen Audio-Schaltkreis
dieses Gehörschutzes kann das tägliche Schallpegellimit
übersteigen.
• Bestimmte Modelle sind als eigensicher gekennzeichnet.
Siehe für weitere Informationen das gesonderte Referen-
zdokument.
ACHTUNG:
• Stellen Sie sicher, dass der Gehörschutz gemäß dieser
Bedienungsanleitung aufgesetzt, angepasst und gewartet
wird. Durch schlechten Sitz dieses Geräts wird die
Schallschutzwirkung verringert. Die beigefügten
Anweisungen sind zu beachten, damit der Gehörschutz
gut sitzt.
• Um einen sicheren Schutz zu gewährleisten, muss der
Gehörschutz in lärmbelasteter Umgebung ununterbrochen
getragen werden.
• Auch wenn ein Gehörschutz zum Schutz vor schädlichen
Effekten durch Impulslärm empfohlen werden kann, basiert
der Schalldämmwert (Noise Reduction Rating, NRR) auf
der Dämpfung von Dauerlärm und ist somit kein genauer
Wert für den erreichbaren Schutz vor Impulslärm wie
Gewehrschüssen (Formulierung durch EPA gefordert).
• Die Schalldämmung kann geringer ausfallen, wenn Brillen,
Schutzbrillen oder Riemen von Atemschutzmasken zwi-
schen den abdichtenden Flächen der Dichtungsringe des
Gehörschutzes und den Kopfseiten des Trägers getragen
werden. Um die bestmögliche Geräuschunterdrückung zu
erreichen, sollten Sie Brillen oder Schutzbrillen mit dünnen
achen Bügeln oder Bändern verwenden, welche nur
minimalen Einuss auf die Abdichtung der Dichtungsringe
haben. Ziehen Sie lange Haare soweit wie möglich zurück
und entfernen Sie andere Gegenstände, wie Stifte, Mützen,
Schmuck oder Ohrhörer, welche die Abdichtung des
Gehörschutzes verringern können. Der Kopfbügel darf nicht
verbogen oder verformt werden, weil dies zu einem losen
Sitz führt und Schallundichtigkeiten zulässt.
• Wenn dieser Gehörschutz entsprechend der Bedienungs-
anleitung getragen wird, trägt er dazu bei, die Belastung
sowohl durch Dauerlärm, wie industriellen Lärm, den Lärm
von Fahrzeugen und Flugzeugen, als auch sehr laute
Schallspitzen wie Gewehrschüsse zu reduzieren. Der
erforderliche und/oder vorhandene Gehörschutz während
der Belastung durch Schallspitzen lässt sich nur schwer
vorhersagen. Bei Gewehrschüssen hängt die Leistungs-
fähigkeit des Gehörschutzes vom Waffentyp, der Anzahl
der abgegebenen Schussfolgen, der richtigen Auswahl,
dem Sitz und der Verwendung des Gehörschutzes, der
ordnungsgemäßen Pege des Gehörschutzes sowie
anderen Parametern ab. Wenn Sie das Gefühl haben,
schlecht zu hören, oder wenn Sie während oder nachdem
Sie Lärm ausgesetzt sind (einschließlich Gewehrschüssen)
ein Klingeln oder Summen hören, oder wenn Sie aus einem
anderen Grund ein Hörproblem vermuten, kann Ihr Gehör
gefährdet sein. Um mehr über Gehörschutz für Impulslärm
zu lernen, besuchen Sie www.3M.com/hearing.
BITTE BEACHTEN:
• Dieser Kapselgehörschützer hat einen elektrischen Audioe-
ingang. Der Benutzer sollte vor dem Gebrauch die korrekte
Funktion kontrollieren. Wenn Verzerrungen oder Fehler
entdeckt werden, sollte der Benutzer die Empfehlungen
des Herstellers beachten.
• Dieses Produkt kann durch bestimmte chemische Stoffe
beeinträchtigt werden. Weitere Informationen können beim
Hersteller angefordert werden.
• Der Gehörschutz und besonders die Dichtungsringe kön-
nen im Laufe der Zeit Alterungserscheinungen zeigen. Sie
sollten regelmäßig beispielsweise auf Risse und Undichtig-
keiten untersucht werden.
• Hygiene-Auagen auf den Dichtungsringen können die
akustische Leistung des Gehörschutzes beeinträchtigen.
• In Kanada müssen Personen, die einen Gehörschutz
zusammen mit einem Helm tragen, die CSA-Norm Z94.1
über industriellen Kopfschutz beachten.
• Betriebs- und Lagertemperatur: -4 °F (-20 °C) bis 131 °F
(55 °C).
• Gewicht des Gehörschutzes:
o MT7H79A*, MT7H79B* und MT7H79F*: 381 g
o MT7H79P3E: 320 g
o HT*79A*, HT*79B* und HT*79F*: 381g
o HT*79P3E: 320 g
o MT7*H540F*: 428 g
o MT7*H540P3E: 345 g

10
DE
• 3M Svenska AB erklärt hiermit, dass dieses 3M™ PEL-
TOR™ Headset mit den wesentlichen Anforderungen und
anderen Bestimmungen der PSA-Richtlinie (89/686/EWG)
und anderen anwendbaren Richtlinien übereinstimmt. Das
Produkt wurde geprüft und zugelassen in Übereinstimmung
mit EN 352-1:2002, EN 352-3:2002 und EN 352-6:2002
sowie anderen anwendbaren harmonisierten Normen. Die
Anforderungen für die CE-Kennzeichnung sind damit erfüllt.
• Bestimmte Modelle entsprechen auch der ATEX-Richtlinie,
siehe gesondertes Faltblatt. Eine Kopie der Konformität-
serklärung und weitergehende in den Richtlinien geforderte
Informationen können Sie erhalten, wenn Sie sich im Land
des Erwerbs an 3M wenden. Kontaktinformationen nden
Sie auf den letzten Seiten dieser Bedienungsanleitung.
Dieses Produkt enthält elektrische und elektronische
Komponenten und darf nicht über den Restmüll
entsorgt werden. Die lokalen Vorschriften zur
Entsorgung von elektrischen und elektronischen
Ausrüstungen sind zu beachten.
DÄMPFUNG UNTER LABORBEDINGUNGEN
Erklärungen zur Dämmwertetabelle:
(A) EN 352-1:2002 / EN 352-6:2002
A:1 Frequenz (Hz)
A:2 Mittelwert Dämpfung (dB)
A:3 Standardabweichung (dB)
A:4 Angenommene Schutzwirkung, APV (dB)
H = Geschätzter Gehörschutz für Töne mit hohen Frequen-
zen (ƒ ≥ 2000 Hz).
M = Geschätzter Gehörschutz für Töne mit mittleren Frequen-
zen (500 Hz < ƒ < 2000 Hz).
L = Geschätzter Gehörschutz für Töne mit niedrigen Frequen-
zen (ƒ ≤ 500 Hz).
(B) ANSI S3.19-1974
B:1 Testfrequenz (Hz)
B:2 Mittelwert Dämpfung (dB)
B:3 Standardabweichung (dB)
Der Schallpegel, der das Ohr einer Person beim ordnungs-
gemäßen Tragen eines Gehörschutzes erreicht, ergibt
sich in sehr guter Näherung aus der Differenz zwischen
dem A-bewerteten Pegel des Umgebungslärms und dem
Schalldämmwert (NRR).
Beispiel
1. Der Umgebungslärmpegel beträgt am Ohr laut Messung
92 dBA.
2. Der Schalldämmwert (NRR) beträgt 21 Decibel (dB).
3. Der das Ohr erreichende Geräuschpegel entspricht
näherungsweise 71 dB(A).
ACHTUNG: Für laute Umgebungen, in denen Frequenzen
unter 500 Hz vorherrschen, sollte der C-bewertete Umge-
bungsschallpegel verwendet werden.
(C) AS/NZS 1270:2002
C:1 Testfrequenz (Hz)
C:2 Mittelwert Dämpfung (dB)
C:3 Standardabweichung (dB)
C:4 Mittelwert minus SD
(D) Kompatible Industrieschutzhelme
Dieser Gehörschutz darf ausschließlich in Kombination
mit den in Tabelle H aufgelisteten Industrieschutzhelmen
benutzt werden. Dieser Gehörschutz wurde in Kombination
mit den folgenden Industrieschutzhelmen geprüft und kann
andere Schutzwerte erreichen, wenn er mit anderen Helmen
verwendet wird.
Erklärung zur Tabelle für die Befestigungen für Industri-
eschutzhelme:
D:1 Helmhersteller
D:2 Helmmodell
D:3 Helmbefestigung
D:4 Kopfgröße: S = Small, M = Medium, L = Large
(E) Externer Audio-Eingangspegel
Tabelle E listet die verschiedenen PELTOR-Headset-Lauts-
precher und den korrespondierenden Spannungspegel auf,
mit denen im Headset ein Schalldruckpegel von 82 dB(A) er-
reicht werden. Um das Lautsprechermodell in Ihrem Headset
zu identizieren, müssen Sie den Hygienesatz entfernen und
den Lautsprecher mit den Abbildungen und den in Tabelle E
beschriebenen Farben vergleichen.
E:1 Modell, Farbe ( grau schwarz blau)
E:2 Eingangsspannung, die 82 dB(A) erzeugt
(F) BESTANDTEILE
F:1 Kopfbügel (PVC oder Leder)
F:2 Kopfbügeldrähte (Edelstahl)
F:3 Zweipunkt-Aufhängung (POM)
F:4 Verbindungskabel mit Nexus TP-120-Stecker (PUR)
F:5 Sprechmikrofon (PUR)
F:6 Dichtungsringe (PVC-Folie, PUR-Schaum)
F:7 Push-To-Talk-Taste (Sprechtaste; nur einige Modelle)
F:8 Kapsel
F:9 Zusammenfaltbarer Kopfbügel (Edelstahl, TPE oder
Leder)
F:10 Nackenbügel (Edelstahl, PO)
F:11 Helmbefestigung (Edelstahl, POM)
F:1
F:6
F:8
F:4
F:2
F:5
F:7
F:3

11
DE
(G) AUFSETZEN DES HEADSETS
Kopfbügel und zusammenfaltbarer Kopfbügel
G:1 G:3
G:2
G:1 Die Kapseln nach außen schieben und die Oberseite der
Schale nach außen neigen. Dabei muss das Kabel an der
Außenseite des Kopfbügels entlangführen.
G:2 Die Höhe der Kapseln einstellen, bis sie dicht und
bequem sitzen. Dabei den Kopfbügel mit der einen Hand
festhalten.
G:3 Der Kopfbügel soll wie dargestellt über die Kopfmitte
verlaufen und das Gewicht des Headsets abstützen.
Nackenbügel
G:4 G:5 G:6
G:4 Die Kapseln auf die Ohren setzen.
G:5 Die Kapseln festhalten, das Kopfband über den Kopf
ziehen und eng anziehen.
G:6 Das Kopfband soll über die Kopfmitte verlaufen und das
Gewicht des Headsets abstützen.
Helmbefestigung
G:7 G:8 G:9
G:10 G:11
G:7 Die Helmbefestigung in den Schlitz am Helm schieben,
bis sie einrastet (G:8).
G:9 Betriebsstellung. Sicherstellen, dass Kapseln und
Bügeldrähte in Betriebsstellung nicht gegen die Kante
des Schutzhelms anliegen, damit keine undichten Stellen
entstehen können.
G:10 Lüftungsstellung. Um das Gerät aus der Betriebs-
stellung in die Lüftungsstellung zu bringen, die Kapseln nach
außen ziehen, bis ein Klick zu hören ist. Die Kapseln dürfen
nicht am Helm (G:11) anliegen, weil sie dann nicht richtig
auslüften können.
Mikrofon
C:1 C:2
Zur Aufrechterhaltung der Umgebungslärmunterdrückung darf
das Mikrofon nur wenige Millimeter (weniger als 3 mm oder
1/8 inch) vom Mundwinkel entfernt sein.
(H) REINIGUNG UND WARTUNG
Äußere Kapseln, Kopfbügel und Dichtungsringe mit einem mit
warmen Seifenwasser angefeuchteten Tuch reinigen.
BITTE BEACHTEN: Den Gehörschutz NICHT in Wasser
tauchen!
Wenn der Gehörschutz nass wird, die Gehörschutzkapseln
nach außen drehen, die Dichtungsringe und die Schau
mauskleidungen entfernen und vor dem Wiederzusammen-
bau trocknen lassen.
Die Dichtungsringe und die Schaumauskleidungen können
im Laufe der Zeit Alterungserscheinungen zeigen. Sie sollten
regelmäßig beispielsweise auf Risse und Undichtigkeiten
untersucht werden. Bei regelmäßiger Verwendung empehlt
3M, die Schaumauskleidungen und die Dichtungsringe min-
destens zweimal im Jahr auszutauschen, damit Dämpfung,
Hygiene und Komfort dauernd erhalten bleiben. Ein defekter
Dichtungsring sollte ausgetauscht werden. Siehe Ersatzteil-
liste unten.
F:9
F:10
F:11

12
DE
ABNEHMEN UND AUSTAUSCHEN DER DICHTUNGS-
RINGE
H:1
H:2
H:3
H:1 Zum Abnehmen der Dichtungsringe
mit den Fingern unter die Kante des Dichtungsrings fassen
und diesen gerade herausziehen.
H:2 Die Schaumauskleidung einsetzen.
H:3 Anschließend eine Seite des Dichtungsrings in die Rille
an der Kapsel einfügen und dann an der gegenüberliegenden
Seite drücken, bis der Dichtungsring voll einrastet.
AUSTAUSCHEN DER HELMBEFESTIGUNGSPLATTE
H:4 H:5
Für eine gute Anpassung an verschiedene Industrieschutz-
helme muss die Helmbefestigungsplatte gegebenenfalls aus-
getauscht werden. Die empfohlene Befestigung nden Sie in
Tabelle D. Platten für P3K-Befestigung sind im Lieferumfang
enthalten. Andere Platten erhalten Sie bei Ihrem Händler. Ein
Schraubendreher wird benötigt.
H:4 Schraube lösen, die die Platte hält.
H:5 Platte austauschen, dabei sicherstellen, dass die Platte
korrekt ausgerichtet ist, und Schraube festziehen.
ERSATZTEILE UND ZUBEHÖR
Kehlkopfmikrofon: MT9
Mikrofonschutz: HYM1000
Feuchtigkeits- und windfester hygienischer Schutz, der ef-
zient schützt und die Lebensdauer des Mikrofons verlängert.
Packungen mit 5 Meter, ausreichend für etwa 50 Anwen-
dungen.
Windschutz für Mikrofon MT7N: M40/1
Effektiver Schutz vor Windgeräuschen. Schützt das Mikrofon
und verlängert seine Lebensdauer. Packung enthält einen
Windschutz.
Einweghülle Clean: HY100A
Hygienische Einweghülle, die sich leicht über die Dichtungs-
ringe ziehen lässt. Verpackungen mit je 100 Paar.
Clip: TKFL01
Kann bei Bedarf verwendet werden, um das Verbindungska-
bel an der Kleidung zu sichern.
Tasche für Headset: FP9007
Schützt Ihr Headset während Transport und Lagerung.
Hygienesatz: HY79
Einfach austauschbare Hygienesätze bestehend aus zwei
Schaumauskleidungen und Dichtungsringen mit Schnapp-
verschluss.
Mikrofon: MT7N
Kompletter Mikrofonarm mit dynamischem Mikrofon.
GARANTIE UND HAFTUNGSBESCHRÄNKUNG
BITTE BEACHTEN: Die folgenden Aussagen gelten nicht
in Australien und Neuseeland. Für Verbraucher gelten die
gesetzlichen Rechte.
GARANTIE: Für den Fall, dass ein Produkt der 3M Personal
Safety Division Material- oder Verarbeitungsmängel aufweist
oder eine ausdrückliche Zusage für einen bestimmten Zweck
nicht erfüllt, besteht die einzige Verpichtung von 3M und Ihr
einziger Anspruch darin, dass 3M, unter freier Entscheidung
von 3M, solche Teile und Produkte repariert oder austauscht
oder den Kaufpreis erstattet, wenn Sie uns rechtzeitig über
die Angelegenheit informieren und bestätigen, dass das
Produkt entsprechend der schriftlichen Anweisungen von 3M
aufbewahrt, gewartet und verwendet worden ist. AUSGE-
NOMMEN, WO DIES GESETZLICH VERBOTEN IST, GILT
DIESE GARANTIE AUSSCHLIESSLICH UND ANSTELLE
VON JEGLICHER AUSDRÜCKLICHEN ODER IMPLI-
ZIERTEN ZUSICHERUNG ALLGEMEINER GEBRAUCH-
STAUGLICHKEIT, EIGNUNG FÜR EINEN BESTIMMTEN
ZWECK ODER ANDERER QUALITÄTSZUSICHERUNGEN
ODER SOLCHER, DIE SICH AUFGRUND EINES
GESCHÄFTSGANGS, EINER HANDELSSITTE ODER
EINES HANDELSBRAUCHS ERGEBEN, MIT AUSNAHME
VON RECHTSANSPRÜCHEN GEGEN PATENTRECHTS-
VERLETZUNGEN. 3M hat unter dieser Garantie keine
Verpichtung, wenn das Produkt Mängel aufweist, aufgrund
unzulänglicher oder ungeeigneter Lagerung, Benutzung oder
Wartung oder weil die Produktanleitung nicht befolgt wurde
oder Veränderungen oder Schäden am Produkt aufgrund von
Unfällen, Vernachlässigung oder Fehlanwendung aufgetreten
sind. HAFTUNGSBESCHRÄNKUNG: AUSGENOMMEN, WO
DIES GESETZLICH VERBOTEN IST, IST 3M UNGEACHTET
DER GELTENDEN RECHTSTHEORIE IN KEINEM FALL
FÜR EINEN DIREKTEN, INDIREKTEN, BESONDEREN,
ZUFÄLLIGEN ODER FOLGEVERLUST ODER -SCHADEN
(EINSCHLIESSLICH ENTGANGENER GEWINNE) HAFT-
BAR, DER DURCH DIESES PRODUKT VERURSACHT
WIRD. ES GELTEN AUSSCHLIESSLICH DIE HIER
FESTGELEGTEN RECHTSMITTEL.
KEINE VERÄNDERUNGEN: Veränderungen an diesem
Gerät sind ohne schriftliche Einverständniserklärung von
3M nicht zulässig. Unerlaubte Veränderungen können die
Gewährleistungsansprüche und das Recht des Benutzers,
das Gerät zu verwenden, verwirken.

13
IT
3M™ PELTOR™ Headset
Serie MT7H79*
Serie HT*79*
TwinCup™ MT7*H540*
INTRODUZIONE
Congratulazioni e grazie per aver scelto l’headset 3M™
PELTOR™ per le vostre esigenze di comunicazione e
protezione dell’udito. Siamo lieti di presentare la nuova
generazione di protezioni che consentono la comunicazione!
INFORMAZIONI IMPORTANTI PER LA SICUREZZA
Leggere, comprendere e rispettare tutte le informazioni
importanti per la sicurezza nelle presenti istruzioni prima di
utilizzare l’headset di comunicazione. Conservare le presenti
istruzioni per riferimento futuro.
AVVERTENZA:
• Il mancato rispetto delle presenti istruzioni e raccomanda-
zioni può compromettere seriamente il livello di protezione
delle cufe protettive.
• Queste protezioni acustiche contribuiscono a ridurre
l’esposizione a rumori pericolosi e altri suoni forti. Il man-
cato utilizzo o l’uso improprio delle protezioni acusti-
che può causare lesioni o perdita dell’udito in caso di
esposizione a rumori pericolosi. Per il corretto utilizzo,
rivolgersi al proprio superiore, consultare le istruzioni per
l’uso o rivolgersi all’assistenza tecnica 3M.
• Il segnale in uscita dal circuito audio elettrico di questa
protezione acustica può superare il livello acustico limite
giornaliero.
• Alcuni modelli specici sono designati come Intrinsecamen-
te sicuri. Vedere la documentazione di riferimento separata
per maggiori informazioni.
ATTENZIONE:
• L’utente deve accertarsi che l’headset sia indossato,
regolato e conservato nel rispetto delle presenti istruzioni
per l’uso. L’inserimento errato del dispositivo riduce
l’efcacia di attenuazione del rumore. Per l’inserimento
corretto, consultare le istruzioni allegate.
• Le protezioni acustiche devono sempre essere indossate
per tutto il tempo di permanenza in ambienti rumorosi per
ottenere una protezione adeguata.
• Nonostante le protezioni acustiche possano essere rac-
comandate per la protezione dagli effetti nocivi del rumore
impulsivo, il grado di riduzione del rumore (NRR) è basato
sull’attenuazione del rumore continuo e potrebbe non
fornire un’indicazione accurata della protezione ottenibile
da rumori impulsivi come ad esempio lo sparo di un’arma
da fuoco (indicazione richiesta dalla EPA).
• La riduzione del rumore può risultare inferiore in caso di
utilizzo di occhiali da vista, occhiali protettivi o cinghie di
dispositivi respiratori tra la supercie di tenuta degli aurico-
lari e i lati della testa dell’utente. Per la massima riduzione
del rumore, si raccomanda l’uso di occhiali da vista e
occhiali protettivi con stanghette piatte e sottili o cinghie tali
da ridurre al minimo l’interferenza con la tenuta degli auri-
colari. Spostare i capelli lunghi il più possibile verso la nuca
e rimuovere altri impedimenti che possono compromettere
la tenuta degli auricolari come matite, cappelli, gioielli o in-
serti auricolari. Evitare di piegare e rimodellare la bardatura
temporale, in quanto si potrebbe comprometterne la tenuta
consentendo inltrazioni di rumore.
• Se utilizzate nel rispetto delle istruzioni per l’uso, queste
protezioni acustiche contribuiscono a ridurre l’esposizione
sia ai rumori continui, quali rumori industriali o di veicoli e
aeromobili, che ai rumori impulsivi estremamente elevati,
fra cui i colpi d’arma da fuoco. È difcile prevedere la prote-
zione acustica richiesta e/o effettiva in caso di esposizione
a rumori impulsivi. Ad esempio, per i colpi d’arma da fuoco,
il tipo di arma e il numero di proiettili sparati, ma anche
la scelta, l’inserimento e l’utilizzo corretti della protezione
acustica, la sua corretta conservazione e altre variabili
inuenzano le prestazioni. Se l’udito diventa monotonale
oppure si avverte un tintinnio o un brusio durante o dopo
l’esposizione ai rumori (compresi i colpi d’arma da fuoco),
o se per qualsiasi altro motivo si sospetta un problema
all’udito, l’udito potrebbe essere a rischio. Per saperne di
più sulle protezioni acustiche per i rumori impulsivi, visitare
il sito www.3M.com/hearing.
NOTA:
• Queste cufe sono dotate di ingresso audio elettrico.
L’utente deve vericarne il corretto funzionamento prima
dell’uso. In caso di anomalia o difetto, l’utente deve rivol-
gersi al produttore per maggiori informazioni.
• Questo prodotto può essere intaccato da diverse sostanze
chimiche. Ulteriori informazioni possono essere richieste
al produttore.
• Le cufe protettive e gli auricolari in particolare sono
soggetti a normale usura e devono essere controllati
regolarmente onde rilevare eventuali crepe o inltrazioni
di rumore.
• Il montaggio di kit igienici sugli auricolari può compromet-
tere le caratteristiche di attenuazione del rumore delle
cufe protettive.
• In Canada, gli utenti di elmetti rigidi abbinati a cufe protet-
tive devono fare riferimento alla normativa CSA Z94.1 in
materia di dispositivi di protezione della testa nell’industria.
• Temperatura di conservazione ed esercizio: da -20°C
(-4°F) a 55°C (131°F).
• Peso della protezione acustica:
o MT7H79A*, MT7H79B* e MT7H79F*: 381 g
o MT7H79P3E: 320 g
o HT*79A*, HT*79B* e HT*79F*: 381 g
o HT*79P3E: 320 g
o MT7*H540F*: 428 g
o MT7*H540P3E: 345 g
• 3M Svenska AB dichiara con la presente che 3M™
PELTOR™ Headset è conforme ai requisiti essenziali ed
alle altre disposizioni rilevanti della Direttiva 89/686/CEE
riguardante i Dispositivi di Protezione Individuale (DPI) e
di altre Direttive appropriate. Il prodotto è stato testato e
omologato in conformità alle norme EN

14
IT
• 352-1:2002, EN 352-3:2002 ed EN 352-6:2002 nonché ad
altre normative armonizzate applicabili. Di conseguenza, è
conforme ai requisiti previsti per il marchio CE.
• Alcuni modelli specici sono conformi anche alla Direttiva
ATEX, vedere il libretto separato. Una copia della dichiara-
zione di conformità e maggiori informazioni sulle Direttive
applicabili possono essere richieste contattando 3M nel
Paese di acquisto. Per i contatti, vedere le ultime pagine
delle presenti istruzioni per l’uso.
Il prodotto contiene componenti elettrici ed elettronici,
quindi non deve essere smaltito fra i riuti generici.
Consultare le normative locali in merito allo smalti-
mento delle apparecchiature elettriche ed elettroniche.
ATTENUAZIONE IN LABORATORIO
Legenda delle tabelle dei dati di attenuazione
(A) EN 352-1:2002 / EN 352-6:2002
A:1 Frequenza (Hz)
A:2 Attenuazione media (dB)
A:3 Deviazione standard (dB)
A:4 Valore di protezione previsto, APV (dB)
H = Protezione acustica stimata per i suoni ad alta frequenza
(ƒ ≥ 2.000 Hz).
M = Protezione acustica stimata per i suoni a media fre-
quenza (500 Hz < ƒ < 2.000 Hz).
L = Protezione acustica stimata per i suoni a bassa frequenza
(ƒ ≤ 500 Hz).
(B) ANSI S3.19-1974
B:1 Frequenza di prova (Hz)
B:2 Attenuazione media (dB)
B:3 Deviazione standard (dB)
Il livello di rumore all’orecchio di una persona, indossando
correttamente le protezioni acustiche, corrisponde circa alla
differenza tra livello di rumore ambientale ponderato su A e
grado di riduzione del rumore (NRR).
Esempio
1. Il livello di rumore ambientale misurato all’orecchio è 92
dBA.
2. Il grado di riduzione del rumore (NRR) è 21 decibel (dB).
3. Il livello di rumore all’orecchio corrisponde circa a 71
dB(A).
ATTENZIONE: Per gli ambienti caratterizzati prevalentemen-
te da rumori con frequenze inferiori a 500 Hz, deve essere
applicato il livello di rumore ambientale ponderato su C.
(C) AS/NZS 1270:2002
C:1 Frequenza di prova (Hz)
C:2 Attenuazione media (dB)
C:3 Deviazione standard (dB)
C:4 Media meno deviazione standard
(D) Elmetti di sicurezza industriali compatibili
Queste cufe protettive devono essere utilizzate esclu-
sivamente con gli elmetti di sicurezza industriali indicati
nella tabella D. Le cufe protettive sono state testate in
combinazione ai seguenti elmetti di sicurezza industriali e
possono fornire livelli di protezione differenti in caso di utilizzo
con elmetti differenti.
Legenda della tabella degli attacchi per elmetti di sicurezza
industriali:
D:1 Produttore dell’elmetto
D:2 Modello dell’elmetto
D:3 Attacco per elmetto
D:4 Grandezza della testa: S = Small, M = Medium, L = Large
(E) Livelli dell’ingresso audio esterno
La tabella E riporta i vari tipi di altoparlanti degli headset
PELTOR e il livello di tensione corrispondente che genera
un livello di pressione acustica di 82 dB(A) nell’headset. Per
determinare il modello di altoparlante nel proprio headset,
rimuovere il kit igienico e confrontare l’altoparlante con le
immagini e i colori riportati nella tabella E.
E:1 Modello, colore ( grigio , nero blu)
E:2 Tensione in ingresso corrispondente a 82 dB(A)
(F) COMPONENTI
F:1 Bardatura temporale (PVC o pelle)
F:2 Filo della bardatura temporale (acciaio inox)
F:3 Attacco a due punti (POM)
F:4 Cavo di collegamento con connettore Nexus TP-120
(PUR)
F:5 Microfono (PUR)
F:6 Auricolare (rivestimento in PVC e schiuma di PUR)
F:7 Pulsante Push-to-talk (solo alcuni modelli)
F:8 Coppa
F:9 Bardatura temporale ripiegabile (acciaio inox, TPE o
pelle)
F:10 Bardatura nucale (acciaio inox, PO)
F:11 Attacco per elmetto (acciaio inox, POM)
F:1
F:6
F:8
F:4
F:2
F:5
F:7
F:3

15
IT
(G) POSIZIONAMENTO DELL’HEADSET
Bardatura temporale e bardatura temporale ripiegabile
G:1 G:3
G:2
G:1 Estrarre le coppe e inclinare la parte superiore delle
coppe verso l’esterno in modo che il cavo non sia d’intralcio
alla bardatura temporale.
G:2 Regolare l’altezza delle coppe nella posizione più
comoda tenendo ferma la bardatura temporale.
G:3 La bardatura temporale deve poggiare saldamente sulla
testa, come illustrato, e sostenere il peso dell’headset.
Bardatura nucale
G:4 G:5 G:6
G:4 Sistemare le coppe in posizione sulle orecchie.
G:5 Mantenere le coppe in posizione, sistemare la cinghia in
posizione sulla testa e bloccarla.
G:6 La cinghia deve poggiare saldamente sulla testa e
sostenere il peso dell’headset.
Attacco per elmetto
G:7 G:8 G:9
G:10 G:11
G:7 Agganciare l’attacco per elmetto alla scanalatura
sull’elmetto (G:8).
G:9 Modalità di lavoro. Accertarsi che le coppe e i li della
bardatura temporale non premano contro il bordo dell’elmetto
nella modalità di lavoro per prevenire inltrazioni di rumore.
G:10 Modalità di aerazione. Per passare dalla modalità di
lavoro a quella di aerazione, tirare le coppe verso l’esterno
nché non scattano. Evitare di collocare le coppe contro
l’elmetto (G:11) per non compromettere l’aerazione.
Microfono
C:1 C:2
Per assicurare la massima attenuazione del rumore, tenere il
microfono molto vicino alla bocca (a meno di 3 mm o 1/8").
(H) PULIZIA E MANUTENZIONE
Per la pulizia di coppe esterne, bardatura temporale e aurico-
lari, utilizzare un panno inumidito con sapone e acqua calda.
NOTA: NON immergere la protezione acustica in acqua.
Qualora la protezione acustica risulti bagnata a causa della
pioggia o del sudore, girare le cufe protettive verso l’esterno,
rimuovere gli auricolari e i rivestimenti in schiuma e lasciarli
asciugare prima di riassemblarli.
Gli auricolari e i rivestimenti in schiuma sono soggetti a
normale usura e devono essere controllati regolarmente onde
rilevare eventuali crepe o inltrazioni di rumore. In caso di
utilizzo regolare, 3M raccomanda di sostituire gli auricolari
e i rivestimenti in schiuma almeno due volte all’anno, per
mantenere un elevato livello di attenuazione, la massima
igiene e un comfort ottimale. Sostituire l’auricolare qualora sia
danneggiato. Vedere la sezione Ricambi di seguito.
F:9
F:10
F:11
Other manuals for PELTOR HT 79 Series
1
This manual suits for next models
12
Table of contents
Languages:
Other 3M Headphones manuals

3M
3M Quiet SPace User manual

3M
3M Quiet Space QuietSP-SIOC User manual

3M
3M WORKTUNES WIRELESS Assembly instructions

3M
3M Peltor X Series User manual

3M
3M Peltor Lite-Com Pro II User manual

3M
3M Peltor WS ProTac XP MT15H7AWS5 Series User manual

3M
3M PELTOR Tactical XP User manual

3M
3M Peltor WS ProTac XP MT15H7WS5 Instruction Manual

3M
3M WORKTUNES WIRELESS User manual

3M
3M E-A-RTONE 3A User manual