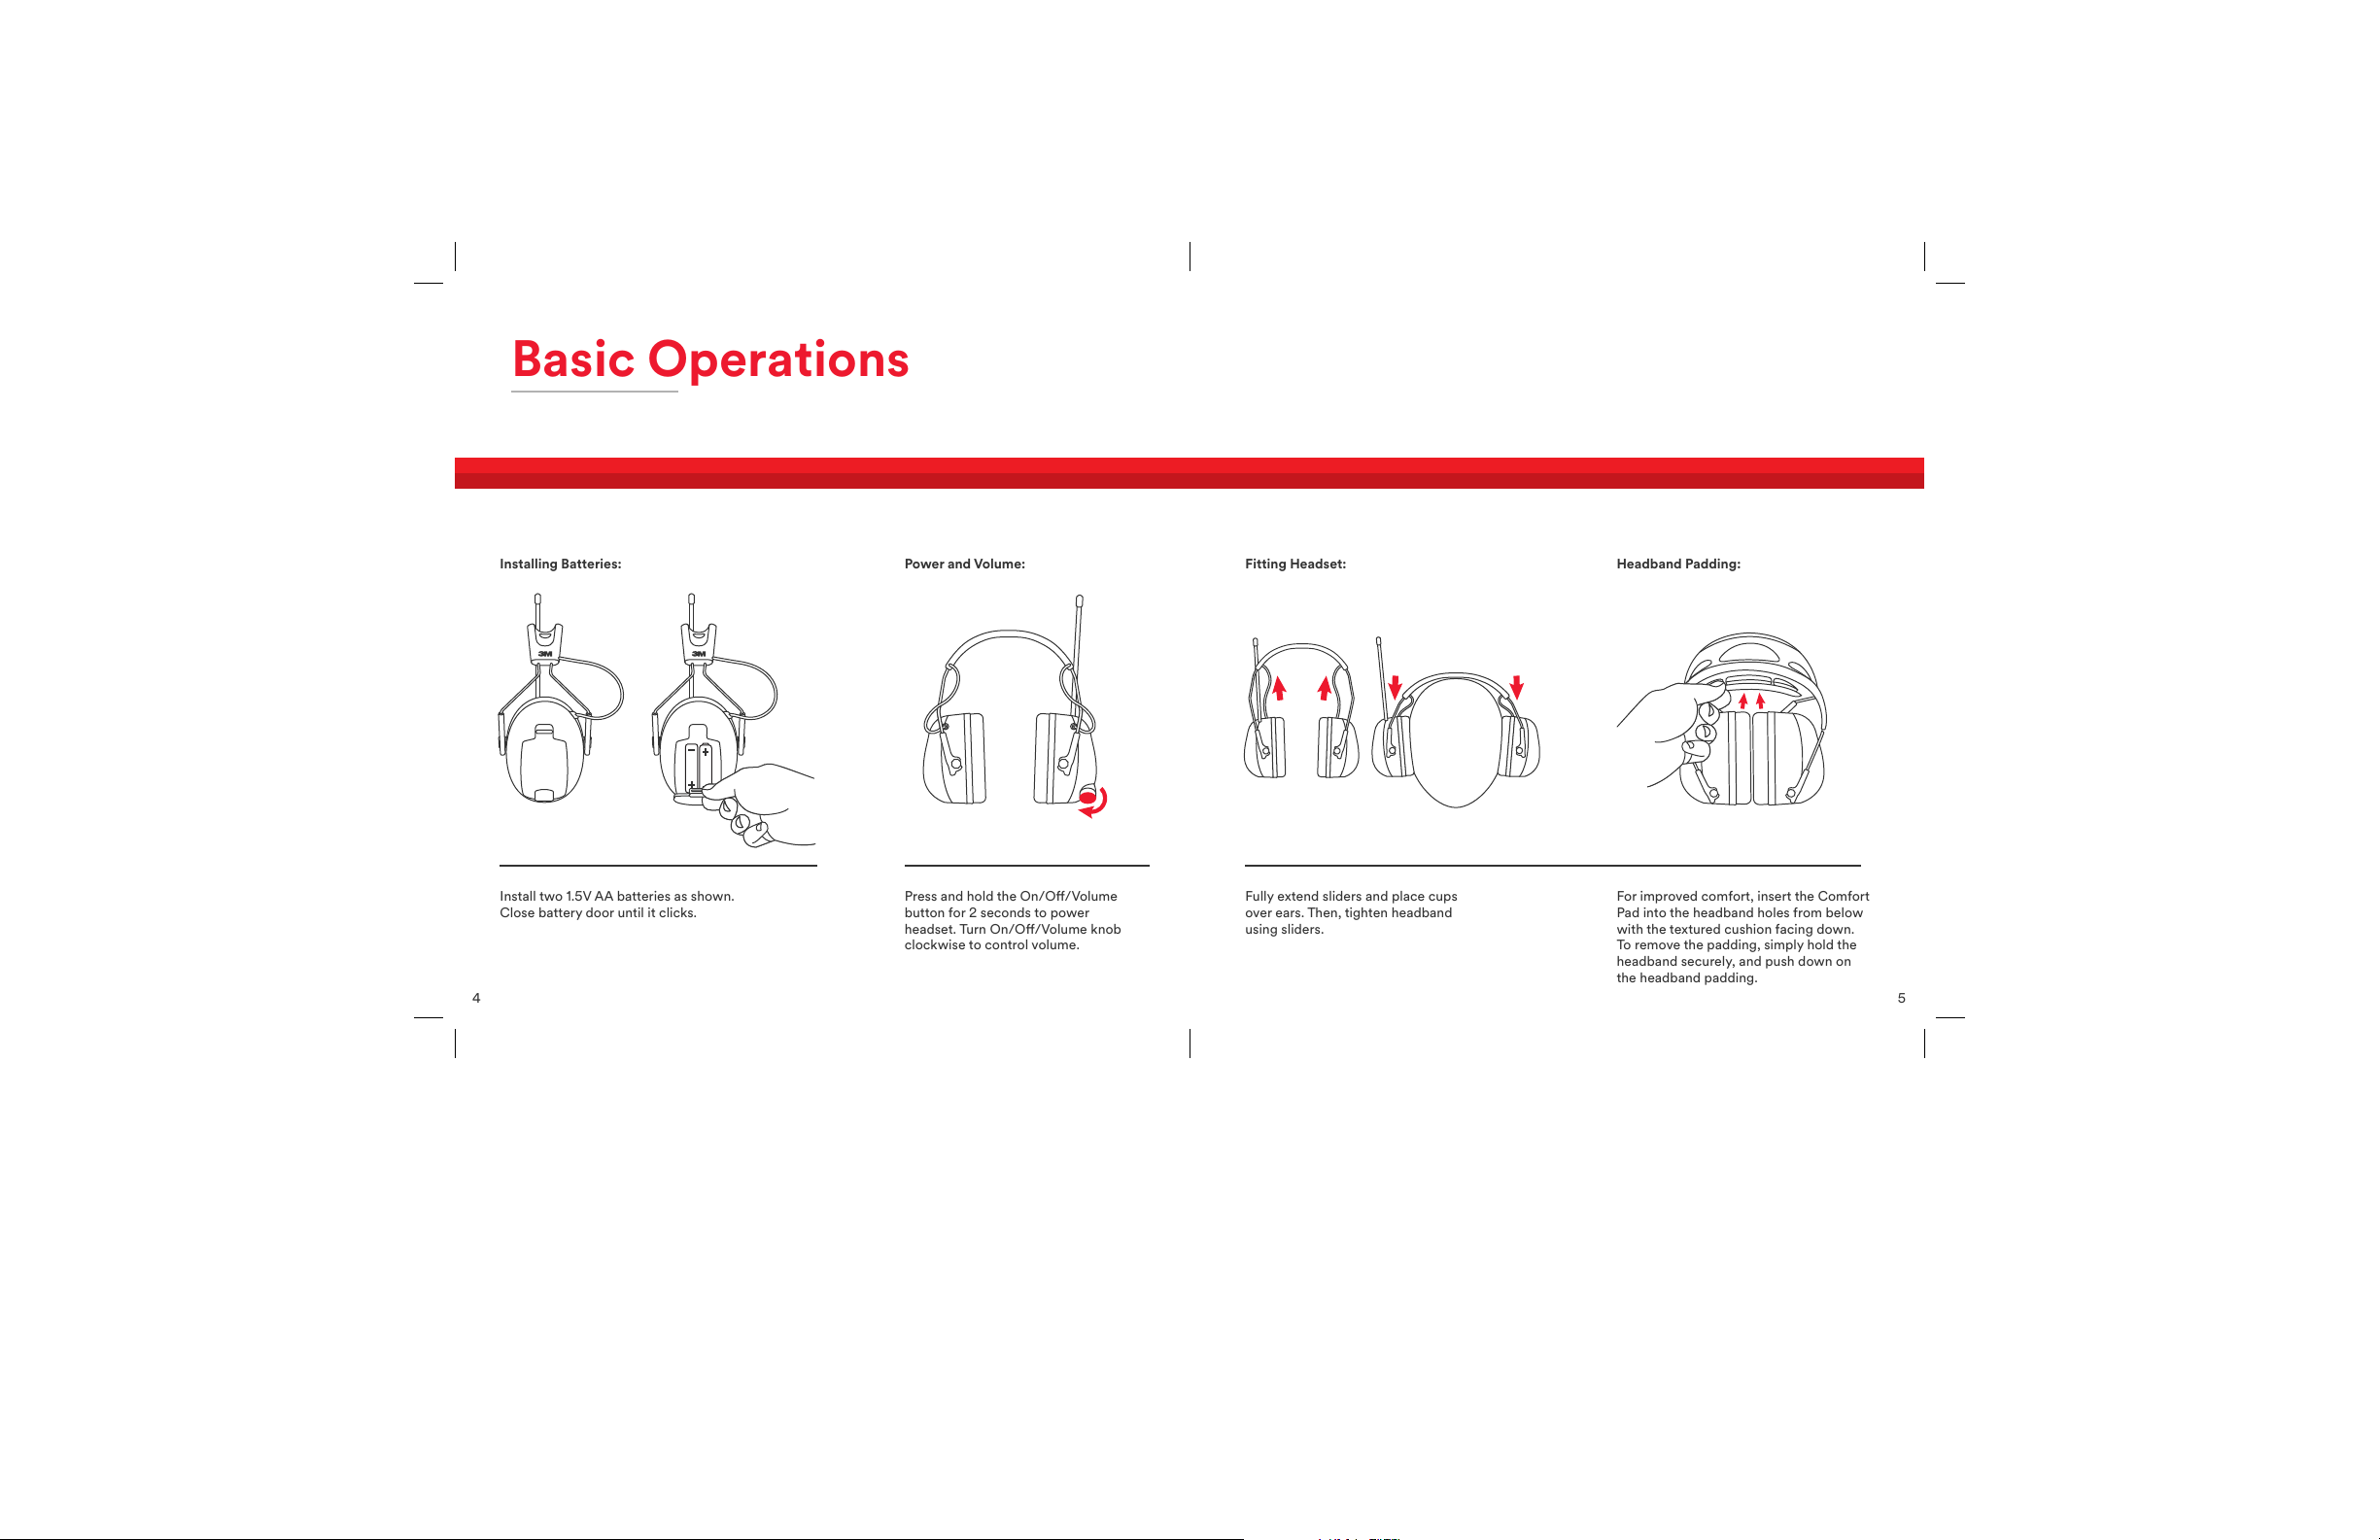
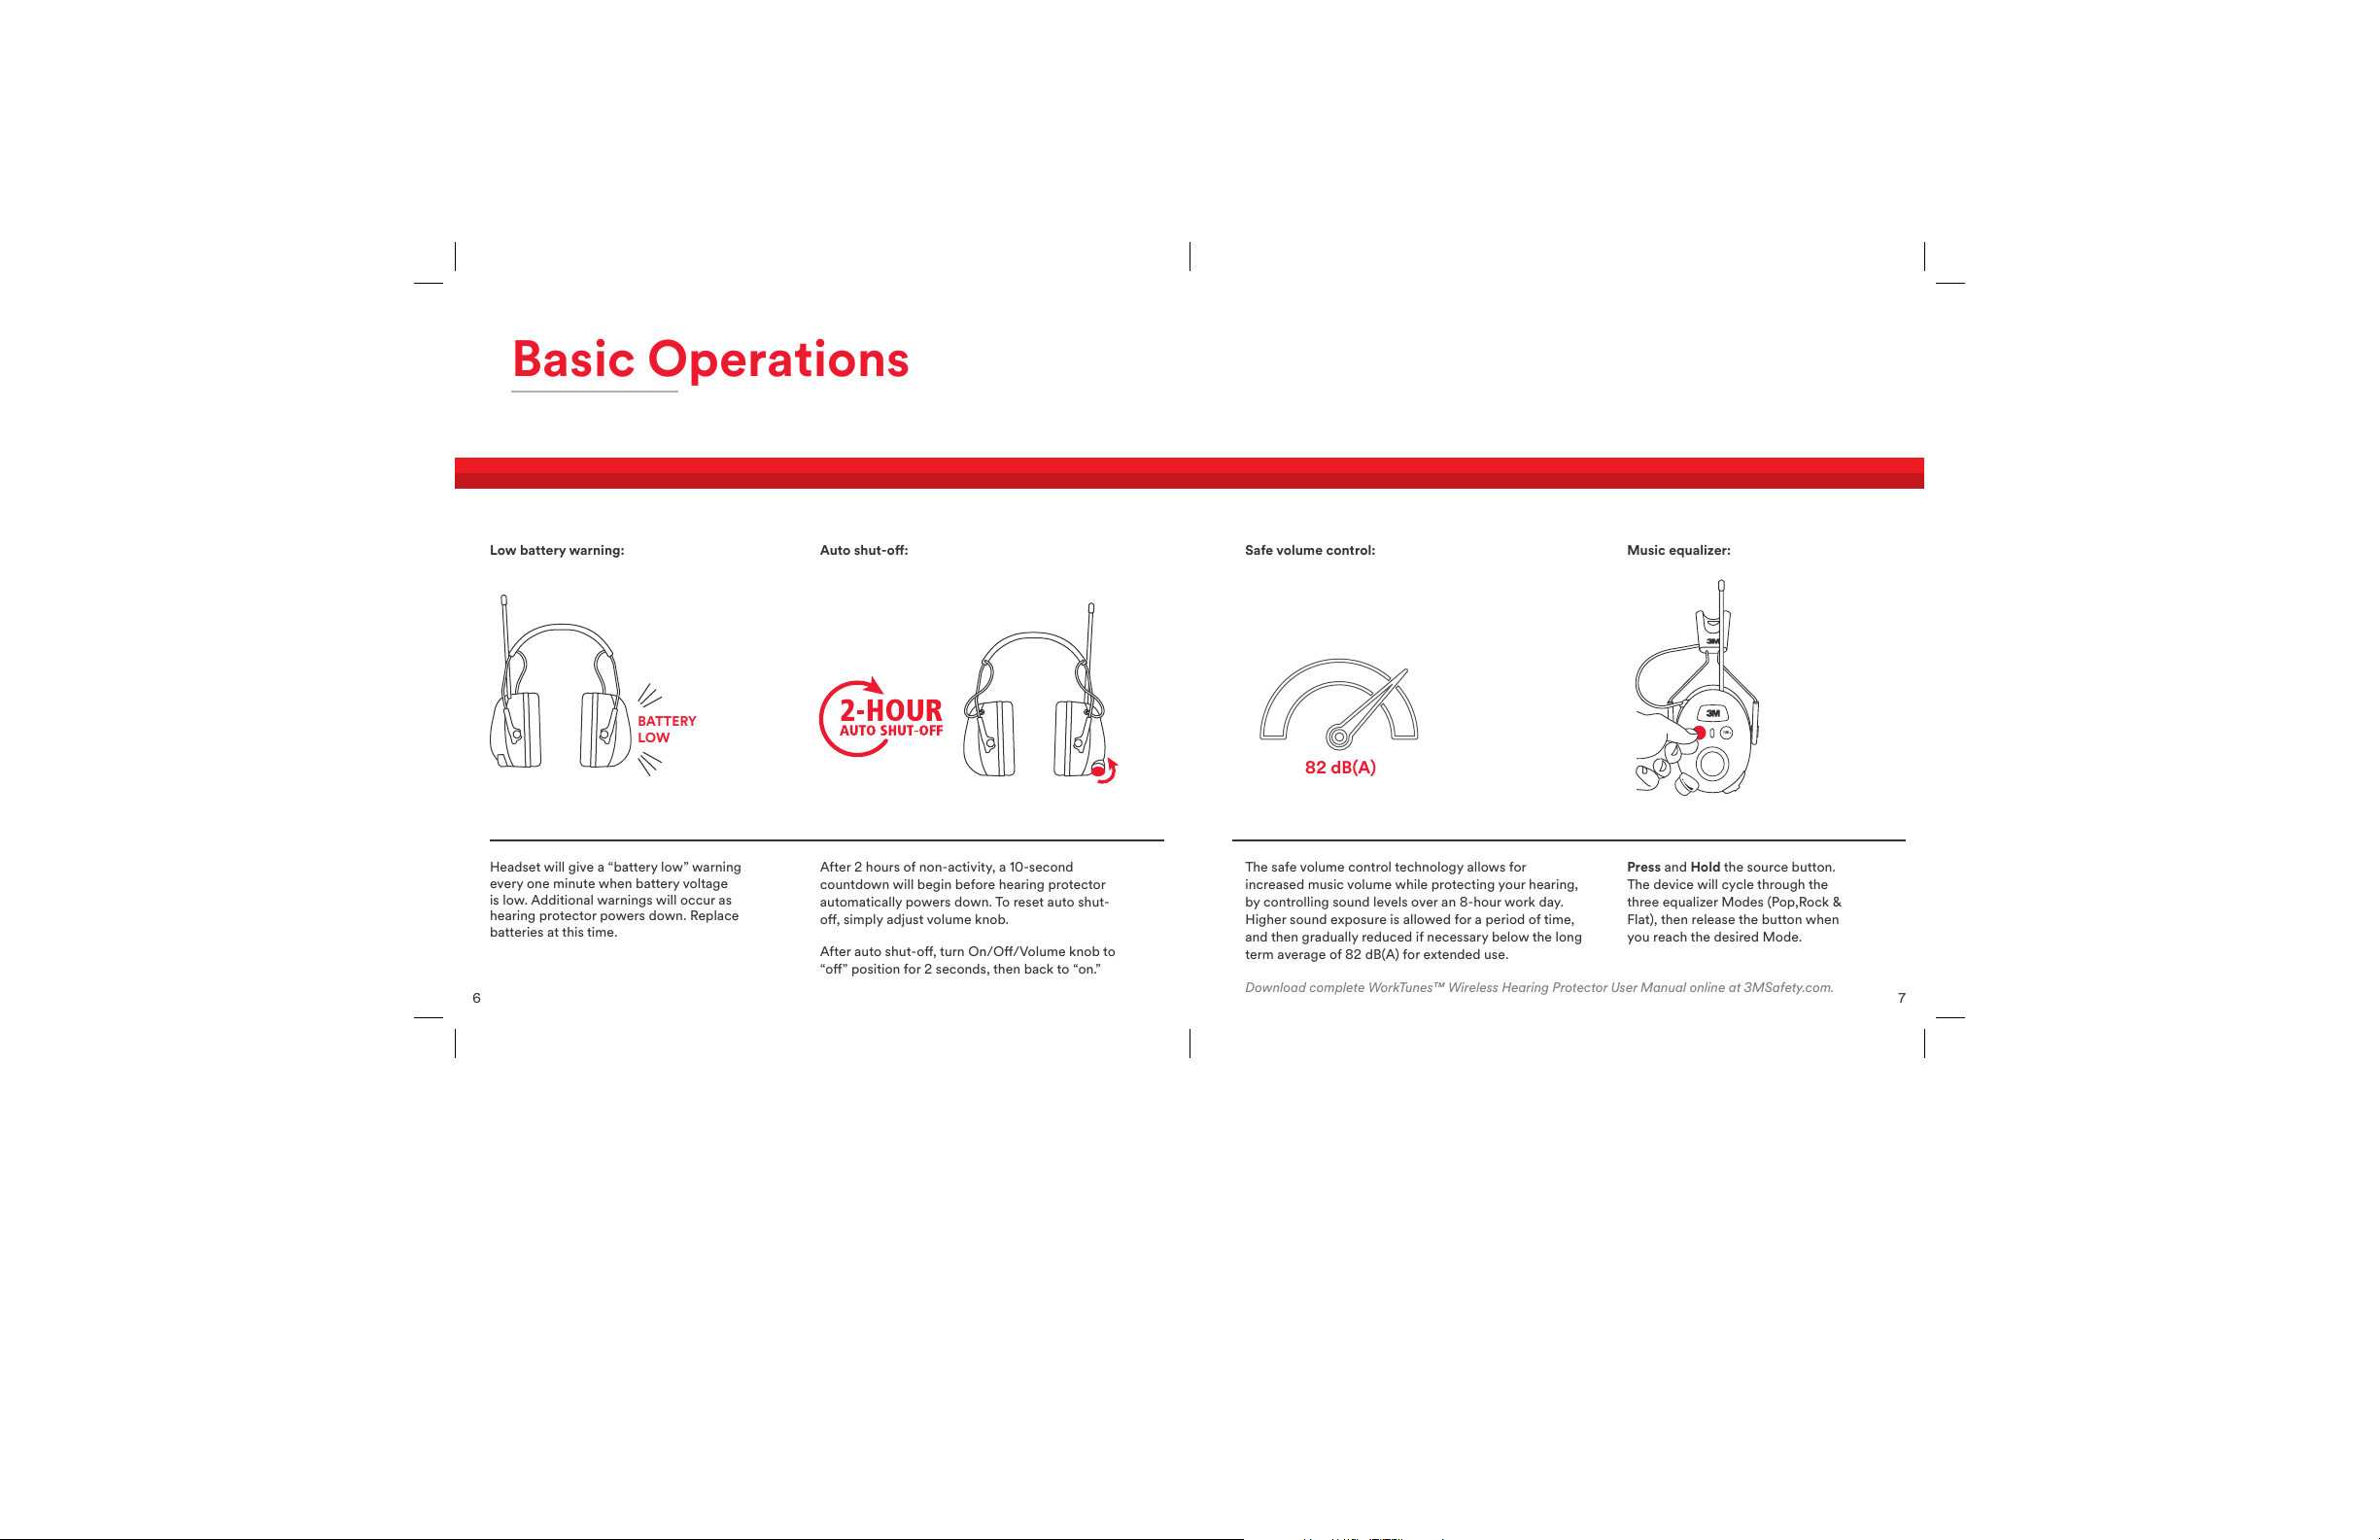
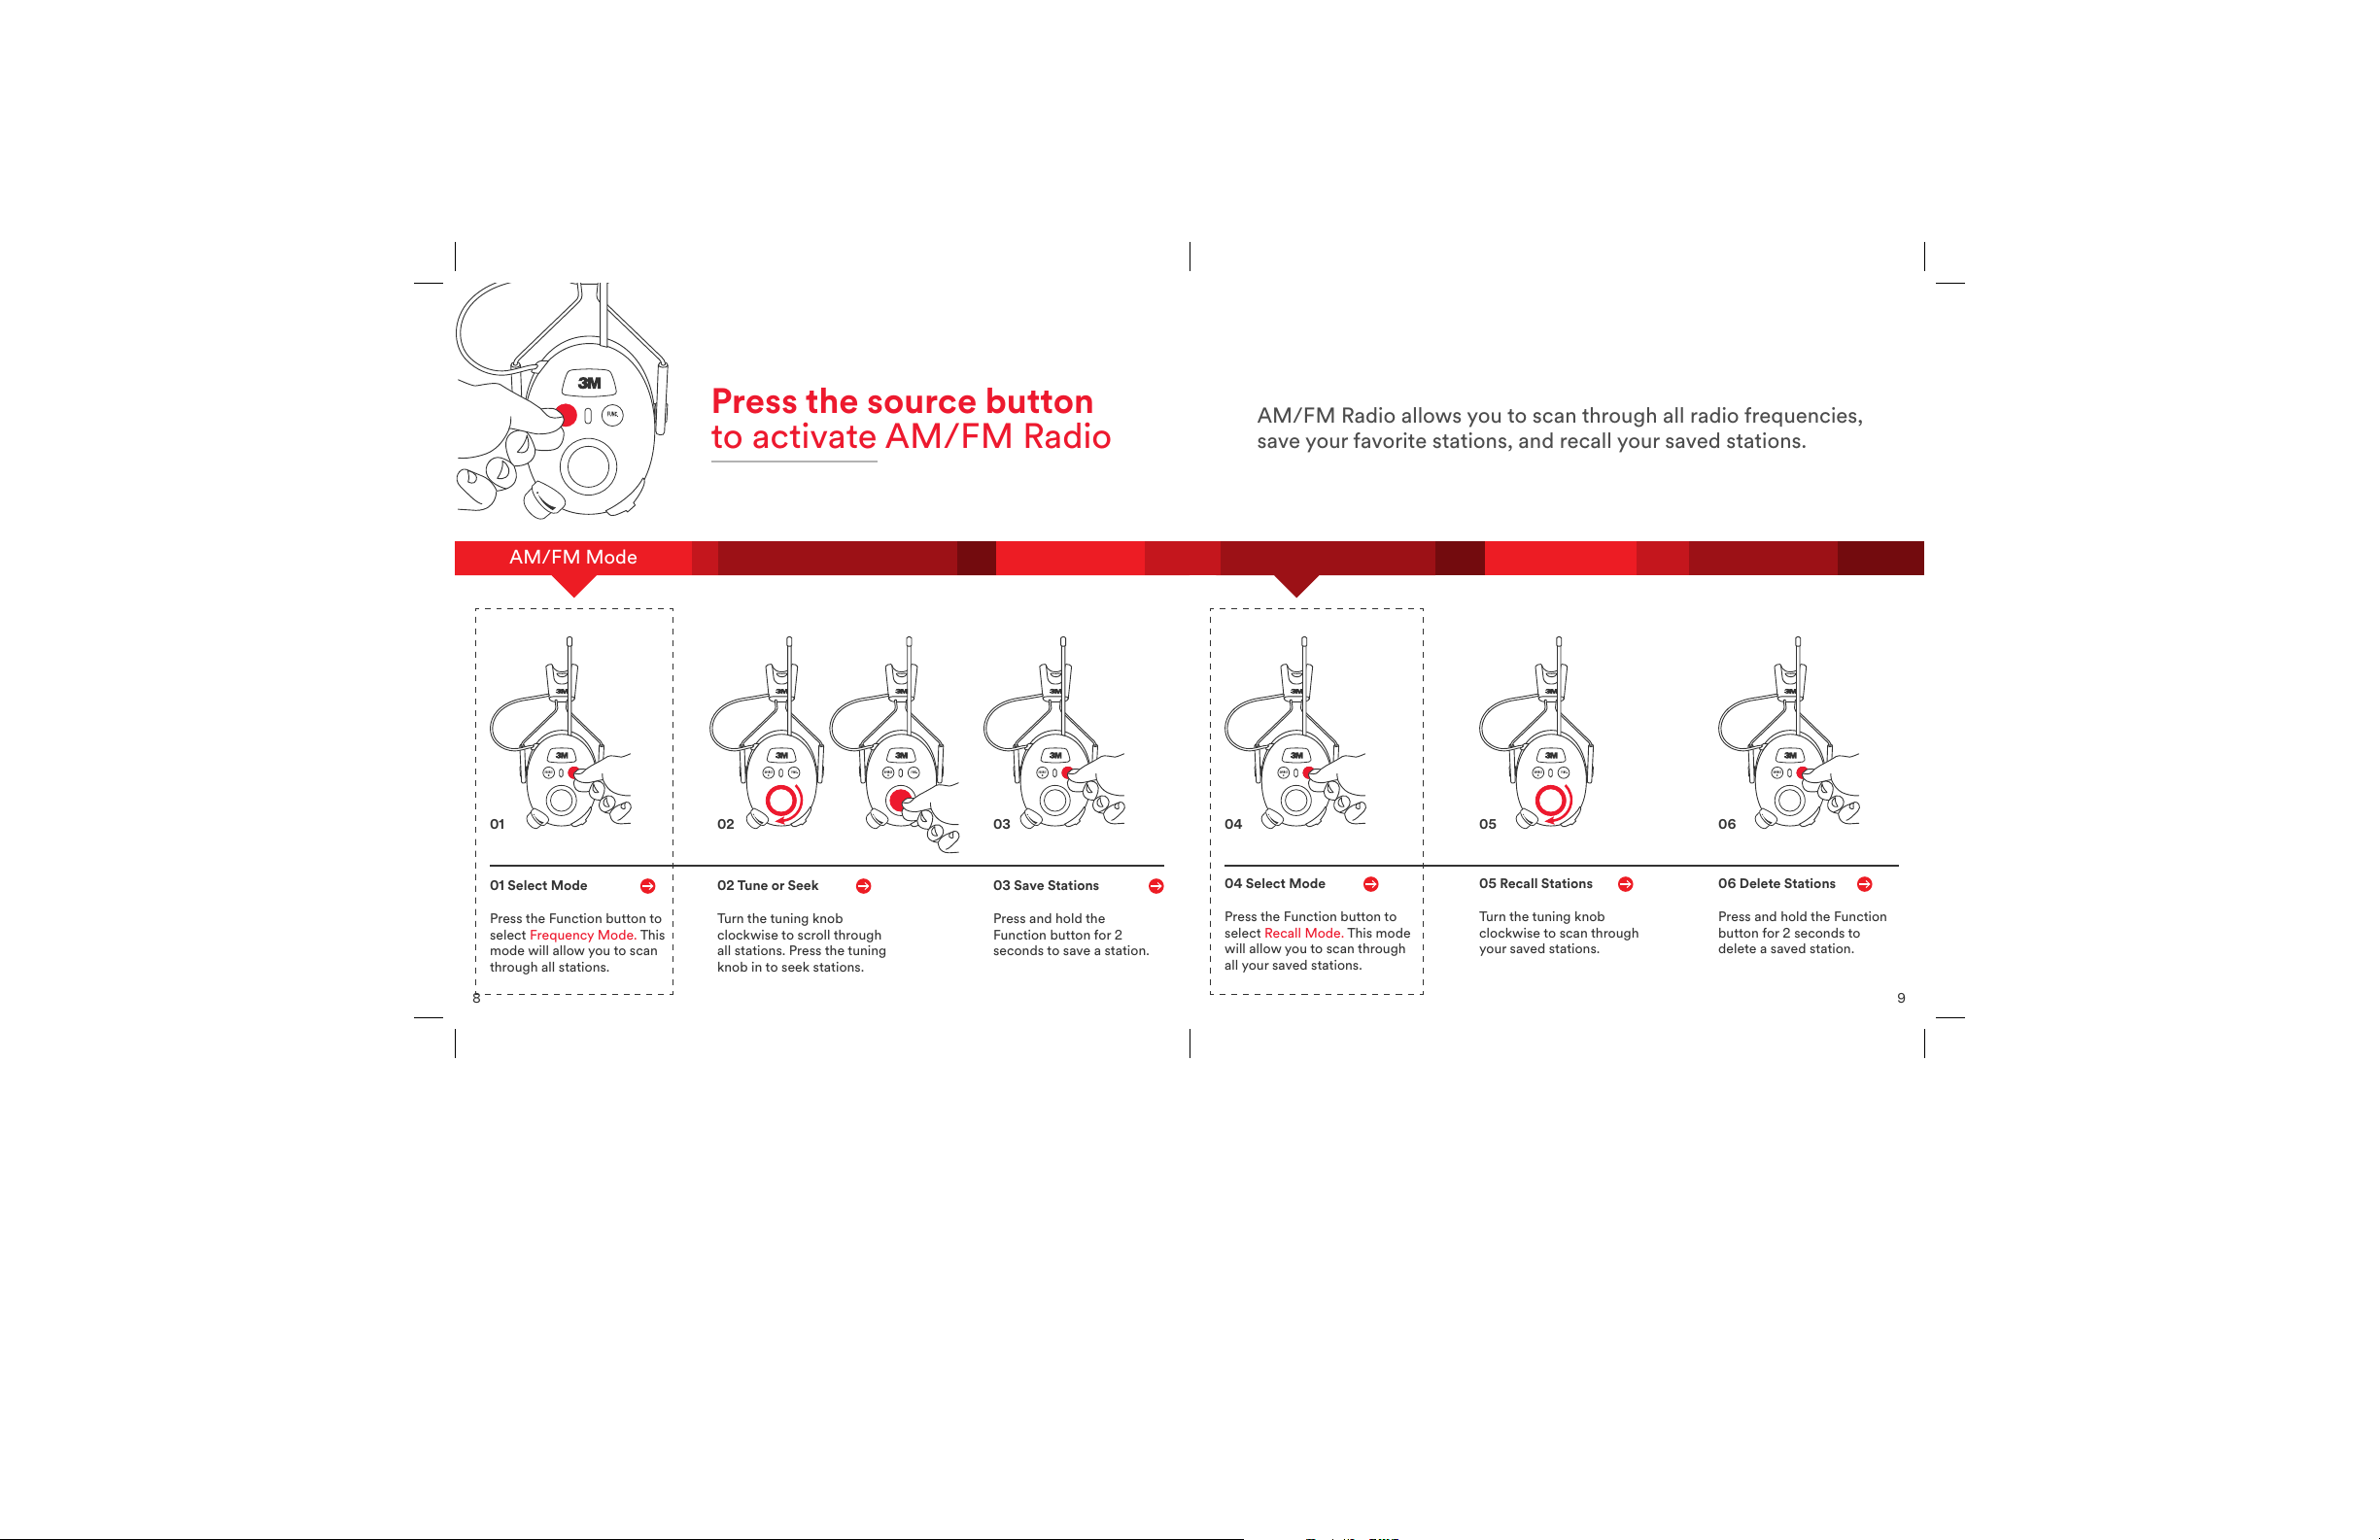
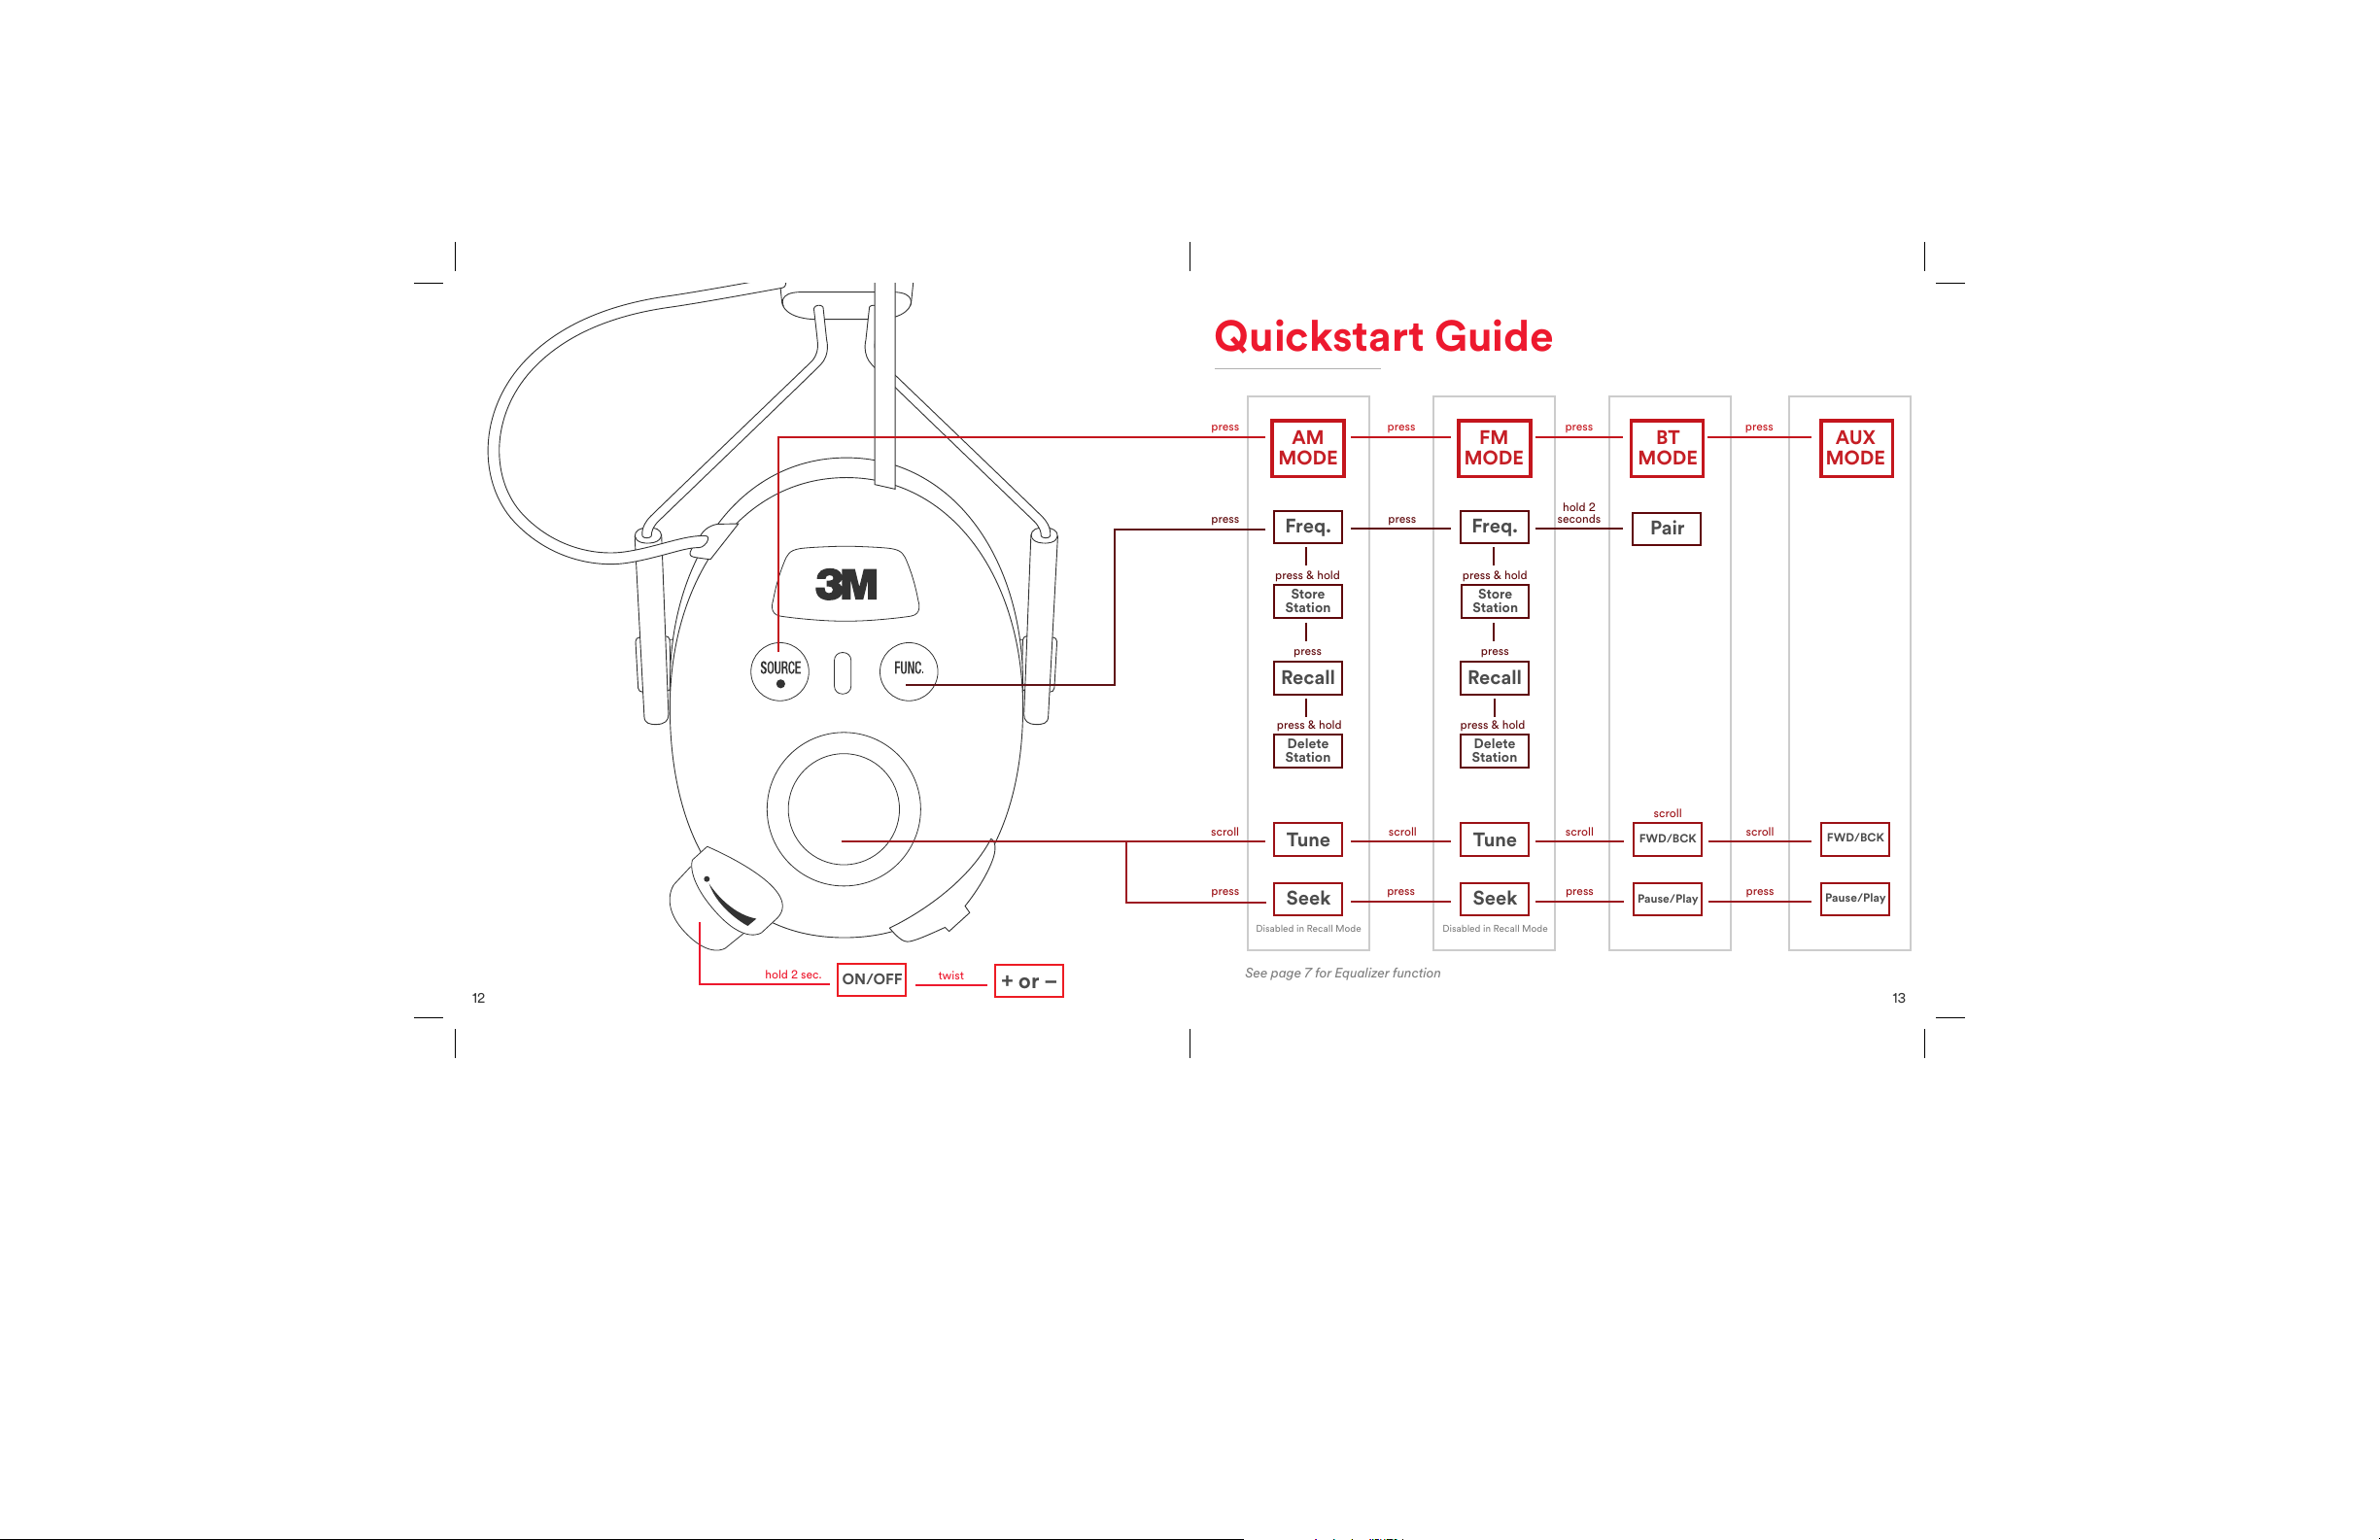
16
noIse reDuCtIon rAtInG (nrr)
The Environmental Protection Agency (EPA) has selected the Noise Reduction Rating
(NRR) as the measure of a hearing protector’s noise-reducing capabilities. 3M makes
no warranties as to the suitability of the NRR as a measure of actual protection from
any noise level since such protection depends on the sound level (loudness), how long
you listen to the loud sound and how well you t the earmu over your ears. Although
hearing protectors can be recommended for protection against harmful eects of
impulse noise, the NRR is based on the attenuation of continuous noise and may not be
an accurate indicator of the protection attainable against impulse noise such as gunre.
The NRR for the Worktunes™Wireless is 24 dB(A). Improper tof this
device will reduce its eectiveness in attenuating noise. Consult the
enclosed instructions for proper t.
The level of noise entering a person’s ear when a hearing protector is
worn as directed is closely approximated by the dierence between
the A-weighted environmental noise level and the NRR.
Attenuation (ANSI S3.19 – 1974)
Test Frequency (Hz) 125 250 500 1000 2000 3150 4000 6300 8000 NRR
Mean Attenuation (dB) 20.3 21.6 30.4 35.7 33.1 36.4 38.9 37.3 36.4 24
Standard Deviation 3.5 2.7 3.2 3.1 3.0 3.6 3.9 3.4 3.6
17
noIse reDuCtIon rAtInG
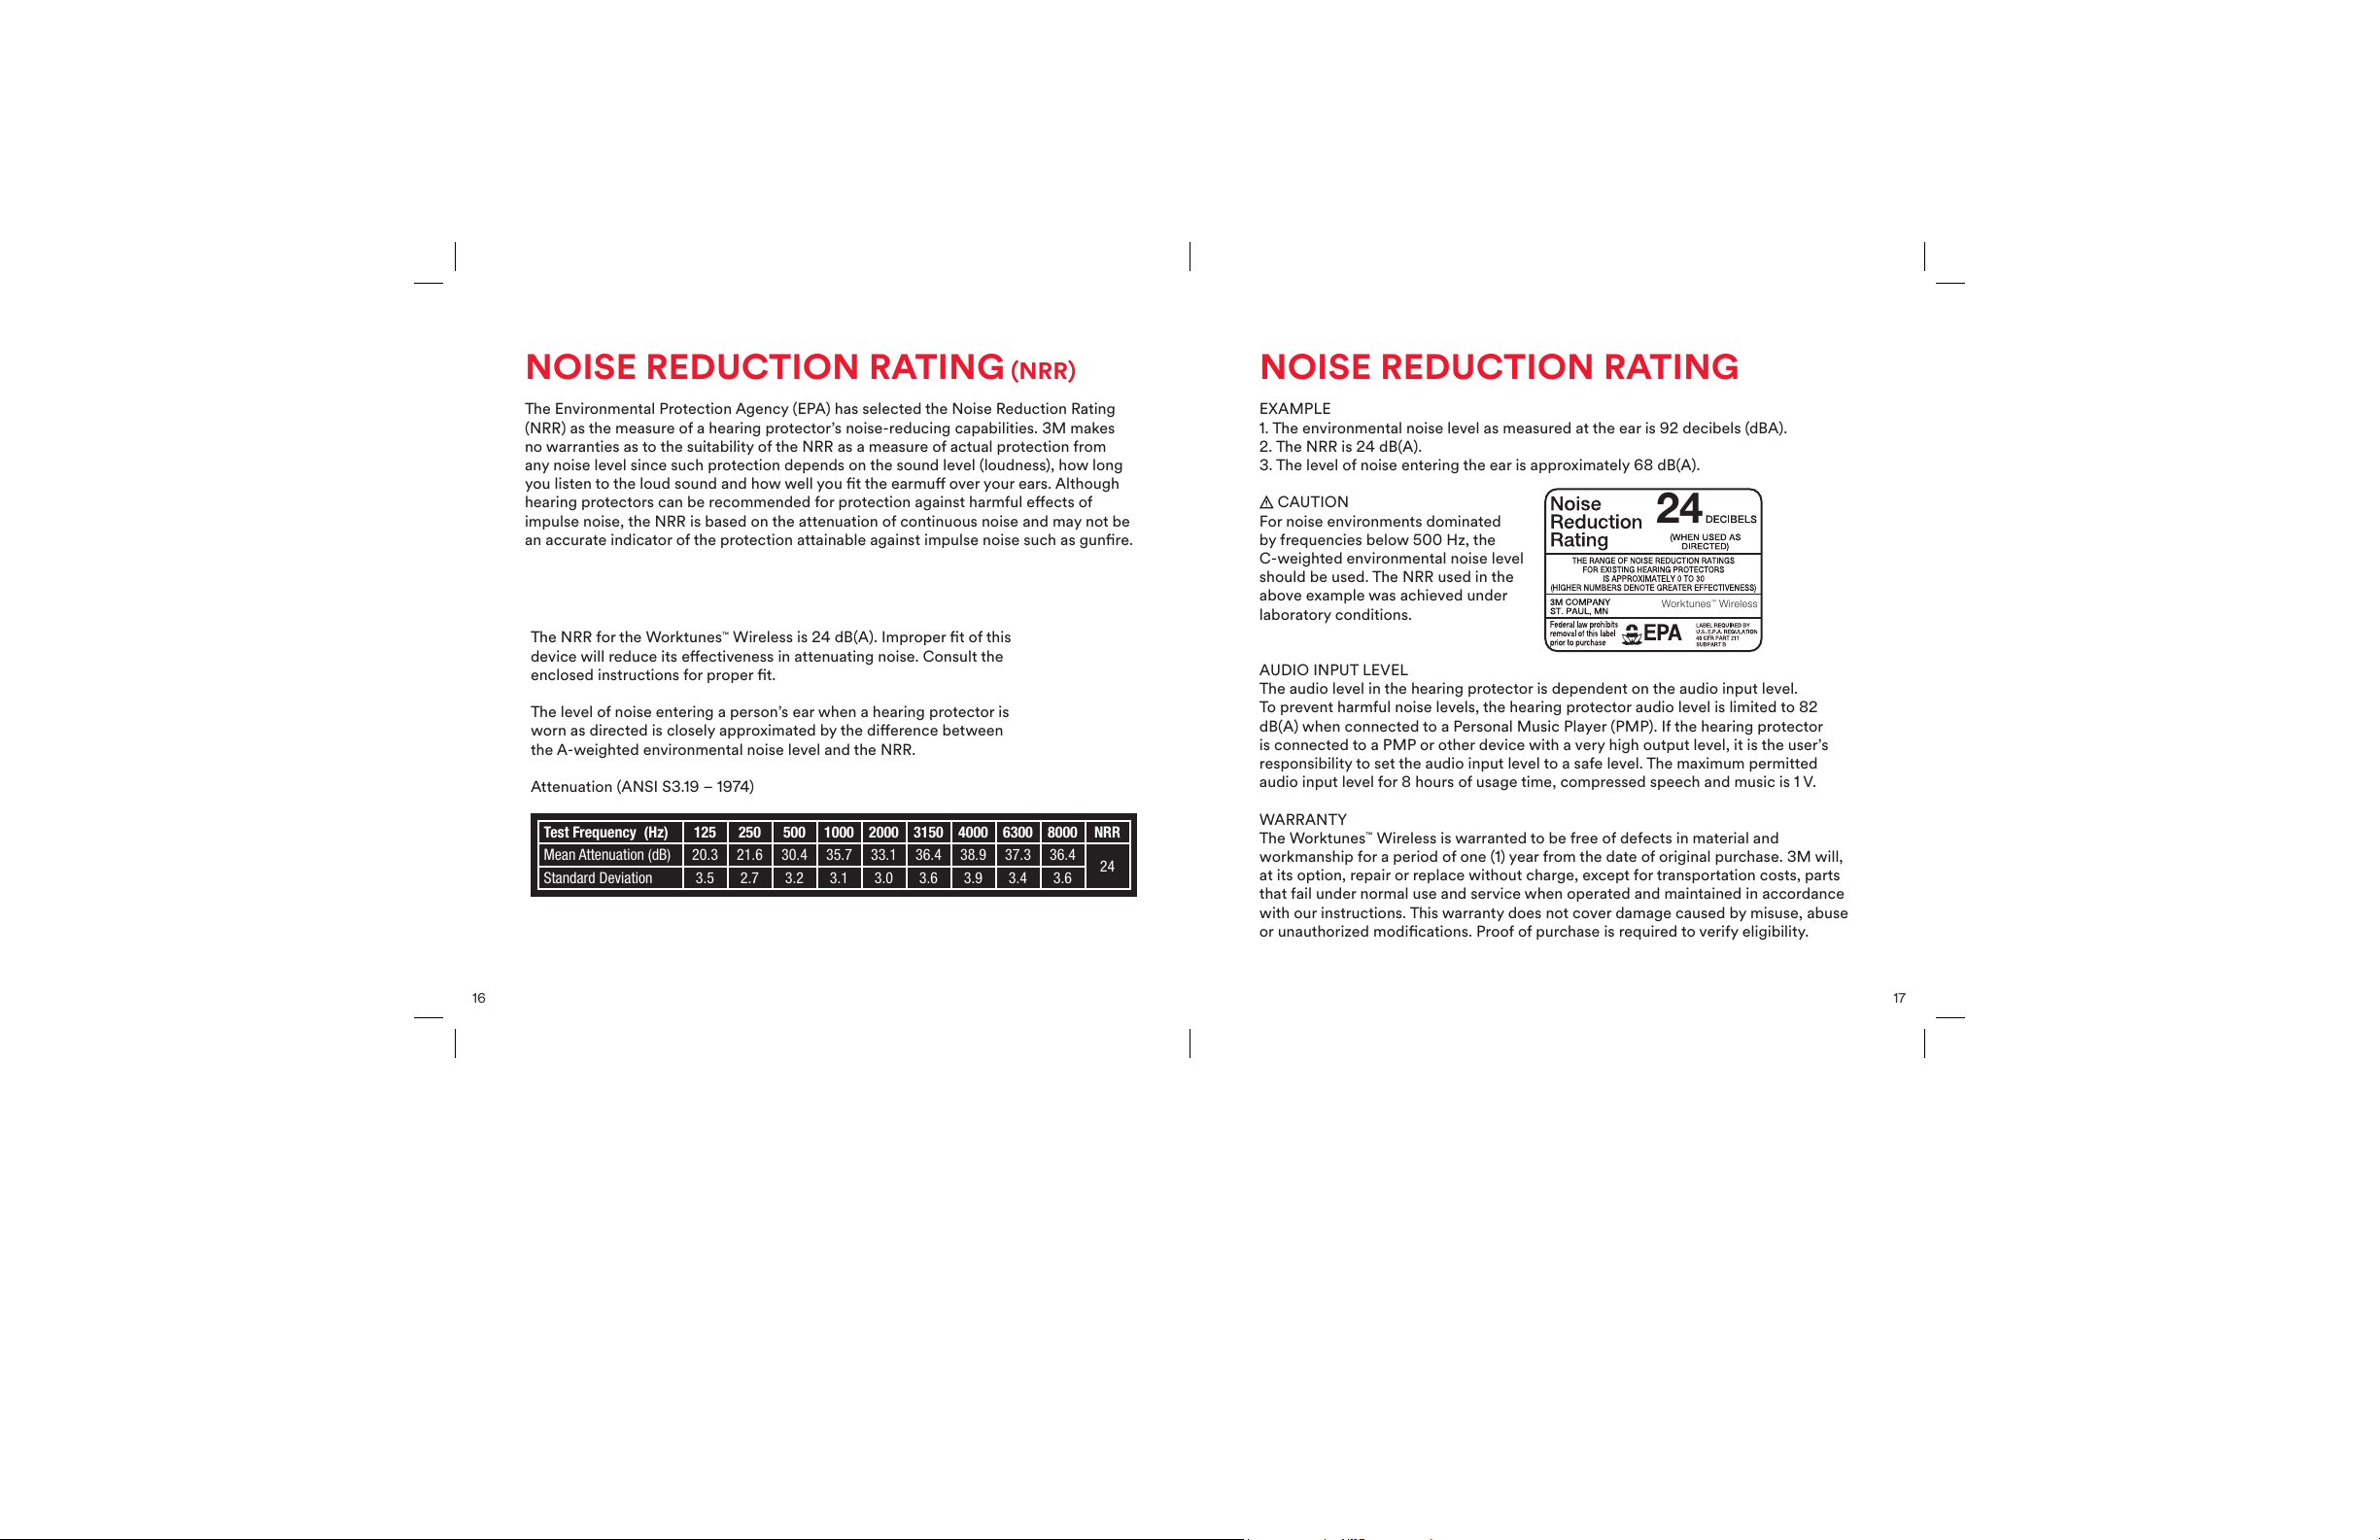
EXAMPLE
1. The environmental noise level as measured at the ear is 92 decibels (dBA).
2. The NRR is 24 dB(A).
3. The level of noise entering the ear is approximately 68 dB(A).
CAUTION
For noise environments dominated
by frequencies below 500 Hz, the
C-weighted environmental noise level
should be used. TheNRR used in the
above example was achieved under
laboratory conditions.
AUDIO INPUT LEVEL
The audio level in the hearing protector is dependent on the audio input level.
To prevent harmful noise levels, the hearing protector audio level is limited to 82
dB(A) when connected to a Personal Music Player (PMP). If the hearing protector
is connected to a PMP or other device with a very high output level, it is the user’s
responsibility to set the audio input level to a safe level. The maximum permitted
audio input level for 8 hours of usage time, compressed speech and music is 1 V.
WARRANTY
The Worktunes™Wireless is warranted to be free of defects in material and
workmanship for a period of one (1) year from the date of original purchase. 3M will,
at its option, repair or replace without charge, except for transportation costs, parts
that fail under normal use and service when operated and maintained in accordance
with our instructions. This warranty does not cover damage caused by misuse, abuse
or unauthorized modications. Proof of purchase is required to verify eligibility.
24
Worktunes
™
Wireless