3M Wireless Network Module EP8790NET Manual

3M Visual Systems Department Printed in U.S.A.
6801 River Place Boulevard © 3M 2003. All Rights Reserved.
Austin, Texas 78726-9000 78-6970-9173-0 Rev. A
Wireless Network Module EP8790NET
Operator’s Guide
For: 3M™ Multimedia Projector MP8790

Thank you for purchasing the EP8790NET wireless network module.
Please read this manual thoroughly to ensure proper and safe use of your new wireless network
module. Keep this manual in a safe place for future reference.
Summary
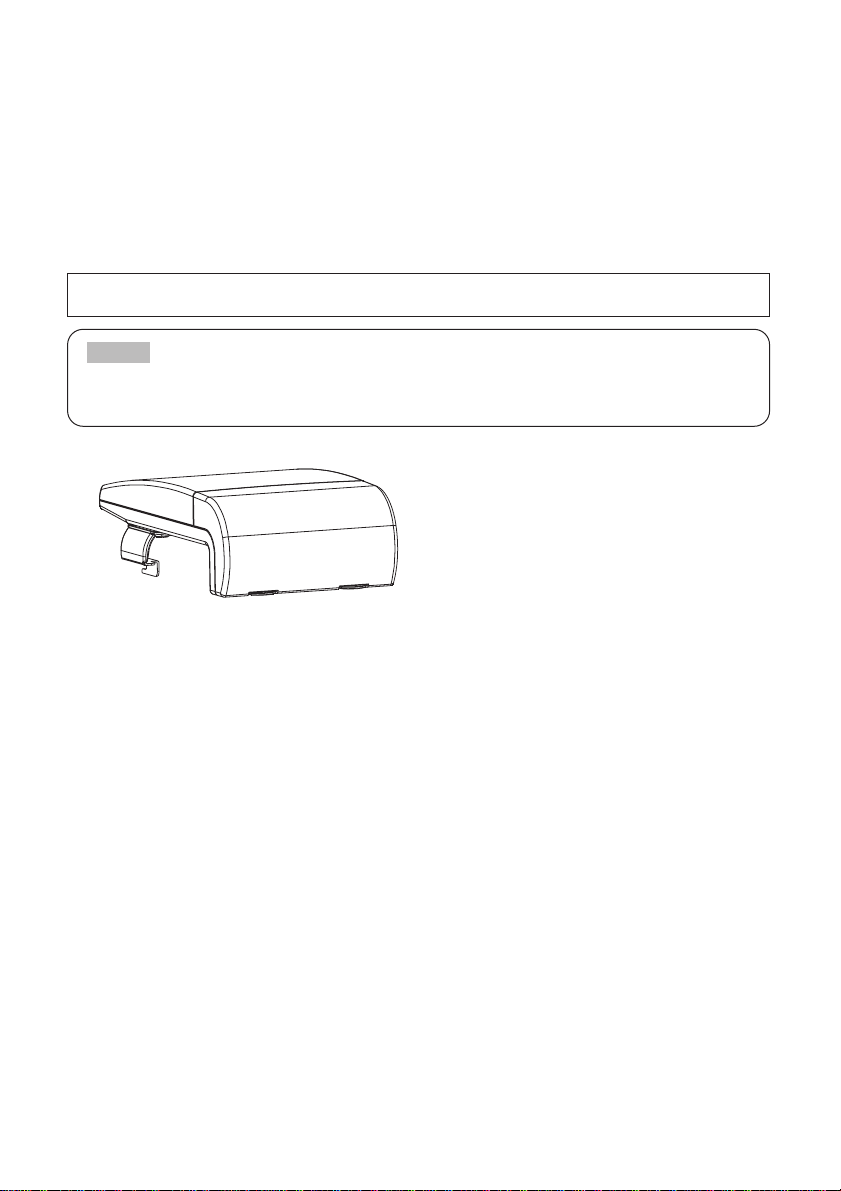
The EP8790NET wireless network module attaches
to 3M Multimedia Projector MP8790 and enables
users to make presentations using multiple
PCs in a cable-free environment.
Features
(1) Cable-Free Presentations
Wireless presentations made possible by
use of a wireless LAN card.
(2) Multiple Screens
Images from up to four PCs can be
presented simultaneously via the same
projector.
(3) Stand Alone Presentations
Now you can leave your PC behind and run
stand alone presentations with just a
memory card (sold separately).
(4) Remote Control via Your Web
Browser
Now you can use your Web browser to
remote control the projector.
Contents
<Introduction>
Functions ....................................................2
EP8790NET Components ............................4
Attaching the EP8790NET Module to the Projector
....5
Installing the Software ................................9
Network Settings........................................11
<Operations>
Wireless Presentations
(Live Mode)..........15
Presentation Playback
(Playback Mode)..........19
Stand Alone Presentations
(PC-less Presentation Mode)..........19
Using ImageViewer ..................................20
Using FileViewer........................................23
Controlling the Projector via Your Web Browser
....25
Configuration Utility ..................................29
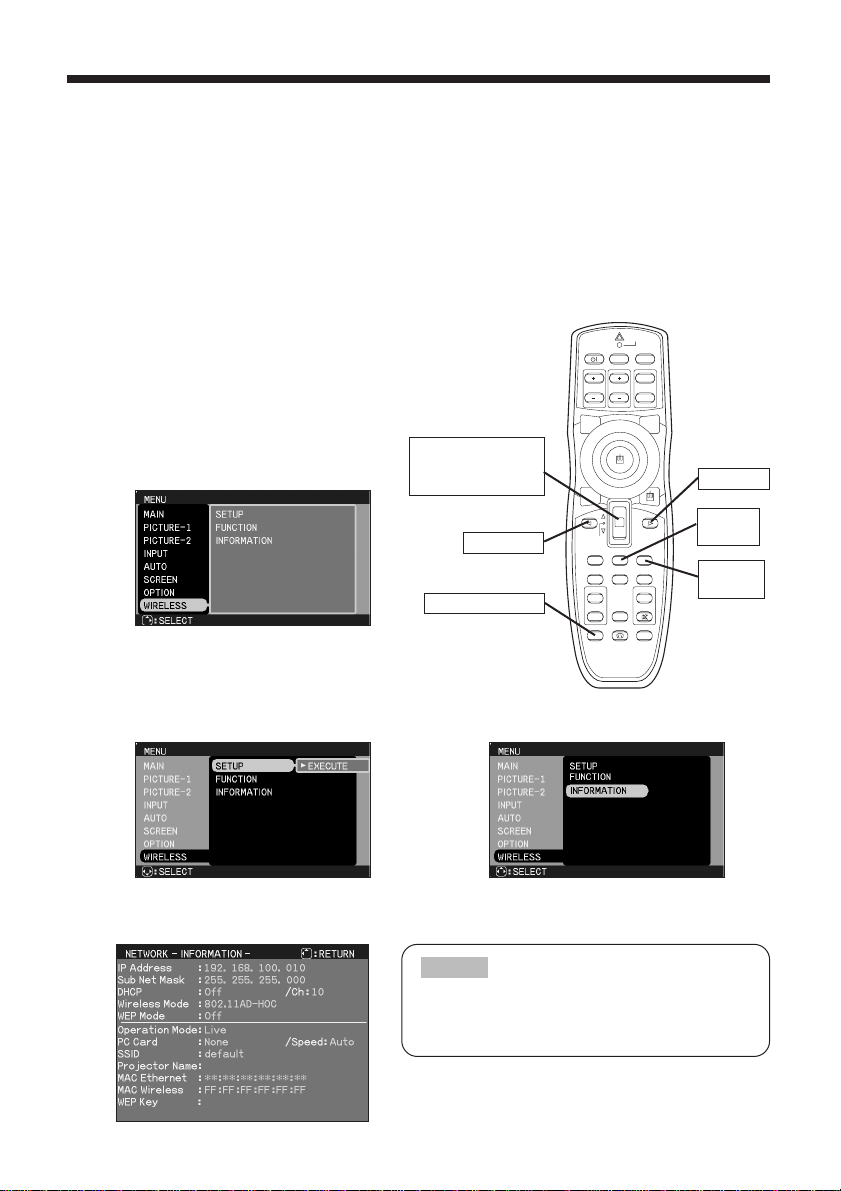
Changing Network Settings Directly from
the EP8790NET Module ............................32
<Additional Items>
Troubleshooting ........................................35
Specifications ............................................37
TRADEMARK ACKNOWLEDGEMENT :
•
VGA and XGA are registered trademarks of
the International Business Machines Corporation.
•
Windows is a registered trademark of Microsoft
Corporation.
• All other trademarks are the property of their
respective owners.
• The information in this manual is subject to change without notice.
• The manufacturer assumes no responsibility for any errors that may appear in this manual
•
The reproduction, transmission or use of this document or contents is not permitted without express written authority.
NOTE
3M™ Wireless Network Module EP8790NET
Operator's Guide
© 3M 2003. All Rights Reserved. 3M™ Multimedia Projector MP8790

2
Introduction
Functions
The EP8790NET wireless network module is equipped with the latest network functions. You can use
the EP8790NET module in combination with 3M MP8790 Multimedia Projector to make presentations
that draw on the power of your network. In addition, the wireless LAN card (*1) allows you to connect
the EP8790NET module to your network without the need to connect any annoying LAN cables.
(*1): Please use the wireless LAN card that came with your EP8790NET.
<Major Functions>
1. Live Mode
The EP8790NET module gives you the power to present PowerPoint® and other presentations with
ease and in a cable-free environment.
Get your computer ready to go! Using the EP8790NET module with PCs that are equipped with the latest
wireless LAN functions allow you to project images from your PC in real time (*2) using wireless
transmission to project a large screen with the same feel as a live broadcast.
No more annoying cables! Not only that, but you can project presentations from multiple computers at
the same! In addition, you can now project a presentation from one computer to multiple projectors.
(*2):
This will depend on the type of images you are attempting to display. Images are refreshed at a rate
of every one to four seconds. Therefore, you might not be able to project extremely dynamic images
such as animation very smoothly, and, in some cases, you may not be able to project them at all.
Office meetings at a snap of the fingers! Up to four PC screens can be displayed at the
same time.
Meetings in a wireless environment! In your showroom or at a convention hall.
Example of a Multiple Screen
3M™ Wireless Network Module EP8790NET
© 3M 2003. All Rights Reserved. 3M™ Multimedia Projector MP8790

3
Consult with your network administrator prior to attempting to connect to your company's LAN.
NOTE
2. Playback Mode
Images transmitted to the projector in Live Mode can be replayed from the projector side (*3).
You can also send images to the projector from the PC in advance (*4).
Regardless of the method chosen, you can select the image you wish to display or even select
multiple images for consecutive playback by viewing the corresponding thumbnail images
stored on the projector side (*5).
(*3): Use the key on your PC keyboard to capture images for replay in Playback mode.
(*4): Refer to for detailed information on how to use FileViewer.
(*5): Refer to for detailed information on how to use ImageViewer.
3. PC-less Presentation Mode (*6)
In order to use PC-less Presentation Mode, you need to store your presentation data (*7) into a
memory card (*8). Next, insert the memory card into the projector and you are all ready to make
a presentation with just the projector. No need for a PC! The presentation is played just as
described in Playback Mode.
(*6):
Since there is only one card slot, you can't use the wireless LAN card when in this mode.
(*7): You can only use still image files of the following extensions: .jpg, .bmp and .png.
(*8): You can use any of the following types of memory cards:
PCMCIA compliant memory card
CF memory card (dedicated PCMCIA adaptor required)
SD card (dedicated PCMCIA adaptor required)
Memory Stick (dedicated PCMCIA adaptor required)
HDD card (ATA compatible; less than 2GB) (IDE compatible HDD cards can't be used)
Microdrive (dedicated PCMCIA adaptor required; ATA compatible; less than 2GB)
(IDE compatible HDD cards can't be used)
Print
Screen
Only memory cards under 2GB can be used. Memory cards formatted to 2GB or more can't be used.
Reformat memory cards to under 2GB as necessary. (Refer to your memory card user guide for details.)
NOTE
4. Remote Control Mode
The EP8790NET incorporates the latest LAN functions, enabling you to not only make presentations,
but also control the projector using a control panel that you interface to using your Web
browser. Remote control functions available include, turning the projector's power on and off,
and selecting between image sources.
This feature also provides you with such information as when the projector's lamp needs to be
replaced. Even if the projector is located in an office room away from your current location, you
can easily operate it via remote control.
If you opt not to use the wireless LAN card, you can still directly connect your computer
using a LAN cable. Be sure to use a cross cable when directly connecting to just one PC. Use
a straight cable for connecting to the closest hub of your company LAN.
23
20
3M™ Wireless Network Module EP8790NET
© 3M 2003. All Rights Reserved. 3M™ Multimedia Projector MP8790

4
Introduction (continued)
EP8790NET Components
The EP8790NET wireless network module is composed of its main unit (1) and rear cover (2).
(1) Main unit:
Mounts onto the multimedea projector MP8790.
(2) Rear cover:
Remove this cover when mounting the EP8790NET module to a projector and then reattach once
the EP8790NET module is properly mounted onto the projector.
(3) Clasp:
Use this to secure the EP8790NET module in place. Tighten these once the EP8790NET module
is properly mounted onto the projector.
(4) LAN port:
The port used to connect to a network hub or directly to a PC using a LAN cable. This
connection can't be accessed when the wireless LAN card is in use. Remove the wireless
LAN card if you wish to use a cable-based LAN connection. (Only one LAN connection at a
time is allowed.)
(5) PCMCIA card slot:
(6) Card eject button:
This is the slot for inserting the PCMCIA compatible wireless LAN card or memory cards.
Insert cards slowly and carefully into this slot. Use this button to remove a card from the card
slot. After pressing this button, slowly remove the card.
(7) Power cable:
Use this cable to connect the module to the projector in order to supply power to the module.
(8) Power port:
Firmly plug the power cable into this port after the module is properly mounted onto the
projector.
(1) Main unit
(4) LAN port (5) PCMCIA card slot
(6) Card eject button (2) Rear cover
(8) Power port
(7) Power cable
(3) Clasp
(9) Locking screws
3M™ Wireless Network Module EP8790NET
© 3M 2003. All Rights Reserved. 3M™ Multimedia Projector MP8790

5
Attaching the EP8790NET Module to the Projector
The EP8790NET module is designed exclusively for use with 3M Multimedia Projector MP8790. Please slowly and carefully
follow the below instructions when attempting to mount the EP8790NET module onto the projector.
(1) Turn off the projector by turning off its AC power switch.
(2) Remove the projector's filter cover.
Push both of the filter cover tabs down and then pull them to remove the filter cover.
(3) Remove the rear cover of the EP8790NET module.
Push the rear cover tabs down and then pull the rear cover to remove it.
(4) Fit the EP8790NET module's clasp into the projector's recess and align the module so that
it can connect to the DVI ports on the back of the projector.
➱
➱
Recess
Clasp
Tabs
Filter cover
Rear cover
Rear cover tabs
DVI port
3M™ Wireless Network Module EP8790NET
© 3M 2003. All Rights Reserved. 3M™ Multimedia Projector MP8790

6
Introduction (continued)
(5) Slowly slide the module into place (in the direction of the arrow). Make sure that the DVI port
is correctly aligned. (Please take care not to cause damage to the projector by the clasp.)
Insert the two module locking screws into the respective DVI port.
[(7) Tighten the screws]
(6) Tighten (turn right) the two DVI port locking screws.
(7) Tighten the clasp to the projector using the accompanying locking screws (M3x8).
(8) Firmly connect the module's power cable to the projector's power port
Power port
(9) Reattach the projector's filter cover.
Filter cover
3M™ Wireless Network Module EP8790NET
© 3M 2003. All Rights Reserved. 3M™ Multimedia Projector MP8790

7
Confirming the Connection to the Projector
Once you have completed mounting the EP8790NET module onto the projector, follow the below instructions
to make sure that the connection to the projector is working okay. During this confirmation, you will check to see:
•
Whether or not the EP8790NET module is correctly recognized when the projector's menu is displayed
(1) Turn on the projector's power.
(Turn on the projector's AC switch and press the STANDBY button.)
(2) Select DVI using the projector's jog dial button or by pressing the WIRELESS button on the
projector's remote control.
STANDBY/ON
VIDEO
UP
DOWN
BLANK
ASPECT
PUSH
LASER
INDICATOR
LASER
RGB
FOCUS
ENTER
ON
OFF
ESC MENU RESET
POSITION
MAGNIFY VOLUME
MUTE
WIRELESS KEYSTONE
FREEZE
ONE TOUCH
AUTO
PinP
ZOOM PAGE
Press the stick for
ENTER move up for
or down for .
button
WIRELESS button
button
MENU
button
RESET
button
(3) Use the remote control or the projectors
operation panel to open the WIRELESS
menu (refer to the projector's operator's
guide as necessary):
•
Press the MENU button.
•
Press the button until the cursor is over
WIRELESS.
(4) Press the button. (5) Press the button twice.
➞
➞
➞
➞
➞
➞
➞
(6)
After a moment, the network information will be displayed as shown below. Confirm the network information.
If the information is not displayed, check the
connection between the EP8790NET module and
the projector.
NOTE
3M™ Wireless Network Module EP8790NET
© 3M 2003. All Rights Reserved. 3M™ Multimedia Projector MP8790

8
Introduction (continued)
[IP Address:]
A unique numeric address used to identify each network device.
The IP's factory default setting is 192.168.100.10.
[Sub Net Mask:]
The network address portion of the IP address.
The factory default is 255.255.255.0.
[DHCP (Dynamic Host Configuration Protocol):]
This setting is used to determine whether to have this device's IP address assigned automatically
by the network's DHCP server or to assign the IP address manually (as described above).
The factory default is to leave this setting Off and assign the IP address manually.
[Ch (Channel):]
The wireless LAN (IEEE802.11b) device can communicate on channels 1 to 11. The factory
default is channel 10.
[Wireless Mode:]
Sets the communication mode to be used for wireless communication. The factory default setting
is 802.11 AD-HOC.
[WEP (Wired Equivalent Privacy):]
An encryption method used for wireless communication. The factory default is "Off," meaning that
encryption is not used.
[
Operation Mode:Use this to confirm the current operation mode of the EP8790NET module.
]
Live: The screen appearing on the PC is displayed on the projector.
Play Back: The images stored in the EP8790NET module are played.
PC-Less: The EP8790NET is ready to execute PC-less Presentation Mode using a memory card.
[PC Card: Displays the type of PC card currently inserted into the EP8790NET.]
[Speed:]
The wireless communication speed. The factory default is AUTO.
[SSID (Service Set Identity):]
The network group name (also referred to as ESSID).
The same name setting is used for the same network group.
This dialog displays the first 16 characters of the SSID. Please note that some symbols cannot be
displayed in this dialog.
[
MAC Ethernet: The fixed MAC address of the wired (cable-based) LAN device installed in this device.
]
[
MAC Wireless: The fixed MAC address of the wireless LAN card inserted in this device.
]
[
WEP Key: The common encryption key when the WEP (encryption) function is enabled for wireless LAN.
]
This is the encryption key used in common by the network group when the WEP (Wired
Equivalent Privacy) function is enabled.
When WEP is set to 40bit, this will be 10 hexadecimal characters. When WEP is set to 128bit, the
first six characters are set as a dummy header (00:00:00) and the remaining 26 characters
(except “:”) are the actual WEP key.
Please note that even if DHCP is enabled, the displayed address is the IP address that was
manually set, not the IP address assigned by the DHCP server.
NOTE
3M™ Wireless Network Module EP8790NET
© 3M 2003. All Rights Reserved. 3M™ Multimedia Projector MP8790

9
Installing the Software
In order to use the EP8790NET with a PC for wireless presentations (Live Mode), you will first need
to install the accompanying software on all the PCs you will be using.
Minimum PC Hardware and Software Requirements
•OS: Windows 98, Windows 98SE, Windows Me, Windows 2000 Professional,
Windows XP
•Graphic Interface: DirectX 6.1a or higher; Video RAM 4MB or higher (8MB recommended)
•CPU: Pentium III (600MHz or higher recommended)
•Display: VGA 640x480 or higher (XGA 1024x768 recommended) 65,536
simultaneous colors or higher
•Memory: 64MB or higher (128MB or higher if using Windows XP)
•
Available Hard Disk Space:
10MB or higher
•Web browser: Internet Explorer®(4.0 or higher) or Netscape Communicator®4.5X,
4.7X, etc.
•CD-ROM drive
•Interface PC card slot (PCMCIA Type-II)
•IEEE802.11b wireless LAN PC card
Software Installation Procedure
1. Turn on the PC.
2. Shut down all applications.
3. Insert the accompanying CD-ROM into the PC's CD-ROM
drive.
4. After a moment, the Welcome to WNM Utilities Setup
dialog will appear as shown on the right. Press Next.
•Not required for PCs with built-in 802.11b wireless LAN
•
Depending on the type of wireless LAN card and PC you are using, the EP8790NET module may
not be able to communicate properly with your PC, even if the PC you are using is equipped
with built-in wireless LAN functionality.
Should communication problems occur, please procure a Wi-Fi certified wireless LAN card.
NOTE
If your PC is currently set to a resolution higher than XGA, please change it to XGA.
NOTE
If the Welcome to WNM Utilities Setup dialog doesn't appear, proceed as follows:
(1) Click on the Start button on the toolbar and select Run.
(2) Enter E:\software\setup.exe and then press OK.
If your CD-ROM drive is not drive E on your PC, you will need to replace E with
the correct drive letter assigned to your CD-ROM drive.
NOTE
3M™ Wireless Network Module EP8790NET
© 3M 2003. All Rights Reserved. 3M™ Multimedia Projector MP8790

10
Introduction (continued)
5. The Choose Destination Location dialog appears. Press
Next.
6. Confirm the program folder name.
If WNM_Utilities is okay, press Next to continue.
If not, enter the desired folder name and then press Next.
7. After a moment, installation will complete and the Setup
Complete dialog will appear as shown on the right. Click
Finish.
This completes the software installation.
(1) To confirm that the software as been properly installed, press the Start button on the toolbar,
select All Programs and then select the WNM Utilities folder.
(2) WNM LiveViewer and WNM FileViewer will appear in that folder if the installation was
successful.
•The C:\Program Files\WNM_Utilities folder will be created and the program will be installed
into that folder.
•If you wish to install to a different folder, click Browse and select another folder.
NOTE
3M™ Wireless Network Module EP8790NET
© 3M 2003. All Rights Reserved. 3M™ Multimedia Projector MP8790

11
Network Settings
This section explains how to do wireless presentations (Live Mode), how to do presentation
playback (Playback Mode) and how to use your Web browser to access the remote control panel.
If your PC is not ready for 802.11b wireless LAN communication, purchase an 802.11b wireless
LAN card and install the device driver. (Refer to the corresponding PC and/or LAN card user
guide for details.)
<Preparations> (set the PC and the module to the same configurations)
•Configure the PC and EP8790NET module for wireless communications. Insert the wireless
LAN cards into both the PC and EP8790NET module and enable wireless LAN communications.
•Next, configure as shown in the following table:
(1) Wireless Settings for the EP8790NET Module
•Slowly and carefully insert the accompanying wireless LAN card into the EP8790NET module's
PC card slot. Be careful not to insert the card too hard as you may bend the connector pins.
•Turn on the power of the projector (that the EP8790NET module is mounted to) and then press
the STANDBY button to turn on the lamp.
•
As explained in the Introduction section of this user guide, bring up the projector's WIRELESS menu and
configure the network settings as necessary. Refer to for information on the network configuration method.
(2) Wireless Settings for the PC
Enable the built-in wireless LAN communications of the PC.
Refer to your PC user guide for details. Continue on for information on how to configure
network settings.
If you are using a new wireless LAN card, follow the instructions in the corresponding wireless
LAN card user guide to install the card's dedicated driver into your PC.
Insert the wireless LAN card into your PC's card slot.
Continue on for information on how to configure network settings.
If the PC is already equipped with a built-in 802.11b wireless LAN card, you don't need to
insert a new wireless LAN card.
NOTE
PCs with a built-in wireless LAN card
PCs using PCMCIA wireless LAN card
Consult with your network administrator if there is already a connection to the network
NOTE
12
12
12
3M™ Wireless Network Module EP8790NET
© 3M 2003. All Rights Reserved. 3M™ Multimedia Projector MP8790

12
Introduction (continued)
<Network Settings>
●Select the network device (network adaptor) to be used
•Wired connection using a LAN cable
•Wireless connection using a wireless LAN card (inserted in PC card slot)
•Wireless connection using a built-in wireless LAN adaptor
●Protocol to be used: TCP/IP
●Configure the TCP/IP attributes (IP address, Subnet Mask)
Manual setting/Automatic setting (for networks utilizing a DHCP server function equipped
devices)
If you will be manually setting the TCP/IP attributes, turn the DHCP setting OFF and then
configure the settings.
●For more details of the settings, see the table below.
PC and EP8790NET Module Connection
Setting
Configuration (Recommend Setting Example)
PC/Access point EP8790NET Module
P2P (Peer to Peer) IP Address
Subnet Mask
DHCP
Communication Mode
Channel
Speed
WEP (encryption)
Encryption Key
SSID
Host Name
192.168.100.N
*N should be unique (1 to 254)
255.255.255.0 recommended
OFF (not used)
802.11 AD-HOC
1 to 11
AUTO (or a fixed speed)
OFF (not used)
Unnecessary
“default”
Can be set for each PC
192.168.100.10
*doesn't need to be 10
255.255.255.0 (same as PC)
Same as PC
Same as PC
Same as PC
Same as PC
Same as PC
Same as PC
Same as PC
Can set the projector name
Local access point IP Address
Subnet Mask
DHCP
Communication Mode
Channel
Speed
WEP (encryption)
Encryption Key
SSID
Host Name
192.168.100.N
*N should be unique (1 to 254;
including access points)
255.255.255.0 recommended
OFF (not used)
Infrastructure
1 to 11
AUTO (or a fixed speed)
OFF (not used)
Unnecessary
“default”
Can be set for each PC
192.168.100.10
*doesn't need to be 10
255.255.255.0 (same as PC)
Same as PC
Same as PC
Same as PC
Same as PC
Same as PC
Same as PC
Same as PC
Can set the projector name
Existing network (via access
point) Consult with your network
administrator. Consult with your network
administrator.
3M™ Wireless Network Module EP8790NET
© 3M 2003. All Rights Reserved. 3M™ Multimedia Projector MP8790

13
[Explanation]
A network address setting is required as you will be connecting the EP8790NET module to
the PC using the network.
You can choose to manually assign an address to each device or have an DHCP server
automatically assign the address.
When configuring the address manually, please use the following setting:
IP address = 192.168.xxx.NNN
<xxx and NNN represent decimals>
Subnet Mask = 255.255.255.0
Be sure to use the same setting for the "xxx" portion of the IP address for both the EP8790NET
module and PCs.
Then "NNN" portion can be any number from 1 to 254, but be careful so as not to assign the
same number to two or more devices connected to the same network.
●
If you are attempting a wireless connection, configure the network adaptor attributes as follows
(configure all the devices, including the projector that the EP8790NET module is mounted to, with the same setting):
❍Communication Mode
•If you won't be using an access point (Peer to Peer):
Set to AD-HOC (pseudo ad hoc) or 802.11AD-HOC (depending on the hardware).
•If you will be using an access point:
Select INFRASTRUCTURE.
❍Communication Speed: This is normally set to Auto (Full Automatic, et al)
❍Communication Channel: Depending on the country or region you are in, the
channels you can use may vary. Be sure to use the same
channel setting for each device.
❍SSID (network group name): Set the same name for all devices.
❍Encryption (WEP) Setting
•Disable if you won't be using encryption
•Enable if you will be using encryption by selecting the type of encryption [40(60)bit or
128bit] and configure the encryption key as well (text or hexadecimal)
Refer to your PC user guide and wireless LAN card user guide (if you are using a wireless
LAN card) for additional information on how to configure these settings.
If there is another network nearby, it is best to use a channel that is
at least four channels away from the other network.
NOTE
3M™ Wireless Network Module EP8790NET
© 3M 2003. All Rights Reserved. 3M™ Multimedia Projector MP8790

14
Introduction (continued)
If you only enter the IP address into your Web browser's
address bar, the following dialog will appear. In this case,
simply click on Remote control link to bring up the Remote
Control panel.
NOTE
Next, let's make sure that your PC and the EP8790NET module are communicating okay.
•Open your Web browser (Microsoft™Internet Explorer®, etc.) and enter the following
address:
http://192.168.100.10/projectorcontrol.htm
This is the factory default setting.
If you see the Remote Control panel as shown on the right, then everything is configured okay.
Remote control
LAN settings
3M™ Wireless Network Module EP8790NET
© 3M 2003. All Rights Reserved. 3M™ Multimedia Projector MP8790

15
Operations
Wireless Presentations (Live Mode)
You can project the content of your PC display as is via the projector to which the EP8790NET
module is mounted using wireless communication. First of all, let's take a look at the basic
wireless presentation operation. (Refer to for additional operations.)
<Startup>
•Turn on the power of the projector (that the EP8790NET module is mounted
to) and then press the STANDBY button. (After a moment, the lamp
comes on.)
•Press the WIRELESS button on the projector's remote control.
•The screen will appear as on the right. Use the remote controls
navigation buttons to move the cursor over the Live Mode option and
then press the ENTER button.
•Startup the PC.
•Open LiveViewer
(Start -> All Programs -> WNM Utilities -> WNM LiveViewer).
(2) Find the projector you wish to
use for your presentation.
A list of projectors appears.
Select the one you wish to use
and the press OK.
The names of the protectors
are listed as configured on the
projectors themselves. If a
name has not been set for a
given projector, its IP address
will be displayed instead.
If you should experience a momentary interruption in communication, press the Find button
again to search for a projector again.
NOTE
(1) Click this
LiveViewer.exe program is installed.
The EP8790NET with the accompanying
802.11b wireless LAN card inserted into
its PC card slot
A PC with built-in 802.11b wireless LAN
functionality or with an 802.11b wireless
LAN card inserted into its PC card slot.
17
3M™ Wireless Network Module EP8790NET
© 3M 2003. All Rights Reserved. 3M™ Multimedia Projector MP8790

16
Operations (continued)
(3) Use the JPEG Quality bar to adjust the compression level of
the images you will send from your PC to the EP8790NET module.
The closer to Rough, the higher the level of compression will be. The
quality of the image will decrease, but transfer speed will increase.
The closer to Fine, the lower the level of compression will be. The
quality of the image will increase, but transfer speed will decrease.
For presentations that are composed of mostly of charts and illustrations,
adjust to the left (Rough) side. For presentations that are composed of
mostly scenic photographs and similar, adjust to the right (Fine) side.
(4) Press the Play button and then click on the X button on the top right hand corner of the dialog.
LiveViewer will begin transferring the presentation images to the EP8790NET module and the dialog will disappear. However,
the LiveViewer will continue to run with its icon residing in the system tray (usually located in the bottom right portion of toolbar).
At that, the images displayed on your PC monitor will be projected real time via the projector. You
may now open the application (PowerPoint®, etc) that contains the images you wish to project.
<What can I do if…>
•Dynamic images such as PowerPoint®animation are projected slower than they appear on my
PC?
➱Try increasing the Capturing Performance priority level as follows:
Right click on the LiveViewer icon residing in the system tray.
Click on Settings.
Slide the Capturing Performance bar to High to increase the priority level.
•I want to open the LiveViewer dialog?
➱Right click on the LiveViewer icon residing in the system tray and then click on Display.
•I want to project another PC's images (i.e., turn control over to another PC)?
➱
Right click on the LiveViewer icon residing in the system tray and then click on Display.
Press the STOP button. (Communication with the projector will be terminated and a Disconnect
message will appear.)
Start LiveViewer on the PC you wish to use. (Refer to for additional operation
information.)
This will depend on the type of images you are attempting to display. Images are refreshed at a rate
of every one to four seconds. Therefore, you might not be able to project extremely dynamic images
such as animation very smoothly, and, in some cases, you may not be able to project them at all.
NOTE
15
3M™ Wireless Network Module EP8790NET
© 3M 2003. All Rights Reserved. 3M™ Multimedia Projector MP8790

17
<Applied Operation: Multiple Screens>
This section explains how to combine images from multiple PCs onto a single projector at the
same time. You can use this function for two, three and even four PCs at a time.
•Open the WNM LiveViewer on each PC.
•Press the PLAY button and close down the LiveViewer dialog.
•Right click on the LiveViewer icon residing in the system tray and then click on Multi PCs.
•Select the number of PCs you wish to use at the same time.
You can adjust this setting from any of the participating PCs. The most recent setting made is
the one that is used.
•
What if the number of PCs set is higher than the actual number of PCs being used?
The images from the participating PCs are projected in the order of top left, top right, bottom left and bottom right.
So, until you have connected the maximum number of PCs (four), you can continue to add additional PCs.
•What if the number of PCs set is lower than the actual number of PCs being used?
For example, if you make the selection for four PCs and the actual number of participating PCs is four, but then you
change the setting to two PCs, only the images of the two most recently connected PCs will remain, with the image
from the first one of the remaining two PCs being projected on the left and the other one being projected on the right.
Can I mark multiple screen images for playback?
Yes. Simply press the Print Screen key when the multiple screen is displayed. The complete
multiple screen image will be saved in the projector's internal memory.
However, that images displayed using this feature will be projected at quarter of the normal size.
NOTE
Two PCs at a time Three PCs at a time Four PCs at a time
In the above example, the images of the first two PCs to be connected will disappear from the screen. However,
no matter what the order of display, if only one PC is selected, then its image will be displayed at full screen size.
NOTE
1st PC
connected 2nd PC
connected
3rd PC
connected 4th PC
connected
15
16
3M™ Wireless Network Module EP8790NET
© 3M 2003. All Rights Reserved. 3M™ Multimedia Projector MP8790

18
Operations (continued)
<Applied Operation: Distributing Images to Multiple Projectors>
You can simultaneously distribute the images from a single PC to a multiple number of projectors(*1) (*2).
(*1): Each image from the PC is distributed in time-share fashion to each projector and then a synchronized
command is issued to have each projector refresh its screen simultaneously.
(*2): The PC can connect to projectors with the same network address. However, the greater number of
projectors involved, the greater delay in the image refresh rate.
•Press the PROJECTOR button from the LiveViewer dialog.
•A list of available projectors is displayed. Select the names (or as the case may be, the IP
address) of the projectors you wish to use (use a left mouse click while pressing the Ctrl key
to select more than one projector at a time).
•Press the PLAY button.
You are now ready to broadcast your PC screen to all the projectors you selected.
3M™ Wireless Network Module EP8790NET
© 3M 2003. All Rights Reserved. 3M™ Multimedia Projector MP8790

19
Presentation Playback (Playback Mode)
Images transmitted to the projector in Live Mode can be replayed (*1). You can also send images
from the PC in advance (*2) for playback using the projector.
(Depending on the size of the images, you can usually store about 20 slides for playback).
(*1): Use the Print Screen key on your PC keyboard to capture images during Live Mode for replay in Playback mode.
(*2): Refer to for detailed information on how to use FileViewer.
•Press the remote control's WIRELESS button to open the Wireless
Menu.
(Press the WIRELESS button again if the menu doesn't appear the first time.)
•Use the navigation buttons to move the cursor over Playback Mode
and then press ENTER.
You can display the thumbnails of the images currently stored for playback
(up to 16 images at a time).
•Select one image that you would like to playback.
•Select images in the order you would like to play them back, from first to last.
(You can also set the time interval for playing back each image.)
Refer to for detailed information on how to use the ImageViewer.
Stand Alone Presentations (PC-less Presentation Mode)
Be simply inserting a storage card (*3) filled with your presentation data into the EP8790NET
module's PC card slot, you can make a presentation without a PC.
(*3): Insert the storage card into the EP8790NET module's PCMCIA card slot.
You can use any of the following types of cards: (However, depending on the manufacturer, some cards may not work.)
PCMCIA compliant memory card
CF memory card (dedicated PCMCIA adaptor required)
SD card (dedicated PCMCIA adaptor required)
Memory Stick (dedicated PCMCIA adaptor required)
HDD card (ATA compatible; less than 2GB) (IDE compatible HDD cards can't be used)
Microdrive (dedicated PCMCIA adaptor required; ATA compatible; less than 2GB)
(IDE compatible HDD cards can't be used)
Since there is only one card slot, you can't use the wireless LAN card at the same time.
You can only store files of the following extensions in the storage card: .jpg, .bmp and .png.
Record the data you wish to present from your PC onto the storage card you will be using.
You can only use files located in the root directory. You can't not playback files located in a
subdirectory.
You can use digital camera storage cards.
However, make sure that the files are stored in the root directory.
Only cards under 2GB (FAT/VFAT-16) can be used. High resolution images such as those from
a digital camera will likely be reduced when projected by the projector.
NOTE
23
20
3M™ Wireless Network Module EP8790NET
© 3M 2003. All Rights Reserved. 3M™ Multimedia Projector MP8790
Table of contents
Other 3M Projector Accessories manuals
Popular Projector Accessories manuals by other brands

Mitsubishi Electric
Mitsubishi Electric XL7100U user manual

Panamorph
Panamorph DCR-S3-ST installation guide

Christie
Christie RPMWU-RPMSP-LED01 manual

Connex
Connex E-LUMINATE CP201 instruction manual

peerless-AV
peerless-AV PRG-1S Installation and assembly manual

Logitech
Logitech R800 - Professional Presenter Presentation Remote... Setup guide

Crestron
Crestron AirMedia Presentation System 200 Do guide

Elite Screens
Elite Screens Spectrum Tab-Tension 2 CineGrey 3D Series user guide

Eiki
Eiki AH-38321 owner's manual

InFocus
InFocus LP630 installation instructions

Mitsubishi Electric
Mitsubishi Electric UD8400U user manual

Epson
Epson BrightLink 450Wi - Interactive Projector Using