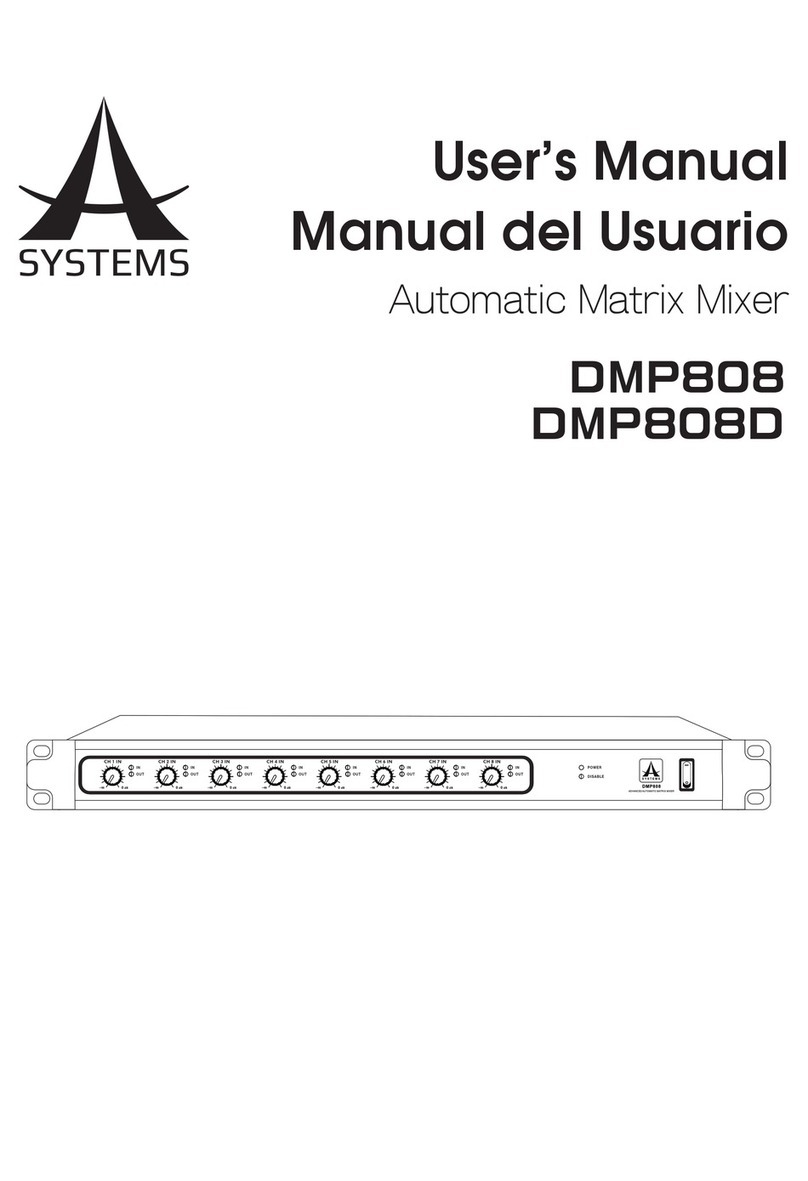
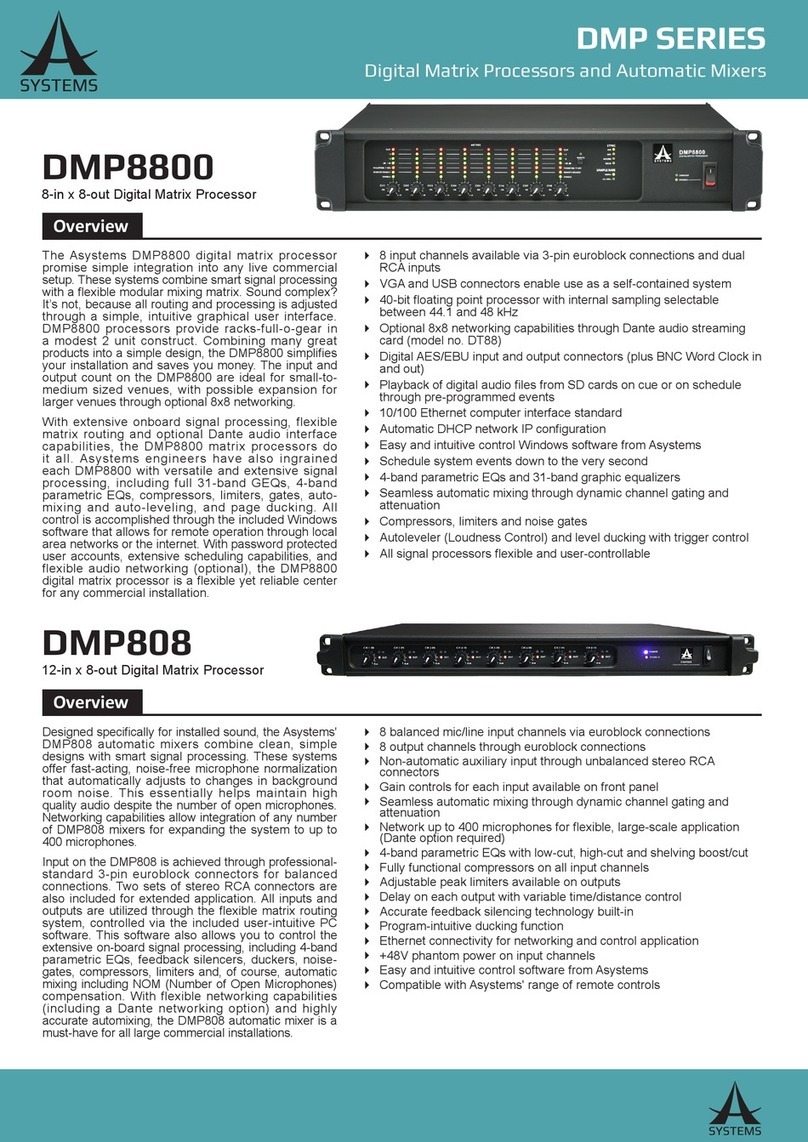
A SYSTEMS DMP8800 User manual

User’s Manual
Manual del Usuario
Digital Matrix Processor
DMP8800

2
DMP8800
English
IMPORTANT SAFETY INSTRUCTIONS�������������������������������������������������������������������������������������� 1
INTRODUCTION�������������������������������������������������������������������������������������������������������������������������� 2
FEATURES����������������������������������������������������������������������������������������������������������������������������������� 2
GETTING STARTED �������������������������������������������������������������������������������������������������������������������� 2
GLOSSARY���������������������������������������������������������������������������������������������������������������������������������� 2
CONTROLS & SETTINGS ����������������������������������������������������������������������������������������������������������� 3
DMP MATRIX SOFTWARE���������������������������������������������������������������������������������������������������������� 5
SIGNAL PROCESSORS ������������������������������������������������������������������������������������������������������������ 12
REMOTE CONTROLS ��������������������������������������������������������������������������������������������������������������� 14
TROUBLESHOOTING ��������������������������������������������������������������������������������������������������������������� 17
SPECIFICATIONS���������������������������������������������������������������������������������������������������������������������� 18
PARAMETERS ��������������������������������������������������������������������������������������������������������������������������� 19
Asystems reserves the right to alter any information contained within this
manual without prior notice�
V1�0 06/20/2016
CONTENTS

1
DMP8800
English
RISQUE DE CHOC ELECTRIQUE
NE PAS OUVRIR
1. Read these instructions – All the safety and
operating instructions should be read before this
product is operated.
2. Keep these instructions – The safety and
operating instructions should be retained for
future reference.
3. Heed all warnings – All warnings on the appliance
and in the operating instructions should be
adhered to.
4. Follow all instructions – All operating and use
instructions should be followed.
5. Do not use this apparatus near water – The
appliance should not be used near water or
moisture – for example, in a wet basement or
near a swimming pool, and the like.
6. Clean only with dry cloth.
7. Do not block any ventilation openings. Install in
accordance with the manufacture’s instructions.
8. Do not install near any heat sources such
as radiators, heat registers, stoves, or other
heat.
9. Do not defeat the safety purpose of the polarized
or grounding plug. A polarized plug has two
blades with one wider than the other. A grounding
plug has two blades and a third grounding prong.
The wide blade or the third prong is provided for
your outlet, consult an electrician for replacement
of the obsolete outlet.
10. Protect the power cord from being walked on or
pinched particularly at the plugs, convenience
receptacles, and at the point where they exit from
the apparatus.
11.
the manufacturer.
12. Use only with the cart, stand, tripod,
manufacturer, or sold with the
apparatus. When a cart or rack is
used, use caution when moving the
cart/apparatus combination to avoid
injury from tip-over.
13. Unplug the apparatus during lightning storms or
when unused for long periods of time.
14.
Servicing is required when the apparatus has
been damaged in any way, such as power supply
cord or plug is damaged, liquid has been spilled
or objects have fallen into the apparatus has been
exposed to rain or moisture, does not operate
normally, or has been dropped.
15. CAUTION: These servicing instructions are
reduce the risk of electric shock, do not perform
any servicing other than that contained in the
do so.
16.
building-in space such as a book case or similar
unit, and remain a well ventilation conditions at
open site. The ventilation should not be impeded
by covering the ventilation openings with items
such as newspaper, table-cloths, curtains, etc.
17. WARNING: The mains plug/appliance coupler is
used as disconnect device, the disconnect device
shall remain readily operable.
18. This apparatus is for professional use only.
19. WARNING:
shock, do not expose this apparatus to rain or
moisture. The apparatus shall not be exposed to
liquids, such as vases, shall not be placed on
apparatus.
20.
an equilateral triangle is intended to alert
the user to the presence of non-insulated
“dangerous voltage” within the product’s
magnitude to constitute a risk of electric
shock.
Warning: To reduce the risk of electric shock, do
not remove cover (or back) as there are no user-
personnel.
The exclamation point within an equilateral
triangle is intended to alert the user to
the presence of important operating and
maintenance instructions in the literature
accompanying the appliance.
21. Protective earthing terminals. The
apparatus should be connected to a
mains socket outlet with a protective
earthing connection.
RISQUE DE CHOC ELECTRIQUE
NE PAS OUVRIR
IMPORTANT SAFETY INSTRUCTIONS

2
DMP8800
English
INTRODUCTION
Congratulations on your purchase of the DMP8800 digital
matrix processor� The DMP8800’s modular expansion
cards will provide you with up to eight channels of audio
matrixing and processing� A single DMP processor
offers eight-in, eight-out support and the entire unit can
be controlled remotely via 10/100 Ethernet, standard
potentiometers and remote controls� Internal processing
is accomplished through a high quality 40-bit oating
point processor, with internal signal processors and
matrix routing all handled with ease�
DMP digital matrix processors offer easy, effective means
for injecting signal processors directly into your input
and output path, with clear, easy-to-use software both
onboard and on your Windows computer� The software
offers full performance monitoring for each processor,
giving real-time information on the load placed upon
DSPs�
We know how eager you are to get started – hooking up
your new DMP processor is probably your rst priority
right now – but we would advise that you take the time
to look over this manual. Inside you’ll nd important
safety considerations and operating instructions that
could prove helpful� After reading the manual, we would
suggest putting it somewhere easy to nd as you will
probably need to refer to it later on�
FEATURES
√ 8 input channels available via 3-pin euroblock
connections and paired RCA inputs
√ VGA and USB connectors enable use as a self-
contained system
√ 40-bit floating point processor with internal
sampling selectable between 44�1 and 48 kHz
√ Optional 8x8 networking capabilities through audio
streaming LAN card
√ Digital AES/EBU input and output connectors
√ Ethernet connectivity for network and internet
control application
√ Automatic DHCP network IP configuration
√ Easy and intuitive control software from Asystems
√ Event scheduling and user-accounts
√ 4-band parametric EQs and 31-band graphic
equalizers
√ Compressors and noise gates
√ Autoleveler (Loudness Control)
√ Level ducking with trigger control
√ All signal processors flexible and user-controllable
√ Detailed system performance monitoring
GETTING STARTED
For easy control of the DMP processor, simply connect
a VGA monitor and USB mouse to the VGA and USB
connectors on the rear of the device� This will give you
immediate access to the onboard software without the
need of a computer�
Using the Mouse: To operate the onboard software with
a connected mouse, simply point and click as you would
on a computer� When adjusting virtual rotary controls,
you are able to click either the right or left mouse buttons
to increase and decrease the setting, respectively�
The DMP processors can also be connected to your
local area network and controlled via network or internet
software� By installing the Asystems software on a
computer will allow for remote control of this unit� Enter
the DMP8800’s IP address into the PC software to locate
the DMP on either the local area network – or anywhere
on the internet, provided both the computer and DMP
are online�
Connect all necessary input and output devices� Input
can be achieved through either the RCAinput connectors,
or with correctly wired euroblock connectors� Wiring for
balanced euroblock connectors should be as follows:
Pin 1: Shield/Ground
Pin 2: Cold (–)
Pin 3: Hot (+)
Whereas unbalanced connectors can be wired as so:
Pin 1: Shield/Ground
Pin 2: Link to Pin 1
Pin 3: Hot (+)
GLOSSARY
The following are a few words that may serve you
well while reading this manual� These aren’t in depth
explanations, but should hopefully give you the basics
and a place to start�
Balanced Connections – balanced connections offer
three conductors, carrying a ground, an in-phase signal,
and an out-of-phase signal� Once the two signals are
sent from one device to another, the out-of-phase signal
has its phase inverted and the two signals are combined�
Any interference picked up along the way is removed
through to phase cancellation� This allows cables to be
run over long distances without collecting excessive
noise on the way�
Compressor – a Compressor reduces signals over a
user-dened threshold by a user-dened amount/ratio.
Dynamic Processor – is any kind of processor that
dynamically – or in real time – adjusts signal properties�
EQ – Equalizer – is a device or process that allows
users to boost or attenuate audio signals at specic
frequencies�

3
DMP8800
English
Euroblock – These types of inputs allow for self-wiring
of connections for permanent installations� Check the
“Getting Started” section for more information on wiring�
GEQ – Graphic Equalizer – is in essence the same
as an equalizer, but this title is reserved for equalizers
with more ‘bands’ than the typical EQ. While a typical
channel EQ may only allow for 3 or 4 frequencies to be
adjusted, a graphic equalizer may allow for 31 different
frequencies�
GUI – Graphical User Interface – this is the software
that is featured within the DMP8800, visible through a
VGA monitor�
HPF – High Pass Filter – a high pass lter will cut or
signicantly reduce all audio signals below a particular
user-dened frequency, allowing – as the name suggests
– high frequency sounds to pass through�
High Shelf Filter – the high shelf lter will reduce or
increase all audio signals below a particular frequency�
The level at which the signal is boosted/attenuated is
determined by the user�
Limiter – work just as compressors do; however with
an input to output signal ratio permanently set to innity-
to-1�
LPF – Low Pass Filter – a low pass lter will cut all
audio signals above a particular user-dened frequency,
allowing low frequency sounds to pass through� This is
signicantly useful when using subwoofer speakers on
particular outputs�
Low Shelf Filter – the low shelf reduces or increases
the level of audio signals below a particular frequency
selected by the user� The level at which the signal is
altered is also set by the user�
Matrix – this is a complex way of routing signals, where
actual input signals can be assigned to virtual input
channels, each of which can then be routed to any
number of outputs� With numerous output options, the
inputs can be assigned to any or all, if required, making
routing far more exible than normal mixing.
Network – as the name suggests, a networked audio
system is simply a set of audio devices connected
together in a chain� This allows the units to share input
and output signals�
Noise Gate – a noise gate is a dynamic process that
turns off or signicantly attenuates the audio signal
passing through it when the signal level falls below a
user adjustable threshold�
Unbalanced Connections – unlike balanced
connections, unbalanced connections only have 2
conductors: one for the signal and one for the grounding�
This, unfortunately, makes them more susceptible to
noise and interference�
CONTROLS &SETTINGS
FRONT PANEL
1. Mounting Holes
These holes are for mounting the DMP8800 matrix
processor on a standard 19” rack�
2. Power Switch
Flick this switch to turn the unit on or put it in standby
mode� Be aware that the power switch can be disabled
through the Asystems DMP8800 software�
3. Standby LED
This LED indicator allows the user to see when the unit
is in standby mode� This essentially shows when the
DMP8800 is disabled�
4. Power Disable LED
This LED indicator will show when the power switch
of the DMP8800 has been disabled by the Asystems
software� When the Power Disable LED lights up red,
the DMP8800 can only be activated or deactivated using
the Asystems software�
5. Clock Source
These LEDs will indicate the
currently selected clock source
between Internal, Network,
AES/EBU and Word Clock� The
master clock source is selected
within the Asystems software�
The Network clock LED turns
orange to indicate Net Matrix
Mode�
6. Sample Rate
The internal sampling rate of the DMP8800 is selectable
between 44�1 and 48 kHz� These indicators will light up
with the currently selected sampling rate�
1
2
3
4
5
6

4
DMP8800
English
7. Level Meters
These meters allow users to view the output signal
levels� There are four LEDs in total, the top of which
indicates whether the output signal is clipping�
8. Meter Button & Input LED
Pushing this button will change the status of the level
meter between that of a pre-DSP input signal level meter
and an output level meter�
9. Phantom Power LEDs
These LED indicators will light up when the corresponding
input’s phantom power circuit is activated� Phantom
power itself can be turned on using the Asystems
software�
10. Remote Enable LEDs
When a remote level control is connected and active
for the corresponding channel, this LED will indicate as
such�
11. Enable LEDs
This LED will light up when the corresponding channel is
activated� This is done through the DMP8800 software�
12. Gain Controls
These rotary controls will allow users to adjust the nal
input level for channels 1 through 8�
REAR PANEL
13. Ethernet Connection
This connection is for standard RJ-45 cables, used
for 10/100 Ethernet control� Using a CAT5 twisted pair
copper cable, Asystems doesn’t recommend a distance
of more than 100 meters to the nearest computer or
hub� The Ethernet connection is used to control the
software via the PC control software and the RM-6E
programmable remote controls�
14. Euroblock Line Inputs
The DMP8800 offers a total of eight line input channels�
These inputs are active balanced with euroblock
connectors� If an unbalanced signal is used, Asystems
advises that customers ground the unused conductor�
15 RCA Line Inputs
These unbalanced RCA connectors are for the
connection of stereo RCA cables� They accompany each
of the eight line input channels mentioned previously�
The stereo signals these inputs receive are summed to
create a mono mix�
16. Line Outputs
The DMP8800 offers a total of eight line outputs� These
are servo-balanced euroblock connectors and can be
wired to either balanced or unbalanced connections�
17. Peripheral Connector
This RJ-45 connector is for connecting Asystems remote
peripherals to the DMP8800 series processor�
18. USB Connectors
Two USB connectors have been included on the
DMP8800 for use with a USB mouse – either wired or
wireless – and USB ash drives. A USB mouse can be
used to control the internal software without the need
of a computer. The ash drive can be connected when
performing rmware updates.
19. VGA Connector
This is a standard XVGA connector for use with standard
computer monitors and high denition displays. This will
allow you to control the internal software of the DMP8800
without the need of a computer�
910
11
12
8
7
13
15 14
16
17 21
181920
22

5
DMP8800
English
20. RS232 Interface
Standard RS232 interface is provided to facilitate third-
party external control system operation of the DMP8800�
21. Word Clock
Word clock connections essentially help keep your gear in
sync� If two digital audio devices have different sampling
rates, there could be sample skipping, jittering, delays
and other unwanted anomalies in your digital afudio�
Word clock synchronization is imperative to keep them at
the same sampling rates and ensure this does not occur�
When, for example, using several AES/EBU devices in a
chain, a master word clock connected to each device will
help them become perfectly synchronized�
22. AES/EBU Connectors
These connectors are for digital devices with AES/EBU
inputs and outputs�
23. SD Card Slot
Insert an SD card into this slot to integrate MP3 les into
your mix�
24. Preset Recall
These connectors are compatible with the Asystems
RM-4 remote controls� See the Remote Control section
of this manual for wiring instructions�
25 Remote Level Control
These euroblock connections can be wired to connect the
Asystems RM-2VR remote level controls� Each RM-2VR
allows for two channels to have their levels controlled�
26. Digital I/O Expansion Card Slot
For installing Asystems DT22/DT44/DT88 Dante
Networking card to enable DMP devices as a networking
portal to other audio devices�
27. AC Power Connector
This is for a standard IEC power cable�
DMP MATRIX SOFTWARE
Firmware
Before beginning, it’s a good idea to ensure you’ve
installed the latest rmware. The latest rmware can
always be found on www�asystems-sys�com� Place
the rmware update le onto a FAT-32 formatted USB
memory stick and connect it to one of the DMP8800’s
rear-panel USB slots� Open the DMP8800’s internal
software then enter the Utility menu� At the bottom of this
menu is the rmware update function. Push the “Update”
button to perform a rmware update.
Connection
For a connection to be established between the Asystems
remote software and the DMP8800, rst both need to be
connected to the same local area network or be ‘online’
(ie. on the internet). Opening the Network settings menu
in the DMP8800’s onboard software will allow users to
view or edit properties such as IP address� On a local
area network, this will be shown 192.168.x.x (where x
is dependent on your network). After setting the unit’s
IP address, this can be entered into the Aystems remote
software’s setup section to locate the DMP8800� A user
name and password can be set to protect the unit from
unauthorized control�
Metering
The front panel of the DMP8800 offers 8 level meters
for monitoring input and output signals� These meters
also include clip indicators to show when signals are so
excessive as to clip the signal� For additional metering
of individual signals and mixes, the matrix pages of the
DMP8800 software can be consulted�
23
24 25
26
27
30W

6
DMP8800
English
DSP
The DSP page will give you an overall idea of input
and output mixes (including levels and naming) as well
as offer a manner to view and edit the current signal
processors assigned to input and output channels�
Name: Edit the name for each of the individual input
channels�
On/Off: Use this button to switch the corresponding
input channel on and off�
Processing: These buttons allow you to inject any of the
DMP8800’s internal signal processors right into the input
chain� Processing will be accomplished in order from left
to right� For more information on the available programs,
check the Signal Processor section of this manual
Reset Button: Pushing these buttons will reset the DSP
parameters for the input or output, including name, on/off
status, and selected signal processors� There is a reset
button available for each the input and output�
Monitoring: The DMP8800 software offers extensive
monitoring for DSP performance� The percentage of the
processor used will be visible at the bottom of the page�
Channel In Matrix
This page offers matrix mixing for the Analog, Network
and AES/EBU inputs to the Channel Input mixes� Any
of the input sources can be assigned to the individual
“Channel Input” mixes� These include the Analog Inputs
(euroblock & RCA), Network Inputs (optional Network
expansion card) and the digital AES/EBU input.
Each of the possible input matrix sources can have a
number of controls available� These include:
Attenuation: Adjust the input level of each of the
individual signals�
Panning: These will let you adjust the left/right mix of the
incoming signals�
ALC: This button will assign the DMP8800’s Auto Level
Control to the corresponding input signal�
Duck: Pushing this button will apply the ducking feature
to the corresponding input signals� The duck function can
be activated as ducker 1, ducker 2, or off, the settings of
which are decided by their respective menus�
INV: This button will invert the phase of the corresponding
signal�
On: This button allows you to turn the corresponding
input signal on and off� When turned off, the signal will
not be sent to the Input Channels selected�
Routing: Each of the 8 analog inputs, 8 network inputs,
and the stereo AES/EBU Input, can be assigned to the
DMP8800’s 8 input channels� These input channels are
what will be used for the DSP processing and will be then
routed to output mixes�
Mix Matrix
Each of the 8 input channels, the 8 matrix inputs and the
8 network inputs can be assigned directly to any of the
8 matrix outputs�
Attenuation: Adjust the input level of each of the
individual input signals or matrix mixes�
Panning: These will let you adjust the left/right mix of the
incoming signals�
ALC: This button will assign the DMP8800’s Auto Level
Control to the corresponding input (channel in, matrix in,
network in, AES/EBU in).
Duck: Pushing this button will apply the ducking feature
to the corresponding mix� The duck function can be
activated as ducker 1, ducker 2, or off, the settings of
which are decided by their respective menus�
INV: This button will invert the phase of the corresponding
input or matrix signal�
On: This button allows you to turn the corresponding
input signal on and off� When turned off, the signal will
not be sent to any of the matrix outputs selected�

7
DMP8800
English
Routing: Each of the 8 analog inputs, 8 matrix inputs, 8
network inputs, and the stereo AES/EBU Input, can be
assigned to the DMP8800’s 8 matrix mixes� Each of the
8 matrix mixes corresponds with an output channel on
the rear of the DMP8800�
Signal Generator
The Channel Inputs and Matrix Outputs can have a
signal generator applied to them� The option can be
found in the Channel In Matrix and Mix Matrix pages
through the right click of a mouse� The signal generator
can be activated with the “ON” buttons and assigned to
the appropriate mixes using the matrix/channel select
section below the controls�
There are 4 different signals available, including White
Noise and Pink Noise – ideal for setup of systems – and
sine and sweep waves – for testing of equipment and for
general setup purposes�
Sine: The sine wave can be selected between 20 Hz and
20 kHz� The signal level can also be adjusted, and the
signal can be turned on and off�
Sweep: When using the sweep wave, a lowest and
highest frequency can be selected� The sweep wave will
move between these frequencies and small increments�
The hold time for each frequency can be selected by the
users� There are also controls for adjusting the signal
level and turning the sweep wave on and off�
Pink Noise: The pink noise function includes level
controls and on/off button�
White Noise: Like the pink noise, the white noise only
offers level controls and an on/off button�
SD Card Playback
Within the same menu as the Signal generator, through
the right click of a mouse, users can also choose to
playback MP3 les from an SD card inserted in the
SD card slot at the back of the DMP8800� Asystems
suggests formatting the cards FAT-32 for best results,
and an MP3 format with bitrate no more than 320kbit/
second is recommended� Included are play, previous,
next, pause and stop buttons�
Network Matrix
Any of the incoming input signals can be assigned directly
to the Network output mixes (up to 8 channels). The
network matrix pages are only used when the Asystems
network expansion card is installed in the DMP8800�
Attenuation: Adjust the input level of each of the
individual input and output mixes�
Panning: These will let you adjust the left/right mix of the
available mixes�
ALC: This button will assign the DMP8800’s Auto Level
Control to the corresponding input (analog in, matrix in,
channel out, AES/EBU inputs).
Duck: Pushing this button will apply the ducking feature
to the corresponding mix� The duck function can be
activated as ducker 1, ducker 2, or off, the settings of
which are decided by their respective menus�
INV: This button will invert the phase of the corresponding
input or matrix signal�
On: This button allows you to turn the corresponding
input signal on and off� When turned off, the signal will
not be sent to any of the matrix outputs selected�
Routing: Each of the 8 analog inputs, 8 matrix inputs,
8 matrix outputs, and the stereo AES/EBU Input, can be
assigned to the DMP8800’s 8 network outputs� These
channels will appear as Network Input connections in any
networked Asystems DMP or DMA matrix devices�
AES/EBU Matrix
These pages allow for detailed assignment and mixing
of the nal stereo mix sent out of the digital AES/EBU
outputs�
Attenuation: Adjust the input level of each of the
individual input and output mixes�
Panning: These will let you adjust the left/right mix of the
available mixes�
ALC: This button will assign the DMP8800’s Auto Level
Control to the corresponding input (analog in, matrix in,
network in, channel out).
Duck: Pushing this button will apply the ducking feature
to the corresponding mix�
INV: This button will invert the phase of the corresponding
mix�

8
DMP8800
English
On: This button allows you to turn the corresponding
input or output signal on and off� When turned off, the
signal will not be sent to the AES/EBU mix�
Routing: Each of the 8 analog inputs, 8 matrix inputs, 8
network inputs and 8 matrix outputs, can be assigned to
the DMP8800’s AES/EBU mix�
Control Panel
The control panel menu offers complete control of input
channels� This menu includes level and gain controls,
metering, and a host of other parameters that can be
edited�
Channel Name: A preselected channel name can be
viewed or edited in this screen�
Fader: The input level can be adjusted using this
onscreen fader�
Meters: The input and output signal level of the channel
can be viewed through these meters� They can be
adjusted between pre- and post-fader meters�
Gain Reduction: The gain reduction meter will provide
a real-time indication of any reduction in gain applied by
the internal DSP processes of the DMP8800 (including
compressors-limiters, equalizers, etcetera).
Limiter: This button will activate the internal limiter
function for the corresponding channel�
Duck: Activate the ‘ducking’ feature by pushing this
button� The duck function can be activated as ducker 1,
ducker 2, or off, the settings of which are decided by their
respective menus�
INV: This button will invert the phase of the corresponding
signal�
CH ON: This button will turn the corresponding channel
on and off�
Remote Gain Controls: The control panel menu offers
a remote gain control for each channel� The gain control
indicates that set by a remote level control and can be
edited using the DMP8800’s software�
GAIN ON: All remote gain controls can be deactivated
using these buttons�
Total Att.: This section will indicate the total amount
of attenuation applied to an input signal, expressed in
decibels�
Network
When using the DMP8800 remote software – either
within the local area network or through the internet –
the network settings need to be set appropriately to allow
external computers to identify and connect to it�
Device Name: The name of the current device is found
here� This can be adjusted by the user if necessary�
DHCP Server/Client: Users can activate DHCP
– Dynamic Host Conguration Protocol – on the
DMP8800� The DMP8800 can be selected as either a
client or a server� When your local network runs off a
DHCP protocol, the network will automatically assign
your DMP8800 an IP address� If your network runs off a
DHCP server, you can turn it on using the DHCP Client
button� If you wish to set your DMP8800 as the DHCP
server, turn it on here�
IP Address: When not using a DHCP server, you can
enter an IP address for your DMP8800 here� Otherwise
it will be automatically assigned� If entering your own
IP address, Asystems suggests 192�168�x�99 – where
“x” could be determined by your local area network’s
settings� Check network settings on other computers on
the same network for this value�
Subnet Mask: The subnet mask for your DMP8800
can be entered into this eld. For most networks – and
particularly if you’re unsure what it is – this should be
kept set as “255�255�255�0”�
Gateway Address: A gateway is a device that can
connect other devices in a network that use different
types of protocols� This is typically your router, but a
computer could also serve as a gateway�
Current Users: At the bottom of the page, a list of
currently connected users will be displayed� This list will
include the user name, the IP address of the user and
the level of access they’re afforded�

9
DMP8800
English
Security
This tab can be found under the Network Settings menu�
The security tab provides a means of securing the
DMP8800 against unauthorized or unqualied changes.
Through the DMP8800’s onboard software these
accounts can be created for use of the Asystems remote
software�
Events
In the Events menu you will be able to set up a number
of events to occur at a particular time of day� Events can
range from simply powering on and off the device to
activating audio les at a particular time.
Current Time & Current Date: Here users can set the
current date and time� Click the Save button to set these
settings� The date and time will be maintained within the
DMP processor provided power is supplied to the device,
whether active or in standby mode�
Time Format: Set the time format to AM/PM or 24 Hour
time�
Schedule: Any already set Events will be displayed here�
Number: Assign a number to the event you’re currently
setting�
Subject: Provide a name or description to your event�
Location: Describe the location of where the event will
occur�
Type: Select the type of event you are setting here�
Available types include power change, channel mute
and relay�
Action: The action can be selected between on and
standby�
Date: Set the date to begin your event�
Time: Set the time the event should occur, down to the
very second�
Period: In the period section you will be able to set
whether to set your event to occur once, weekly, daily,
etc� You can also pick the days of the week for it to occur�
Global Settings
Analog In
Each of the analog inputs can have +48V of phantom
power applied to it, ideal for condenser microphones�
This menu also allows the user to trim the signal slightly
if levels are too excessive. A high-pass lter can also be
added to each of the analog inputs to help remove stage
rumble and other unwanted noise�
Global In On/Off
This menu provides on buttons for each individual input
including the analog inputs, network inputs, AES/EBU
input and signal generator�

10
DMP8800
English
Ducker
The ducker allows a signal to temporarily attenuate below
another signal when said signal activates the ducking
feature� This is useful when making announcements
and other such times when a signal needs to be heard
clearly� The ducker can be activated on input and output
channels by pushing the ‘Duck’ buttons found in the
individual Matrix control pages� There are two of these
‘duckers’ total on the DMP8800�
Source: This is used to select the source of the duck
function; ie� the trigger signal� When the selected
source’s signal rises to a user-selected level, the
currently selected ‘duck’ signals will attenuate at the
selected level�
Threshold: This determines the level that the source
signal needs to be before the ducking function will be
activated�
Depth: This determines how much the selected ‘duck’
signals will be attenuated�
Attack: The attack time is the time it takes for the
ducking feature to kick in after the source signal passes
the selected threshold�
Release: The release time control will determine the
time the ‘duck’ feature will remain active as the source
signal drops back below the set threshold�
ALC – Auto Level Control
An autoleveler will allow users to dynamically change the
level of an input or output signal to match a predened
level set by the user� The autolevel function can be
activated for each individual mix in the matrix pages� The
settings for these autolevelers can be found within this
ALC menu�
In Target: The target level setting allows users to select
the desired signal level for their autoleveler� All signals
that are processed by the autoleveler will essentially aim
for the target level�
Below Target: The below target threshold of the
autoleveler is the point at which the autoleveler will kick
in� Signals below the threshold will not be affected, but
signals above will be have their gain increased�
Ratio: The ratio is the input level change in decibels to
the output level change in decibels�
Increase Gain: The increase gain determines the amount
that the signal can be increased to meet the target level�
This helps prevent sudden, alarming changes in audio
level�
Decrease Gain: The decrease gain works the same
as the decrease gain, but in reverse� It determines the
amount a signal can be cut�
Hold Time: This determines the time the ALC will remain
engaged after the signal falls back below the determined
threshold�
Compressor/Limiter
This menu allows compressors and limiters to be applied
to channel outputs, network outputs or AES/EBU outputs�
Limiter Threshold: This control determines the threshold
for the limiter function� This means that no signal will
surpass the selected threshold, being ‘compressed’ at a
ratio of innity:1.
Compressor Threshold: Use this control to set the
threshold of the compressor function� Any signals that
surpass the selected threshold will be compressed at the
selected ratio�
Compressor Ratio: This control can be used to set
the ratio for the compressor� The ratio is expressed as
<input>:<output>�

11
DMP8800
English
Compressor Attack: This control adjusts the attack
time of the compressor, essentially determining the time
taken for the compressor to kick in after it passes the
selected threshold�
Compressor Release: The release control determines
the time the DMP8800 will wait before disengaging the
compressor when the signal bypasses the selected
threshold�
Side Chain HPF: This allows users to set a high pass
lter on these channels to essentially help rid these
channels of low-frequency noise�
System
System Clock: This menu allows you to select a master
clock source for digital devices� Selecting 44�1 or 48
kHz will set the DMP8800 as the master clock source
and determine the sampling rate� Selecting AES/EBU,
Network, or Word Clock will set these as the master
clock� Whenever a new clock source is selected, the
ENTER button must be pushed to conrm.
Power Settings: There are three power settings on the
DMP8800� The software power can be turned on and off,
essentially enabling the DMP8800 to be turned on and
off via the software – including event scheduling� The
hardware power can be selected on and off, essentially
allow the unit to be activated and deactivated using the
hardwired switch on the front of the DMP8800�
Relay (GPIO)
The GPI – or General Purpose Interface – output is used
to remotely control the Asystems DMP8800� The relay
page itself is used to setup the GPIs, including any and
all remote controls connected to the unit� More detailed
information on this will be provided at a later date�
RM Control
This page offers a number of assignment options for the
optional Asystems RM remote controls� More detailed
information on this can be found later in this manual
Utility
All of the DSP processes can have their settings saved
for later use� While there are a number of factory presets
available, users are always encouraged to nd their own
settings and save them for later use� The DMP8800 has
onboard storage for a number of settings to be saved,
or users can connect USB ash drives to save settings.
Also available in the Utility menu is a rmware update
button. When a new version of rmware is available it
can be installed using the “Update” button� Place the
rmware update le on a formatted USB ash drive and
insert it into a USB port� The “Update” button should
take care of the rest. After the rmware is updated, the
initialize button can be selected to reset the device� Save
any settings (or “scenes”) before initializing the system.

12
DMP8800
English
SIGNAL PROCESSORS
Below you will nd the onboard signal processors of the
DMP8800 and information on their use and respective
parameter� These can be applied to any of the input or
output channels of the DMP8800�
Compressor-Limiter
Compressor Threshold: Use this control to set the
threshold of the compressor function� Any signals that
surpass the selected threshold will be compressed at the
selected ratio�
Compressor Attack: This control adjusts the attack
time of the compressor, essentially determining the time
taken for the compressor to kick in after it passes the
selected threshold�
Ratio: This control can be used to set the ratio for the
compressor� The ratio is expressed as <input>:<output>�
Compressor Release: The release control determines
the time the DMP8800 will wait before disengaging the
compressor when the signal bypasses the selected
threshold�
Limiter Threshold: This control determines the threshold
for the limiter function� This means that no signal will
surpass the selected threshold, being ‘compressed’ at a
ratio of innity:1.
Output Gain: This control determines the amount of
gain applied to the signal after already passing through
the compressor-limiter�
On & Reset Buttons: The on button is, of course, used
to turn the Compressor-Limiter on and off, while the reset
button will reset all values to default�
Gate
On: This button turns the gate on and off�
Reset: Push the reset button to restore all parameters
back to default�
Dynamic Graph: This graph shows the currently set
gate properties and how it will affect your audio�
Level Meters: These meters give the input and output
level of the gate for the current channel�
Gain Reduction: The gain reduction meter will provide
a real-time indication of any reduction in signal caused
by the gate�
Threshold: This control will set the threshold of the gate
function� Any signals that fall below the set threshold will
activate the gate function�
Range: This control sets the amount of attenuation when
the gate is closed�
Attack: This control adjusts the attack time of the gate�
This is the time the DMP8800 will wait after the signal
drops below the threshold before engaging the gate�
Hold: The hold will allow you to select the length of time
the gate will remain open after the signal drops below the
set threshold�
Release: The release control determines how long the
gate will wait before disengaging when the signal rises
back above the selected threshold�
Expander
On: This button turns the expander on and off�
Reset: Push the reset button to restore all parameters
back to default�
Dynamic Graph: This graph shows the currently set
expander properties and how it will affect your audio�
Level Meters: These meters give the input and output
level of the expander for the current channel�
Gain Reduction: The gain reduction meter will provide
a real-time indication of any reduction in signal caused
by the expander�
Threshold: This control will set the threshold of the
expander function� Any signals that fall below the set
threshold will activate the expander at the user-set ratio�
Ratio: This signal sets the ratio of the expander function�
When a signal drops below the threshold, the signal will
be decreased by the selected ratio�
Attack: This control adjusts the attack time of the gate�
This is the time the DMP8800 will wait after the signal
drops below the threshold before engaging the gate�
Release: The release control determines how long the
gate will wait before disengaging when the signal rises
back above the selected threshold�
Delay
Adding a delay on output can be particularly helpful to
help time align drivers within a single cabinet or help avoid
delay in larger multi speaker setups� For example, when
there are a number of drivers in a single cabinet, typically
they’re different distances from the front of the cabinet�
The tweeter, typically longer than the woofer, could have
its driver 8 inches deeper than the woofer� The problem
this creates is the sound from the woofer will be pushed
out a fraction of a second before the tweeter, arriving at
the wavefront at different times� Adding a 0�6 millisecond
delay to the woofer can combat this, essentially making
the signal wait for the tweeter to catch up�
Delay: Use this control to adjust the delay time� To the
right of the control, the selected delay will be indicated in
milliseconds, meters and feet�
Temperature Control: This allows you to set the
current temperature for the delay circuit� This allows the
DMP8800 to better rene the delay’s ‘meter’ and ‘feet’
results� The temperature is indicated in both degrees
Celsius and degrees Fahrenheit�
On & Reset Buttons: The on button is used to turn the
delay circuit on and off� The reset button resets all values
to default�
Parametric Equalizers
EQ On/Off Button: This button can turn the Equalizer
for the currently selected channel on and off�
Reset: Push the reset button to restore all parameters
back to default�
EQ Band On/Off: Use these buttons to turn the
corresponding EQ bands on and off. While not named
specically, these bands can be thought of as the low,
low-mid, high-mid and high frequency bands on your
average 4-band EQ.

13
DMP8800
English
EQ Type: For the rst and fourth bands on the EQ, users
can select the type of curve used for the EQ. Band 1
can be swapped between a normal EQ band (PEAK),
low shelf lter (SHELF), and high pass lter (CUT). Band
4 can be selected between an EQ band (PEAK), high
shelf lter (SHELF), and low pass lter (CUT). The Low/
High Pass Filters will cut frequencies above and below
the selected frequencies at 18 dB per octave� High and
Low Shelf lters act similarly, but cut frequencies below
the selected frequency by the preset level determined
by the user�
EQ Parameters: The EQ offers users the ability to view
or edit various parameters/properties of their EQ bands,
including the Gain (dB), the frequency (Hz/kHz) and the
‘Q’ of the EQ band.
Meters: Both input and output meters are available for
this process, essentially showing the difference in the
overall signal level after equalization�
Feedback Silencer
Feedback occurs when the sound from your speakers
makes its way back into the mixer through microphones�
The audio look causes a high pitch squeal or screech
that can easily ruin your performance� Feedback can be
removed, however, by reducing or removing the problem
frequencies. With a razor-thin lter, feedback can be
completely removed without affecting your audio what-
so-ever�
The DMP8800 features a 12 lter feedback silencer.
This can operate in 2 different modes: Automatic and
Manual. When set to automatic, the activated lters will
automatically search for and remove feedback� When
set to manual, the user is able to adjust the frequency,
gain and Q of the individual lters.
Parameters: When the Feedback Silencer is set to
“Manual” it offers users the ability to view or edit various
parameters/properties of their EQ bands, including the
Gain (dB), the frequency (Hz/kHz) and the ‘Q’ of the 12
lters.
Threshold: Adjusting the threshold will determine
the level of signal required for the automatic feedback
silencer to kick in�
31-band GEQ
Graphic equalizers are fantastic in live setups where you
may need to compensate for room acoustics or other
factors� Include a 31-band graphic equalizer on your
speaker output signals to better rene your live audio.
Frequency bands: The GEQ’s frequency bands can be
boost or cut by the user. Frequencies are set at xed
frequencies between 20Hz and 20kHz�
Q: The Q for the individual bands of the 31-band GEQ
can be adjusted to better rene the equalization.
VCA
VCA – or voltage controlled amplier – allows for multiple
mixes to be controlled together while still maintaining
their respective offset� The VCA offers four groups for
channels to be assigned where each of these individual
groups can have their levels controlled together using
the VCA faders� This is typically helpful in ensuring
things such as vocals or instruments can be controlled
without affecting the mix of audio�
Assign: When the VCA is selected for a channel on
the DSP page, the channel’s signal can be routed or
assigned to one of four groups shown here� To assign
the group, push the respective button and increase the
respective rotary control� This will determine the level of
the signal that will be sent to this VCA group�
Meter: These meters will show the input level of the
channel as well as the appropriate output level when
after the VCA has been applied�
On: Activating the on button will apply the VCA to the
appropriate channel�
Fader: Pushing the fader button will bring up a new
window that features a fader for each of the four VCA
groups� Adjusting these faders will adjust channels in
their respective VCA groups accordingly� As previously
noted, adjusting a VCA group will still allow the channels
to keep the offset between each channel� Each fader also
features an on/off button that will activate and deactivate
the VCA group�
Divider: I/O with HPF and LPF, 2 or 3-way divider (for
output only).

14
DMP8800
English
RM-2VR REMOTE LEVEL CONTROL
With a single RM-2VR you will be able to control up to 2
channels of the DMP8800 Digital Matrix Processor at a
single time� Up to four RM-2VRs can be utilized at any
one time to control all 8 outputs�
WIRING
The RM-2VR can be wired to the “Remote Level Control”
section on the rear of the Asystems DMP8800 digital
matrix processors�
As shown, there are pins for each of the devices’ 8 input
mixes in addition to a +5V power pin and a grounding
pin� Each of the 8 pins corresponds with the output mix
of the device you’re using� This being the case, for a
single RM-2VR to control channels 1 and 2, it should be
wired thusly:
Channel 2 Ground is internally
wired to channel 1 ground
SETUP AND OPERATION
To utilize the RM-2VR you will need
to activate the remote within the DMP
software� At the bottom of each channel
within the “Control Panel” window you
will be able to find an on/off button for the
Remote level control� You will also be
able to view the remote level in the virtual
rotary control found directly below this
button� DMP8800
Do not connect the RM-2VR grounding
pins to any other external grounds�

15
DMP8800
English
RM-4 PRESET RECALL REMOTE
With a single RM-4 you will be able to recall up to 4
independent presets�
WIRING
The RM-4 can be wired to the “Preset” section on the
rear of the DMP8800�
As shown, there are pins for each of the 4 preset buttons
on the RM-4, as well as a grounding pin� Each of the 4
pins corresponds with a user-selected “Scene” within the
control software�
Suggested wiring:
SETUP AND OPERATION
To utilize the RM-4, you simply need to assign a preset
to each of the buttons� This is done within the Control
Software of the DMP 8800� First, enter the “Global
Settings” menu and find the GPIO submenu� Here you
will find the “Preset” panel (shown below). Each of the
pins on the rear of the device will correspond to the Ports
listed here. You can then select which “Scene” (or preset)
you wish to assign to that port�
The pre-saved scenes are all listed within the Utility
menu. Scenes can be saved (and recalled) in this
menu� The “No” in the Preset window on the GPIO
page will correspond with the ‘Scene’ numbers found
here� The Subject in the Preset window will be updated
automatically�
A single preset can be recalled at any one time� The
button selected on the RM-4 will lock down, releasing
any other preset button that may have previously been
selected�
DMP8800 RM-4

16
DMP8800
English
RM-6E PROGRAMMABLE REMOTE
With a single RM-6E you will be able to control up to 6
independent functions including gain control, channel
muting and matrix mixing� Up to eight RM-6Es can be
utilized at any one time�
SETUP
The rear of the RM-6E features 3 DIP switches that can
be utilized for identification of the unit� These correspond
with the 8 ports available within the DMA and DMP
software� The pin identifications and their corresponding
ports are as follows:
To assign a function to any of the RM-6E’s buttons, you
will need to enter the software of your DMA or DMP series
device� When in the software, navigate to the “Global
Settings” tab� Within this menu there is an “RM Control”
submenu that offers control of the RM-6E programmable
remote controls�
The “Port” option at the top of the page will correspond with
the port options found above� When the corresponding
port is selected, the 6 rows in the lower-half of the
page can be used to determine the operation of each
individual button on the RM-6E� Available functions are:
“Gain Control”, “Channel In Mute”, “Channel Out Mute”
and “Matrix Mixer”� The first three functions also have
a “Source” option that simply lets you select from an
available channel that you can then control� The “Matrix
Mixer” function has further options, allowing you to select
from the applicable matrix mix and input source�
Below the “Port” option in the control software, there
is also a “Lock” option� When a port is “locked”, the
corresponding functions of the RM-6E assigned to this
port will be deactivated and cannot be utilized using that
remote unit�
OPERATION
When a function is selected, pushing the RM-6E’s
corresponding onboard buttons will activate said
function� In the case of “Gain Control”, the up/down arrow
buttons are used to adjust the gain as needed� When a
“Mute” function is selected, simply pushing the button
will mute the selected channel/source� Finally, when the
Matrix function is selected, pushing the corresponding
button will route the signal selected to the mix selected�
Pushing it again will un-route the signal�
With up to 8 individual RM-6E units you’re able to set a
maximum of 48 individual gain controls, channel mutes
and/or matrix routing presets for use at any time�
WIRING
The RM-6E has an “IN” port that
can be connected to the RJ-45
“Peripheral” connector on the
DMA and DMP series of digital
matrix amplifiers and processors�
This is done using a typical
CAT5/6 cable�
A second RM-6E can then be
daisy-chained off the first by
connecting the “LINK” RJ-45
connector on the first to the “IN” connector on the second�
This can then be repeated for a third, a fourth, and so on�
You can use a maximum of 8 RM-6E’s together with your
DMP or DMA unit�
PORT
DIP
12345678

17
DMP8800
English
TROUBLESHOOTING
My meters aren’t working
Have you wired the input signals correctly? Is the input
selected as the input signal source? Have you activated
the channel? Have you set your input gains and levels
correctly? Is the matrix mixer section properly routed?
I don’t have any output
Have you activated the output channels? Do you see a
signal in the output meters? Have you correctly routed
your inputs to channels, turned levels up, and unmuted
mixes? Have you applied an excessive compressor-
limiter to any input or output signals?
I have a signal, but it’s really distorted!
Are any of the Clip LEDs lighting up for input or output
mixes? Do any of the signals on your entire audio chain
seem excessive? This could include input connectors,
channel inputs, matrix outputs�
My devices are not communicating via Ethernet
Are the red and green LEDs on the Ethernet connectors
lighting up? Are you using a decent quality Ethernet
cable? Do you have the Primary port of the rst
device connected to the Secondary port of the second
DMP8800?
My DMP8800 won’t communicate with my computer
Are you using a decent quality Ethernet cable? Are your
computer and DMP8800 both connected to the same
network? Do you have a rewall turned on?

18
DMP8800
English
SPECIFICATIONS
Overall Sonic Performance Analog In, Digital Out Digital In, Analog Out
Frequency Response, 20Hz to 20kHz +/-0.1dB +/-0.25dB
Dynamic Range, 20Hz to 20kHz, unweighted >115dB >114dB
Latency at 48 kHz <1 ms <1ms
Audio Inputs Analog Mic/Line AES/EBU Digital
Input Type Active balanced Euroblock + RCA Transformer balanced female XLR
Input Impedance E: 3.37K, RCA: 8.2K 118 ohms
Max Input Level +20dBu 7�0 Vpp
Audio Outputs Analog Output AES/EBU Digital
Output Type Servo-balanced Euroblock Transformer balanced male XLR
Output Impedance 20 ohms 110 ohms
Max Output Level +20dBu 5�0 Vpp
Word Clock
Input/Output Type 75 ohm BNC
Lock Range 48 kHz +/-4%
Input Impedance Selectable 75 ohm or high impedance
Input Voltage Range 1�0Vpp - 7�0Vpp
Output Impedance 75 ohm BNC
Output Level 5�0 Vpp nominal, unterminated
Master Clock
Sources Audio network, Word clock, AES3, Internal crystal clock
Modes Prioritized auto switching or manual
Digital Audio Hardware
Sampling Rates 44�1kHz, 48kHz ,Network , AES
DSP Processing 40-bit oating-point Share processor array
Audio Input Source Selection Selectable in adjacent channel pairs from analog,
digital, or network inputs
Network Audio Routing Selectable between input/ouput or internal to matrix mixer
Digital Control
Ethernet Control Standard RJ45 10/100 Ethernet with auto-conguration
7 pin pre-set remote Peripheral for RM6E remote control
Relay 1 set, 5VDC
Analog Control
Remote Attenuators 10-pin Euroblock for (8) assignable 5VDC passive remote attenuators
Power Requirements 100V to 240V VAC, 50-60Hz, 70W maximum
Item Size (L x W x H) 482 x 295 x 95 mm / 18�97” x 37�4” x 11�61”
Item Weight 5.1 Kgs / 11.2 lbs
Table of contents
Languages:
Other A SYSTEMS Computer Hardware manuals
Popular Computer Hardware manuals by other brands

Texas Instruments
Texas Instruments DAC38RF8x Application report

Beck
Beck IPC@CHIP DB240 Hardware manual

Asus
Asus AAEON BOXER-6406-ADN user manual

SilverStone
SilverStone REDLINE Series installation guide

Link electronics
Link electronics Analog Pulse Generator 812-OP/H Specification sheet

Acromag
Acromag IOS-7200 user manual

janitza
janitza Procont LMC-008-IO User manual and technical data

Texas Instruments
Texas Instruments LM38020EVM user guide

Supermicro
Supermicro H13SAE-MF Quick reference guide

Artaflex
Artaflex AWAC24UR user manual

Intel
Intel CORE 2 DUO MOBILE - THERMAL DESIGN GUIDE... Design guide

ICP Electronics
ICP Electronics PCISA-3716E2V manual