manuals.online logo
Brands
  1. Home
  2. •
  3. Brands
  4. •
  5. Aastra
  6. •
  7. Telephone
  8. •
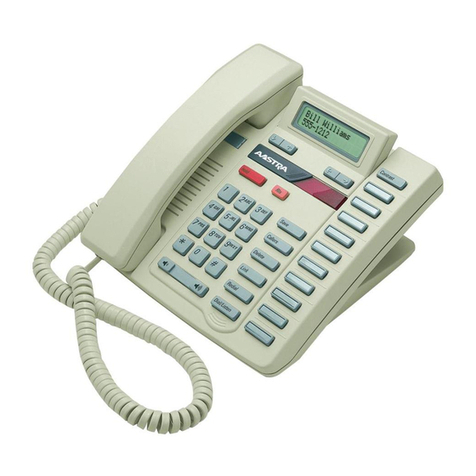
  9. Aastra 8004 User manual

Aastra 8004 User manual

FG
E
B
A
D
C
8004
Installation
1. Attach the handset by plugging one end of the coiled
cord (A) into the handset jack (B), and plugging the other
end into the handset (C). The connectors should click
into place.
2. Plug the telephone cord into the telephone jack shown
(D).
3. Route the telephone cord as shown along the groove
leading towards the storage pocket (E). Tuck any excess
cord into the storage pocket.
Depending on where you want to place the telephone, complete
either step 4 or step 5 below.
4. Desk-mounting –Thread the telephone cord through
the hole in the the desk stand (F). Attach the desk stand
by inserting the two pegs (G) into the two peg holes as
shown, and then swinging the stand downward until the
third peg snaps into place. Finally, plug the loose end of
the telephone cord into a nearby telephone jack.
5. Wall-mounting –For wall-mounting, you will need a
wall-mounting plate (H) instead of the desk stand. (If
you need a wall-mounting plate installed, contact your
telephone company.) Plug the loose end of the telephone
cord into the telephone jack on the wall mounting plate
(I). Push the telephone onto the wall-mounting plate so
that the pegs on the plate fit inside the keyholes on the
back of the telephone (J), and then pull downward to lock
it into place.
Installation
1. Raccordezle combinéen insérant une extrémitédu cordon
spiralé(A) dans la prise de combiné(B) située sous l’appareil et
l’autre extrémitédans le combiné(C). Vous devriezentendre
un déclic.
2. Enfichezune extrémitédu cordon du téléphone dans la prise
affectée àcette fin (D) et située sous l’appareil.
3. Acheminezle cordon du téléphone dans la rainure jusqu’à la
cavitéde rangement (E). Inséreztoute longueur de cordon
excédentaire dans la cavité.
Selon le type d’installation voulu, exécutezles étapes 4 ou 5 ci-dessous.
4. Installation sur un bureauou une table–Faites passer
l’extrémitélibre du cordon du téléphone dans l’ouverture du
support de montage (F). Fixezle support en insérant les deux
pattes de fixation (G) dans les ouvertures correspondantes (voir
l’illustration), puis abaissezle support jusqu’à ce que la troisième
patte soit fermement fixée. Enfin, branchezl’extrémitélibre
du cordon dans une prise téléphonique murale àproximitédu
bureau ou de la table.
5. Installation murale–Utilisezune plaque de montage
mural (H) plutôt que le support de montage (F). (Pour faire
installer une plaque de montage mural, veuillezcommuniquer
avec votre compagnie de téléphone.) Branchezl’extrémitélibre
du cordon du téléphone dans la prise téléphonique de la plaque
murale (I). Fixezl’appareil àla plaque de montage en ayant soin
de bien engager les pattes dans les ouvertures en forme de trou
de serrure qui se trouvent sous le téléphone (J). Enfin, exercez
une pression vers le bas sur l’appareil de façon àbien le fixer
àla plaque.
Installation andUser Guide
Guide d’installation et
d’utilisation
Guía del usuario y
de instalación
Instalación
1. Para instalar el auricular inserte el conector de uno de los extremos del
cordón en espiral (A) en el conector de la base del teléfono (B) y el otro en
el conector del auricular (C). Se escucharáun chasquido.
2. Inserte el conector de uno de los extremos del cable del teléfono en el
conector de la base del teléfono (D).
3. Encamine el cable del teléfono a través de la ranura que lleva a la cavidad
de almacenamiento (E). Enrolle y guarde el cable sobrante en la cavidad de
almacenamiento.
Según el tipo de instalación deseado, efectúe el paso 4 o el paso 5 correspondiente.
4. Montajedeescritorio –Pase el cable del teléfono a través del orificio del
soporte para escritorio (F). Introduzca las dos lengüetas del soporte (G) en
los dos orificios de la base del teléfono que se muestran en la ilustración.
Baje el soporte y presione firmemente hasta que la tercera lengüeta encaje
en el orificio. Por último, inserte el conector libre del cable del teléfono en
el conector telefónico mural más cercano.
5. Montajemural –Se requiere de una placa de montaje mural (H) en lugar
del soporte para escritorio (comuníquese con su compañía de teléfonos en
caso de que necesite hacer instalar la placa de montaje mural). Inserte el
conector libre del cable del teléfono en el conector de la placa de montaje
mural (I). Introduzca los tornillos de la placa en los orificios de la parte
posterior de la base del teléfono (J) y jale hacia abajo hasta que encajen
correctamente.
Wall-mounting
Installation murale
Montaje mural
JH
I
Features of the 8005
C.The red indicator light flashes when the telephone
rings and when you have a voice message (if you
subscribe to a voice messaging service with voltage
message waiting).
D.Use Flash to access telephone networkservices
such as Call Waiting and Three-Way Calling.
(To subscribe to these services,contact
your telephone company.)
Answering aCall Waiting call –When
you hear the Call Waiting tone,press
Flash to place your original call on
hold and answer the new call. To
return to the original call,press
Flash again. Press Flash to alter-
nate between calls.
Making aThree-Waycall
–First,make a call. When
the first call is answered,press
Flash. That call is put on hold,
and you will hear a dial tone.
Make the second call. When
the second call is answered,
press Flash again to linkthe
calls together.
E.Press Redial to redial the
last telephone number that was
dialed.
F.Press and hold down Mute when you
don’t want your caller to hear you. Release Mute
when you want to be heard.
G.Ringer Volume –Slide this switch to set the loudness
of the ringer.
H.Handset Speaker Volume –Slide this switch to set
the loudness of the handset.
xxxx
xxxxx
xxxx
D
C
HG
F
E
A
B
ADetach the Directory
Card (on the left),
write your frequently
called phone numbers on it,
and place it as shown. Then
cover the card with the plastic
lens of the same size. To install
the lens,insert one tab into
its slot and then bend the lens
slightly and insert the other
tab.
Retirezl’aide-mémoire
(àgauche),inscrivez-y vos
numéros importants,puis
remettez-le en place,comme
il est illustré. Recouvrez-le
du protecteur en plastique.
Pour mettre le protecteur
en place,insérezun onglet
dans l’une des fentes,courbez
légèrement le protecteur,puis
insérezl’autre onglet dans
l’autre fente.
Retire la tarjeta guía (a la
izquierda),escriba en ella los
números de teléfono a los que
llama con más frecuencia y
vuelva a ponerla en su lugar
como se muestra en la ilus-
tración. Coloque el protector
plástico sobre la tarjeta inser-
tando una de las lengüetas del
protector en la ranura cor-
respondiente. Luego flexione
ligeramente el protector para
insertar la otra lengüeta.
Fonctions du poste 8005
C.Le voyant rouge clignote lorsque le téléphone sonne ou lorsque vous avezun ou plusieurs messages dans votre boîte vocale (si vous êtes
abonnéàun service de messagerie vocale avec indicateur de messages).
D.Appuyezsur la touche Liaison pour répondre àl’appel en attente ou établir une conférence àtrois. (Pour vous abonner àces services,
veuillezcommuniquer avec votre compagnie de téléphone.)
Prise d’un appelen attente –Lorsque vous percevezla tonalitéd’appel en attente,appuyezsur la touche Liaisonpour mettre le premier
appel en garde et répondre au deuxième appel. Pour reprendre l’appel initial,appuyezde nouveau sur Liaison. Vous pouvezappuyer sur Liaison
pour passer d’un appel àl’autre.
Établissement d’une conférence àtrois–Établissezd’abord la communication avec le premier interlocuteur,puis appuyezsur Liaisonpour
mettre l’appel en garde. Vous entendrezalors la tonalitéde manœuvre. Établissezla deuxième communication. Cela fait,appuyezde nouveau sur
Liaisonpour parler simultanément avec les deuxinterlocuteurs.
E.La touche Recomppermet de lancer la recomposition automatique du dernier numéro que vous avezcomposé.
F.Maintenezenfoncée la touche Discrétionpour tenir un aparté. Relâchez-la pour permettre àvos interlocuteurs de vous entendre de
nouveau.
G.Réglage du volume de la sonnerie –Faites glisser ce sélecteur pour régler le volume de la sonnerie.
H.Réglage du volume du combiné–Faites glisser ce sélecteur pour régler le volume du combiné.
Gettinghelp
If the telephone does not ring or you cannot hear a dial tone,
checkto make sure the telephone cord and handset cord are
connected properly. If you’ve read this guide and still have
questions,call 1-800-574-1611 in the USAand Canada. In other
areas,contact your local telephone company.
Aide
Si le téléphone ne sonne pas ou si vous n’entendezpas la
tonalitéde manœuvre,vérifiezsi les cordons du téléphone et
du combinésont bien branchés. Si des questions subsistent
après la lecture du présent guide,faites le 1800 574-1611 au
Canada et auxÉtats-Unis. Àl’extérieur de l’Amérique du Nord,
veuillezcommuniquer avec votre compagnie de téléphone.
Ayuda
Si no suena el timbre del teléfono o no escucha el tono
de marcar,verifique que los cables del teléfono y el cordón
en espiral del auricular estén conectados correctamente.
Si desea mayor información después de haber leído esta
guía,comuníquese con su compañía de teléfonos,o marque
el 1-800-574-1611 si llama desde Estados Unidos o Canadá.
Funciones del8005
C.El indicador luminoso rojo centellea cuando suena el
timbre del teléfono y cuando tiene un mensaje en su
mensajería por voz(es necesario suscribirse al servicio
de mensajería por vozcon indicador de mensaje).
D.La tecla Enlace le permite el acceso a los servicios
telefónicos de red como Llamada en espera y Llamada
de conferencia (es necesario suscribirse a estos servicios
ofrecidos por su compañía de teléfonos).
Paracontestar unaLlamadaen espera–Al escuchar el
tono de llamada en espera,oprima la tecla Enlace. La llamada
original se pondráen retención y podrácontestar la llamada
nueva. Vuelva a oprimir la tecla Enlace para regresar a la llamada
original,o para alternar entre las dos llamadas.
Parahacer unaLlamadade conferencia–Marque el
primer número. Al establecer la comunicación,oprima la tecla
Enlace para poner la primera llamada en retención y escuchar
el tono de marcar. Marque el segundo número. Al establecer la
comunicación,oprima nuevamente la tecla Enlace para poner en
comunicación a las tres líneas.
E.La tecla Rediscar permite llamar al último número
marcado.
F.La tecla Privadopermite evitar que lo escuche el inter-
locutor,mientras mantiene oprimida la tecla. Al dejar de
oprimirla,el interlocutor volveráa escucharlo.
G.Volumen del timbre –Deslice el interruptor para ajustar
el volumen del timbre.
H.Volumen del auricular –Deslice el interruptor para
ajustar el volumen del auricular.
P0890285 Issue 03
BDetach the Feature
Card,write your phone
number on it and place
it next to the three feature
buttons as shown. Then cover
the card with the plastic lens.
Retirezla fiche de fonctions,
inscrivez-y votre numéro de
téléphone et remettez-la près
des trois touches de fonction,
comme il est illustré.
Couvrez-la ensuite du pro-
tecteur.
Retire la tarjeta de funciones
y escriba su número de telé-
fono en ella. Vuelva a ponerla
al lado de las tres teclas de
función como se muestra en la
ilustración y coloque el protec-
tor plástico correspondiente.
Flash
Redial
Mute
Enlace
Rediscar
Privado
Liaison
Recomp
Discrétion
Maintenir enfoncée
Mantener presionado
Press and hold
Other Aastra Telephone manuals

Aastra Meridian 8004 User manual

Aastra

Aastra Meridian 8004 User manual

Aastra Maestro 3500CW User manual

Aastra

Aastra Maestro 3500CW User manual

Aastra 5360 User manual

Aastra

Aastra 5360 User manual

Aastra 6721ip User manual

Aastra

Aastra 6721ip User manual

Aastra dialog 4220 User manual

Aastra

Aastra dialog 4220 User manual

Aastra MERIDIAN M5316 User manual

Aastra

Aastra MERIDIAN M5316 User manual

Aastra DT4X3 User manual

Aastra

Aastra DT4X3 User manual

Aastra Meridian 8009 User manual

Aastra

Aastra Meridian 8009 User manual

Aastra 9316CW User manual

Aastra

Aastra 9316CW User manual

Aastra Maestro 900DSS Owner's User manual

Aastra

Aastra Maestro 900DSS Owner's User manual

Aastra 6771 User manual

Aastra

Aastra 6771 User manual

Aastra Clearspan 6731i User manual

Aastra

Aastra Clearspan 6731i User manual

Aastra 470 User manual

Aastra

Aastra 470 User manual

Aastra Ascotel Office 70IP-b User manual

Aastra

Aastra Ascotel Office 70IP-b User manual

Aastra 9110 User manual

Aastra

Aastra 9110 User manual

Aastra 480 Guide User manual

Aastra

Aastra 480 Guide User manual

Aastra 673xi User manual

Aastra

Aastra 673xi User manual

Aastra BluStar 8000i User manual

Aastra

Aastra BluStar 8000i User manual

Aastra Featurephone M6310 User manual

Aastra

Aastra Featurephone M6310 User manual

Aastra DIALOG 4223 PROFESSIONAL User manual

Aastra

Aastra DIALOG 4223 PROFESSIONAL User manual

Aastra DIALOG 4223 PROFESSIONAL User manual

Aastra

Aastra DIALOG 4223 PROFESSIONAL User manual

Aastra Aastra 610d User manual

Aastra

Aastra Aastra 610d User manual

Aastra 480E User manual

Aastra

Aastra 480E User manual

Aastra 571i User manual

Aastra

Aastra 571i User manual

Popular Telephone manuals by other brands

NOCH Sound Station II quick start guide

NOCH

NOCH Sound Station II quick start guide

Nokia 2780 user guide

Nokia

Nokia 2780 user guide

BT GRAPHITE 1100 user guide

BT

BT GRAPHITE 1100 user guide

jWIN JT-P840 Owner's Manual and Operating Instructions

jWIN

jWIN JT-P840 Owner's Manual and Operating Instructions

GPO 746 manual

GPO

GPO 746 manual

Emos H2015 manual

Emos

Emos H2015 manual

Auerswald COMfortel D-110 instructions

Auerswald

Auerswald COMfortel D-110 instructions

Panasonic T7020B - KX - Digital Phone Reference manual

Panasonic

Panasonic T7020B - KX - Digital Phone Reference manual

ZOEYLINK A-7V user manual

ZOEYLINK

ZOEYLINK A-7V user manual

AUDIOLINE TEL39G CLIP operating instructions

AUDIOLINE

AUDIOLINE TEL39G CLIP operating instructions

Cisco Small Business Pro SPA 504G Setup and user guide

Cisco

Cisco Small Business Pro SPA 504G Setup and user guide

Topcom CHEOPS ONE user guide

Topcom

Topcom CHEOPS ONE user guide

NEC DT430 Series quick start guide

NEC

NEC DT430 Series quick start guide

Samsung Digital keyset Quick reference guide

Samsung

Samsung Digital keyset Quick reference guide

Clarity c200 user guide

Clarity

Clarity c200 user guide

ALcom Premium AT6206 user manual

ALcom

ALcom Premium AT6206 user manual

Toshiba Strata CIX DP5000-Series Quick reference guide

Toshiba

Toshiba Strata CIX DP5000-Series Quick reference guide

Spracht MCP-3020 user manual

Spracht

Spracht MCP-3020 user manual

manuals.online logo
manuals.online logoBrands
  • About & Mission
  • Contact us
  • Privacy Policy
  • Terms and Conditions

Copyright 2025 Manuals.Online. All Rights Reserved.