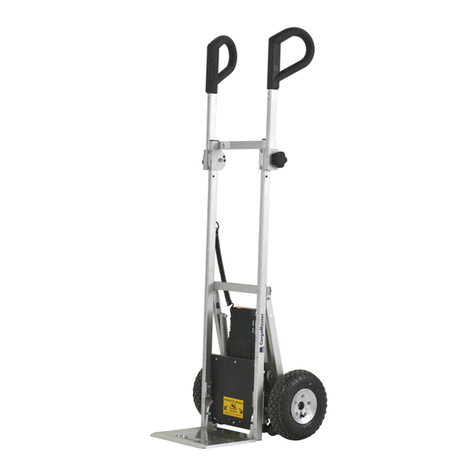
AAT V1001 Installation and operating instructions

Translation of the original user’s manual
Vertical lift V1001

CE Declaration of conformity
The company AAT Alber Antriebstechnik GmbH herewith declares that the
vertical lift V1001 was designed and produced according to the relevant re-
gulations of the European Union for machinery 2006/42/EG.
Any tampering or alteration done to the above mentioned device that has not
been confirmed by AAT Alber Antriebstechnik GmbH makes this declaration
void.
Signature of the manufacturer:
Markus Alber
Managing partner
AAT Alber Antriebstechnik GmbH
2
Vertical lift V1001
v1001_gb_08_2010
AAT Alber Antriebstechnik GmbH
Postfach 10 05 60 · D-72426 Albstadt
Tel.: 0 74 31 - 12 95 0 · Fax.: 0 74 31 - 12 95 35

3
Vertical lift V1001
Table of contents
CE Declaration of conformity . . . . . . . . . . . . . . . . 2
Table of contents . . . . . . . . . . . . . . . . . . . . . . 3
1 General information . . . . . . . . . . . . . . . . . . . . . 4
1.1 How to use this user’s manual . . . . . . . . . . . 4
1.2 Care and maintenance . . . . . . . . . . . . . . . 4
1.3 Warranty and liability. . . . . . . . . . . . . . . . 4
2 Description of the product . . . . . . . . . . . . . . . . . . 5
2.1 Adequate use . . . . . . . . . . . . . . . . . . . 5
2.2 Overview . . . . . . . . . . . . . . . . . . . . . 6
2.3 Technical data . . . . . . . . . . . . . . . . . . . 7
2.4 Dimensional drawing . . . . . . . . . . . . . . . . 9
2.5 Serial scope of delivery . . . . . . . . . . . . . . . 12
2.6 Optimal accessories . . . . . . . . . . . . . . . . 12
3 First operation . . . . . . . . . . . . . . . . . . . . . . . 13
3.1 On-/Off switch . . . . . . . . . . . . . . . . . . . 13
3.2 Foldable blade . . . . . . . . . . . . . . . . . . . 13
3.3 Foldable outrigger (optional) . . . . . . . . . . . . 13
3.4 Adjusting the vertical lift . . . . . . . . . . . . . . 14
3.5 Securing the vertical lift on the carrier device . . . . 14
3.6 Disconnecting the vertical lift . . . . . . . . . . . . 15
3.7 Load pick-up . . . . . . . . . . . . . . . . . . . 15
3.8 Driving on level ground . . . . . . . . . . . . . . . 15
3.9 Driving on a slope . . . . . . . . . . . . . . . . . 15
3.10 Loading a vehicle or a shelf . . . . . . . . . . . . . 16
3.11 Unloading a vehicle or a shelf. . . . . . . . . . . . 16
3.12 Functional check. . . . . . . . . . . . . . . . . . 16
3.13 Transportation . . . . . . . . . . . . . . . . . . . 17
4 Safety instructions . . . . . . . . . . . . . . . . . . . . . 18
4.1 Special instructions for operation . . . . . . . . . . 18
4.2 Operation . . . . . . . . . . . . . . . . . . . . . 18
4.3 Load . . . . . . . . . . . . . . . . . . . . . . . 18
4.4 Care and maintenance . . . . . . . . . . . . . . . 18
4.5 Condition of paths, walkways etc. . . . . . . . . . . 18
4.6 Battery charge . . . . . . . . . . . . . . . . . . . 19
4.7 Transportation . . . . . . . . . . . . . . . . . . . 19
5 Operation . . . . . . . . . . . . . . . . . . . . . . . . . 20
5.1 Maximum load . . . . . . . . . . . . . . . . . . . 20
5.2 Lead batteries . . . . . . . . . . . . . . . . . . . 20
6 Care, maintenance and recycling. . . . . . . . . . . . . . . 21
6.1 Charger . . . . . . . . . . . . . . . . . . . . . . 21
6.2 Sealed lead acid batteries . . . . . . . . . . . . . 22
6.3 Tighten the chain . . . . . . . . . . . . . . . . . 24
6.4 Cleaning. . . . . . . . . . . . . . . . . . . . . . 24
6.5 Recycling . . . . . . . . . . . . . . . . . . . . . 24
7 Warranty and liability . . . . . . . . . . . . . . . . . . . . 25
7.1 Warranty . . . . . . . . . . . . . . . . . . . . . 25
7.2 Liability . . . . . . . . . . . . . . . . . . . . . . 25

1 General information
Congratulations! You acquired a strong and multi-functional transportation
device that will be a great and indispensable help to you in no time.
With the vertical lift you can lift goods up to 100 kg. The maximum lifting
range is 55 cm, 90 cm or 115 cm.
The sticker with the device’s serial number is located on the housing’s bot-
tom side. Please find the serial number there.
1.1 How to use this user’s manual
The user’s manual is part of the delivery package and instruct you step by
step about the safe and adequate use of the vertical lift which does call for a
certain skill.
Please read this user’s manual carefully and particularly take note of the sa-
fety instructions before you use the vertical lift for the first time.
After reading, please store this user’s manual at an appropriate place for
further reference.
1.2 Care and maintenance
A major aspect of care for this particular device is the charging of the lead
batteries. They are inside the housing and must be charged after every use.
Other than that your vertical lift is low in maintenance and does not need
special care or maintenance. For detailed information, please go to chapter
6.
1.3 Warranty and liability
For damage due to non-observance of this manual’s instructions AAT does
not assume any liability. Detailed information you find in chapter 7.
4
Vertical lift V1001

2 Description of the product
2.1 Adequate use
The vertical lift is used inside in industrial areas to lift and lower mobile
goods, mainly to load and unload shelves or vehicles.
It can only be used in connection with a carrier device (Cargo Master C-Sys-
tem, AMEISE trolley, Expresso dolliers or Sano stair climbers).
Please transport exclusively goods with the vertical lift.
To avoid injuries, please make sure that there is nobody standing under the
device, while you lift or lower goods. Also, never put your hand in the chain
guide.
FIn the interest of your safety you may not use the vertical lift on esca-
lators or moving belts!
FIt is prohibited to transport persons with the device!
FNever leave the vertical lift unattended.
FPlease avoid using the vertical lift in heavy rain, wet conditions,
snow or ice. Please make sure that the load (e.g. a washing machine)
does not leak water that could potentially get into contact with the
device. Dampness penetrating the vertical lift may lead to malfuncti-
on or breakdown of the device.
FPlease note that the vertical lift topples backward without a carrier
device!
5
Vertical lift V1001

6
Vertical lift V1001
2.2 Overview
1 = housing
2 = on-/off switch
3 = LED (light emitting diode) for battery display
4 = bar
5 = hinged blade
6 = locking bolt (for folding mechanism)
7 = support (optional with folding mechanism)
8 = guide roller
9 = lower handle
10 = upper handle with locking bol
11 = up-/down switch

2.3 Technical data
Model V1001-550:
Model V1001-750:
7
Vertical lift V1001
Dimension
height = 900 mm
width = 430 mm
depth = 610 mm
Weight 15,8 kg
Max. lifting capacity 100 kg
Lifting range 55 cm
Batteries 2 x 12 V / 5 Ah
Direct current motor 24 V / 120 W
Lifting speed 0,1 m/sec.
Max. number of lifts (with 75 kg) 60
Noise level the device's A-weighted noise level lies under 70 dB (A)
Storing/operation temperature: device 0° C to +60°C / -30° C to +50° C
Vibration the weighted RMS value of acceleration the upper body is exposed to
lies typically below 2,5 m/s²
Dimension
height = 1200 mm
width = 430 mm
depth = 635 mm
Weight 16,9 kg
Max. lifting capacity 100 kg
Lifting range 90 cm
Batteries 2 x 12 V / 5 Ah
Direct current motor 24 V / 120 W
Lifting speed 0,1 m/sec.
Max. number of lifts (with 75 kg) 60
Noise level the device's A-weighted noise level lies under 70 dB (A)
Storing/operation temperature: device 0° C to +60°C / -30° C to +50° C
Vibration the weighted RMS value of acceleration the upper body is exposed to
lies typically below 2,5 m/s²

Model V1001-1150:
8
Vertical lift V1001
Dimension
height = 1500 mm
width = 430 mm
depth = 660 mm
Weight 18 kg
Max. lifting capacity 100 kg
Lifting range 115 cm
Batteries 2 x 12 V / 5 Ah
Direct current motor 24 V / 120 W
Lifting speed 0,1 m/sec.
Max. number of lifts (with 75 kg) 60
Noise level the device's A-weighted noise level lies under 70 dB (A)
Storing/operation temperature: device 0° C to +60°C / -30° C to +50° C
Vibration the weighted RMS value of acceleration the upper body is exposed to
lies typically below 2,5 m/s²

2.4 Dimensional drawing
Model V1001-550:
9
Vertical lift V1001

Model V1001-750:
10
Vertical lift V1001

Model V1001-1150:
11
Vertical lift V1001

2.5 Serial scope of delivery
1 = charger including user's manual
2 = Vertical lift
2.6 Optimal accessories
1 = blade extension
2 = support (foldable)
3 = carrier device
12
Vertical lift V1001

3 First operation
FPlease charge the batteries completely before you use the device for
the first time.
FPlease note that the vertical lift topples backward without a carrier
device.
3.1 On-/Off switch
Before operating, please turn on the vertical lift with the On-/Off switch .
Then put the blade into its lowest position by using the Up/Down switch.
FTurn off the vertical lift when you take a break, during transportation
or when you park the vertical lift.
3.2 Foldable blade
Please put the blade into a vertical position before you use the device for
the first time.
Pull and turn the locking bolt to 90°. The blade is unlocked and you can fold
it down. Bring the blade into a horizontal position and fix it by pulling and
turning the locking bolt once again.
FPlease make sure that the blade is securely locked in this position.
If you do not need the vertical lift any more you can fold the blade upward
again so that the device can be stored or transported in a tight place (see pic-
ture).
To fold the blade up again, please follow instructions in reverse order.
3.3 Foldable outriggers (optional)
Press the locking bolt and fold down the outriggers. They must be pressed
into the frame in a horizontal position. Please make sure that they are secu-
rely locked.
If you do not need the vertical lift any more you can fold up the blade and the
outriggers again. That way the device can be stored in a tight space, e.g. for
transportation (see picture).
Please fold up the device in reverse order.
Please put the blade in its highest position before folding it up. Loosen the
locking bolts and pull out the outriggers simultaneously until they are unlo-
cked. Then you can fold up the outriggers. Finally loosen the locking bolt for
the blade and fold it up as well.
13
Vertical lift V1001

3.4 Adjusting the vertical lift
Due to allowances it might be necessary to adjust the vertical lift to your car-
rier device. This is the case when the base plate of the vertical lift does not
rest on the base plate of the carrier device. In such case you need to move
the vertical lift’s handles.
In order to do this you need to remove the vertical lift from the carrier device
and loosen the handles’ screws so that you can easily move them. Hook the
vertical lift into the carrier device and set the handles on the carrier’s hori-
zontal bars. The two upper handles must lock .Mark the handles’ position
on the columns with a pencil. Remove the vertical lift again and fix the hand-
les with a screw in the marked position. Now check wether the vertical lift’s
toe plate sits on the carrier device’s toe plate when the vertical lift is hooked
in place on the carrier device.
3.5 Securing the vertical lift on the carrier device
First, please fold down the carrier device’s blade (if you have the foldable
version). Now put the vertical lift in front of the carrier device, centre it and
loosen the locking bolts at the two upper handles by pulling and turning
them. Now the handles are unlocked and hang down.
1. Stand behind the carrier device and pull the vertical lift as close as possi-
ble (if necessary, support the carrier device with your foot to keep it from rol-
ling away).
2. Lift up the vertical lift and pull it backwards simultaneously until the
handles sit on the carrier device’s horizontal bars.
3. Now tilt the carrier device slightly backward at its handles and push the
vertical lift forward with one hand. At this point the vertical lift slides
downward and locks in place on the carrier device at the handles.
FMake sure that all four handles are securely locked in the carrier
device’s horizontal bars.
Finally lock the vertical vertical lift’s locking bolts by turning its two upper
handles.
14
Vertical lift V1001

3.6 Removing the vertical lift
1. Stand behind the carrier device and loosen the locking bolts at the two up-
per handles by pulling and turning them. Now the handles are unlocked.
2. Hoist the vertical lift at its two bars until the handles are lifted out of the
carrier device’s horizontal bar.
3. Now the vertical lift can be pushed away from the carrier device.
3.7 Load pick-up
Push the load a bit backward so that there is a space. Move the blade under
the load and push it all the way onto the blade.
FPlease make sure that the load touches the back bar.
FPlease make sure that the maximum lifting capacity of 100 kg is not
exceeded.
3.8 Driving on level ground
To drive on level ground the load needs to be in the lowest position possible
in order to keep the centre of gravity as low as possible.
3.9 Driving on slopes
If you want to drive up a ramp, you must tilt the vertical lift.
Tip: Put your foot on the horizontal bar and tilt the device backwards.
15
Vertical lift V1001

3.10 Loading of a vehicle or a shelf
Drive as closely as possible to the sill of the car’s boot or the shelf. Press the
Up/Down switch in direction “UP” until the blade is approximately 10 mm
above the sill of the car’s boot or the shelf . Slide the load of the car's boot
or the shelf .
3.11 Unloading of a vehicle or a shelf
Drive as closely as possible to the sill of the car’s boot or the shelf. Push the
Up/Down switch in direction “UP” until the surface of the blade is approxi-
mately 10 mm underneath the sill of the car’s boot or the shelf . Pull the
load on the blade of the vertical lift .
FPlease make sure that the load touches the back bars!
FPlease always drive with the loads in the lowest position!
3.12 Functional check
FPlease check the device’s electronic functions before each operati-
on!
FMake sure that the batteries are fully charged before each operation!
16
Vertical lift V1001

3.13 Transportation
The blade (optional the support) can be folded for transportation (please see
chapter 3.1 and 3.2).
Pick up the vertical lift at the beams on the right and the left. If necessary a
second person should assist you.
FFor transportation in vehicles, please store the vertical lift securely
according to current legal regulations.
FPlease note the weight of either 15,8, 16,9 or 18 kg!
FAlways turn off the vertical lift for transportation!
FThe batteries used in the vertical lift are airtight lead batteries which
are not considered hazardous goods according to the IATA special
regulations A67 and GGVS Rn-No 2801 A, paragraph 2, thus they
are admitted for air travel by DOT and IATA.
17
Vertical lift V1001

4 Safety instructions
FFor safe operation it is important that you observe and adhere to all
the warning signs and instructions in this user’s manual as well as
the warning and instruction signs on the device itself.
4.1 Special information concerning the operation: Due to safety rea-
sons the vertical lift may not be used on escalators and moving walkways!
Make sure that water inside loaded goods (e.g. washing machines) does not
leak and gets into contact with the device because penetrating dampness
can lead to malfunction.
During operation never touch the blade or the chain guide.
Never stand or sit underneath the load.
Each load to be transported must be secured by a tie-down strap to keep it
from falling down.
Please operate the vertical lift only with the appropriate safety devices.
4.1.1 Climate: To ensure proper functioning it is not advisable to expose
the vertical lift to freezing conditions. Should this be unavoidable, always
put the vertical lift in a non-freezing environment for at least one hour before
using it.
4.2 Operation: Persons under age may not work with the vertical lift,
with the exception of adolescents above 16 years of age that have been trai-
ned under supervision. For operation you must wear safety shoes.
4.3 Load: The indicated maximum load of 100 kg may not be exceed
(see chapter 5.1).
FIt is not allowed to transport persons with the vertical lift!
4.4 Care and maintenance: Please make sure that the lead batteries
are charged after each use. During longer breaks, please turn off the vertical
lift.
Before maintenance work, please turn off the vertical lift and take it off the
charger.
FRepairs may only be done by the manufacturer or authorized person-
nel. Please only use original AAT accessories.
Please note the detailed care and maintenance instructions in chapter 6.
4.5 Condition of paths, walkways etc:Please make sure that the paths
and walkways you use are free of obstacles and not slippery. Avoid operation
on damaged stair linings, snow, ice, etc.
18
Vertical lift V1001

4.6 Battery charge: The vertical lift should only be operated with fully
charged batteries. The diode on the battery display shows the capacity left
on the battery. If the battery is empty, the LED is red. If the battery is fully
charged, the LED is green.
FPlease note, the LED (light emitting diode) only glows, if the vertical
lifter is turned on and the Up/Down switch is activated.
4.7 Transportation:
FAlways turn off the vertical lift for transportation!
FWhen you transport the vertical lift in vehicles, please secure it ac-
cording to the relevant legal regulations in your country.
19
Vertical lift V1001

5 Operation
5.1 Maximum load
Please make sure that you never exceed the indicated load of 100 kg.
5.2 Lead batteries
Please fully charge the batteries before you use the device for the first time
(for detailed information see chapter 6.2).
20
Vertical lift V1001
Table of contents
Other AAT Lifting System manuals