ABB Terra 360 CE Specification sheet

Operation and installation manual
Terra 360/180/60 CE
© Copyright ABB. All rights reserved

Copyright
All rights to copyrights, registered trademarks, and trademarks reside with their respective
owners.
Copyright ® ABB E-mobility B.V.. All rights reserved.
29AKK108467A6398-EN | 002

Contents
1 About this document.......................................................................... 9
1.1 Function of this document...................................................................................................... 9
1.2 Disclaimer....................................................................................................................................9
1.3 Target group............................................................................................................................... 9
1.4 Revision history..........................................................................................................................9
1.5 Language.....................................................................................................................................9
1.6 Illustrations.................................................................................................................................9
1.7 Units of measurement............................................................................................................ 10
1.8 Typographical conventions....................................................................................................10
1.9 How to use this document.....................................................................................................10
1.10 General symbols and signal words used in the document..............................................10
1.11 Manufacturer and contact data.............................................................................................11
1.12 Abbreviations............................................................................................................................12
1.13 Terminology.............................................................................................................................. 12
1.14 Orientation agreements......................................................................................................... 13
2 Safety.................................................................................................. 14
2.1 Liability...................................................................................................................................... 14
2.2 General safety instructions....................................................................................................14
2.3 Responsibilities for the owner.............................................................................................. 15
2.4 Required qualifications for the installation engineer....................................................... 15
2.5 Personal protective equipment.............................................................................................16
2.6 Safety instructions during transport...................................................................................16
2.7 Safety instructions during installation................................................................................16
2.8 Safety instructions for use..................................................................................................... 17
2.9 Safety instructions during cleaning or maintenance........................................................17
2.10 Safety instructions for earthing............................................................................................17
2.11 Signs on the EVSE....................................................................................................................18
2.12 Discard the EVSE or parts of the EVSE................................................................................ 18
2.13 Cyber security...........................................................................................................................19
3 Description.........................................................................................20
3.1 Type plate..................................................................................................................................20
3.2 Intended use.............................................................................................................................20
3.3 Working principles...................................................................................................................22
3.3.1 Block diagram - Terra 360......................................................................................22
3.3.2 Terra 360 - 2 outlets, 25 percent...........................................................................24
3.3.3 Terra 360 - 2 outlets, 50 percent.......................................................................... 25
3.3.4 Block diagram - Terra 180......................................................................................26
Contents
9AKK108467A6398-EN | 002 3

3.3.5 Block diagram - Terra 60 CC and CJ/C................................................................28
3.4 Overview....................................................................................................................................30
3.4.1 Overview of the system......................................................................................... 30
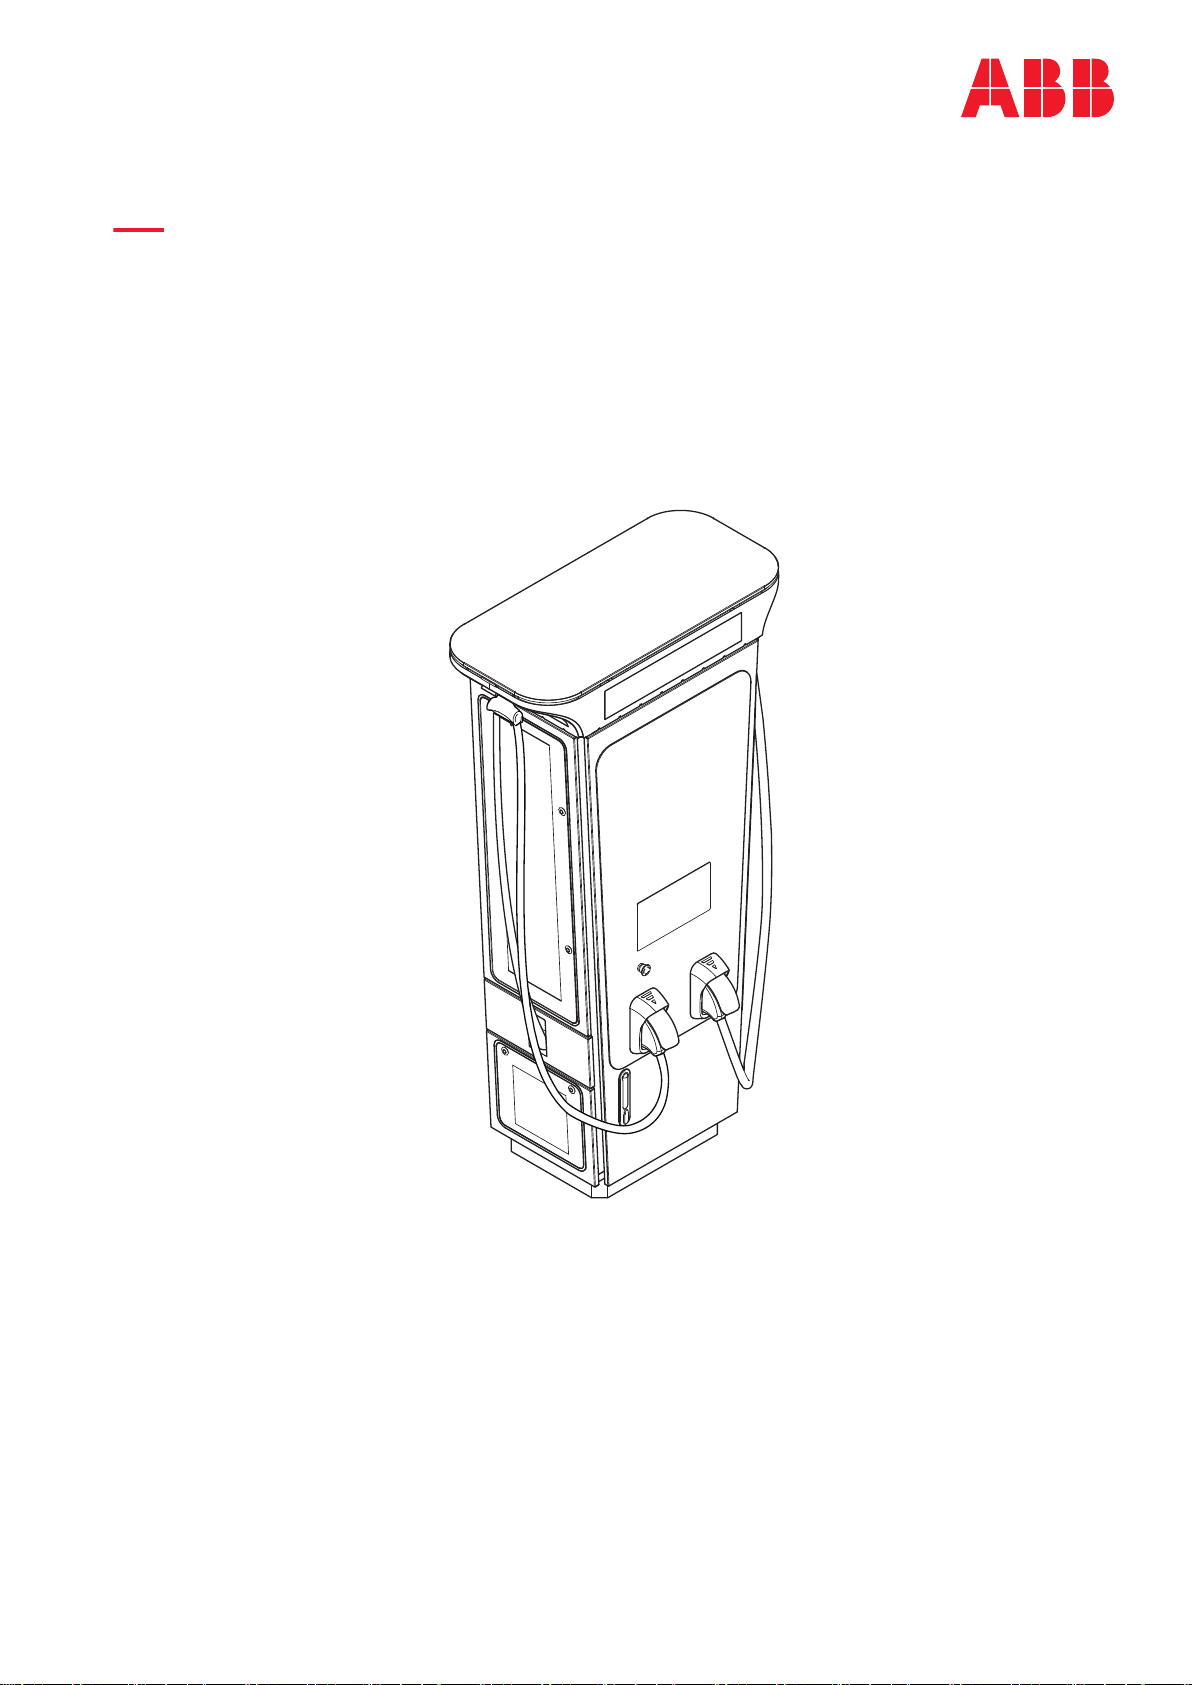
3.4.2 Overview of the Terra 60, outside........................................................................31
3.4.3 Overview of the Terra 60, inside...........................................................................32
3.4.4 Overview of the Terra 60, air inlet/outlet and filter locations....................... 33
3.4.5 Overview of the Terra 180, outside......................................................................34
3.4.6 Overview of the EVSE, inside................................................................................ 35
3.4.7 Overview of the Terra 180, air inlet/outlet and filter locations..................... 36
3.4.8 Overview of the Terra 360, outside......................................................................37
3.4.9 Overview of the Terra 360, inside........................................................................ 38
3.4.10 Overview of the Terra 360, air inlet/outlet and filter locations..................... 39
3.4.11 Overview of the cable management system.....................................................40
3.4.12 Overview of the locations of the lifting points.................................................40
3.5 Authorization to charge..........................................................................................................41
3.6 Payment terminal.....................................................................................................................41
3.7 Options......................................................................................................................................42
3.7.1 EV charge cable, CCS 1........................................................................................... 42
3.7.2 EV charge cable, CCS 2...........................................................................................42
3.7.3 Socket, Type 2..........................................................................................................43
3.7.4 EV charge cable, CHAdeMO.................................................................................. 43
3.7.5 Integrated payment terminal............................................................................... 43
3.7.6 Integrated payment terminal - Nayax.................................................................44
3.7.7 Integrated payment terminal - CCV.................................................................... 44
3.7.8 Fiscal metering system......................................................................................... 44
3.7.9 Tilt sensors...............................................................................................................45
3.8 Cable management system...................................................................................................46
3.9 Power allocation strategies...................................................................................................46
3.9.1 Sequential power allocation................................................................................. 46
3.9.2 Concurrent allocation.............................................................................................47
3.9.3 Dynamic allocation 'First In First Served'........................................................... 47
3.9.4 Dynamic allocation 'Fair share'.............................................................................48
3.10 External residual-current device...........................................................................................48
3.11 Description of the touchscreen............................................................................................49
3.11.1 General description of the layout........................................................................ 49
3.11.2 General description of the buttons.....................................................................50
3.12 Status of the EVSE LEDs.........................................................................................................51
3.13 Local Service Portal................................................................................................................. 51
3.14 Cloud service portal................................................................................................................ 52
4 Transport, handling and unpacking................................................ 53
4.1 Transport the EVSE to the site..............................................................................................53
4.1.1 Hoist the packaged cabinet..................................................................................53
4.1.2 Move the packaged cabinet with a forklift truck............................................. 54
Contents
49AKK108467A6398-EN | 002

4.2 Unpacking................................................................................................................................. 55
4.2.1 Unpacking procedure.............................................................................................55
4.2.2 Do a check of the transport sensors...................................................................56
5 Installation..........................................................................................57
5.1 General installation procedure..............................................................................................57
5.2 Site preparation....................................................................................................................... 57
5.2.1 Prepare the site........................................................................................................57
5.2.2 Control the space and airflow around the cabinet...........................................58
5.3 Prepare the foundation.......................................................................................................... 58
5.3.1 Prepare the foundation - general procedure.....................................................58
5.3.2 Prepare a standard prefabricated foundation.................................................. 59
5.3.3 Prepare a cast foundation..................................................................................... 59
5.4 Detach the cabinet and base................................................................................................ 59
5.4.1 Detach the cabinet (Terra 360)............................................................................ 59
5.4.2 Detach the cabinet (Terra 180 and 60)...............................................................60
5.4.3 Detach the base.......................................................................................................61
5.5 Prepare the cables...................................................................................................................62
5.5.1 Cable installation procedure.................................................................................62
5.5.2 Open the cable glands (Terra 360)...................................................................... 62
5.5.3 Open the cable glands (Terra 60 and 180)......................................................... 63
5.5.4 Guide the cables through the opening in the cable guide plate................... 63
5.5.5 Install the base on the foundation...................................................................... 64
5.5.6 Cut the cables to the correct length................................................................... 64
5.6 Mechanical installation...........................................................................................................65
5.6.1 Mechanical installation procedure.......................................................................65
5.6.2 Install the cabinet on the base.............................................................................65
5.6.3 Connect the cabinet to the base......................................................................... 66
5.7 Electrical installation.............................................................................................................. 66
5.7.1 Electrical installation procedure.......................................................................... 66
5.7.2 Connect the wires of the AC input cable (Terra 360)....................................... 67
5.7.3 Connect the wires of the AC input cable (Terra 180).......................................68
5.7.4 Connect the wires of the AC input cable (Terra 60).........................................69
5.7.5 Connect the PE wire (Terra 360)...........................................................................71
5.7.6 Connect the PE wire (Terra 180 and 60)............................................................. 72
5.7.7 Connect the Ethernet cable (Terra 360)............................................................. 73
5.7.8 Connect the Ethernet cable (Terra 180)..............................................................73
5.7.9 Connect the Ethernet cable (Terra 180)..............................................................74
5.8 Tilt sensors installation (option).......................................................................................... 75
5.8.1 General procedure...................................................................................................75
5.8.2 Install the bracket of the tilt sensors.................................................................. 76
5.8.3 Install the tilt sensors.............................................................................................76
5.8.4 Connect the tilt sensors.........................................................................................77
5.9 Prepare for commissioning....................................................................................................77
Contents
9AKK108467A6398-EN | 002 5

6 Operation............................................................................................79
6.1 Prepare before use.................................................................................................................. 79
6.2 Charge session......................................................................................................................... 79
6.2.1 Charge an EV............................................................................................................ 79
6.2.2 Start a charge session............................................................................................79
6.2.3 Stop a charge session............................................................................................80
6.3 Energize the EVSE................................................................................................................... 80
6.4 Remove condensation from the cabinet.............................................................................81
6.5 Local service portal operations.............................................................................................81
6.5.1 Start the local service portal.................................................................................81
6.5.2 Set the configuration parameters.......................................................................82
6.5.3 Set the OCPP parameters......................................................................................82
6.5.4 Install new software............................................................................................... 82
6.5.5 Close the local service portal................................................................................83
7 Maintenance and cleaning................................................................84
7.1 Maintenance schedule for the owner.................................................................................. 84
7.2 Clean the cabinet.....................................................................................................................84
7.3 Do a check on the cabinet......................................................................................................85
7.4 Replace an air filter..................................................................................................................85
7.5 De-energize the EVSE..............................................................................................................87
7.5.1 De-energize the EVSE - general procedure.........................................................87
7.5.2 Measure the AC voltage (Terra 360).................................................................... 87
7.5.3 Measure the AC voltage (Terra 180).................................................................... 88
7.5.4 Measure the AC voltage (Terra 60)......................................................................88
7.5.5 Measure the DC voltage.........................................................................................89
8 Access to parts.................................................................................. 90
8.1 Open the doors........................................................................................................................90
8.2 Close the doors........................................................................................................................90
8.3 Install the border covers.........................................................................................................91
8.4 Remove the border covers..................................................................................................... 91
9 Troubleshooting................................................................................ 93
9.1 Troubleshooting procedure...................................................................................................93
9.2 Troubleshooting table............................................................................................................ 93
10 Technical data....................................................................................94
10.1 EVSE type.................................................................................................................................. 94
10.2 General specifications............................................................................................................ 97
10.3 Parts included in the delivery................................................................................................ 97
Contents
69AKK108467A6398-EN | 002

10.4 Transport specifications........................................................................................................97
10.5 Required tools for installation.............................................................................................. 97
10.6 Required parts for installation..............................................................................................98
10.7 Torque specifications.............................................................................................................98
10.8 Ambient conditions.................................................................................................................99
10.9 Tilt sensor specifications.......................................................................................................99
10.9.1 General specifications........................................................................................... 99
10.9.2 Wire specifications................................................................................................. 99
10.9.3 Wiring diagram for the tilt sensors................................................................... 100
10.10 Cable management system specifications.......................................................................101
10.11 Dimensions..............................................................................................................................101
10.11.1 General dimensions (Terra 360)......................................................................... 101
10.11.2 General dimensions (Terra 180 and 60)............................................................102
10.11.3 Packaged product................................................................................................. 102
10.11.4 Mass of the EVSE (without packaging material)............................................ 103
10.11.5 Floor space requirements (Terra 360, pre-series).......................................... 103
10.11.6 Floor space requirements (Terra 360, serial production)............................. 104
10.11.7 Floor space requirements (Terra 180 and 60)................................................. 105
10.11.8 Prefabricated foundation (Terra 360)...............................................................106
10.11.9 Cast foundation (Terra 360)................................................................................107
10.11.10 Cast foundation (Terra 180 and 60).................................................................. 108
10.11.11 Cable slack..............................................................................................................108
10.11.12 Height of user operable elements.....................................................................109
10.12 Communication interface specifications.......................................................................... 110
10.13 EVSE power rating................................................................................................................. 110
10.13.1 EVSE rating during normal duty operation...................................................... 110
10.13.2 EVSE derating during normal duty operation..................................................110
10.13.3 EVSE rating in heavy duty operation..................................................................111
10.13.4 EVSE derating during heavy duty operation.................................................... 112
10.14 Harmonics................................................................................................................................112
10.14.1 Harmonics Terra 360, equal share......................................................................112
10.14.2 Terra 180, equal share...........................................................................................114
10.14.3 Harmonics Terra 60...............................................................................................116
10.15 AC input specifications......................................................................................................... 117
10.15.1 General AC input specifications..........................................................................117
10.15.2 AC input cable........................................................................................................ 118
10.15.3 Terra 360................................................................................................................. 118
10.15.4 Terra 180..................................................................................................................118
10.15.5 Terra 60....................................................................................................................119
10.16 DC output specifications......................................................................................................119
10.16.1 General specifications.......................................................................................... 119
10.16.2 Terra 360..................................................................................................................119
10.16.3 Terra 180.................................................................................................................. 121
10.16.4 Terra 60....................................................................................................................122
10.17 AC output specifications (Option for 180 and 60)..........................................................124
Contents
9AKK108467A6398-EN | 002 7

10.18 Power consumption.............................................................................................................. 124
10.18.1 General specifications..........................................................................................124
10.18.2 Terra 360................................................................................................................. 124
10.18.3 Terra 180................................................................................................................. 124
10.18.4 Terra 60................................................................................................................... 124
10.19 Cooling system specifications............................................................................................124
10.20 External residual current device specifications...............................................................125
10.20.1 External residual current device (Terra 360).................................................... 125
10.20.2 External residual current device (Terra 180).................................................... 126
10.20.3 External residual current device (Terra 60)...................................................... 127
10.21 In-rush current........................................................................................................................128
10.22 Cleaning specifications........................................................................................................ 128
11 Appendix...........................................................................................129
11.1 Declaration of conformity....................................................................................................129
11.2 Hinweise zur Messgenauigkeit entsprechend der Baumusterprüfbescheinigung...131
Contents
89AKK108467A6398-EN | 002

1 About this document
1.1 Function of this document
The document is only applicable for this EVSE (Terra xx0), including the variants and
options listed in section 10.1.
The document gives the information that is necessary to safely do these tasks:
• Install the EVSE
• Use the EVSE
• Do basic maintenance tasks
Note: "Terra xx0": This is a generic name for the EVSE to address the
main types of the EVSE.
1.2 Disclaimer
ABB E-mobility B.V. shall not be liable for any damages, losses, costs or expenses
resulting from the improper handling of the EVSE, in particular resulting from non-
compliance with the instructions of this document and other applicable regulations
and standards (e.g. installation, transport, occupational health andother safety
standards).
1.3 Target group
The document is intended for these groups:
• Owner of the EVSE
• Installation engineer
For a description of the responsibilities of the owner, refer to section 2.3.
For the required qualifications for the installation engineer, refer to section 2.4.
1.4 Revision history
Version Date Description
001 July 2022 Initial version
002 December 2022 Update of texts
1.5 Language
The original instructions of this document are in English (EN-US). All other language
versions are translations of the original instructions.
1.6 Illustrations
It is not always possible to show the configuration of your EVSE. The illustrations in
this document show a typical setup. They are for instruction and description only.
About this document
9AKK108467A6398-EN | 002 9

1.7 Units of measurement
SI units of measurement (metric system) are used. If necessary, the document
shows other units between parentheses () or in separate columns in tables.
1.8 Typographical conventions
The lists and steps in procedures have numbers (123) or letters (abc) if the sequence
is important.
1.9 How to use this document
1. Make sure that you know the structure and contents of this document.
2. Read the safety chapter and make sure that you know all the instructions.
3. Do the steps in the procedures fully and in the correct sequence.
4. Keep the document in a safe location that you can easily access. This document
is a part of the EVSE.
1.10 General symbols and signal words used in the document
Symbol Description
With signal word 'Danger':
If you do not obey the instruction, this can cause injury or
death.
With signal word 'Warning':
If you do not obey the instruction, this can cause injury.
With signal word 'Caution':
If you do not obey the instruction, this can cause damage to
the EVSE or to property.
Hazardous voltage that gives risk of electrocution
Risk of pinching or crushing of body parts
Rotating parts that can cause a risk of entrapment
Hot surface that gives risk of burn injuries
About this document
10 9AKK108467A6398-EN | 002

Symbol Description
With signal word 'Note':
A note gives more data, to make it easier to do the steps, for
example.
Information about the condition of the EVSE before you start
the procedure.
Requirements for personnel for a procedure.
General safety instructions for a procedure.
Information about spare parts that are necessary for a proce-
dure.
Information about support equipment that is necessary for a
procedure.
Information about supplies (consumables) that are necessary
for a procedure.
Make sure that the power supply to the EVSE is disconnected.
Electrotechnical expertise is required, according to the local
rules.
Alternating current supply
Note: It is possible that not all symbols or signal words are present in this
document.
1.11 Manufacturer and contact data
Manufacturer
ABB E-mobility B.V.
Heertjeslaan 6
2629 JG Delft
The Netherlands
About this document
9AKK108467A6398-EN | 002 11

Contact data
ABB E-mobility B.V. in your country can give you support on the EVSE. You can find
the contact data here: https://new.abb.com/ev-charging
1.12 Abbreviations
Abbreviation Definition
AC Alternating current
BESS Battery energy storage system
CAN Controller area network
CPU Central processing unit
DC Direct current
EMC Electromagnetic compatibility
EV Electric vehicle
EVSE Electric vehicle supply equipment
MID Measuring Instruments Directive
NFC Near field communication
NoBo Notified body
OCPP Open charge point protocol
PE Protective earth
PPE Personal protective equipment
RFID Radio-frequency identification
Note: It is possible that not all abbreviations are present in this
document.
1.13 Terminology
Term Definition
Network operating center
of ABB EV Infrastructure
Facility of the manufacturer to do a remote check on
the correct operation of the EVSE
Cabinet Enclosure of the EVSE, including the components on
the inside
Cable slack Extra length of cable from the top of the foundation
so that the cable length is sufficient to connect to the
correct terminal in the cabinet
CCS Combined Charging System, a standard charging
method for electric vehicles
CHAdeMO Abbreviation of
CHArge de MOve
, a standard charging
method for electric vehicles
Grid provider Company that is responsible for the transport and dis-
tribution of electricity
About this document
12 9AKK108467A6398-EN | 002

Term Definition
Local rules All rules that apply to the EVSE during the entire lifecy-
cle of the EVSE. The local rules also include the national
laws and regulations
Open charge point proto-
col
Open standard for communication with charge sta-
tions
Owner Legal owner of the EVSE
Protective devices Devices for the personal protection of individuals
against the risk of injury or electrcial shock when they
do commissioning, operation and maintenance activi-
ties. Examples of protective devices are a door, the
electrical parts covers, the latches, etc.
Site operator Entity that is responsible for the day-to-day control of
the EVSE. The site operator does not have to be the
owner
User Owner of an EV, who uses the EVSE to charge the EV
Note: It is possible that not all terms are present in this document.
1.14 Orientation agreements
C
A
XY
Z
D
B
A Front side: face forward to the
EVSE during normal use
B Left side
C Right side
D Rear side
X X-direction (positive is to the right)
Y Y-direction (positive is rearward)
Z Z-direction (positive is upward)
About this document
9AKK108467A6398-EN | 002 13

2 Safety
2.1 Liability
The manufacturer is not liable for damages, losses, costs or expenses incurred
by any user of the EVSE (e.g. the installation engineer or owner of the EVSE) if
such damages, losses, costs or expenses result from a failure to comply with the
applicable safety instructions given by the manufacturer, including, but not limited
to, the following:
• Power outages or disruptions to the electrical supply to the EVSE.
• Accumulation of dirt or ingress of foreign substances within the EVSE.
• Corrosion of component parts.
• Upgrades enhancements or modifications to the equipment or its use.
• Damage to software or hardware due to any IT security problem, such as but not
limited to a virus breakout or malicious hacking of the system.
• Damage or failure of equipment caused by vermin, insect infestations or the like.
• Damage or failure resulting from faults in some other equipment connected to
the scope of work.
• Damage or loss caused by hazards such as fire, flood, storm or the like or
spillage or leakage of chemicals or harmful substances onto the EVSE.
• Fault tracing caused by problems from a source external to the scope of work.
• Unprofessional or incorrect installation, installation not complying to standards,
or installation not following the installation instructions contained in the
product specific manual.
• Improper operation (in breach of the technical requirements or specifications or
manuals of the product), negligence or repairs carried out by the Owner (or any
third party not authorized by ABB).
• Non-compliance with the applicable safety regulations or other legal standards
by other parties than ABB.
• Insufficient ventilation of the EVSE.
• Operation of the EVSE outside of its design conditions.
• Relocation of the EVSE from the original installation location or alteration of the
overall system design.
• Only make changes to the EVSE if the manufacturer approves in writing of the
changes.
2.2 General safety instructions
• Only perform the procedures as indicated in this document.
• Only perform any services as installation engineer or use the EVSE when you are
fully qualified to do so.
• Comply with the local rules and the instructions in this manual. If the local rules
contradict the instructions in this manual, the local rules will apply.
If and to the extent permitted by law, in case of inconsistency or contradiction,
between any requirements or procedure contained in this document and any
such local laws and/or rules, comply with the stricter laws and/or rules,
requirements and procedures specified in this document.
Safety
14 9AKK108467A6398-EN | 002

2.3 Responsibilities for the owner
The owner is the person who runs the EVSE for commercial or business purposes
for itself or leaves it to a third party for use. During operation the owner bears legal
responsibility for the protection of the user, other employees or third parties, which
includes the following:
• To know and implement the applicable laws and rules.
• To identify the hazards and do a risk assessment prior to commercing work that
result from the working conditions on the site.
• To operate the EVSE with the protective devices installed.
• To make sure that all protective devices are installed after installation or
maintenance work.
• To make an emergency plan that instructs people what to do in the event of an
emergency relating to the EVSE or to another site emergency.
• To make sure that all employees, the owner and third parties are qualified
according to the applicable local laws and/or rules to do the work.
• To make sure that there is sufficient space around the EVSE to safely do
maintenance and installation activities.
• To identify a site operator who is responsible for the safe operation of the EVSE
and for the coordination of all work, if the owner does not do these tasks.
Note: For German users, notes on the measurement accuracy according
to the sample test certificate apply. Refer to section 11.2.
2.4 Required qualifications for the installation engineer
• The qualified installation engineer fully knows the EVSE and its safe installation.
• The installation engineer is qualified according to the applicable local rules to do
the work.
• The qualified installation engineer obeys all local rules and the instructions in
the installation procedures in the operation and installation manual.
Safety
9AKK108467A6398-EN | 002 15

2.5 Personal protective equipment
Symbol Description
Protective clothing
Safety gloves
Safety shoes
Safety glasses
2.6 Safety instructions during transport
Preliminary requirements
• Installation engineer •
• Make sure that the hoisting equipment or forklift truck can lift the EVSE safely.
Take into account the mass and the center of gravity of the EVSE.
• Obey the applicable safety instructions for the hoisting equipment or for the
forklift truck. For example, the instructions specified on the related shipment
label that is applied to the EVSE packaging.
• Put on the correct personal protective equipment. Refer to section 2.5.
2.7 Safety instructions during installation
Preliminary requirements
•
Installation engineer
•
Safety
16 9AKK108467A6398-EN | 002

• Make sure that there is no voltage on the AC input cables during the complete
installation procedure.
• Keep unqualified personnel at a safe distance during installation.
• Only use electrical wires of sufficient gauge and insulation to handle the rated
current and voltage demand.
• Make sure that the load capacity of the grid is in accordance with the EVSE.
• Make sure that the wiring inside the EVSE is protected from damage and cannot
get trapped when you open or close the cabinet.
• Make sure that water cannot enter the cabinet.
• Protect the EVSE with safety devices and measures that the local rules specify.
• If it is necessary to remove safety devices, immediately install the safety devices
after the work.
• Put on the correct personal protective equipment. Refer to section 2.5.
2.8 Safety instructions for use
Do not use the EVSE and immediately get in contact with the manufacturer if the
safety or the safe use of the EVSE is at risk. This includes, but is not limited to, these
conditions:
• An enclosure has damage.
• An EV charge cable or connector has damage.
• Lightning struck the EVSE.
• There was an accident or a fire at or near the EVSE.
• Water entered the EVSE.
2.9 Safety instructions during cleaning or maintenance
Preliminary requirements
•
• Keep unauthorized personnel at a safe distance during cleaning or maintenance.
• If for cleaning or maintenance it is necessary to remove safety devices,
immediately install the safety devices after the work.
• Put on the correct personal protective equipment. Refer to section 2.5.
2.10 Safety instructions for earthing
Preliminary requirements
•
• Make sure that the EVSE is connected to a grounded, metal, permanent wiring
system, or an equipment-grounding conductor must be run with the circuit
Safety
9AKK108467A6398-EN | 002 17

conductors and connected to the equipment grounding terminal or lead on the
product.
• Make sure that the connections to the EVSE comply with all applicable local
rules.
2.11 Signs on the EVSE
Symbol Description
General risk
Hazardous voltage that gives risk of electrocution
Risk of pinching or crushing of body parts
Rotating parts that can cause a risk of entrapment
Hot surface that gives risk of burn injuries
Appliance class 1
Sign that means that you must read the manual before
you install the EVSE
Waste from electrical and electronic equipment
Note: It is possible that not all symbols are present on the EVSE.
2.12 Discard the EVSE or parts of the EVSE
Incorrect waste handling can have a negative effect on the environment and human
health due to potential hazardous substances. With the correct disposal of this
product, you contribute to reuse and recycling of materials and protection of the
environment.
Safety
18 9AKK108467A6398-EN | 002

• Obey the local law and rules when you discard parts, packaging material or the
EVSE.
• Discard electrical and electronic equipment separately in compliance with the
WEEE - 2012/19/EU Directive on waste of electrical and electronic equipment.
• As the symbol of the crossed out wheeled-bin on your EVSE indicates, do not
mix or dispose the EVSE with your household waste, at the end of use. Instead,
hand the EVSE over to your local community waste collection point for recycling.
• For more information, contact the Government Waste-Disposal department in
your country.
2.13 Cyber security
Note: This topic is valid for a wired Ethernet connection.
This product is designed to be connected to and to communicate information and
data via a network interface. It is the Owner's sole responsibility to provide and
continuously ensure a secure connection between the product and Owner's network
or any other network (as the case may be).
The Owner shall establish and maintain any appropriate measures (such as but
not limited to the installation of firewalls, application of authentication measures,
encryption of data, installation of anti-virus programs, etc) to protect the product,
the network, its system and the interface against any kind of security breaches,
unauthorized access, interference, intrusion, leakage and/or theft of data or
information.
The manufacturer (ABB E-mobility B.V.) and its affiliates are not liable for
damages and/or losses related to such security breaches, any unauthorized access,
interference, intrusion, leakage and/or theft of data or information.
Safety
9AKK108467A6398-EN | 002 19

3 Description
3.1 Type plate
IP54
SN: XXXX-XXX-XXXX-XXX
Part number XXXXXXXXXX
Prod. date XX XXXX XXXXXXXXXXXX
XX XXXXX XX
FOR USE WITH ELECTRICAL VEHICLES
Input xxxV x+PE-
DC Input xxx-xxxV Max xxxA
DC Output 1 CCS2 xxx-xxxV Max xxxA
DC Output 2 CHAdeMO xxx-xxxV Max xxxA
Max x.xkW/xxHz
DC AUX xxV xA
Heertjeslaan 6,
2629 JG Delft,
The Nederlands
MADE IN ITALY www.abb.com
Weight XXX Kg
XX-X
VDE - XXXXxxxx
Class X xxx. xx XX-XXXXX x
XX-XXXXX x
XX-XXXX
XXXXXXXXXX
XXXX-XXX-XXXX-XXX
A
B
C
D
E
G
H
I
J
F
K
L
M
N
A Manufacturer
B Serial number
C Part number of the EVSE
D Production date
E Internal product code (for the
manufacturer)
F Full EVSE type
G EVSE mass
H EVSE rating
I Address of the manufacturer
J CE mark
K Barcode with the serial number of
the EVSE
L Barcode with the part number of
the EVSE
M Additional EVSE rating data
N MID certified charger identification
Note: Find the type plate on your EVSE to see the applicable data. Refer
to section 3.4.2.
Note: For the German market the charge post is equipped with energy
metering to comply with the 2014/32/EU MID directive. The energy meter
is a field installable device.
3.2 Intended use
The EVSE is intended for the DC charging of EVs. The EVSE is intended for indoor or
outdoor use.
The properties of the electrical grid, the ambient conditions and the EV must
comply with the technical data of the EVSE. Refer to chapter 10.
Only use the EVSE with accessories that the manufacturer provides and that obey
the local rules.
Description
20 9AKK108467A6398-EN | 002
This manual suits for next models
2
Table of contents
Other ABB Batteries Charger manuals
Popular Batteries Charger manuals by other brands

Elo TouchSystems
Elo TouchSystems M50 Quick installation guide

True blue power
True blue power TT43 Installation manual and operating instructions

Fuelsis
Fuelsis 6 Series user guide

JMP
JMP Skan 1.0 manual

Tektronix
Tektronix TDS3CHG instructions

Webasto
Webasto ProCore Edge 9 Installation, operation and maintenance manual