manuals.online logo
Brands
  1. Home
  2. •
  3. Brands
  4. •
  5. AbleNet
  6. •
  7. Switch
  8. •
  9. AbleNet Big Beamer User manual

AbleNet Big Beamer User manual

3Wireless SLAT Set-Up (WSLAT only)
Quickstart Guide:
Big Beamer™and Jelly Beamer™Wireless
Switch, or Wireless Switch Latch and Timer
(WSLAT)
Mode Button
Select your Mode of Control by repeatedly pressing the
“Mode” button.
The receiver’s mode lights will indicate which mode is activated.
For Timed Modes - Adjust the Timer Dial from 1-60 seconds or
minutes as desired.
Note: First half-turn of the Timer Dial ranges from 1-10 sec/min.
Second half-turn ranges from 11-60 sec/min.
1Powering and turning on transmitters and receivers
2Connecting and Activating
On
On
Plug the wireless receiver into a device.
Press the transmitter’s switch top.
Signal lights on both components will light up and the
attached device will activate.
Note: Big and Jelly Beamer has an effective range of up to 30 feet.
Computer access requires a switch interface (not included).
Direct
Traditional switch behavior - device
remains ON as long as switch is held.
Timed Seconds
Runs device from 1 to 60 seconds with
each activation.
Timed Minutes
Runs device from 1 to 60 minutes with
each activation.
Latch
First activation turns device ON; second
activation turns it OFF.
Programming Tip: Turn the Timer Dial all the way up
to 60 and activate the device. As the desired time
approaches, turn the Dial back down towards 0,
stopping the device at the time desired.
Modes of Control
Insert two AA batteries into both components as shown on housing.
(Big Beamer transmitter uses 2 AAA batteries)
Slide the power switches on each component to the “On” position.
The components’ lights will activate briefly when the components are turned on.
Timer Dial
Learn Button
Mode Lights
On
Product Information
Re-mating the Transmitter and Receiver:
Should the Transmitter and Receiver stop communicating,
follow these steps to re-mate the two components.
1. With both components ON, press a paper clip into the
small hole on the back of Transmitter and Receiver. For
the Big Beamer, press the “Learn button” next to the
power switch beneath the switch cover (as pictured in step 1).
Each components’ Signal Light will turn green.
2. Press the switch top on the Transmitter, the Signal Light
will turn red, then off. Your components should be mated.
Mounting Options
The following products are suggested for mounting Big and
Jelly Beamer:
Dual Lock interlocking tape for angled or vertical surfaces,
Velcro® straps for use with the included Mounting Slots on
the Receiver,
UltraStik® reusable adhesive for mounting on flat surfaces,
Slim Armstrong® or Universal Switch Mounting System with
Small Rectangular Mounting Plate for Jelly Beamer or Large
Triangular Plate for Big Beamer.
Safety & Care
Components should not be placed in water or where it could
get wet.
To clean, wipe surfaces with a slightly moist cloth.
Components requires 2 AA batteries for each component.
(AAA for Big Beamer transmitter.) When batteries are low,
the Signal Light will flash three (3) times.
Warranty
AbleNet manufactured products include a two-year limited warranty.
This warranty is against defects in materials and manufacturing for
two-years from the date of purchase. Warranty in full text is available
at www.ablenetinc.com. For warranty and repair outside the United
States please contact your local AbleNet reseller.
Guarantee
AbleNet offers a 30-day money back guarantee if our products do not
meet your needs or expectations. Products must be in new condition
to honor this service. Please follow our repair/return policy when sending
products back under our guarantee.
AbleNet, Inc. Repair Information
If documentation identifying the date of purchase is not supplied, the
warranty period will be determined as two years from the manufacture
date stamped inside the product.
All products under warranty are repaired free of charge. Products no
longer covered by warranty may be repaired for a nominal fee. All
repairs are warranted for 90 days. Before sending in a product for
repair, please contact an AbleNet customer representative for the
Return Authorization Number (RA#) and repair charge, if applicable.
•
•
•
•
•
•
•
PN 900-80181-01 Rev. B (03/09)
Transmitters:
Receivers:
Big Beamer
Wireless Switch WSLAT Mounting
Jelly Beamer
Mode
Lights
Timer
Dial
Mode
Button
Signal
Light Test
Button
Power
On/Off
Power
On/Off
External
Switch Jack
(opposite side)
Power
On/Off
Signal
Light
Signal
Light
Switch
Top
Switch
Top

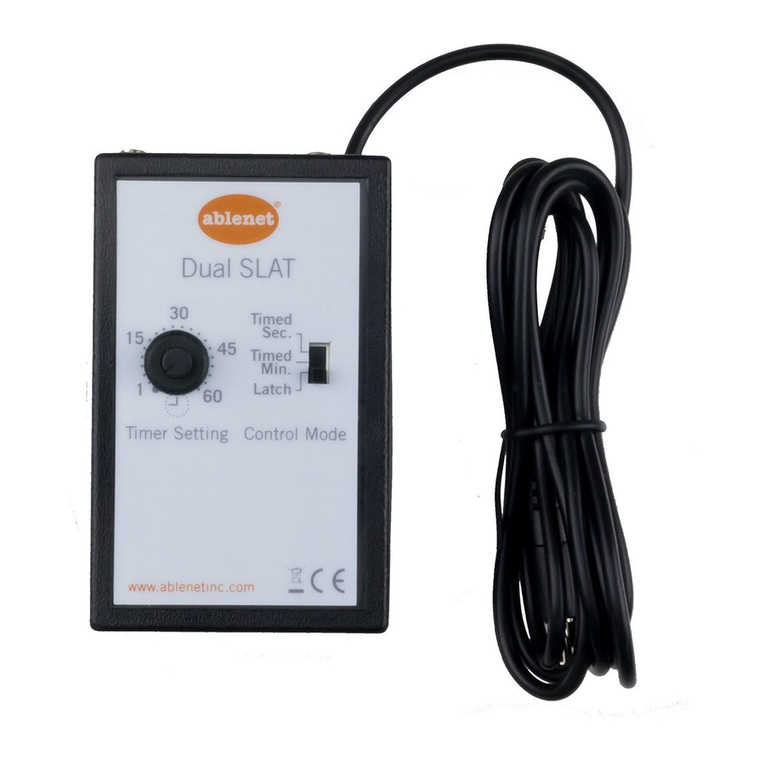
This manual suits for next models

1

Other AbleNet Switch manuals

AbleNet Blue2 FT User manual

AbleNet

AbleNet Blue2 FT User manual

AbleNet Big Beamer User manual

AbleNet

AbleNet Big Beamer User manual

AbleNet SCATIR 51100 User manual

AbleNet

AbleNet SCATIR 51100 User manual

AbleNet Blue2 User manual

AbleNet

AbleNet Blue2 User manual

AbleNet Blue2 User manual

AbleNet

AbleNet Blue2 User manual

AbleNet Blue2 User manual

AbleNet

AbleNet Blue2 User manual

AbleNet LITTLE Candy Corn User manual

AbleNet

AbleNet LITTLE Candy Corn User manual

AbleNet 100DSLAT User manual

AbleNet

AbleNet 100DSLAT User manual

AbleNet HouseMate User manual

AbleNet

AbleNet HouseMate User manual

AbleNet Blue2 User manual

AbleNet

AbleNet Blue2 User manual

Popular Switch manuals by other brands

Siemens 8BK30 Operation and maintenance instructions

Siemens

Siemens 8BK30 Operation and maintenance instructions

CNET CNSH-800 Specifications

CNET

CNET CNSH-800 Specifications

Nortel Meridian Meridian 1 release note

Nortel

Nortel Meridian Meridian 1 release note

Gomax VP-5004MZ2-C user manual

Gomax

Gomax VP-5004MZ2-C user manual

Aqara WXKG11LM manual

Aqara

Aqara WXKG11LM manual

showhome ZW30T manual

showhome

showhome ZW30T manual

Applied Wireless SF900C user guide

Applied Wireless

Applied Wireless SF900C user guide

Impact Acoustics 3-Play user manual

Impact Acoustics

Impact Acoustics 3-Play user manual

Brocade Communications Systems X6-8 Hardware installation guide

Brocade Communications Systems

Brocade Communications Systems X6-8 Hardware installation guide

Perle IDS-509GPP quick start guide

Perle

Perle IDS-509GPP quick start guide

D-Link Web Smart Switch DGS-1210-16 product manual

D-Link

D-Link Web Smart Switch DGS-1210-16 product manual

Elsner Corlo Touch KNX Technical specifications and installation instructions

Elsner

Elsner Corlo Touch KNX Technical specifications and installation instructions

SMC Networks ISE20B Operation manual

SMC Networks

SMC Networks ISE20B Operation manual

Baseus WKWG020113 user manual

Baseus

Baseus WKWG020113 user manual

Sea Wit 9138H user guide

Sea Wit

Sea Wit 9138H user guide

TRENDnet TK-210K Quick installation guide

TRENDnet

TRENDnet TK-210K Quick installation guide

Johansson 9750 user manual

Johansson

Johansson 9750 user manual

CTC Union IGS-401F Quick installation guide

CTC Union

CTC Union IGS-401F Quick installation guide

manuals.online logo
manuals.online logoBrands
  • About & Mission
  • Contact us
  • Privacy Policy
  • Terms and Conditions

Copyright 2025 Manuals.Online. All Rights Reserved.