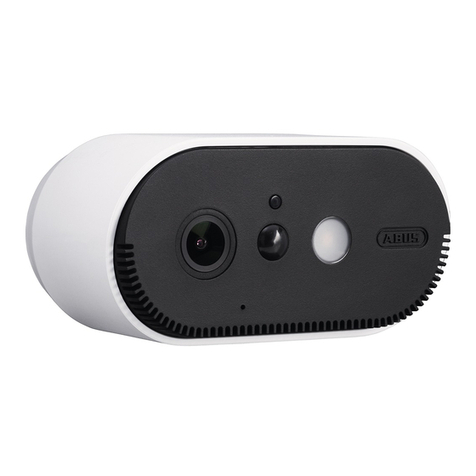
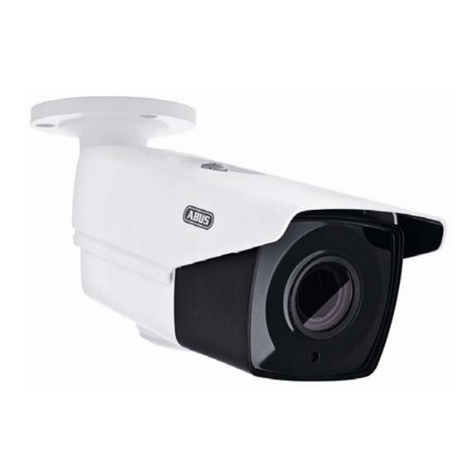
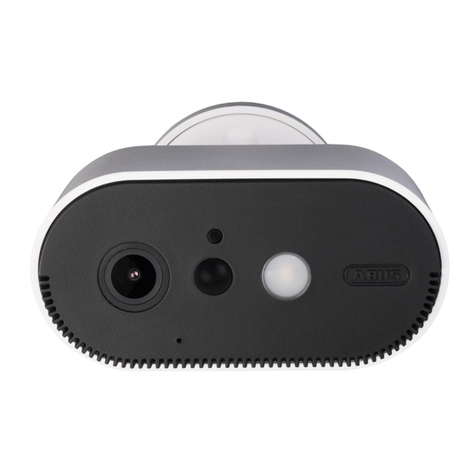
Abus PPIC90200 User manual

ABUS Security Center • Linker Kreuthweg 5
86444 Aing • Germany • abus.com
PPIC90200
QUICK GUIDE

Lieferumfang / Scope of delivery
2× 1×
BatteryCam
Akku Cam
Base station
Basisstation
2×
Bracket
Halterung
1×
USB
power plug
USB
Stecknetzteil

Mounting
material
Montage
material
2×1×
USB to micro
USB cable
USB auf micro
USB Kabel
2×
Reset - Tool
Reset - Tool

Objektiv
Lens
innenliegende Antenne*
Internal Antenna*
Mikrofon
Microphone
* Funk-Frequenz: 2,4Ghz (802.11 b/g/n)
Max. Sendeleistung: 20dBm
*Radio-Frequency:2,4Ghz(802.11b/g/n)
Max. Transmission power: 20dBm
PIR Sensor
Lichtsensor
Light sensor
Weißlicht LED
White light LED Lautsprecher
Speaker

Pairing Taste
(1x kurz drücken, die Kamera wird
eingeschalten, 3x kurz drücken, bereit
für das Einlernen, 5 Sekunden gedrückt
halten, Ausschalten der Kamera)
Pairing button
(Pressshortly1x,camerapoweron,press
shortly3x,readyforpairing,5seconds
continouspressing,powerocamera)
1/4“ Gewinde für Halterung
1/4“ screw thread for bracket
Status LED für Ladevorgang (blinkt während des Ladevorgangs,
beivollerLadungundKabelbetriebleuchtetdiesedauerha)
StatusLEDforCharging(ashesduringcharging,staysonperma-
nentlyifcompletelychargedandduringcontinousoperation)
Micro-USB Anschluss
Micro-USB Connection

Reset Taste
Reset button
Pairing Taste
Pairing button
Status LED
MicroSD Kartenslot (max. 128 GB)
MicroSD card slot (max. 128 GB)

Fixierring
Fixing ring
Abdeckung
Top Cover
Kugelgelenk
Ball Joint Rückplatte
Back Plate

App
- App2Cam Plus -
Installieren Sie die App2Cam
Plus aus dem App Store.
Install the App2Cam Plus from
yourAppStore.
Für eine Aufzeichnung benötigen
Sie eine MicroSD-Karte. Diese ist
optional erhältlich. Bitte legen
Sie diese ein und achten Sie
darauf, dass diese einrastet.
Forrecordingsyouneeda
microSD card, which is optional
available. Please insert the
SD card and take care, that it
hooks in.
Note
Hinweis
1
3
SD card
Download
iOS/Android
Wählen Sie „neue Kamera“
aus für die Erstinstallation.
In Abhängigkeit Ihres Netzwerkes
kann es notwendig sein, den
alternativen Installations-
prozess zu nutzen, wählen Sie
hierfür „Alternative Installation“.
Press „new device“ for the
rstsetup.Dependingonyour
networkitmaybenecessaryto
use the alternative installation
process, please select „Alternative
Installation”.
Wählen Sie die Akku Cam
für die Installation aus.
PleasechoosetheBattery
Cam for the installation.
Wählen Sie das Plus aus, um den
Einlernprozess zu starten.
Click on the Plus to start the
installtion process.
4
65
Drücken Sie 1x kurz auf das Einschaltzeichen, um die Kamera
einzuschalten. Die LED unter der Gummiabdichtung leuchtet
dauerharot.
Press 1 time short on the Power icon to power on the camera,
theLEDundertherubberwillglowpermanently.
2

Scannen Sie den QR Code auf
der Rückseite der Basisstation.
Verbinden Sie die Baissstation
anschließend mit dem USB-
Netzteil wie abgebildet und
schließen Sie es an einer
Steckdose an.
Scan the QR code on the back of
theGateway.Thenconnectthe
GatewaytotheUSBpowersupply
as shown and plug it
into a wall outlet.
Bitte scannen Sie den QR Code auf
der Rückseite der Basisstation.
Please scan the QR code at the
backside of the base station.
Geben Sie hier das WLAN Passwort
ein. Falls nicht das richtige Netz-
werk angezeigt wird, können
Sie durch Auswahl „anderes
Netzwerk“ nochmals zurück
gehen.
PleaseinsertyourWiFipassword.
IfadierentWiFiisshown,
please press „select network“
to go back.
iOS Setup
iOS Setup
Basisstation ist nach 60 Sekunden
einsatzbereit, sobald der Sprach-
befehl „Bereit für das Verbinden
mit dem Netzwerk“ ausgegeben
wird. Bitte verbinden Sie
anschließend Ihr Smartphone
mit dem Netzwerk, in welches
die Basisstation eingelernt
werden soll. Das Netzwerk
muss den 2,4GHz Standard
nutzen.
TheGatewayisreadyforuseaer
60 seconds as soon as the voice
command„Readytoconnectto
the network“ is given. Please
thenconnectyourSmartphone
to the Network in which the
gatewayistobeconnectedto.
The network must use the
2,4 GHz standard.
iOS Setup
iOS Setup
8
10.1
11
7
9
10.2
Home
Bitte beachten Sie, dass in der
weiteren Installation ein 2,4 GHz
Netzwerk ausgewählt wird.
Please take notice, that in the
following steps a 2,4 GHz network
will be selected.
Home
Android Setup
Android Setup
Wählen Sie hier Ihr Heim-
netzwerk aus und geben
Sie das Passwort ein.
PleasechooseyourWiFifrom
thelistandinsertyourpassword.
Readyforusein
60 seconds
Einsatzbereit in
60 Sekunden

Die App überträgt per Sound die
WLAN Daten an die Basisstation,
der maximale Abstand darf
nicht mehr als 30 cm sein.
Drücken Sie auf „Jetzt Sound
Information senden“
The App transfers the WiFi data
via sound to the Base station,
the maximum distance should
not exceed 30 cm. Click on
„Send sound information now”
Die Basisstation gibt den Sprachbefehl
„Netzwerkinformationen erhalten“
aus. Um den Sound erneut zu über-
tragen, klicken sie auf „Erneut
senden“. Bei erfolgreicher Über-
tragung, ist die Basisstation eingelernt
und startet neu, dies kann bis zu
120 Sekunden dauern. Falls die
Sound-Übertragung nicht erfolgreich
war, können Sie auch die Alternative
Installation nutzen.
Thebasestationplaybacksthevoice
command „network information
received“. To send the sound again,
please press “No, re-send”. If the
conrmationisreceived,thebase
station is connected now and will
restart. This can take up to 120.
Please use the alternative Installation
if the sound transmission was not
successful.
Stellen Sie die Lautstärke ihres
Smartphones auf mindestens
70% für den folgenden Installa-
tionsschritt. Weiter nach links
wischen.
Pleaseturnonthesoundofyour
smartphone to at least 70%, for
the following Setup step. Swipe
letocontinue.
13
15
17
12
14
16
Klicken Sie nun auf das
Kamerabild in der Übersicht
um das Livebild zu starten.
Please press on the camera
picture to enter the live view.
Sicherheitscode
ändern
Change
SecurityCode
Bei der Erstinstallation muss der
Sicherheitscode geändert werden. Die
erneute Verwendung des Standard
Sicherheitscodes „123456“ ist nicht
möglich. Es wird empfohlen eine
Kombination aus Zahlen sowie Klein-
und Großbuchstaben zu verwenden.
Die Verwendung von Umlauten und
Sonderzeichen ist nicht möglich.
Intherstinstallationyouwill
needtochangethesecuritycode.
You will not be allowed to enter the
standardsecuritycode‚123456‘asyour
new code. We recommend using a
combination of numbers and letters
in lower and uppercase. The use of
special characters is not supported.
Conrm
Sicherheitscode ändern
•••••••
•••••••
Um weitere Einstellungen an
der Basisstation und der Kamera
vorzunehmen, klicken Sie auf
dasEinstellungssymbolunten
und im Anschluss auf das
Einstellungsicon im Kamerabild.
For further settings of the base
station and of the camera, please
pressthesettingssymbolinthe
bottom and the settings icon of
the camera picture.
23
BevorSiedieAppönen,gehen
Sie zu den Netzwerkeinstellungen
Ihres Gerätes und verbinden sich
mit dem WLAN der Kamera. Dieses
erkennen Sie an dem Namen
„HD-XXXXXX“. Das Passwort für
das WLAN der Kamera lautet:
„12345678“.
Beforeyouopentheapp,go
totheWi-Fisettingsofyour
device and connect to the Wi-Fi
of the camera. The name of the
Wi-Fi will be „HD-XXXXXX“. The
password for the Wi-Fi of the
camera is: „12345678“.
19
20
18
21
22
Bei dem ersten Aufruf der erweiterten
Einstellungen, muss das Admin
Passwort geändert werden. Geben Sie
das Standard Passwort „123456“ ein
und aktivieren Sie „Auto Anmeldung“
um das Passwort auf dem Endgerät
zu speichern und bei dem nächsten
Aufruf der Einstellungen nicht erneut
das Passwort einzugeben. Die erneute
Verwendung des Standard Admin
Passworts ist nicht möglich, das
Passwort muss aus mindestens
8 Zeichen bestehen.
IfyouentertheSettingsforthe
rsttime,youneedtochangethe
admin password. Enter the standard
password “123456” and activate
“auto login” to save the password on
yoursmartphone.Whenenteringthe
settingsnexttime,youdon’thaveto
typeinthepasswordagain.Youwill
not be allowed to enter the standard
adminpasswordasyournew
password. The password must
have at least 8 characters.
Alternative
Installation
Alternative
Installation
Alternative
Installation
Alternative
Installation
Alternative
Installation
Alternative
Installation
Alternative
Installation
Alternative
Installation
Alternative
Installation
Alternative
Installation
Wählen Sie die Akku Cam
für die Installation aus.
PleasechoosetheBattery
Cam for the installation.
Wählen Sie das WLAN-Netzwerk
HD-xxxxx und geben Sie das
Standard Passwort „12345678“
ein. Klicken Sie auf OK, wenn Sie
mit dem Access Point verbunden
sind.
Connect to the Wi-Fi network
HD-xxxxx and enter the standard
password „12345678“. Press OK
onesyouareconnectedtothe
access point.
Klicken Sie auf „Alternative
Installation“ um die Basisstation
hinzuzufügen.
Select „Alternative Installation“
to add the base station.
ÖnenSiedieWLANEinstellungen
Ihres Smartphones.
EntertheWi-Fisettingsofyour
Smartphone.

Schrauben Sie den Fixierring auf das Gewinde.
Pleasescrewthexingringontothethread.
29
Bohren Sie anhand der Bohr-
schablone die Löcher vor
und schrauben Sie mithilfe
des Montagematerials die
Bodenplatte fest.
Drill holes into the wall with
the drilling templates and
mont the base plate with
the mounting material to
the wall.
27
Camera
Mounting
Kamera
Montage
Setzen SIe das Kugel-
gelenk ein und schrauben
Sie die Abdeckung auf, bitte
ziehen Sie diese nicht
fest um im Anschluss die
Kamera auszurichten.
Pleaseputhteballjoint
inside and screw the top
coveron.Pleasedonotx
it , so that the camera can
be aligned.
28
24 25
26
Alternative
Installation
Alternative
Installation
Alternative
Installation
Alternative
Installation
Alternative
Installation
Alternative
Installation
Wählen Sie aus der Liste der
WLAN-Netzwerke das WLAN Ihres
Heim-Netzwerkes aus.
SelecttheWi-Fiofyourhome
network from the list of Wi-Fi
networks.
Geben Sie das Passwort des
WLAN Ihres Heim-Netzwerkes
ein. Drücken Sie „OK“, um die
Verbindung herzustellen. Die
Kamera verbindet sich nun mit
dem Netzwerk, dies kann bis zu
120 Sekunden dauern.
The base station will now connect
to the network. This can take up
to 120 seconds.
Falls das Gerät nach dem
Neustart „getrennt“ anzeigt,
prüfen Sie ob ihr Smartphone
mit dem Netzwerk verbunden
ist, falls das Gerät weiterhin
„getrennt“ anzeigt, setzen Sie die
Basisstation zurück und führen
Sie die Installation erneut durch.
Ifthedevicedisplays
„disconnected“aerthereboot,
checkifyourphoneisconnected
to the network, if the device still
displays„disconnected“,reset
the base station and start the
installation again.
Home

Default
Settings
Werksein-
stellungen
Halten Sie die Reset-Taste für ca.
5 Sekunden gedrückt, bis die
LED rot blinkt. Die Basisstation
wird zurückgesetzt und startet
neu. Die Basisstation ist nach
ca. 90 Sekunden wieder im
Auslieferungszustand.
Press the reset button for about 5
seconds,untiltheredLEDashes.
The base station will be reseted and
will restart. The base station will
be restored to its default settings in
aproximately90seconds.
i
Richten Sie die Kamera mithilfe Ihres Smartphones aus
und schrauben Sie die Abdeckung der Halterung fest.
Pleasealignthecamerawithyoursmartphoneand
tighten the top cover of the bracket.
31
3332
Camera
pairing
Kamera
einlernen
Camera
pairing
Kamera
einlernen
Drücken Sie 3 x kurz auf das Einschaltzeichen, um die Kamera
einzulernen. Bei erfolgreicher Verbindung wird der Sprachbefehl
„Kameraverbindung erfolgreich abgeschlossen“ wiedergegeben.
Press3timesshortlyonthePowericontopoweronthecamera.
The camera pairing is successful if the voice command „Camera
pairingsuccesfull“isplaybacked.
Drücken Sie die Pairing Taste für
mindestens 3 Sekunden bis die
LED blau blinkt. Der Sprachbefehl
„Bereit für Kameraverbindung“ wird
abgespielt. Falls die Kamera bereits
in einer Basisstation eingelernt ist,
löschen Sie diese bitte vorab aus
der Liste.
Press the pairing button for at least
3secondsuntiltheLEDashesblue.
The voice command „Waiting for
camerapairing“willbeplaybacked.
Ifthecameraisalreadypairedwith
a base station, please delete it
beforehand.
Schrauben Sie die Kamera auf das Gewinde.
Please screw the camera onto the thread.
30

Sie haben die Möglichkeit die Kamera auf einer ebenen Fläche, wie z.B. ein Regal oder ein Schrank, zu
platzieren.ZwischenderKameraundderBasisstationsolltensichkeinegroßenGegenständebenden.
DiesekönnendieÜbertragungzwischendenGerätenbeeinussen.
Youhavetheoptionofplacingthecameraonaatsurface,suchasashelforcupboard.Betweenthe
cameraandthebasestationthereshouldbenolargeobjects,thesecanaectthetransmissionbetween
the devices.
i
i
i
Installation der
Kamera ohne
Wandhalterung
Installation
of the camera
without wall
bracket
Installation der
Kamera ohne
Wandhalterung
Installation der
Kamera ohne
Wandhalterung
Achtung!
PlatzierenSiedieKameraanderKantederAblageäche,daessonstbeiAktivierung
der Weißlicht LED zu Überblendungen im Kamerabild kommen kann.
BittebeachtenSie,dasskeineObjektedirektvorderKameralinseplatziertwerden,um
Überblendungen zu vermeiden.
DieKamerasolltenichtaufeinemGlasregalplatziertwerden,daeszuReektionenkommenkann.
Attention!
Place the camera on the edge of the shelf, otherwise the white light LED will cause crossfades
in the camera image.
Pleasenotethatnoobjectsareplaceddirectlyinfrontofthecameralenstoavoidcrossfades.
Thecamerashouldnotbeplacedonaglassshelfasreectionsmayoccur.
Installation
of the camera
without wall
bracket
Installation
of the camera
without wall
bracket

i
i
Der Blickwinkel der Kamera ist größer als der PIR-Blickwinkel. Bei einer Installation kann es
vorkommen,dassPersonenzwaraufdemLivebildsichtbarsind,jedochkeineAufnahmeauslösen,
dasichdiePersonaußerhalbdesPIR-Erfassungsbereichvon8Meternbendet.
TheviewingangleofthecameraislargerthanthePIRangle.Itmayhappenataninstallationthat
people are visible on the live image but do not trigger a recording.
Since the person is outside the PIR detection range of 8 meters.
PIR
Erfassungs-
bereich
PIR detection
angle
PIR
Erfassungs-
bereich
PIR detection
angle
PIR
8m
112
115
8m0.0m
2m
= REC
= REC
Blickwinkel /
viewing angle

Eine alternative Inbetriebnahme sowie detaillierte Informationen erhalten Sie in
der Bedienungsanleitung erhältlich auf der Website: abus.com/product/PPIC90200
Vous trouverez une alternative de mise en service ainsi que des informations
détaillées dans le manuel d’utilisateur disponible sur le site Internet :
abus.com/product/PPIC90200
Een alternatieve ingebruikname en gedetailleerde informatie vindt u in de
gebruikershandleiding op de website: abus.com/product/PPIC90200
Per informazioni su una messa in funzione alternativa o sui dettagli del prodotto,
consultare le istruzioni per l‘uso disponibili all‘indirizzo: abus.com/products/PPIC90200
An alternative installation as well as detailed information can be found in the
user manual which is available on the website: abus.com/product/PPIC90200
Alternatividritagningsamtdetaljeredeoplysningerndesibetjeningsvejledningen,
somndespåhjemmesiden:abus.com/product/PPIC90200
Informacjedotyczącealternatywnychsposobówuruchomieniaorazdodatkowe
szczegółyznajdująsięwinstrukcjiobsługi,którąmożnapobraćnastronie:abus.com/
product/PPIC90200
En el manual de instrucciones disponible en nuestra página web podrá consultar
unapuestaenfuncionamientoalternativa,asícomoinformaciónmásdetallada.
abus.com/product/PPIC90200
Alternatividritagningsamtdetaljeradinformationnnsibruksanvisningen
somkanhämtaspåwebbsidan:abus.com/product/PPIC90200
Other manuals for PPIC90200
1
Table of contents
Other Abus Digital Camera manuals

Abus
Abus IPCV10020 User manual

Abus
Abus PPIC90520 User manual

Abus
Abus TVCC50021 User manual

Abus
Abus HDCC65550 User manual

Abus
Abus TVIP81000 User manual

Abus
Abus IPCS62130 User manual

Abus
Abus PPIC42520B User manual

Abus
Abus PPIC91000 User manual

Abus
Abus TVCC10000 User manual

Abus
Abus Eyseo TV7057 User manual

Abus
Abus eyseo TVCC10540 User manual

Abus
Abus PPIC90200 User manual

Abus
Abus Security-Center Ecoline TV 7075 User manual

Abus
Abus HDCC42502 User manual

Abus
Abus Security Center Eyseo TV7300 User manual

Abus
Abus IPCB62500 User manual

Abus
Abus TVIP11561 User manual

Abus
Abus Eycasa CASA30400 User manual

Abus
Abus tvac16000a/b User manual

Abus
Abus IPCV10000 User manual