Acard AEC-6290 User manual

Serial ATA PCI
Host Adapter
AEC-6290/6295
User’s Manual
Version:1.0
Copyright © 2003 ACARD Technology Corp.
Release: April 2003

Copyright and Trademarks
The information of the product in this manual is subject to change without prior
notice and does not represent a commitment on the part of the vendor, who as-
sumes no liability or responsibility for any errors that may appear in this manual.
ACARD and SCSIDE are the trademarks of ACARD Technology Corp. Microsoft
and the Windows Logo are the registered trademarks, and Windows is the trade-
mark of Microsoft Corporation. All brands and trademarks are the properties of their
respective owners.
This manual contains materials protected under International Copyright Laws. All
rights reserved. No part of this manual may be reproduced in any form or by any
means, electronic or mechanical, including photocopying, without the written per-
mission of the manufacturer and the author. All inquires should be addressed to
ACARD Technology Corp.

Table of Contents
Chapter 1 Introduction .......................................5
1.1 Overview ................................................................ 5
1.2 Features ................................................................. 5
1.2.1 AEC-6290.......................................................................... 5
1.2.2 AEC-6295.......................................................................... 5
1.3 Specifications........................................................ 5
1.4 Package.................................................................. 6
Chapter 2 Hardware Installation........................7
2.1 Quick Installation .................................................. 7
2.1.1 Use Serial ATA HDD ........................................................ 7
2.1.2 Use ATA HDD and Converter.......................................... 7
2.1.3 Use ATA HDD (for AEC-6295 only) ................................ 7
2.2 The Board Layout.................................................. 8
2.3 Connection of Cable and Power Cord ................ 9
2.3.1 Connect a Serial HDD ..................................................... 9
2.3.2 Connect an IDE HDD..................................................... 10
2.4 Compatibility ........................................................11
Chapter 3 BIOS Setup ......................................12
3.1 IDE Devices.......................................................... 13
3.2 Adapter Setup...................................................... 13
3.3 Utility .................................................................... 14
3.4 Load Defaults ...................................................... 14
3.5 Exit Setup............................................................. 15
Chapter 4 System & Driver Installation ..........16
4.1 In Win 2000/XP..................................................... 16
4.1.1 Install the Driver ............................................................ 16
4.1.2 Boot from AEC-6290/6295 ............................................ 21
4.2 In Win NT.............................................................. 21
4.2.1 Install the Driver ............................................................ 21
4.2.2 Boot from AEC-6290/6295 ............................................ 22
4.3 In Win 9X/ME........................................................ 22
4.3.1 Install the Driver ............................................................ 22
4.3.2 Boot from AEC-6290/6295 ............................................ 22
4.4 In Linux ................................................................ 22
Chapter 5 Troubleshooting..............................23
Appendix A Make An Installation Disk ...........24
Appendix B ASPITool32 Manager ...................27

AEC-6290/6295 Manual
5
Chapter 1 Introduction
1.1 Overview
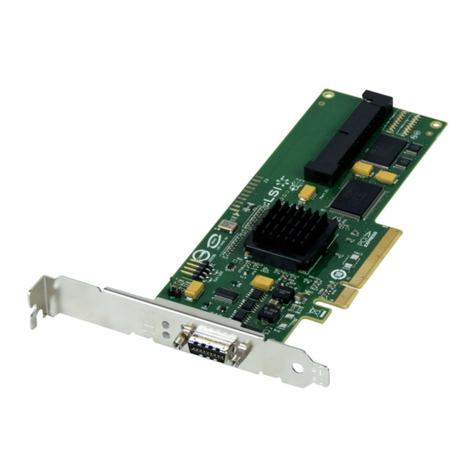
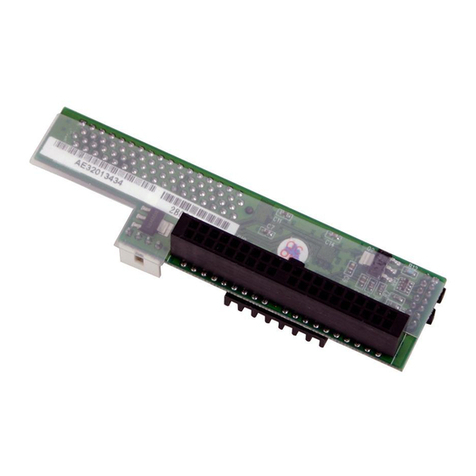
ACARD AEC-6290 and 6295 are Serial ATA PCI host adapters. They meet serial
ATA 1.0 and parallel ATA 133 specifications. Their advantages are robust data trans-
mission, reduced pin counts, lower power requirement, thinner and longer cabling,
etc. They have drop-in compatibility with the current operating environment, too.
1.2 Features
nAn add-on PCI-to-Serial ATA controller
nData transfer rate up to 150MB/s
nTwo independent channels
nSupports up to 2 IDE hard drives
1.2.1 AEC-6290
1.2.2 AEC-6295
nAn add-on PCI-to-Serial ATA controller
nData transfer rate up to 150MB/s
nFour independent channels
nSupports up to 6 IDE hard drives
1.3 Specifications
nPower requirement --- Voltage: 3.3V +/–2%
5V +/–2%
Current: 0.5A Max.
nEnvironment --- Operating temperature: 0oC to 70oC
Storage temperature: –20oC to 85oC
nHumidity --- 15% to 90%

AEC-6290/6295 Manual
6
1.4 Package
When you open the package, please examine the following items.
nAEC-6290/6295 × 1
nInternal Serial ATA Cable ×1
nUser’s Manual
nACARD Support CD × 1
nInternal ATA 133 Cable × 1 (for AEC-6295 only)
nY-splitter Power Cord for IDE Hard Drive (for AEC-6295 only)
nY-splitter Power Cord for IDE Hard Drive and converter (for the package
with AEC-7900 enclosure only)
nDimensions --- AEC-6290: 13.0 (W) × 7.6 (H) cm
AEC-6295: 17.5 (W) × 8.1 (H) cm
nConnectors --- AEC-6290: Two 4-pin SATA connectors
AEC-6295: Two 4-pin SATA connectors
Two 40-pin IDE connectors

AEC-6290/6295 Manual
7
Chapter 2 Hardware Installation
2.1 Quick Installation
Please follow the 4 steps to install AEC-6290 or 6295 at once.
2.1.1 Use Serial ATA HDD
(1). Be sure that the system power has been off.
(2). Open the housing of PC.
(3). Insert AEC-6290/6295 into an available PCI slot firmly.
(4). Screw AEC-6290/6295 onto the housing.
When using a serial ATA HDD, follow the 3 steps.
(1). Connect the serial ATA cable to AEC-6290/6295 and the hard drive (ATA 133
cable is fit for the channel 3 and 4 of AEC-6295).
(2). Connect the power cord to the power supply and the hard drive.
(3). Screw the housing of PC, and plug the system power (see Figure 2-3).
2.1.2 Use ATA HDD and Converter
When using an ATA HDD and ATA-to-serial converter, follow the 4 steps.
(1). Connect one end of the serial ATA cable to AEC-6290/6295 and another to the
ATA-to-serial converter.
(2). Connect the ATA-to-serial converter to the ATA HDD, and connect the small 4-
pin power cord to the ATA-to-serial converter.
(3). Connect the power cord to the HDD.
(4). Screw the housing of PC, and plug the system power (see Figure 2-4).
2.1.3 Use ATA HDD (for AEC-6295 only)
When using an ATA hard drive, follow the 3 steps.
(1). Connect one end of the ATA cable to AEC-6295 and another to the ATA HDD.
(2). Connect the power cord to the HDD.
(3). Screw the housing of PC, and plug the system power (see Figure 2-5).

AEC-6290/6295 Manual
8
2.2 The Board Layout
Figure 2-1
The layout of AEC-6290 board is shown as follows.
The layout of AEC-6295 board is shown as follows.
Serial Port 2 Serial Port 1
Figure 2-2
Channel 4 Channel 3 Channel 1 Channel 2
LED
LED

AEC-6290/6295 Manual
9
2.3 Connection of Cable and Power Cord
It is quite easy to connect the ATA 133 cable, serial ATA cable, and the power cord,
because they are foolproof. Here we take AEC-6295 as an example. On the 4-
channel adapter Channel 3 and Channel 4 are two channels for connecting IDE
hard drives while Channel 1 and Channel 2 for connecting serial ones.
2.3.1 Connect a Serial HDD
(1). Connect the serial ATA cable to AEC-6295 and the serial hard drive.
(2). Connect the power cord to the hard drive.
Figure 2-3

AEC-6290/6295 Manual
10
Figure 2-4
But If your hard drive is not a serial one, you need a converter to connect.
(1). Connect one end of the serial ATA cable to AEC-6295 and another to the ATA-
to-serial converter.
(2). Connect the converter to the IDE HDD, then connect them with a Y-splitter
power cord.
2.3.2 Connect an IDE HDD
(1). Find out a color line of the ATA 133 cable indicating pin 1 of the connector.
(2). Find out pin 1 of the connector on the IDE hard drive.
(3). Connect the ATA 133 cable to the IDE hard drive by pin 1 to pin 1.
(4). Connect the power cord to the IDE hard drive.

AEC-6290/6295 Manual
11
NOTICE: The ATA 133 cable has three connectors. The blue connector
is connected to AEC-6290/6295, the middle one to HDD set as Slave
and the remaining one to HDD set as Master.
Figure 2-5
2.4 Compatibility
AEC-6290 and 6295 support native serial ATA hard drives and DMA 133/100/66
hard drives. AEC-6290 needs to be used together with AEC-7900. For the newest
compatibility, please visit http://www.acard.com

AEC-6290/6295 Manual
12
Chapter 3 BIOS Setup
After installing AEC-6290/6295 and booting the host PC, you will see the following
figure indicating your BIOS version, hard drive information, etc. Here we only take
AEC-6290 as an example.
Figure 3-1
Please press <F1> or <F10> to enter BIOS Setup Utility.
Figure 3-2
On BIOS screen use <á>,<â> to change items, press <Enter> or space bar to
select, and press <Esc> to cancel or exit. Meanwhile at the bottom of the screen,
you can see the location and capacity of hard drives.

AEC-6290/6295 Manual
13
3.1 IDE Devices
Figure 3-3
The next figure shows the information of IDE devices connected to AEC-6290/6295.
3.2 Adapter Setup
nInt 13h Bios Enable: Set if to load the BIOS of AEC6290/6295 to the system
upon booting.
nCD-ROM Bootable: Set if to boot from CD-ROM.
nZip Supported: Enable this option when using Zip tape drive.
nDevice Properties
Ch1 Ser: Enable or disable the Serial ATA device on channel 1.
Ch2 Ser: Enable or disable the Serial ATA device on channel 2.
Ch3 Mas: Enable or disable the Master device on channel 3.
Transfer Mode: IO mode can be <AUTO> or adjusted manually.
Ch3 Slv: Enable or disable the Slave device on channel 3.
Transfer Mode: IO mode can be <AUTO> or adjusted manually.
Ch4 Mas: Enable or disable the Master device on channel 4.
Transfer Mode: IO mode can be <AUTO> or adjusted manually.
Ch4 Slv: Enable or disable the Slave device on channel 4.
Transfer Mode: IO mode can be <AUTO> or adjusted manually.
nBoot HardDisk Device: Set a bootable IDE device.

AEC-6290/6295 Manual
14
Figure 3-4
3.3 Utility
nQuick Erase: It can quickly erase the data on a selected hard drive. Beware
that the data and the partitions will be completely erased.
Figure 3-5
3.4 Load Defaults
This can recover the defaults of BIOS.

AEC-6290/6295 Manual
15
3.5 Exit Setup
nCancel: It makes ineffective or inoperative.
nUpdate Data & Exit: Save and leave.
nNo update, Exit: Leave withoug saving.
Figure 3-6

AEC-6290/6295 Manual
16
Chapter 4 System & Driver Installation
Driver installation varies somewhat in different operating systems. You can install
the driver of AEC-6290/6295 in an existing OS, or install a new OS to the hard drive
connected to AEC-6290/6295. The second method can be said to boot from the
adapter.
4.1 In Win 2000/XP
Please follow the steps given below to install the driver of AEC-6295.
(1). After installing AEC-6295, boot the PC and enter Windows XP.
(2). The system will detect a new device and require a directory to access. Select
“Install from a list or specific location (Advanced)”. Then click “Next”.
We only take installing the driver of AEC-6295 in Windows XP as an example.
4.1.1 Install the Driver
Figure 4-1

AEC-6290/6295 Manual
17
(3). Follow the wizard. Windows XP will require the driver’s location. Select
“Include this location in the search”.
(4). Select “Browse” to find the driver’s directory such as A:\WinXP.
Figure 4-2
(5). After the wizard finds the driver, click “Next” to install it.
Figure 4-3

AEC-6290/6295 Manual
18
(6). Click “Continue Anyway” to continue the installation.
Figure 4-4
(7). Follow the directions. The system will complete the setup automatically.
Figure 4-5

AEC-6290/6295 Manual
19
(8). After setup, please boot the system again, and click “My Computer”.
Figure 4-6
(9). Find “View system information”, and double click it.
Figure 4-7

AEC-6290/6295 Manual
20
(10). In “System Properties” click “Hardware” and then “Device Manager”.
(11). Under “SCSI and RAID Controllers” double click “ACARD AEC-6295 Serial
ATA PCI Host Adapter” to see if the card has been installed successfully.
Figure 4-8
Figure 4-9
This manual suits for next models
1
Table of contents
Other Acard Adapter manuals

Acard
Acard AEC-6293 User manual

Acard
Acard AEC-6290M User manual

Acard
Acard AEC-7730A User manual

Acard
Acard AEC-6710S User manual

Acard
Acard AEC-67162 User manual

Acard
Acard Mirror Smart Ultra160 User manual

Acard
Acard AEC-67162M User manual

Acard
Acard AEC-6885MLP User manual

Acard
Acard AEC-6293M User manual

Acard
Acard AEC-67160D User manual
Popular Adapter manuals by other brands

Kindermann
Kindermann 7492 series Mounting instructions

Hama
Hama 53173 operating instructions

Quatech
Quatech Audio/Video Capture USB 2.0 user manual

TP-Link
TP-Link TL-PA211 Quick installation guide

ZyXEL Communications
ZyXEL Communications Wireless LAN USB Adapter ZyAIR 200 quick start guide

NETGEAR
NETGEAR RB-WPN111NA Reference manual