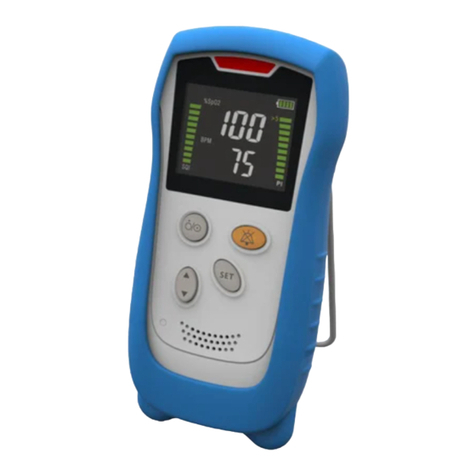
Accurate Bio-Medical Technology HS20A User manual

HS20A Pulse Oximeter Operator’s Manual HS20A-03-RDP-003 V4.0
Copy Right. Hunan Accurate Bio-Medical Technology Co., Ltd Page 1/ Total 39
HS20
Handheld Pulse Oximeter
OPERATOR’S MANUAL

HS20A Pulse Oximeter Operator’s Manual HS20A-03-RDP-003 V4.0
Copy Right. Hunan Accurate Bio-Medical Technology Co., Ltd Page 2 / Total 39
Product Information
Product Name: Pulse Oximeter
Product Model: HS20A, HS20A-LI
Manufacturer: Hunan Accurate Bio-Medical Technology Co., Ltd.
Address: 6th Floor,Biyang Industrial Zone,Lijiacun Road,Xueshi Street of Yuelu
District,410208 Changsha,Hunan Province, PEOPLE`S REPUBLIC OF CHINA
Tel: +86 731-84118539
Fax: +86 731-84118539
Software Version:V1.0
EUROPEAN REPRESENTATIVE:
Name:Shanghai International Holding Corp. GmbH (Europe)
ADD:Eiffestrasse 80, 20537 Hamburg,Germany
Tel: +49-40-2513175 Fax: +49-40-255726
Revision History
This manual has a revision number. This revision number changes whenever the manual is updated due
to software or technical specification change. Contents of this manual are subject to change without prior
notice.
Revision number: 4.0
Release time: 2022-07
© Copyright Hunan Accurate Bio-Medical Technology Co., Ltd. All rights reserved.

HS20A Pulse Oximeter Operator’s Manual HS20A-03-RDP-003 V4.0
Copy Right. Hunan Accurate Bio-Medical Technology Co., Ltd Page 3 / Total 39
Preface
Manual Purpose
This manual contains the instructions necessary to operate the product safely and in accordance with its function and intended use.
Observance of this manual is a prerequisite for proper product performance and correct operation and ensures patient and operator safety.
This manual is based on the maximum configuration and therefore some contents may not apply to your product. If you have any
question, please contact us.
This manual is an integral part of the product. It should always be kept close to the equipment so that it can be obtained conveniently
when needed.
This product is a reusable medical device.
Intended Audience
This manual is geared for clinical professionals who are expected to have a working knowledge of medical procedures, practices and
terminology as required for monitoring of critically ill patients.
Illustrations
All illustrations in this manual serve as examples only. They may not necessarily reflect the setup or data displayed on your pulse
oximeter.
Conventions
Italic text is used in this manual to quote the referenced chapters or sections.
→ is used to indicate operational procedures.
[ ] is used to enclose screen texts.

HS20A Pulse Oximeter Operator’s Manual HS20A-03-RDP-003 V4.0
Copy Right. Hunan Accurate Bio-Medical Technology Co., Ltd Page 4 / Total 39
Contents
Contents ........................................................................................................................................................4
1 Safety ......................................................................................................................................................... 7
1.1 Safety Information .......................................................................................................................... 7
1.1.1 Dangers ................................................................................................................................ 7
1.1.2 Warnings .............................................................................................................................. 7
1.1.3 Cautions ............................................................................................................................... 8
1.1.4 Notes .................................................................................................................................... 9
1.2 Equipment Symbols ........................................................................................................................ 9
2 The Basics ................................................................................................................................................11
2.1 Introduction ................................................................................................................................... 11
2.1.1 Intended Use .......................................................................................................................11
2.1.2 Intended operator ............................................................................................................... 11
2.1.3 Intended Patient Population ............................................................................................... 11
2.1.4 Medical Condition ..............................................................................................................11
2.1.5 Essential Performance ........................................................................................................11
2.1.6 Contraindications ............................................................................................................... 11
2.1.7 Components ........................................................................................................................11
2.1.8 Operator Position ............................................................................................................... 11
2.1.9 Validation ........................................................................................................................... 11
2.2 Main Unit ...................................................................................................................................... 12
2.2.1 Front View ......................................................................................................................... 12
2.2.2 Rear View and Right View ................................................................................................13
2.3 Display Views ............................................................................................................................... 13
2.3.1 SpO2 Area ..........................................................................................................................14
2.3.2 PR Area .............................................................................................................................. 14
2.3.3 Information Area ................................................................................................................14
3 Getting Started ....................................................................................................................................... 15
3.1 Unpacking and Checking ..............................................................................................................15
3.2 Environmental Requirements ....................................................................................................... 15
3.3 Power On the Pulse Oximeter .......................................................................................................15
3.4 Power Off the Pulse Oximeter ...................................................................................................... 15
4 Basic Operations .....................................................................................................................................16
4.1 Adjusting the Pulse Volume ......................................................................................................... 16
4.2 Selecting Patient Type .................................................................................................................. 16

HS20A Pulse Oximeter Operator’s Manual HS20A-03-RDP-003 V4.0
Copy Right. Hunan Accurate Bio-Medical Technology Co., Ltd Page 5 / Total 39
4.3 Setting Alarm Limit ...................................................................................................................... 17
4.3.1 Setting PR High Alarm Limit ............................................................................................ 17
4.3.2 Setting PR Low Alarm Limit .............................................................................................17
4.3.3 Setting SPO2High Alarm Limit ........................................................................................ 18
4.3.4 Setting SPO2Low Alarm Limit .........................................................................................18
4.4 Data Storage ..................................................................................................................................18
4.4.1 Date Storage ON/OFF ....................................................................................................... 19
4.4.2 Date Storage Time Step ..................................................................................................... 19
5 Notices ..................................................................................................................................................... 20
5.1 Notice Categories ..........................................................................................................................20
5.2 Notice Levels ................................................................................................................................ 20
5.3 Notice Indicators ........................................................................................................................... 20
5.3.1 Notice Lamp .......................................................................................................................20
5.3.2 Notice Tones ...................................................................................................................... 20
5.3.3 Notice Messages ................................................................................................................ 21
5.4 Notice Tone Configuration ........................................................................................................... 21
5.4.1 Switch ON/OFF Notice Volume ....................................................................................... 21
5.4.2 Pausing the Notice Tones .................................................................................................. 21
5.5 When an Notice Occurs ................................................................................................................ 22
6 Measuring SpO2 .....................................................................................................................................23
6.1 Introduction ................................................................................................................................... 23
6.2 Safety .............................................................................................................................................23
6.3 Applying the Sensor ......................................................................................................................23
6.4 Settings ..........................................................................................................................................24
6.4.1 Setting Patient Type ........................................................................................................... 24
6.4.2 Adjusting the Notice Limits ...............................................................................................24
6.4.3 Setting VOL ....................................................................................................................... 24
6.5 Measurement Limitations ............................................................................................................. 24
7 Battery ..................................................................................................................................................... 25
7.1 Overview .......................................................................................................................................25
7.2 Installing the Batteries .................................................................................................................. 25
7.2.1 Opening the Battery Door ..................................................................................................25
7.2.2 Installing the Alkaline Batteries ........................................................................................ 25
7.2.3 Installing the Lithium Batteries ......................................................................................... 25
7.2.4 Charging the Lithium Batteries ......................................................................................... 26
To charge the lithium battery. .....................................................................................................26
7.3 Checking The Lithium Battery ..................................................................................................... 26
7.4 Disposing Of The Batteries ...........................................................................................................26

HS20A Pulse Oximeter Operator’s Manual HS20A-03-RDP-003 V4.0
Copy Right. Hunan Accurate Bio-Medical Technology Co., Ltd Page 6 / Total 39
8 Maintenance and Cleaning ....................................................................................................................27
8.1 Safety Checks ................................................................................................................................27
8.2 Cleaning ........................................................................................................................................ 27
8.3 Disinfecting ................................................................................................................................... 28
8.4 Disposal .........................................................................................................................................28
9 Accessories .............................................................................................................................................. 29
A Product Specifications .......................................................................................................................... 29
B EMC ........................................................................................................................................................31
C Factory Defaults .................................................................................................................................... 35
C.1 System Setup ................................................................................................................................ 35
C.2 SpO2 Setup ...................................................................................................................................35
D Notice Messages ..................................................................................................................................... 35
D.1 Physiological Notice Messages ....................................................................................................35
D.2 Technical Notice Messages .......................................................................................................... 36
E SpO2 Sensor Model ............................................................................................................................... 36
E.1 Disposable SpO2 Sensor .............................................................................................................. 36
E.2 Reusable SpO2 Sensor ................................................................................................................. 36
F Symbols and Abbreviations .................................................................................................................. 37
F.1 Units .............................................................................................................................................. 37
F.2 Symbols .........................................................................................................................................37
F.3 Abbreviations ................................................................................................................................ 38

HS20A Pulse Oximeter Operator’s Manual HS20A-03-RDP-003 V4.0
Copy Right. Hunan Accurate Bio-Medical Technology Co., Ltd Page 7 / Total 39
1 Safety
1.1 Safety Information
DANGER
Indicates an imminent hazard that, if not avoided, will result in death or serious injury.
Indicates a statement that there may be hazards in using different alarm presets for the same or similar devices in any
signal area.
WARNING
Indicates a potential hazard or unsafe practice that, if not avoided, will result in death or serious injury.
Indicates a warning to the effect that probes and cables are designed for use with specific monitors.
Indicates a warning statement to the effect that the responsible organization or operators needs to verify the compatibility
of the monitor, probe or cables before use, or patient injury can result.
Indicates a warning statement to the effect that misapplication of a probe with excessive pressure for prolonged periods
can induce pressure injury.
CAUTION
Indicates a potential hazard or unsafe practice that, if not avoided, could result in minor personal injury or
product/property damage.
Indicates a statement to the effect that a FUNCTIONAL TESTER cannot be used to access the ACCURACY of a pulse
oximeter probe or a pulse oximeter monitor.
NOTE
Provides application tips or other useful information to ensure that you get the most from your product.
The pulse oximeter is not part of the body or tissue.
1.1.1 Dangers
There are no dangers that refer to the product in general. Specific “Danger” statements may be given in the respective sections of
this manual.
1.1.2 Warnings
WARNINGS
Before putting the system into operation, verify that the equipment, connecting cables and accessories are in correct
working order and operating condition.
To avoid explosion hazard, do not use the equipment in the presence of flammable anesthetics, vapors or liquids.
Do not open the equipment housings; electric shock hazard may exist. All servicing and future upgrades must be carried
out by the personnel trained and authorized by our company only.
When using the equipment with electrosurgical units (ESU), make sure the personnel is safe.
Do not come into contact with the personnel during defibrillation. Otherwise serious injury or death could result.
Do not rely exclusively on the audible notice system for personnel monitoring. Adjustment of notice volume to a low level

HS20A Pulse Oximeter Operator’s Manual HS20A-03-RDP-003 V4.0
Copy Right. Hunan Accurate Bio-Medical Technology Co., Ltd Page 8 / Total 39
or off may result in a hazard to the personnel. Remember that notice settings should be customized according to different
or personnel situations and always keeping the personnel under close surveillance is the most reliable way for safe
personnel monitoring.
The physiological data and notice messages displayed on the equipment are for reference only and cannot be directly used
for diagnostic interpretation.
To avoid inadvertent disconnection, route all cables in a way to prevent a stumbling hazard. Wrap and secure excess
cabling to avoid risk of entanglement or strangulation by personnel.
No modification of this equipment is allowed.
The maximum temperature that the applied part can achieve is 42.2℃at an environmental temperature of 40℃.
The continuous test time of one part shall not exceed 2 hours, and the test part shall be replaced.
Applied part having contact with the patient for a time “t”, 10 min ≤t≤2 hours.
Don’t near active HF surgical equipment and the RF shielded room of an ME system for magnetic resonance imaging,
where the intensity of EM disturbances is high.
Use of this equipment adjacent to or stacked with other equipment should be avoided because it could result in improper
operation. If such use is necessary, this equipment and the other equipment should be observed to verify that they are
operating normally.
Use of accessories, transducers and cables other than those specified or provided by the manufacturer of this equipment
could result in increased electromagnetic emissions or decreased electromagnetic immunity of this equipment and result
in improper operation.
Portable RF communications equipment (including peripherals such as antenna cables and external antennas) should be
used no closer than 30 cm (12 inches) to any part of the equipment, including cables specified by the
manufacturer. Otherwise, degradation of the performance of this equipment could result.
1.1.3 Cautions
CAUTIONS
To ensure safety, use only parts and accessories specified in this manual.
At the end of its shelf life, the equipment, as well as its accessories, must be disposed of in compliance with the guidelines
regulating the disposal of such products. If you have any questions concerning disposal of the equipment, please contact us.
Magnetic and electrical fields are capable of interfering with the proper performance of the equipment. For this reason
make sure that all external devices operated in the vicinity of the equipment comply with the relevant EMC requirements.
Mobile phone, X-ray equipment or MRI devices are a possible source of interference as they may emit higher levels of
electromagnetic radiation.
Always install or carry the equipment properly to avoid damage caused by drop, impact, strong vibration or other
mechanical force.
WARNING
Use only accessories specified in this manual. Using other accessories may cause damage to the pulse oximeter.
Disposable accessories are designed for single-person use only. Reuse of them may cause a risk of contamination and
affect the measurement accuracy
Check the accessories and their packages for any sign of damage. Do not use them if any damage is detected.
The SpO2 sensor mentioned in this chapter meet the bio-compatibility requirements and complies with ISO 10993-1, ISO
10993-5 and ISO10993-10 standards.
It should change the measurement part per 2 hours when user continuing using for detecting.
The measured value is best when the pulse rate waveform is smooth and stable after normalization. Data update period:

HS20A Pulse Oximeter Operator’s Manual HS20A-03-RDP-003 V4.0
Copy Right. Hunan Accurate Bio-Medical Technology Co., Ltd Page 9 / Total 39
≤3 pulse rate cycles, <30s.
FUNCTIONAL TESTER cannot be used to assess the ACCURACY of a PULSE OXIMETER .
The nature of Reminder signals is continue to turning on for 1s. And the intervals between Reminder signals is turn on 1
seconds and turn off 4 second. One cycle has 5 seconds.
1.1.4 Notes
NOTES
Put the equipment in a location where you can easily see the screen and access the operating controls.
Keep this manual in the vicinity of the equipment so that it can be obtained conveniently when needed.
The emissions characteristics of this equipment make it suitable for use in industrial areas and hospitals (CISPR 11 class A).
If it is used in a residential environment (for which CISPR 11 class B is normally required) this equipment might not offer
adequate protection to radio-frequency communication services. The user might need to take mitigation measures, such as
relocating or re-orienting the equipment.
1.2 Equipment Symbols
Direct Current(DC)(Only for lithium)
Attention: Consult accompanying documents (this manual).
Auxiliary output connector
Notification silence button
Setting button
Power button
Up button
Down button
Manufacturer
Date of manufacture
Serial number
Type BF applied part, defibrillation protected
European community representative

HS20A Pulse Oximeter Operator’s Manual HS20A-03-RDP-003 V4.0
Copy Right. Hunan Accurate Bio-Medical Technology Co., Ltd Page 10 / Total 39
The following definition of the WEEE label applies to EU member states only.
This symbol indicates that this product should not be treated as household waste.
Power supply connector (Only for lithium)
Safety Class II equipment (Only for lithium)
Charging indicator light (Only for lithium)

HS20A Pulse Oximeter Operator’s Manual HS20A-03-RDP-003 V4.0
Copy Right. Hunan Accurate Bio-Medical Technology Co., Ltd Page 11 / Total 39
2 The Basics
2.1 Introduction
2.1.1 Intended Use
Monitoring of functional arterial oxygen saturation (SpO2) and pulse rate.
WARNING
This pulse oximeter is intended for use only by clinical professionals or under their guidance. It must only be used by
persons who have received adequate training in its use. Anyone unauthorized or untrained must not perform any
operation on it.
2.1.2 Intended operator
The intended operator of the pulse oximeter are clinical professionals or under their guidance. It must only be uesed by persons who have
received adequate training in its use. Anyone unauthorized or untrained must not perform any operation on it .
2.1.3 Intended Patient Population
The Pulse Oximeter is intended for adult, adolescent, child, infant and neonatus patients.
2.1.4 Medical Condition
The Pulse Oximeter is intended to be used in hospitals and clinics.
2.1.5 Essential Performance
1.Pulse rate.
2.Blood oxygen saturation concentration.
WARNING
Blood oxygen and pulse rate inaccurate measurement probably may lead to the doctors do false diagnosis.
2.1.6 Contraindications
None.
2.1.7 Components
This pulse oximeter consists of a main unit and an SpO2sensor.
2.1.8 Operator Position
This device is a handheld portable pulse oximeter. Generally, the operator should use it within half a meter from the device.
2.1.9 Validation
Generally, after operator turn on the device , and the beep will continue to turn on for 1 second prove that it is working normally .

HS20A Pulse Oximeter Operator’s Manual HS20A-03-RDP-003 V4.0
Copy Right. Hunan Accurate Bio-Medical Technology Co., Ltd Page 12 / Total 39
2.2 Main Unit
2.2.1 Front View
1. Display screen
2. Power button
Press this button to turn the pulse oximeter on after the batteries are installed.
Press and hold it for 2 seconds to turn off the pulse oximeter.
Press this button for 1 second, the menu screen can quickly return to measurement interface.
3. Up button
Press this button to change the value of select menu item or raise the beat volume.
4. Down button
Press this button to change the value of select menu item or lower the beat volume.
5. Power Indicating Lamp(Only for lithium)
It is a LED that lights green and yellow.The status of the LED is specified as follows:
Green: The lithium battery of the device has been fully charged when the power adapter is connected to the device;
Yellow: The lithium battery of the device is being charged when the power adapter is connected to the device;
Off: The device configured with the lithium battery is not connected to the power adapter.
6. Power Supply Connector(Only for lithium)
It is used to connect the AC adapter.
7. Speaker
8. Setting button
Press this button to enter the main menu.
9. Notice Silence Button
Press this button to pause or reactivate the notice sound.
10. Notice indicating lamp

HS20A Pulse Oximeter Operator’s Manual HS20A-03-RDP-003 V4.0
Copy Right. Hunan Accurate Bio-Medical Technology Co., Ltd Page 13 / Total 39
When an notice occurs, this lamp will light up as defined below:
High level notices: the lamp quickly flashes red.
Medium level notices: the lamp slowly flashes yellow.
2.2.2 Rear View and Right View
1. Sensor connector
It is used to connect an SpO2sensor to measure the oxygen saturation.
2. Cord hole
3. Battery door
2.3 Display Views
The following figures show the layout of the normal screen.:
1.Alarm information Area 2.SpO2label

HS20A Pulse Oximeter Operator’s Manual HS20A-03-RDP-003 V4.0
Copy Right. Hunan Accurate Bio-Medical Technology Co., Ltd Page 14 / Total 39
3.SpO2(%) Value 4.Wave Area
5. Tech Information Area 6.User Type
7. Function ICON Area 8.PR(bpm) label
9.User ID 10.PR Value
11.Pulse Bar 12.Time
13.Battery level
2.3.1 SpO2Area
1. SpO2label and unit
2. Oxygen saturation reading
2.3.2 PR Area
1. PR label and unit
2. Pulse rate reading
2.3.3 Information Area
1. Physiological Alarm Area
2. Technology Alarm Area
3. Battery level

HS20A Pulse Oximeter Operator’s Manual HS20A-03-RDP-003 V4.0
Copy Right. Hunan Accurate Bio-Medical Technology Co., Ltd Page 15 / Total 39
3 Getting Started
3.1 Unpacking and Checking
Before unpacking, examine the packing case carefully for signs of damage. If any damage is detected, contact the carrier.
If the packing case is intact, open the package and remove the equipment and accessories carefully. Check all materials as per the packing
list and check for any mechanical damage. Contact us in case of any problem.
NOTE
Save the packing case and packaging material as they can be used if the equipment must be reshipped.
WARNING
Keep the packing material out of children’s reach. Disposal of the packaging material should observe the applicable waste
control regulations.
The equipment might be contaminated during storage and transport. Before use, please verify whether the packages,
especially the packages of the single use accessories, are intact. In case of any damage, do not apply it to person.
3.2 Environmental Requirements
The operating environment of the equipment must meet the requirements specified in this manual. When the equipment is moved from
one place to another, condensation may occur as a result of temperature or humidity difference. In this case, never start the system before
the condensation disappears.
WARNING
Make sure that the operating environment of the equipment meets the specific requirements. Otherwise the equipment may
not meet the specifications claimed in this manual and unexpected consequences, e.g. damage to the equipment, could
result.
3.3 Power On the Pulse Oximeter
1.Before use, check whether there is any mechanical damage on the pulse oximeter.
2. Install the alkaline batteries or the lithium ion battery and ensure that the batteries have sufficient power.
3. Plug the SpO2extension cable into the multifunctional connector.
4. Press the Power button. The pulse oximeter enters the main screen.
WARNING
Do not use the pulse oximeter for monitoring if it is mechanically damaged or appears abnormal. Contact your service
personnel or us.
3.4 Power Off the Pulse Oximeter
Shut down the pulse oximeter:
1. Confirm that the person monitoring is finished.
2. Disconnect the SpO2extension cable from the pulse oximeter.
3. Press and hold the Power button for 2 seconds to shut down the device.

HS20A Pulse Oximeter Operator’s Manual HS20A-03-RDP-003 V4.0
Copy Right. Hunan Accurate Bio-Medical Technology Co., Ltd Page 16 / Total 39
4 Basic Operations
4.1 Adjusting the Pulse Volume
To adjust the pulse volume:
1. Press [SET] button, enter the Main Menu.
2. Press the [Up]/[Down] button, select the [System].
3. Press the [SET] button, enter the System Menu.
4. Press the [Up]/[Down] button, select the [Sound volume].
5. press the [SET] button, enter the Sound Volume setting.
6. Press the [Up]/[Down] button, set a value between 0 and 10.
7. Press the [SET] button, quit the Sound Volume setting.
8. Press the Power button for 1 second, the menu screen will quickly return to the measurement interface.
NOTE
0 means the pulse volume is turned off, and 10 is the maximum volume.
Increase/decrease the pulse volume by pressing the Up/Down button in the case that no menu is opened.
During SpO2 monitoring, the pitch of the pulse tone changes as the patient’s oxygen saturation level changes.
The pitch of the tone rises as the oxygen saturation level increases and falls as the oxygen saturation level decreases.
4.2 Selecting Patient Type
WARNING
Be sure to select correct patient type setting for your patient before measurement. Wrong patient category may result in
patient hazard due to improper notice limits.
To admit a patient:
1. Press [SET] button,enter the Main Menu.
2. Press the [Up]/[Down] button,select the [Patient].
3. Press the [SET] button,enter the Patient Menu.

HS20A Pulse Oximeter Operator’s Manual HS20A-03-RDP-003 V4.0
Copy Right. Hunan Accurate Bio-Medical Technology Co., Ltd Page 17 / Total 39
4. Press the [Up]/[Down] button,select the [Patient Type].
5. Press the [SET] button,enter the Patient Type setting.
6. Pressing the [Up]/[Down] button,set to a value:ADU(Adult), PED(pediatric),NEO(neonate).
7. Press the [SET] button,exit the Patient Type setting.
8. Press the Power button for 1 second, the menu screen can quickly return to the measurement interface.
4.3 Setting Alarm Limit
4.3.1 Setting PR High Alarm Limit
To adjust the PR high alarm limit:
1.Press [SET] button, enter the Main Menu.
2.Press the [Up]/[Down] button, select the [Alarm].
3.Press the [SET] button, enter the Alarm Menu.
4.Long press the [Up] button for 3s, and repeat three times.
5.Press the [Up]/[Down] button, select the [PR Alarm High].
6.press the [SET] button, enter the PR Alarm High setting.
7.Press the [Up]/[Down] button, set a value between (low limit+1) and 250.
8. Press the [SET] button, quit the PR Alarm High setting.
9.Press the Power button for 1 second, the menu screen will quickly return to the measurement interface.
4.3.2 Setting PR Low Alarm Limit
To adjust the PR low alarm limit:
1.Press [SET] button, enter the Main Menu.
2.Press the [Up]/[Down] button, select the [Alarm].
3.Press the [SET] button, enter the Alarm Menu.
4.Long press the [Up] button for 3s, and repeat three times.
5.Press the [Up]/[Down] button, select the [PR Alarm High].
6.press the [SET] button, enter the PR Alarm Low setting.
7.Press the [Up]/[Down] button, set a value between 25 and (high limit - 1).
8. Press the [SET] button, quit the PR Alarm Low setting.
9.Press the Power button for 1 second, the menu screen will quickly return to the measurement interface.

HS20A Pulse Oximeter Operator’s Manual HS20A-03-RDP-003 V4.0
Copy Right. Hunan Accurate Bio-Medical Technology Co., Ltd Page 18 / Total 39
4.3.3 Setting SPO2High Alarm Limit
To adjust the SpO2 high alarm limit:
1.Press [SET] button, enter the Main Menu.
2.Press the [Up]/[Down] button, select the [Alarm].
3.Press the [SET] button, enter the Alarm Menu.
4.Long press the [Up] button for 3s, and repeat three times.
5.Press the [Up]/[Down] button, select the [SPO2 Alarm High].
6.press the [SET] button, enter the SPO2 Alarm High setting.
7.Press the [Up]/[Down] button, set a value between (low limit+1) and 100.
8. Press the [SET] button, quit the SPO2 Alarm High setting.
9.Press the Power button for 1 second, the menu screen will quickly return to the measurement interface.
4.3.4 Setting SPO2Low Alarm Limit
To adjust the SpO2 low alarm limit:
1.Press [SET] button, enter the Main Menu.
2.Press the [Up]/[Down] button, select the [Alarm].
3.Press the [SET] button, enter the Alarm Menu.
4.Long press the [Up] button for 3s, and repeat three times.
5.Press the [Up]/[Down] button, select the [SPO2 Alarm Low].
6.press the [SET] button, enter the SPO2 Alarm Low setting.
7.Press the [Up]/[Down] button, set a value between 88 and (high limit - 1).
8. Press the [SET] button, quit the SPO2 Alarm Low setting.
9.Press the Power button for 1 second, the menu screen will quickly return to the measurement interface.
4.4 Data Storage
■It can save 10 patents' data. There are 600 pcs storage of measured result for each patient.
■If the measured result have been saved successfully, user can see the graph or table in the menu “Graph”or “Table”

HS20A Pulse Oximeter Operator’s Manual HS20A-03-RDP-003 V4.0
Copy Right. Hunan Accurate Bio-Medical Technology Co., Ltd Page 19 / Total 39
4.4.1 Date Storage ON/OFF
1. Press [SET] button,enter the Main Menu.
2. Press the [Up]/[Down] button,select the [Data].
3. Press the [SET] button,enter the Data Menu.
4. Press the [Up]/[Down] button,select the [Storage].
5. Press the [SET] button,enter Storage setting.
6. Press the [Up]/[Down] button,set to a status: ON or OFF
7. Press the [SET] button,quit the Storage setting.
8. Press the [Power] button for 1 second, the menu screen can quickly return to the measurement interface.
4.4.2 Date Storage Time Step
Save a measured result every Data Storage Time Step
1. Press [SET] button,enter the Main Menu.
2. Press the [Up]/[Down] button,select the [Data].
3. Press the [SET] button,enter the Data Menu.
4. Press the [Up]/[Down] button,select the [Storage Time].
5. Press the [SET] button,enter Storage Time setting.
6. Press the [Up]/[Down] button, set to a value between 6 to 60,step 2.
7. Press the [SET],quit the Storage Time setting.
8. Press the [Power] button for 1 second, the menu screen can quickly return to normal operation display.

HS20A Pulse Oximeter Operator’s Manual HS20A-03-RDP-003 V4.0
Copy Right. Hunan Accurate Bio-Medical Technology Co., Ltd Page 20 / Total 39
5 Notices
Notices triggered by a vital sign that appears abnormal or by technical problems of the Pulse Oximeter, are presented to the user by visual
and audible notice indications.
5.1 Notice Categories
By nature, the pulse oximeter’s notices can be classified into three categories: physiological notices, technical notices and prompt
messages.
1. Physiological notices
Physiological notices, also called patient status notices, are triggered by a monitored parameter value that violates set notice limits or an
abnormal patient condition.
2. Technical notices
Technical notices, also called system status notices, are triggered by a device malfunction or a patient data distortion due to improper
operation or system problems.
3. Prompt messages
In fact, prompt messages are not notice messages, which are displayed in the technical notice area. Apart from the physiological and
technical messages, the pulse oximeter will show some messages which indicate the system status.
5.2 Notice Levels
By severity, the pulse oximeter’s physiological notices can be classified into three categories: high level notices, medium level notices
and low level notices.
1. High level notices
Indicate that the patient is in a life threatening situation and an emergency treatment is demanded.
2. Medium level notices
Indicate that the patient’s vital signs appear abnormal and an immediate treatment is required.
5.3 Notice Indicators
When an notice occurs, the pulse oximeter will indicate it through the following indications:
Notice lamp
Notice tone
Notice message
The notice lamp,tone and messages will be indicated differently according to different notice levels.
5.3.1 Notice Lamp
If a technical or a physiological notice occurs, the notice lamp will flash. The flashing color and frequency match the notice level as
follows:
High level notices: the lamp quickly flashes red.
Medium level notices the lamp slowly flashes yellow.
5.3.2 Notice Tones
When a technical or a physiological notice occurs, the pulse oximeter presents different notice tone patterns to match the notice level:
This manual suits for next models
1
Table of contents
Other Accurate Bio-Medical Technology Medical Equipment manuals
Popular Medical Equipment manuals by other brands

Getinge
Getinge Arjohuntleigh Nimbus 3 Professional Instructions for use

Mettler Electronics
Mettler Electronics Sonicator 730 Maintenance manual

Pressalit Care
Pressalit Care R1100 Mounting instruction

Denas MS
Denas MS DENAS-T operating manual

bort medical
bort medical ActiveColor quick guide

AccuVein
AccuVein AV400 user manual