Accurate Bio-Medical Technology WS Series User manual

Copy Right. Hunan Accurate Bio-Medical Technology Co., Ltd Page 1 / Total 29
User Manual
WS Series
Pulse Oximeter
Please read the manual carefully before use

Copy Right. Hunan Accurate Bio-Medical Technology Co., Ltd Page 2 / Total 29
Introduction
Thank you for your purchase of our pulse oximeter (“oximeter”). Prior to
use of the product, please read the content of this manual carefully to ensure
proper use of the product. After reading, please keep this manual properly for
future reference.
Hunan Accurate Bio-Medical Technology Co., Ltd. (“Accurate”) owns the
intellectual property rights associated with this User Manual and the product
described herein.
© Copyright owned by Hunan Accurate Bio-Medical Technology Co., Ltd.
Without the written permission of Accurate, no individual or organization shall
reproduce, amend or translate any part of this manual.
Version of Manual: V1.1
Issue date: 2023--8
Product Information
Product Name: Pulse Oximeter
Product Model: WS20A
Software Version:V1.0
Manufacturer: Hunan Accurate Bio-Medical Technology Co., Ltd.
Address: Accurate Industrial Park, No.108, Zhixian Road,
Xuelian Community,Xueshi Street of Yuelu District, 410208 Changsha, Hu
nan Province, PEOPLE'S REPUBLIC OF China
Tel: +86 731-85598539
EUROPEAN REPRESENTATIVE:
Name:Shanghai International Holding Corp. GmbH (Europe)
ADD: Eiffestrasse 80, 20537 Hamburg,Germany
Tel: +49-40-2513175 Fax: +49-40-255726

Copy Right. Hunan Accurate Bio-Medical Technology Co., Ltd Page 3 / Total 29
Foreword
Introduction
This manual introduces in detail the use and functions of the product
as well as how to operate it. Prior to use of the product, please carefully read
and understand the content of this manual to ensure proper use of the product
and safety of user.
This manual introduces the product having the most complete
configurations. Therefore, some content hereof may not apply to the product
you have purchased. If you have any question, please feel free to contact us.
Please keep this manual near the product for easy and prompt access
when needed.
Illustrations
All illustrations provided herein are for reference only. The settings or data
as can be seen in the illustrations may differ from those actually shown on the
product.
Conventions
Bold and italic: Represents chapters quoted.
[Character]: Represents character strings in the software.
→: Represents operating steps.

Copy Right. Hunan Accurate Bio-Medical Technology Co., Ltd Page 4 / Total 29
contents
1.Safety ....................................................................................................................................................................1
1.1 Safety Information .............................................................................................................................. 1
1.1.1DANGER .................................................................................................................................... 1
1.1.2WARNING..................................................................................................................................1
1.1.3CAUTION................................................................................................................................... 2
1.1.4NOTE ........................................................................................................................................... 3
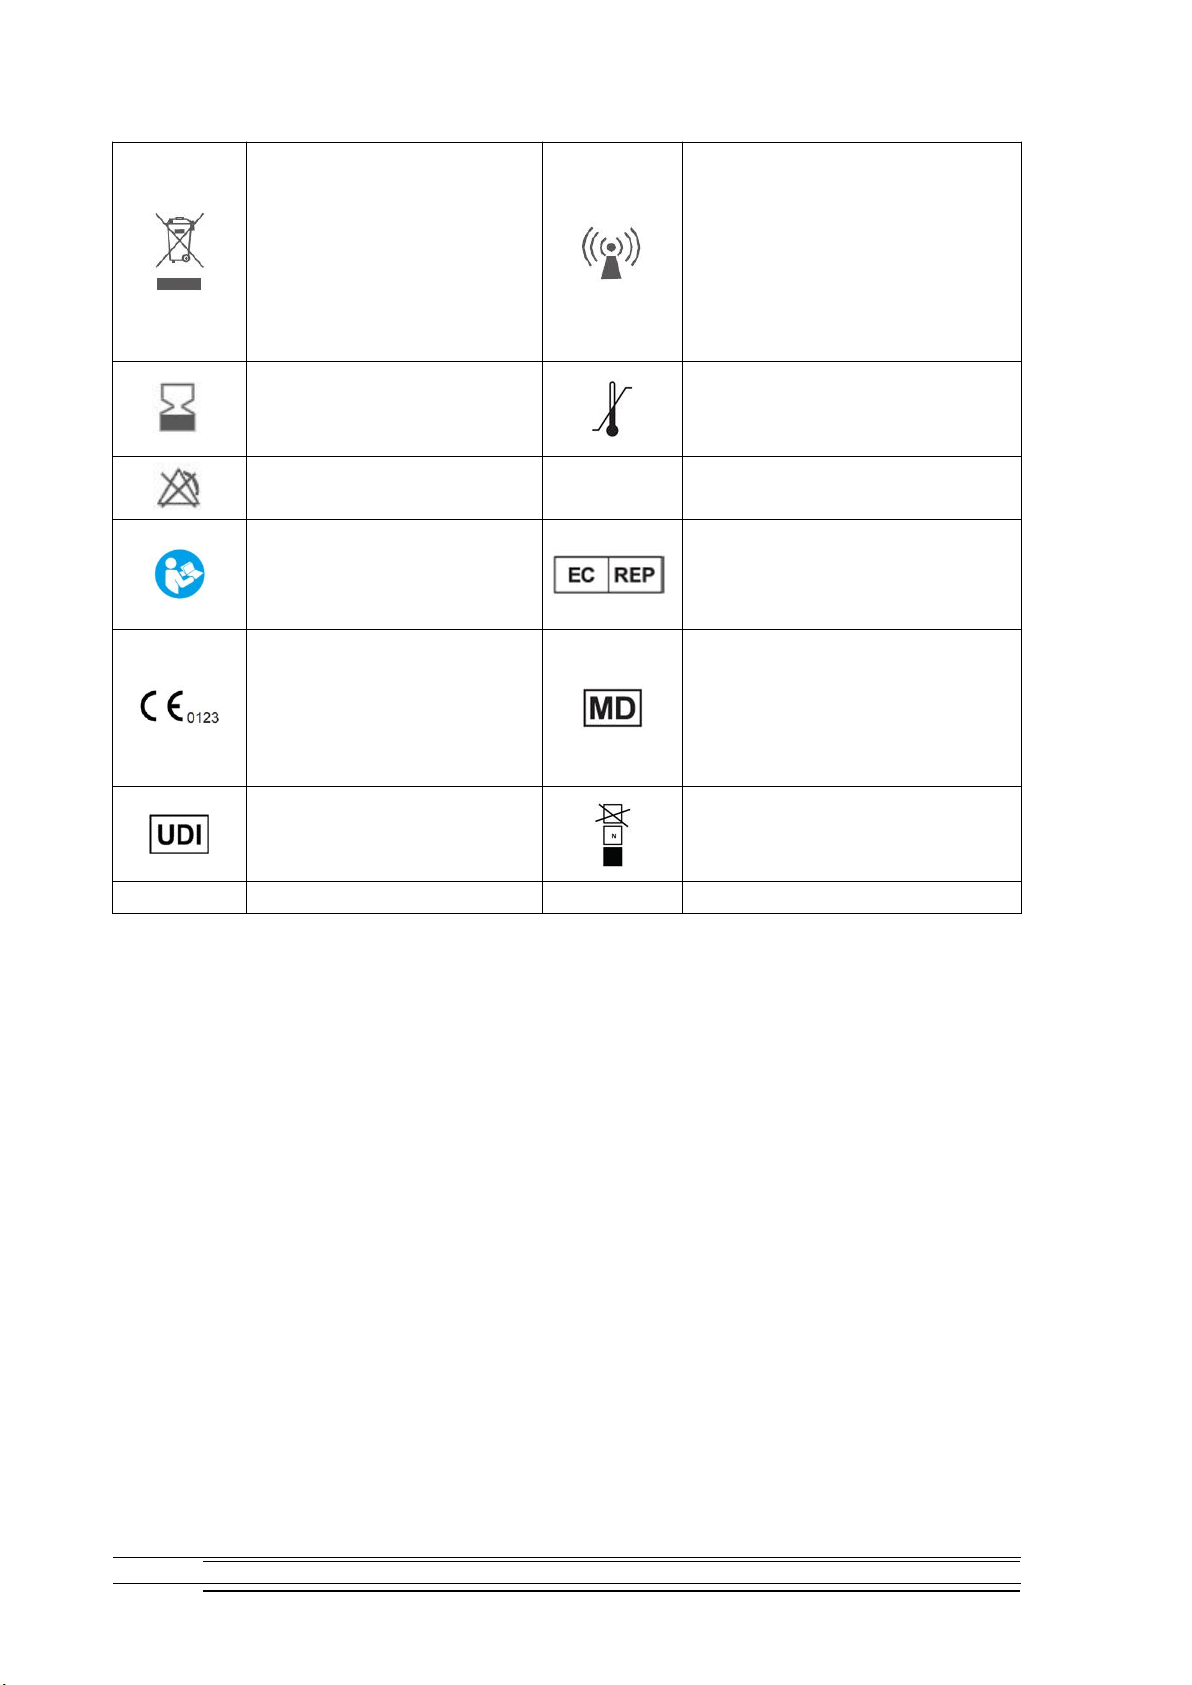
1.2 Device Symbols ...................................................................................................................................3
2. Overview .............................................................................................................................................................5
2.1 Introduction ............................................................................................................................................5
2.1.1 Scope of Application.............................................................................................................5
2.1.2 Intended Use...........................................................................................................................5
2.1.3 Intended operator ..................................................................................................................5
2.1.4 Intended Patient Population ............................................................................................. 5
2.1.5 Medical Condition ..................................................................................................................5
2.1.6 Contraindications ...................................................................................................................5
2.2 Appearance ........................................................................................................................................... 5
2.3 Product Function List ........................................................................................................................ 6
3. Preparation before Use ................................................................................................................................8
3.1 Unpacking Inspection ....................................................................................................................... 8
3.2 Environmental Requirements ........................................................................................................8
3.3 Start up....................................................................................................................................................8
3.4 Shutdown ............................................................................................................................................... 8
4. Basic Operations..........................................................................................................................................10
4.1 User Setup.......................................................................................................................................... 10
4.2 System Setup .....................................................................................................................................11
4.3 Review.................................................................................................................................................. 12
4.4 Report....................................................................................................................................................12
4.5 Battery Level Detection ................................................................................................................. 12
4.6 Transmission via Bluetooth..........................................................................................................12
4.7 Data Transmission ...........................................................................................................................12
4.8 Measurement Duration .................................................................................................................. 12
4.9 Main Unit State Indication ............................................................................................................ 12
5. SpO2Measurement and Information ...................................................................................................14
5.1 Overview .............................................................................................................................................. 14
5.2 Safety Information ............................................................................................................................14
5.3 Measurement Steps ........................................................................................................................15
5.4 Factors Affecting Measurement.................................................................................................15
6. Battery...............................................................................................................................................................16
6.1 Overview .............................................................................................................................................. 16
6.1.1 Lithium Battery Charging .................................................................................................16
7. Maintenance and Cleaning ......................................................................................................................17

Copy Right. Hunan Accurate Bio-Medical Technology Co., Ltd Page 5 / Total 29
7.1 Check.................................................................................................................................................... 17
7.2 Cleaning and Disinfection .............................................................................................................17
7.3 Scrapping .............................................................................................................................................18
8. Troubleshooting ............................................................................................................................................ 19
A. Product Specifications ...............................................................................................................................20
Technical Description ............................................................................................................................. 21
B. Network Security..........................................................................................................................................23
C. EMC.................................................................................................................................................................. 24
D. Default Factory Settings ...........................................................................................................................29
E. Product and Accessories ..........................................................................................................................29

Copy Right. Hunan Accurate Bio-Medical Technology Co., Ltd Page 1 / Total 29
1.Safety
1.1 Safety Information
DANGER
Indicates an imminently hazardous situation, which, if not avoided, could
result in death, serious injury or property damage.
WARNING
Alerts you to potential dangers or unsafe operations, which, if not avoided,
may result in death or serious injury or property damage.
CAUTION
Alerts you to potential dangers or unsafe operations, which, if not avoided,
may result in minor injury, product failure or damage, or property damage.
▲ NOTE
Emphasizes important precautions and provides instructions or explanations
for better use of the product.
1.1.1DANGER
This product does not involve any information about danger levels.
1.1.2WARNING
Prior to use, please first check the oximeter; do not use it if any abnormality is
found. If it is found that the device works abnormally during use, please stop
using it immediately.
In order to avoid fire or explosion, do not use the device in an environment with
anesthetic agent or other inflammables or explosives.
Do not open the housing of the device. In case of any problem, please contact
your dealer or the manufacturer.
The patient’s safety should be guaranteed when the device is used in conjunction
with electrosurgical equipment.
Please carefully place the power cord and the cables of various accessories to
prevent the patient from getting wound or suffocated, entanglement of the
cables, or electrical interference.
Only use the SpO2probe supplied by the manufacturer; use of a SpO2probe from
other source could result in performance degradation or damage of the device
or cause safety risks.
Do not use the SpO2probe supplied by the manufacturer in conjunction with other
equipment; otherwise, safety risks could be caused.
This device is not suitable for neonate or infant patients or people weighing less
than 30KG.
This device is just auxiliary equipment for clinical diagnosis; the physiological
parameters and waveforms it displays are only for reference by doctors, which
cannot be directly used as a basis for clinical treatment.
A functional tester cannot be used to assess the accuracy of the SpO2probe or

Copy Right. Hunan Accurate Bio-Medical Technology Co., Ltd Page 2 / Total 29
oximeter.
The computer connected with the oximeter for file transfer should conform to IEC
60950-1.
Don’t near active HF surgical equipment and the RF shielded room of an ME
system for magnetic resonance imaging, where the intensity of EM disturbances
is high.
Use of this equipment adjacent to or stacked with other equipment should be
avoided because it could result in improper operation. If such use is necessary,
this equipment and the other equipment should be observed to verify that they
are operating normally.
Use of accessories, transducers and cables other than those specified or
provided by the manufacturer of this equipment could result in increased
electromagnetic emissions or decreased electromagnetic immunity of this
equipment and result in improper operation.”
Portable RF communications equipment (including peripherals such as antenna
cables and external antennas) should be used no closer than 30 cm (12 inches)
to any part of the equipment, including cables specified by the manufacturer.
Otherwise, degradation of the performance of this equipment could result.
The temperature of the enclosure such as the button and LCD display can reach
44.4 degrees . The internal temperature of the shell near the battery can reach
47.1 degrees .So don't touch buttons and screens for more than 10 minutes.
1.1.3CAUTION
For the sake of user’s safety, please use accessories specified in this manual.
For scrapping and disposal of the oximeter and its package, please observe the
local laws and regulations.
The oximeter could be subjected to interference by other equipment even if such
equipment conforms to the requirements of applicable national standard on
emission.
Please properly install or carry the device to avoid damage due to drop, collision,
strong oscillation or other mechanical forces.
This device is used to measure the O2content in blood; the following factors could
degrade the measurement performance and accuracy of the oximeter:
1) Strong interference by light (e.g., fluorescent light, dual ruby light, infrared
heater, operating light, direct sunlight) in the application environment will
affect the measurement accuracy.
2) Water vapor and mist in the device.
3) The size of finger measured is out of range.
4) Weak pulse.
5) Venous pulse.
6) The shock, anemia, hypothermia or application of vasoconstrictors may
reduce the arterial blood flow to a non-measurable level.
7) Stain exists in blood vessels.

Copy Right. Hunan Accurate Bio-Medical Technology Co., Ltd Page 3 / Total 29
8) Concentration of the non-functional hemoglobin, like COHb or MetHb.
9) Dysfunction of important indices of hemoglobin (e.g., carboxyhemoglobin
and methemoglobin).
10) Arrhythmia.
11) External light radiation.
12) Intense activity of user, interference from electrosurgical equipment.
13) Existence of certain stains, such as methylene blue and indigo carmine.
14) Improper position of SpO2probe, or use of incorrect SpO2probe.
15) Not suitable for user with arrhythmia, heart failure, hypoperfusion (PI<0.3),
finger shivering, etc.
16) The finger is too thin or too cold.
1.1.4NOTE
NOTE
Please install the device at a position where observation, operation and
maintenance can be easily carried out.
The software for this device has been developed in accordance with the
requirements of IEC 60601-1-4 to minimize the probability of risks caused by
program error.
Do not attempt to open the housing for repair. If the product is damaged and
needs repair, it can be repaired by qualified service personnel designated by
the manufacturer. The manufacturer may provide the service personnel with
the Service Manual which contains information necessary for repair such as
circuit diagram, component list, legend and correction rules.
It is not suggested to place the SpO2probe at the same position of fingertip
too long within 24h.
1.2 Device Symbols
Symbol
Meaning
Symbol
Meaning
Notice. See the
accompanying documents
(this User Manual)
Keep away from sunlight
Power/Confirm key
This side up during transport
or placement
Up key
Type BF equipment
Down key
The device belongs to Class II
equipment
Manufacturer
Date of manufacture
Protect the package from
rain
The packaging box contains
fragile items. Handle with care

Copy Right. Hunan Accurate Bio-Medical Technology Co., Ltd Page 4 / Total 29
The symbol indicates that
the device should be sent
to the special agencies
according to local
regulation for separate
collection after its useful
life
Non-ionizing radiation
Use-by date
Temperature limit
No alarm system
IP22
Degree of protection against
liquid ingress
Caution, consult
accompanying documents
Authorized representative
This item is compliant
with REGULATION (EU)
2017/745 OF THE
EUROPEAN PARLIAMENT
AND OF THE COUNCIL.
Medical device
Unique device identifier
Stacking layer limit

Copy Right. Hunan Accurate Bio-Medical Technology Co., Ltd Page 5 / Total 29
2. Overview
2.1 Introduction
2.1.1 Scope of Application
The product is intended for monitoring of user’s SpO2and PR in hospitals and at
home.
WARNING
The oximeter should be used by or under the guidance of medical workers.
When using the device at home, user should carefully read the User
Manual before use and where necessary, consult the doctor, dealer or
manufacturer.Human contact part of the equipment meet the
bio-compatibility requirements and complies with ISO 10993-1, ISO
10993-5 and ISO10993-10 standards.
▲ NOTE
The oximeter can be used in hospitals or for home care.
The Pulse Oximeter is not suitable for use under hypoperfusion and
exercise conditions.
2.1.2 Intended Use
The Pulse Oximeter is intended to measure functional arterial oxygen saturation
(SpO2) and pulse rate of patients in Home Health Care and Medical Facility.
2.1.3 Intended operator
This pulse Oximeter is intended for use only by clinical professionals or under their
guidance. It must only be used by persons who have received adequate training in its
use. Anyone unauthorized or untrained must not perform any operation on it.
2.1.4 Intended Patient Population
The Pulse Oximeter is intended for adult patients.The patient’s finger thickness should
between 8 to 25.4 mm.
2.1.5 Medical Condition
The Pulse Oximeter is intended to be used in hospital,clinical institution, helthcare
community. We recommend index finger, middle finger and ring finger are suitable
position for monitor.
2.1.6 Contraindications
None
2.2 Appearance

Copy Right. Hunan Accurate Bio-Medical Technology Co., Ltd Page 6 / Total 29
1. Display screen
Display the SpO2and SpO2measurement trend graph; PR value, PR
measurement trend graph, pulse intensity bar chart, perfusion index (PI) value, pulse
wave, operating state of main unit, measurement duration, user ID, battery level, and
time.
2. Power/Confirm key
Power: Press this key to start the oximeter.
In Menu mode, it serves as the Confirm key.
3. Up key
This key has different functions in different situations. Press this key to move the
cursor upward, increase the value of a menu item, etc.
4. Down key
This key has different functions in different situations. Press this key to move the
cursor downward, reduce the value of a menu item, etc.
5. Multi-purpose multiplex interface
Connect the charging cable or SpO2probe.
6. Watchband
7. SpO2probe (model: A401-201)
2.3 Product Function List
WS20A
Display screen
SpO2
PR
Pulse wave
Battery level display
Multi-purpose multiplex interface
Display screen
Adjustable watchband
Down key
Up key
Power key
SpO2probe

Copy Right. Hunan Accurate Bio-Medical Technology Co., Ltd Page 7 / Total 29
Rechargeable
Bluetooth
Storage
※“” represents that the device has this function;
“/” represents that the device does not have this function.

Copy Right. Hunan Accurate Bio-Medical Technology Co., Ltd Page 8 / Total 29
3. Preparation before Use
3.1 Unpacking Inspection
Please check the packing box carefully before opening it. Please get in touch with
the carrier immediately if any damage is found. Properly open the packing box;
carefully take the device and other components out of the packaging box, and count
them item by item according to the Packing List. Check whether the device has any
mechanical damage and whether all articles are complete. If you have any question,
please contact us immediately.
▲NOTE
Please properly keep the packaging box and packaging materials for use
in future transport or storage.
WARNING
Please keep the packaging materials out of the reach of children. Please
observe the local regulations or the hospital’s waste disposal rules when
disposing of packaging materials.
The device may be contaminated with microorganisms during storage,
transport and use. Please confirm the package is complete prior to use,
and do not use the device if any damage is found.
3.2 Environmental Requirements
The operating environment for this device must conform to the environmental
requirements specified in this manual. When the device is moved from one
environment to another, condensation of the device could occur due to difference in
temperature or humidity. In such case, the device can be used only after condensation
disappears.
WARNING
Please make sure the device works under the specified environmental
conditions; otherwise, the technical specifications stated herein will not be
achieved, and unforeseeable consequences such as device damage may
take place.
If the oximeter is damaged or cannot work normally, it should not be used
for patient monitoring. Please contact the service personnel or our
Company immediately.
3.3 Start up
1. Prior to startup, please check whether the oximeter has any mechanical damage.
2. Make sure the remaining battery capacity is adequate.
3. Press the Power key to enter the main interface.
3.4 Shutdown

Copy Right. Hunan Accurate Bio-Medical Technology Co., Ltd Page 9 / Total 29
Please shut down the oximeter according to the following steps:
1. Confirm that the measurement is to be ended.
2. Disconnect the SpO2probe from the oximeter.
3. Place the main unit of oximeter still for a while (time can be set under Menu
Setup); then the oximeter will shut down automatically.

Copy Right. Hunan Accurate Bio-Medical Technology Co., Ltd Page 10 / Total 29
4. Basic Operations
4.1 User Setup
Measurement interface → Press the Confirm key to enter the interface → Main
interface → Press the Up/Down key to select a user menu, and press the Confirm key
to enter the user menu interface.
Set User ID
1. Press the Confirm key to confirm the selection of User ID;
2. Press the Up/Down key for selection;
3. Press the Confirm key to confirm the modification and return to other menu
for selection.
Set Age
1. Press the Confirm key to confirm the selection of Age;
2. Press the Up/Down key for selection;
3. Press the Confirm key to confirm the modification and return to other menu
for selection.
Set Sex
1. Press the Confirm key to confirm the selection of Sex;
2. Press the Up/Down key for selection;
3. Press the Confirm key to confirm the modification and return to other menu
for selection.
SpO2 Reminder ON/OFF
1. Press the Confirm key to confirm the selection of Reminder;
2. Press the Up/Down key to select ON/OFF;
3. Press the Confirm key to confirm the modification and return to other menu
for selection.
Set low limit for SpO2reminder
1. Press the Up/Down key to set the range of lower limit for SpO2reminder:
70%~94%;
2. Press the Confirm key to confirm the modification and return to other menu
for selection.
PR Reminder ON/OFF
1. Press the Confirm key to confirm the selection of Reminder;
2. Press the Up/Down key to select ON/OFF;
3. Press the Confirm key to confirm the modification and return to other menu
for selection.
Set high limit for PR reminder
1. Press the Confirm key to confirm the start of setting;
2. Press the Up/Down key to set the range of upper limit for PR reminder:
(lower limit + 1bpm)~250bpm;

Copy Right. Hunan Accurate Bio-Medical Technology Co., Ltd Page 11 / Total 29
3. Press the Confirm key to confirm the modification and return to other menu
for selection.
Set low limit for PR reminder
1. Press the Confirm key to confirm the start of setting;
2. Press the Up/Down key to set the range of lower limit for PR reminder:
25bpm~(upper limit - 1bpm);
3. Press the Confirm key to confirm the modification and return to other menu
for selection.
Remark: When the Reminder function is set to ON, if the value measured by the
pulse oximeter is beyond the reminder setting range and this state lasts
for some time, the measured value will flicker automatically and
meanwhile the vibration function will be turned on. You can press any
key to end this state.
4.2 System Setup
Time Setup (disabled when the main unit is inserted with a probe)
1. Measurement interface → Press the Confirm key to enter the interface →
Main menu → Setting → Time;
2. Press the Up/Down key to select the setting item, and press the Confirm
key to confirm the selection;
3. After selecting the item, press the Up/Down key to change the value, and
press the Confirm key to confirm the modification.
Backlight Brightness
1. Measurement interface → Press the Confirm key to enter the interface →
Main menu → Setting → Brightness;
2. Press the Confirm key to confirm the selection; press the Up/Down key to
select the level, and press the Confirm key to confirm the modification.
Backlight Time
1. Measurement interface → Press the Confirm key to enter the interface →
Main menu → Setting → Light Time;
2. Press the Confirm key to confirm the selection; press the Up/Down key to
select the option, and press the Confirm key to confirm the modification;
3. “10s” represents that backlight will be turned off automatically in 10s after
stop of operation; other options can be explained similarly.
Factory
1. Measurement interface → Press the Confirm key to enter the interface →
Main menu → Setting → Factory;
2. Press the Confirm key to confirm the selection; press the Up/Down key to
select the option, and press the Confirm key to confirm the modification;

Copy Right. Hunan Accurate Bio-Medical Technology Co., Ltd Page 12 / Total 29
4.3 Review
1. Measurement interface → Press the Confirm key to enter the interface →
Main menu → Review;
2. Display abnormality data in the measurement process.
4.4 Report
After the device continuously monitors SpO2and PR for some time, the software
will automatically generate a report according to the measured data for view by user.
For example, the device can provide long-time monitoring during sleep, and the
software will summarize and generate a sleep report according to the measured SpO2
and PR for user to view and know the measured results.
Note: The report is for reference only and cannot be used as a basis for
treatment.
4.5 Battery Level Detection
The device automatically monitors the battery level, and displays and updates it
on the display screen. When the battery level is displayed as , please charge
the battery timely.
4.6 Transmission via Bluetooth
Turn on Bluetooth on your smart phone; launch the specific application to connect
the device so that you can upload data via Bluetooth.
▲ Note: This device only support Bluetooth Protocol 4.0 and higher version.
4.7 Data Transmission
In USB mode, the PC can correctly display data files saved during measurement,
and such files can be copied to the PC.
4.8 Measurement Duration
Turn on the SpO2main unit and connect the probe; insert your finger into the
probe and start measurement. The main interface displays 00:00:00; when a value is
obtained, it will update the measurement time in real time. Unplug the probe, the
measurement time will continue accruing until the main unit can no longer receive
detection data, and then it will stop automatically.
4.9 Main Unit State Indication
When the probe is not inserted after the SpO2main unit is turned on, the state
indication is “No Senser”;

Copy Right. Hunan Accurate Bio-Medical Technology Co., Ltd Page 13 / Total 29
When the probe is inserted after the SpO2main unit is turned on, the state
indication is “Testing...”.

Copy Right. Hunan Accurate Bio-Medical Technology Co., Ltd Page 14 / Total 29
5. SpO2Measurement and Information
5.1 Overview
Continuous non-invasive pulse SpO2oximetry is employed for SpO2
measurement. It measures the luminous flux of light of specific wavelength emitted by
the luminous light source of SpO2probe after absorption by oxyhemoglobin in the
patient’s tissue and arrival at the photoelectric detector, thus to obtain SpO2and PR.
This oximeter has been calibrated to display functional SpO2.
The oximeter provides:
1. Time
2. Bluetooth connection state
3. Battery level
4. SpO2: The percentage of oxyhemoglobin in total hemoglobin.
5. PR: The detected number of pulses per minute.
6. Bar chart: The amplitude of bar chart represents the level of pulse strength.
7. PI: Perfusion index.
8. Measurement duration: Records the duration of measurement.
9. Main unit operating state: The current state of the main unit.
10. PR measurement trend graph
11. SpO2measurement trend graph
12. Pulse wave
13. ID: User’s ID code (where applicable)
Statement: All waveforms displayed have been normalized.
5.2 Safety Information
WARNING
When the patient has the hypoxia tendency, the blood sample should be
analyzed so as to completely know the patient’s condition.
Avoid using the oximeter when MRI equipment is used; otherwise, the

Copy Right. Hunan Accurate Bio-Medical Technology Co., Ltd Page 15 / Total 29
induced current may cause severe burn to the patient.
During long-time continuous monitoring, the position where the SpO2probe is
fitted should be checked every two hours; also, the probe should be properly
moved in case of any skin change or every four hours. Some patients may
require more frequent examinations, such as patients with skin allergy. This is
because long-time continuous monitoring may increase the possibility of
unforeseeable skin changes, such as allergy, er ythrosis, blistering or
pressure necrosis.
It is suggested to change the wearing position every 2-3h; if the patient feels
uncomfortable or suffers allergy, stop using the device immediately and where
necessary, seek medical advice.
The cable of electrosurgical equipment should not be entangled with the cable
of SpO2probe.
Do not place the SpO2probe on a limb with any arterial duct or intravenous
line.
Do not place the SpO2probe and the BP cuff on the same limb since blood
flow occlusion during BP measurement will affect the SpO2reading.
5.3 Measurement Steps
1. Clean the measuring position, such as colored nail polish.
2. Place the SpO2probe at the measuring position.
3. Connect the main unit and SpO2probe.
4. Generally measured data can be read from the screen in 10s.
5.4 Factors Affecting Measurement
If you have any doubt about the accuracy of the measured result, please first
use other method to check the patient’s vital signs, and then check the SpO2main
unit and the SpO2probe. See 1.1.3 for factors that could affect the measurement
accuracy:
▲Note: When signal is incomplete (signal noise is too high, signal quality
becomes poorer or signal disappears), the SpO2and PR values will become
invalid, and the main unit screen will display the component as “--”.
This manual suits for next models
1
Table of contents
Other Accurate Bio-Medical Technology Medical Equipment manuals