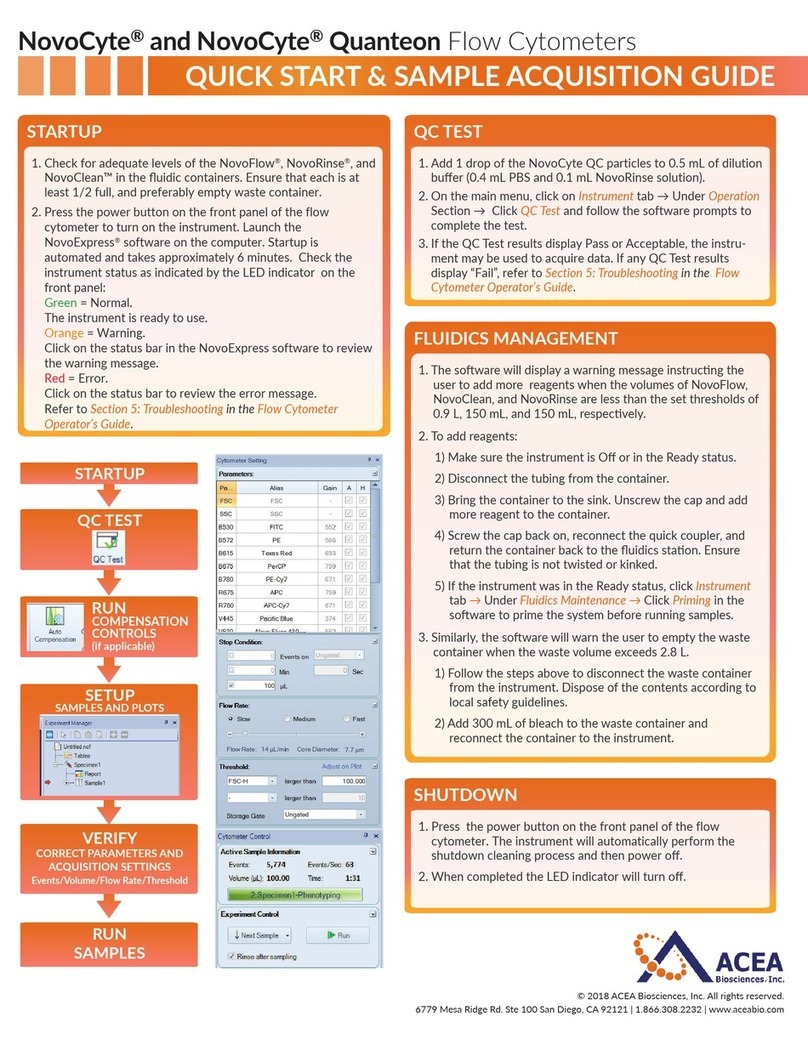
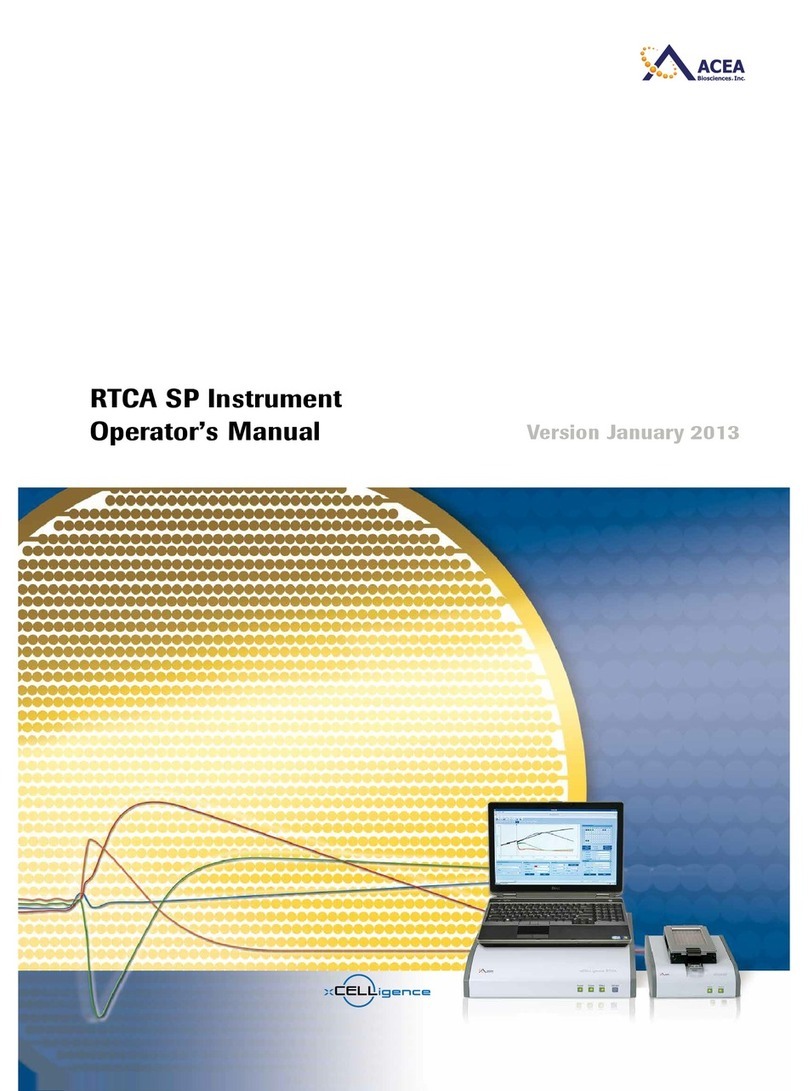
Acea NovoCyte Operating manual

Maintenance Guide
V2
NovoCyte®Flow Cytometer


3
Table of Content
Prologue 5
I. Revision History ........................................................................................................................5
II. Contact Information .................................................................................................................6
III. Using this Guide........................................................................................................................6
IV. Conventions ...............................................................................................................................6
V. Technical Support .....................................................................................................................7
1. Scheduled Maintenance 8
1.1 Preventative Maintenance......................................................................................................9
1.2 Replacing Fluidic System Consumables........................................................................... 13
2. Unscheduled Maintenance 19
2.1 Remove Bubbles .................................................................................................................... 19
2.2 Unclog the Sample Injection Probe (SIP) ........................................................................ 20
2.3 Clean the External Surface of the Instrument ................................................................. 21
2.4 Clean the Sample Injection Probe (SIP)........................................................................... 22
2.5 Decontamination ................................................................................................................... 24
2.6 Clean Fluidic System before Long-Term Storage............................................................ 25
2.7 Purge Fluidic System before Shipment............................................................................. 26
2.8 Calibrate the Fluidics Station.............................................................................................. 27
2.9 Clean the Optical Filters and Mirrors ................................................................................ 28

4
Table of Content

5
Prologue
Revision History
Prologue
I. Revision History
Version Revision Date
1.0 2015.12
1.1 2016.08
© Copyright 2015, ACEA Biosciences, Inc. All rights reserved. e product description
and its corresponding intellectual property rights belong to ACEA Biosciences, Inc.
e content in this guide may not be reproduced in any form, transmitted, transcribed,
stored in a retrieval system, or translated into any language or computer language, in any
form or by any means without prior written permission from ACEA Biosciences, Inc.
ACEA NovoCyte®© ACEA Biosciences, Inc. ACEA NovoCyte®ow cytometer and re-
lated reagents are the property of ACEA Biosciences, Inc.
ACEA NovoExpress®© ACEA Biosciences, Inc. ACEA NovoExpress®soware
is the property of ACEA Biosciences, Inc. Each sale of a stored unit of this so-
ware grants the purchaser a nonexclusive personal license. is soware may not be
duplicated, reproduced, or copied in any form or by any means whatsoever, except as
otherwise permitted by law.
e information in this guide is subject to change without notice. ACEA Biosciences
reserves the right to change its products and services at any time to incorporate the lat-
est technological developments. Even though this guide has been prepared with every
precaution to ensure accuracy, ACEA Biosciences assumes no liability for any errors or
omissions, nor for any damages resulting from the application or use of this information.
ACEA Biosciences welcomes customer input on corrections and suggestions for improve-
ment.
Questions or comments regarding the contents of this guide can be directed to the address
below or to your local ACEA Biosciences representative.
ACEA Biosciences, Inc.
6779 Mesa Ridge Rd. #100
San Diego, CA 92121
USA

6
Prologue
Contact Information
II. Contact Information
Manufacturer ACEA Biosciences, Inc.
6779 Mesa Ridge Rd., Suite 100
San Diego, CA 92121
USA
China Distributor ACEA Bio (Hangzhou) Co., Ltd.
Building 5, 2# Xiyuan Wu Rd., Xihu District
Hangzhou, Zhejiang Province, P. R. China
310030
International Distributors Please contact ACEA Biosciences, Inc., or visit
www.aceabio.com for a complete list of interna-
tional distributors
III. Using this Guide
is maintenance guide describes the maintenance of the ACEA NovoCyte ow cytom-
eter. Most of these functions are controlled by the ACEA NovoExpress soware. For ad-
ditional information about the ACEA NovoCyte, please refer to NovoCyte®Flow Cytom-
eter Operator’s Guide. For additional information about the ACEA NovoExpress soware,
please refer to NovoExpress®Soware Guide.
ACEA NovoCyte Flow Cytometer Maintenance Guide assumes that the user is familiar
with the Microso Windows®operating system. For questions regarding the Microso
Windows®operating system, see the operating system’s help and support les.
IV. Conventions
Text Conventions
To impart information that is consistent and easy-to-read, the following text conventions
are used in this guide:
Format Description
Numbered Listing
12......
Describes the steps in a procedure that must be performed
in the listed order.
Italic font, gold Points to a different chapter in this guide, which should be
referred to for better understanding.
Italic font Describes buttons, icons or functions when operating the
NovoExpress software. In addition, important notes and in-
formation are also shown in italic font.
→Indicates the sequence of the menu operation in NovoEx-
press software. For example, File →Print means to select the
Print function from the File menu.
Ctrl+X When used with keyboard characters, + means to press two
keys simultaneously. For example, Ctrl+C means to hold
down the Control key while pressing the letter C key.

7
Prologue
Technical Support
Symbols
e following table lists the symbols used in this guide:
Symbol Meaning Description
Biohazard This symbol indicates that certain precautions must
be taken when working with potentially infectious bio-
logical specimens and materials.
Laser Radiation This symbol indicates that the operation could po-
tentially cause exposure to laser radiation. Protective
measures should be taken during the operation.
Warning This symbol indicates that improper or unsafe opera-
tion could result in instrument damage, data loss, and
personal injury.
Shock Hazard This symbol indicates that the operation has a risk of
electric shock.
Important Note This symbol indicates information which is critical to
the success of the procedure or use of the product.
Additional Informa-
tion
This symbol provides additional information about the
current topic or procedure.
uuu Form Table continues on next page.
nThe End of the Table End of a table.
V. Technical Support
If there are operating or technical questions, please refer to the sections relating to the in-
strument operation in this guide. For additional technical support, please contact your lo-
cal ACEA Biosciences representative or distributor. When contacting ACEA Biosciences,
be sure to provide the following information:
►e product name, product model and serial number.
►Usage history of the instrument.
►Instrument status information on the status bar from the NovoExpress soware. Or if
there is a warning or error message, please also provide that information.
►Experiment information conducted on the instrument, if not condential.
►Details of recent instrument QC test.
For support within the US, please call 866-308-2232.
For support within China, please call 400-600-1063.
For users in other countries or regions, contact your local ACEA Biosciences representa-
tives or distributors, which may be found at www.aceabio.com.

8
1
1
Scheduled Maintenance
1. Scheduled Maintenance
It is important to conduct instrument maintenance on a regular basis in order to achieve
optimal performance for the instrument and obtain reliable data. ACEA NovoCyte incor-
porates automatic procedures for maintenances as much as possible, eliminating time-
consuming manual maintenance. is chapter describes the procedures to execute or con-
duct the maintenance procedures.
Table 1-1 lists the regular maintenance to be done on the NovoCyte instrument.
Maintenance Recommended Maintenance Frequency
Daily Start-up Daily. Automatic system cleaning during start-up.
Daily Shutdown Daily. Automatic system cleaning and decontam-
ination during shutdown.
Add Instrument Reagents (ACEA No-
voFlow Sheath Fluid, ACEA NovoRinse
Solution, and ACEA NovoClean Solu-
tion)
As needed. Check the instrument reagent volume
in the containers before each experiment and
add more reagents when necessary.
Empty Waste As needed. Check waste volume before each ex-
periment and empty waste container when nec-
essary.
Preventive Maintenance
►Clean the Sample Injection Probe
(SIP)
►Clean the SIP Cleaning Apparatus
►Conduct Extensive Rinse
►Unclog the Flow Cell
►Sterilize Instrument Reagent
Containers
Every month
Replacing Fluidic System Consumables
►Replace the ACEA Sheath Fluid
In-Line Filter
►Replace the Waste Filter
►Replace the ACEA NovoFlow
Sheath Fluid Inlet Filter
►Replace the ACEA NovoRinse and
ACEA NovoClean Solution Inlet
Filters
Every two months or prompted by NovoExpress
Software
n
Table 1-1 Scheduled Maintenance and Recommended Frequency

9
1
1
Scheduled Maintenance
Preventative Maintenance
1.1 Preventative Maintenance
It is recommended to conduct preventative maintenance once every month to ensure the
uidic system is in good condition.
►Clean the Sample Injection Probe (SIP)
Materials
►Clean so cloth
►ACEA NovoClean solution (1X)
►Deionized (DI) water
Procedure
1Turn off the power of the instrument.
2Open the top cover of the instrument.
3Locate the SIP.
Figure 1-1 Locate the SIP
uuu

10
1
1
Scheduled Maintenance
Preventative Maintenance
4Unscrew the brown connector by turning it counter clockwise.
Figure 1-2 Unscrew the Brown Connector
Sample injection probe directly contacts the biological samples which may be
biohazardous. Wear gloves when handling the sample injection probe.
Pay attention to the ferrule (indicated with a red arrow in Figure 1-3) at the end
of the tubing aer removing the brown connector from the slot. Handle the as-
sembly carefully and do not remove the ferrule from the tubing. Place the entire
assembly on a clean lint-free wipe.
Figure 1-3 Ferrule at the End of Tubing after Removing the Connector
uuu

11
1
1
Scheduled Maintenance
Preventative Maintenance
5Remove the SIP straight up from the housing slot.
Figure 1-4 Take SIP out from the Housing Slot
Sample injection probe directly contacts the biological samples which may be
biohazardous. Wear gloves when handling the sample injection probe.
Sample injection probe is fragile and may be damaged if handled improperly.
When cleaning the sample injection probe, please be careful and prevent deform-
ing or bending it.
6Prepare a damp cloth with ACEA NovoClean solution (1X). Wipe the sample injection
probe’s surface back and forth until the surface is cleaned.
7Prepare a damp cloth with DI water. Wipe the sample injection probe back and forth for
at least ve times to clean the ACEA NovoClean solution residue.
8Put SIP back into the housing slot after cleaning. Make sure that the SIP goes through
the hole of the SIP Cleaning Apparatus and the SIP is straight.
Figure 1-5 Put SIP back into the Housing Slot
9Install the brown connector and tubing by nger tightening it clockwise.
uuu

12
1
1
Scheduled Maintenance
Preventative Maintenance
10 Power on ACEA NovoCyte instrument and start NovoExpress software. After the instru-
ment is Ready, click Instrument → Fluidics Maintenance → Backush to ush the sample
injection probe.
n
►Clean the SIP Cleaning Apparatus
Materials
►Clean so cloth
►ACEA NovoClean solution (1X)
►Deionized (DI) water
Procedure
1Turn off the power of the instrument.
2Open the top cover of the instrument.
3Prepare a damp cloth with ACEA NovoClean solution (1X). Wipe the SIP cleaning ap-
paratus back and forth at least ve times.
4Prepare a damp cloth with DI water. Wipe the SIP cleaning apparatus back and forth at
least ve times.
5Power on NovoCyte instrument and start NovoExpress software. After the instrument is
Ready, click Instrument → Fluidics Maintenance → Backush to ush the sample injec-
tion probe.
n
SIP cleaning apparatus directly contacts the biological samples which may be bio-
hazardous. Wear gloves when handling the SIP cleaning apparatus.
When cleaning the SIP cleaning apparatus, please be careful to prevent damaging the
apparatus and sample injection probe.
►Conduct Extensive Rinse
When NovoCyte is Ready click Instrument →Fluidics Maintenance →Extensive Rinse
from NovoExpress soware, and the Extensive Rinse procedure will automatically be ex-
ecuted. e progress of the procedure will be shown in the NovoExpress status bar.
►Unclog the Flow Cell
When the NovoCyte is in Ready status, click Instrument →Fluidics Maintenance →Un-
clog from NovoExpress soware, and the Unclog procedure will automatically be execut-
ed. e progress of the procedure will be shown in the NovoExpress status bar.
►Sterilize Instrument Reagent Containers
It is very important to keep the instrument reagent free of bacteria for the cytometer. It
is highly recommended to clean and sterilize the instrument reagent containers once a
month or whenever there is a suspected bacteria growth or possible contamination (e.g.
by mishandling the containers). e reagent containers can be cleaned and sterilized using
the following method.

13
1
1
Scheduled Maintenance
Replacing Fluidic System Consumables
Materials
►Clean so cloth
►ACEA NovoClean solution (1X)
►Deionized (DI) water (or ACEA NovoFlow solution)
Procedure
1Wipe the outer surface of the container using medical gauze pads.
2Empty the reagent container. Fill the reagent container with at least 300 mL of ACEA
NovoClean solution (1X) and cap the bottle. Shake the container vigorously to let the
ACEA NovoClean solution cover the entire inner surface. Repeat for several times and
then soak for 30 min.
3Empty the reagent container. Fill about 500 mL DI water (or ACEA NovoFlow solution)
to reagent container and cap the bottle. Shake reagent container for at least 2 minutes.
4Repeat step 3 three times.
5Fill the reagent container all the way to the neck or close to the brim with 0.2 µm ltered
DI water or NovoFlow sheath uid. Soak 20 min and empty the reagent container.
6Wipe the outer surface of the container with a clean soft cloth. The container is ready to
use.
n
1.2 Replacing Fluidic System Consumables
e NovoCyte ow cytometer monitors the accumulated running time of the uidic sys-
tem consumables to ensure the consumables are changed in a timely manner for optimal
ow cytometry results. When the accumulated running time is reached, the NovoExpress
soware will prompt a message to remind the user to replace the consumables (Figure
1-6).
Click Replace to continue. Clicking the Close button will cancel the process and allow con-
tinued use of the system. However the consumables should be replaced promptly.
Figure 1-6 NovoExpress Software Message for Replacing Fluidic System Consumables
e uidic system consumable replacement process can also be initiated manually at
any time by clicking the Instrument →Replace Fluidic System Consumables icon in
the NovoExpress soware when the instrument is in Ready status.
Click the Replace button and a dialog box as shown in Figure 1-7 will be prompted.

14
1
1
Scheduled Maintenance
Replacing Fluidic System Consumables
Figure 1-7 NovoExpress Software Message for Fluidics Consumables Replacement
e following uidic system consumables should be replaced at the same time:
►ACEA NovoFlow sheath uid in-line lter (1pcs) (Cat. No. 2030002)
►Waste lter (1pcs) (Cat. No. 2030003)
►ACEA NovoFlow sheath uid inlet lter (1pcs) (Cat. No. 2030001)
►ACEA NovoRinse solution inlet lter (1pcs) (Cat. No. 2030005)
►ACEA NovoClean solution inlet lter (1pcs) (Cat. No. 2030007)
Follow the procedure described below to replace all of the uidic system consumables.
Once all of the uidic system consumables have been replaced with the new ones, click the
Next button to continue.
If Cancel is selected, a dialog box as shown in Figure 1-8 will be prompted. e process can
be aborted by clicking Yes button.
Figure 1-8 NovoExpress Software Message for Cancelling Fluidics System Consumable Replacement
A conrmation message will be prompted (Figure 1-9). Click Yes button to inform the
system that the consumables have been replaced.
Figure 1-9 NovoExpress Software Message Conrmation for Fluidics Consumables Replaced
Aer conrmation of uidics consumables being replaced, the NovoExpress soware will
prompt a window to remind users to conduct the Priming procedure (Figure 1-10).

15
1
1
Scheduled Maintenance
Replacing Fluidic System Consumables
Figure 1-10 NovoExpress Software Message for Priming after Replacing Fluidic System Consumables
During the Priming procedure, the progress of the Priming will be shown in the NovoEx-
press soware (Figure 1-11).
Figure 1-11 NovoExpress Software Message for Priming in Process
e Priming procedure can also be manually initiated by clicking Instrument →Fluid-
ics Maintenance →Priming on the NovoExpress soware when the instrument is in
Ready status.
Once the Priming procedure is completed, a dialog box will be prompted for conduting
the QC Test (Figure 1-12). Prepare the NovoCyte QC particle sample as described in Sec-
tion 2.3.1 of NovoCyte®Flow Cytometer Operator’s Guide and place it in the tube holder.
Click QC Test to initiate the QC Test. e QC Test will automatically start. Follow the steps
and complete the QC Test. A QC Test must be conducted each time when uidic system
consumables are replaced in order to check the performance of the system.
Figure 1-12 NovoExpress Software Message for Initiating the QC Test after Completion of Fluidic Sys-
tem Consumables Replacement
e following sections describe the detailed procedure for replacing uidic system con-
sumables. It is highly recommended to replace all the uidic system consumables at the
same time to ensure the optimal system performance. However, each component can also

16
1
1
Scheduled Maintenance
Replacing Fluidic System Consumables
be replaced individually if necessary. Click Instrument → Replace Fluidic System Consum-
ables in the NovoExpress soware to initiate the process. Always conduct the Priming
process aer the uidic system consumables have been replaced as prompted by the No-
voExpress soware or manually conduct the Priming process by clicking Instrument →
Fluidics Maintenance → Priming.
►Replace the ACEA NovoFlow Sheath Fluid In-Line Filter
Open the front panel of the NovoCyte instrument, and locate the sheath uid in-line lter
shown in Figure 1-13.
Figure 1-13 Sheath Fluid In-line Filter
Procedure
1Turn off the power of the instrument.
2Open the front panel of the instrument.
3Unscrew the Luer connectors at two ends of the lter to disconnect the tubings from the
lter.
Use lint free wipes to gently wipe of the sheath uid from the tubing and avoid
sheath uid dripping onto the instrument.
4Replace the old lter with a new one and correctly connect the tubings to the lter.
Finger tightening the Luer connectors only to avoid damage of the lters and lter
leakage.
5Turn on the NovoCyte instrument, and automatic start-up cleaning process will be initi-
ated. Observe the sheath uid ows through the lter properly and make sure there is no
leakage through the lter-tubing connections.
6Once the instrument is Ready, Click Instrument →Fluidics Maintenance →Priming to
prime the uidic system.
n
e ends of the sheath uid in-line lter are designed to be dierent on purpose to
ensure the in-line lter is connected into the system in the correct direction. Incorrect
direction would lead to system malfunction.
When replacing the sheath uid in-line lter, do not twist or kink the tubing.

17
1
1
Scheduled Maintenance
Replacing Fluidic System Consumables
►Replace the Waste Filter
Open the side panel of the NovoCyte instrument, and locate the waste lter as shown in
Figure 1-14.
Figure 1-14 Waste Filter
Procedure
1Turn off the power of the instrument.
2Open the side panel of the instrument.
3Unscrew the Luer connectors at two ends of the waste lter to disconnect the tubings
from the lter.
Use lint free wipes to gently wipe of the sheath uid from the tubing and avoid
sheath uid dripping onto the instrument.
4Replace the old lter with a new one and correctly connect the tubing to the lter.
Finger tightening the Luer connectors only to avoid damage of the lters and lter
leakage.
5Turn on the NovoCyte instrument, and automatic start-up cleaning process will be initi-
ated. Observe the waste ows through the waste lter properly and make sure there is
no leakage through the lter-tubing connections.
n
e ends of the waste lter are designed to be dierent on purpose to ensure the lter
is connected into the system in the correct direction. Incorrect direction would lead to
system malfunction.
When replacing the waste lter, do not twist or kink the tubing.
All biological samples or materials can contain infectious deadly disease. Please
be careful and always wear protective clothing, masks, and gloves when handling
the waste.
►Replace the ACEA NovoFlow Sheath Fluid Inlet Filter
ACEA NovoFlow sheath uid inlet lter is placed inside the ACEA NovoFlow container
to lter out micro-particles or impurities in the sheath uid.

18
1
1
Scheduled Maintenance
Replacing Fluidic System Consumables
Procedure
1Make sure the NovoCyte is in Ready status.
2Press the metal clip on the quick coupler to disconnect the tubing from the ACEA Novo-
Flow sheath uid container.
3Unscrew the cap and take the tubing-lter assembly out from the container and put it on
a clean lint-free wipe (Figure 1-15).
Figure 1-15 Change ACEA NovoFlow Sheath Fluid Inlet Filter
4Replace the old lter with a new one and correctly connect the tubing to the lter.
Please use proper force when tightening the Luer connectors.
e ends of the sheath uid inlet lter are dierent to ensure the lter is connected
into the system in the correct direction. Incorrect installation will lead to system
malfunction.
5Click Instrument →Fluidics Maintenance →Priming to prime the uidic system.
n
When replacing the sheath uid inlet lter, do not twist or kink the tubing.
►Replace the ACEA NovoRinse and ACEA NovoClean Solution Inlet Filter
ACEA NovoRinse and ACEA NovoClean solution inlet lters are placed inside the ACEA
NovoRinse and ACEA NovoClean containers, respectively, to lter out micro-particles or
impurities in the solution.
Procedure
1Make sure the NovoCyte is in Ready status.
2Press the metal clip on the quick coupler to disconnect the tubing from the ACEA Novo-
Rinse or ACEA NovoClean container.
3Unscrew the cap and take the tubing-lter assembly out from the container and put it
on a clean lint free wipe. Take off the old lter and replace with a new one (Figure 1-16).
Figure 1-16 Change ACEA NovoRinse and ACEA NovoClean Solution Inlet Filter
4Click Instrument →Fluidics Maintenance →Priming to prime the uidic system.
n

19
2
2
Unscheduled Maintenance
Remove Bubbles
2. Unscheduled Maintenance
e following instrument components should be checked occasionally and maintenance
or cleaning should be conduted when necessary. e frequency depends on how oen the
cytometer is used. Other components not listed here should also be checked periodically
for wear and replacement if necessary.
Table 2-1 lists the unscheduled maintenace to be done on the NovoCyte instrument.
Unscheduled Maintenance When to Perform
Remove Bubbles ►The CV of the data is larger than normal
►QC test failed
Unclog the Sample Injection Probe
(SIP)
►Much less amount of events are detected
than expected
►Perform a large amount of tests in one day
Clean the External Surface of the
Instrument
Keep the external surface of the instrument clean
Clean the Sample Injection Probe (SIP) The sample injection probe’s outer surface is dirty
Decontamination When suspecting bacteria contamination in the
system
Clean Fluidic System before Long-Term
Storage
No plan to run the NovoCyte cytometer for more
than two weeks
Purge Fluidic System before Shipment The NovoCyte ow cytometer needs to be
shipped
Calibrate the Fluidics Station Abnormal warning about the liquid level in the
reagent containers is observed
Clean the Optical Filters and Mirrors The optical lters and mirrors are dirty
n
Table 2-1 Unscheduled Maintenance and When to Perform
2.1 Remove Bubbles
When the CV of the data is larger than normal or the QC Test fails, there is a possibility
that bubbles exist inside the ow chamber. In this case, the following procedure should be
conducted to remove the bubbles.
When the NovoCyte instrument is in Ready status, place a tube containing at least 1 mL
of 70% ethanol into the sample holder. Click Instrument →Fluidics Maintenance →De-
bubble from the NovoExpress soware to execute the debubble procedure.

20
2
2
Unscheduled Maintenance
Unclog the Sample Injection Probe (SIP)
2.2 Unclog the Sample Injection Probe (SIP)
During a test, if much fewer events are detected than expected, there is possibility that the
SIP is clogged. To solve this issue, when the NovoCyte instrument is in Ready status, click
Instrument →Fluidics Maintenance →Backush to execute the Backush procedure to
unclog the SIP.
If the problem still exists aer Backush, follow the procedure below to manually clear the
clog inside the SIP.
Materials
►1/16” Inner Diameter (ID) tubing (included in the NovoCyte maintenance kit)
►A 10 mL syringe
►ACEA NovoClean solution (1X)
►ACEA NovoFlow sheath uid
Procedure
1Turn off the power of the instrument.
2Open the top cover of the instrument.
3Unscrew the connector to the SIP and remove the SIP from the instrument (Figure 2-1);
Please refer to Clean the Sample Injection Probe (SIP) of 1.1 Preventative Maintenance.
Figure 2-1 Remove the SIP from the Instrument
Sample injection probe is fragile and may be damaged if handled improperly.
When handling the sample injection probe, please be careful and prevent deform-
ing or bending it.
uuu
Other manuals for NovoCyte
2
Table of contents
Other Acea Laboratory Equipment manuals
Popular Laboratory Equipment manuals by other brands

Dionex
Dionex P680 Quick installation guide

FujiFilm
FujiFilm DRI-CHEM NX10N instruction manual

Sartorius Stedim Biotech
Sartorius Stedim Biotech CERTOMAT BS-1 operating manual

ThermoFisher Scientific
ThermoFisher Scientific KingFisher Apex Dx user guide

Drucker
Drucker 614B Operator's manual

SPE ware
SPE ware CEREX SYSTEM 96-II operating instructions