manuals.online logo
Brands
  1. Home
  2. •
  3. Brands
  4. •
  5. aci
  6. •
  7. Accessories
  8. •
  9. aci ACCESS series Installation instructions

aci ACCESS series Installation instructions

Automation Components, Inc.
2305 Pleasant View Road | Middleton, WI 53562
Phone: 1-888-967-5224 | Website: workaci.com
Page 1
Version: 5.0
I0000812
FIGURE 1: ENCLOSURE
DIMENSIONS
OUTDOOR SERIES
Installation & Operation Instructions Phone: 1-888-967-5224
Website: workaci.com
PRECAUTIONS
• DO NOT RUN THE WIRING IN ANY CONDUIT
WITH LINE VOLTAGE (24/120/230 VAC).
GENERAL INFORMATION
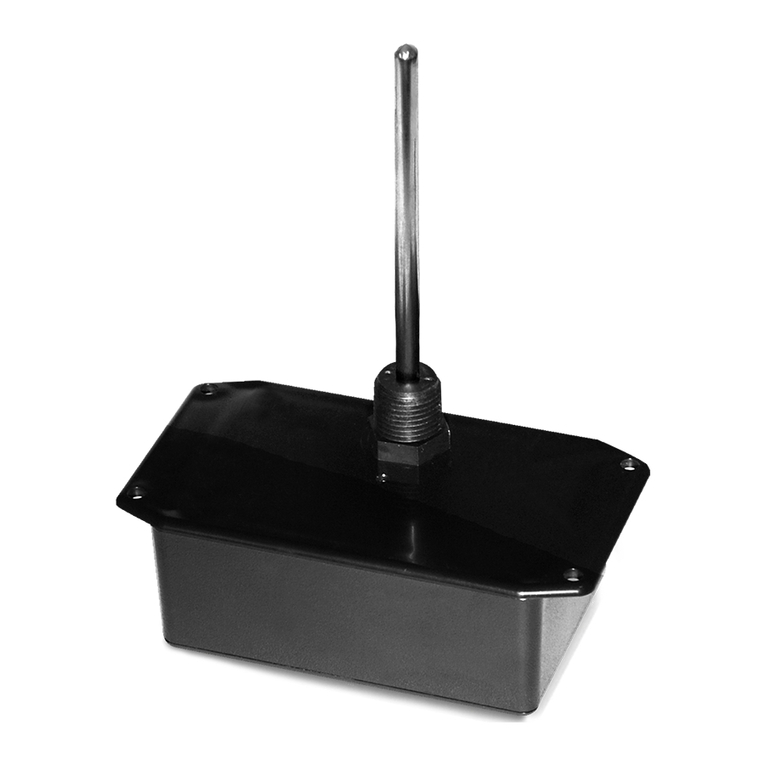
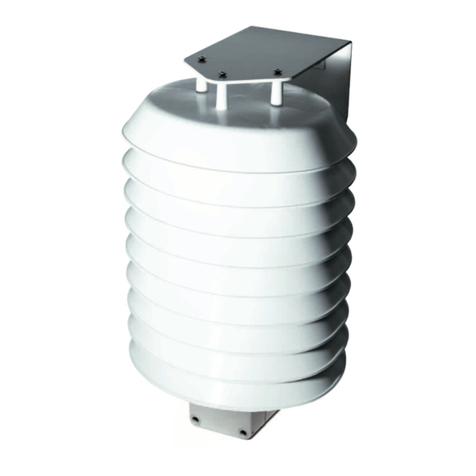
The outside air sensor is a single point temperature
sensor that is designed for use with electronic
controllers in commercial heating and cooling
building management systems. It is available with
multiple thermistor or RTD options.
For optimal temperature readings, follow these
tips:
•Avoid mounting to chimney walls, above windows,
above vents, near doors, or dampers.
•Mount at least 1’-2’ (0.3-0.6 m) below eave to
prevent thermal radiation from aecting
performance – see FIGURE 2 (p. 2).
•Mount at least 4’(1.22 m) above ground to prevent
thermal radiation rising up aecting
performance.
•Mount in shade on North side of the structure to
minimize sun exposure. In the Southern
hemisphere the South side of the building is
where the sensor should be mounted.
•The plastic tube that houses the sensor must be
pointed down to avoid debris, water, or ice
potentially aecting sensor performance.
MOUNTING INSTRUCTIONS
Attach the base directly to the wall. Mounting
holes are located at the corners of the housing –
see FIGURE 1 (right). Drill pilot holes for the
mounting screws. Use the enclosure mounting
holes as a guide, or use the dimensions listed
below to measure out. Install the PG11 watertight
fitting supplied with the sensor if not using
conduit. The outer knockout ring (PG 11/16) on
housing should not be removed when using a ½”
NPT conduit fitting.
NEMA -4X (-4X)
EURO (-EH)
BELL BOX (-BB)
3.11"
(78.99 mm)
2.69"
(68.28 mm)
3.94"
(100.1 mm)
2.55"
(64.77 mm) 2.23"
(56.71 mm) 1.96"
(49.784 mm)
4.00"
(101.57 mm) 2.12"
(53.72 mm) 2.69"
(68.28 mm)
2.97"
(75.44 mm) 2.29"
(58.10 mm) 3.18"
(80.77 mm)
4.70"
(119.46 mm) 4.70"
(119.46 mm) 3.77"
(93.98 mm)
4.72"
(119.83 mm)
4.60"
(116.88 mm)
Automation Components, Inc.
2305 Pleasant View Road | Middleton, WI 53562
Phone: 1-888-967-5224 | Website: workaci.com
Page 2
Version: 5.0
I0000812
MOUNTING (Continued)
Take care when mounting. Sensors should not be
placed in direct sunlight, or any other potential
heating or cooling sources that could aect
temperature being sensed. Refer to the Wiring
Instructions (p. 2) to make necessary connections.
WIRING INSTRUCTIONS
Open the cover of the enclosure. ACI recommends
16 to 26 AWG twisted pair wires or shielded cables
for all sensors. Signal wiring must be run separate
from low and high voltage wires (24/120/230VAC).
All thermistor sensors are non-polarity. All
thermistor type units are supplied with (2) ying
lead wires – see FIGURE 3 (right).
Connect thermistor/RTD wire leads to controller
analog input wires using wire nuts, terminal
blocks, or crimp style connectors. All wiring must
comply with all local and National Electric Codes.
After wiring, attach the cover to the enclosure.
Conrm gasketed cover is fastened securely in
order to prevent any moisture being introduced
into housing.
Note: When using a shielded cable, be sure to
connect only (1) end of the shield to ground at the controller. Connecting both ends of the shield to
ground may cause a ground loop. When removing the shield from the sensor end, make sure to properly
trim the shield to prevent any chance of shorting.
Note: If the controller requires a (2) wire input for a RTD, connect the (2) common wires (same color)
together. If the controller requires (3) wires, use (3) individual wires.
Recommended 1-2 ft
(0.3-0.6 m) Below Eave
Install Sensor
Downward
Roof
Ground
FIGURE 2: MOUNTED ASSEMBLY
FIGURE 3: TEMPERATURE WIRING
THERMISTOR OR
RTD 2WIRE
WIRE NUT
RTD 3WIRE
SAME COLOR WIRES
WIRE NUT
WIRING FROM CONTROLLER
ANALOG INPUT
WIRING FROM CONTROLLER
ANALOG INPUT
3-WIRE RTD WIRING
2-WIRE THERMISTOR or RTD WIRING
WARRANTY
The ACI Outdoor Series temperature sensors are covered by ACI’s Five (5) Year Limited Warranty, which is located
in the front of ACI’S SENSORS & TRANSMITTERS CATALOG or can be found on ACI’s website: www.workaci.com.
W.E.E.E. DIRECTIVE
At the end of their useful life the packaging and product should be disposed of via a suitable recycling
centre. Do not dispose of with household waste. Do not burn.
TROUBLESHOOTING
PROBLEM
Sensor reading is incorrect
Sensor reads innity/very high resistance
Sensor reads low resistance
Erratic readings
SOLUTION(S)
•Verify sensor wiring to controller is not damaged and has continuity.
•Verify sensor or wires are not shorted together.
•Verify controller is setup for correct sensor curve.
•Disconnect wires from sensor terminal block, tighten terminal block
screws down, and take a resistance (ohm) reading with a multimeter.
•Compare the resistance reading to the Temperature Vs Resistance
Curves online: http://www.workaci.com/content/thermistor-curves-0
•Verify proper mounting location to conrm no external factors are
aecting reading.
•Sensor or wires are open.
•Sensor or wires are shorted together.
•Condensation on PCB board
•Bad wire connections.
Automation Components, Inc.
2305 Pleasant View Road | Middleton, WI 53562
Phone: 1-888-967-5224 | Website: workaci.com
Page 3
Version: 5.0
I0000812
PRODUCT SPECIFICATIONS
Automation Components, Inc.
2305 Pleasant View Road | Middleton, WI 53562
Phone: 1-888-967-5224 | Website: workaci.com
Page 4
Version: 5.0
I0000812
A/1.8K: 1.8 KΩ nominal (Red/Yellow)
A/3K: 3 KΩ nominal (White/Brown)
A/AN (Type III): 10 KΩ nominal (White/White)
A/AN-BC: 5.238 KΩ nominal (White/Yellow)
A/CP (Type II): 10 KΩ nominal (White/Green)
A/50K: 50KΩ nominal (Brown/Yellow)
A/1.8K Series: +/- 0.5 °C @ 25 °C (77 °F)
and (+/-1.0 °C) (+/-1.8 °F)
A/100: 100 Ω nominal
+/- 0.06% Class A (Tolerance Formula: +/- °C = (0.15 °C + (0.002 * |t|))
where |t| is the absolute value of Temperature above or below 0 °C in °C)
@ -40 °C (-40 °F): +/- 0.23ºC (+/- 0.414ºF)
@ 0 °C (32 °F): +/- 0.15 °C (+/- 0.27 °F)
1 KΩ nominal (Orange/Yellow)
@ 21.1 °C (70 °F): +/- 1%
1 KΩ nominal (Red/Red)
@ -40 °C (-40 °F): +/- 1.52 °C (+/- 2.73 °F)
@ 0 °C (32 °F): +/- 0.4 °C (+/- 0.72 °F)
One
-40 to 70 °C (-22 to 158 °F)
-40 to 70 °C (-40 to 158 °F)
10 to 95% RH, non-condensing
”-EH” Enclosure: ABS Plastic with UV Protectant, UL94-V0
”-4X” Enclosure: Polystyrene Plastic, UL94-V2, IP66 (NEMA 4X)
“-BB” Enclosure: Aluminum, IP32 (NEMA 3R)
14” (35.6 cm) / 22 AWG (0.65 mm)
A/CSI: 10 KΩ nominal (Green/Yellow)
A/10KS: 10 KΩ nominal (White/Blue)
A/10K-E1: 10 KΩ nominal (Gray/Orange)
A/20K: 20 KΩ nominal (Brown/Blue)
A/100KS: 100 KΩ nominal (Black/Yellow)
A/10K-E1 Series: +/- 0.3 °C (+/- 0.54 °F)
All Else: +/- 0.2 °C (+/- 0.36 °F)
A/1K: 1 KΩ nominal
@ 70 °C (158 °F): +/- 0.29 °C (+/- 0.53 °F)
@ 21.1 °C (70 °F): +/- 0.17 °C (+/- 0.34 °F)
@ 54.4 °C (130 °F): +/- 0.56 °C (+/- 1. 00°F)
SENSOR NON-SPECIFIC INFORMATION
Number Sensing Points:
Operating Temperature Range:
Storage Temperature Range:
Operating Humidity Range:
Enclosure Specications:
(Material, Flammability,
NEMA/IP Ratings)
Lead Length | Conductor Size:
THERMISTOR
Sensor Output @ 25 °C (77 °F):
(Lead Wire Colors)
*Does not include CL2P
Accuracy @ 0-70 °C (32 - 158 °F):
PLATINUM
Sensor Output @ 0 °C (32 °F):
Accuracy:
BALCO
Sensor Output @ 21.1 °C (70 °F):
(Lead Wire Colors)
Accuracy:
NICKEL
Sensor Output @ 21.1 °C (70 °F):
(Lead Wire Colors)
Accuracy:
Other manuals for ACCESS series

16

This manual suits for next models

3

Other aci Accessories manuals

aci ACCESS series Installation instructions

aci

aci ACCESS series Installation instructions

aci Room Series Installation instructions

aci

aci Room Series Installation instructions

aci HAZARDOUS ROOM Series Installation instructions

aci

aci HAZARDOUS ROOM Series Installation instructions

aci Room Series Installation instructions

aci

aci Room Series Installation instructions

aci RT2630 Series Installation instructions

aci

aci RT2630 Series Installation instructions

aci DT2650 Installation instructions

aci

aci DT2650 Installation instructions

aci A/CTE-50 User manual

aci

aci A/CTE-50 User manual

aci OST2630 Installation instructions

aci

aci OST2630 Installation instructions

aci BACnet / Modbus IMMERSION Series Installation instructions

aci

aci BACnet / Modbus IMMERSION Series Installation instructions

aci VOC-ROOM Owner's manual

aci

aci VOC-ROOM Owner's manual

aci aSENSE RL User manual

aci

aci aSENSE RL User manual

aci TUCH2 User manual

aci

aci TUCH2 User manual

aci BACnet Outside Series Installation instructions

aci

aci BACnet Outside Series Installation instructions

aci SST2630 Installation instructions

aci

aci SST2630 Installation instructions

aci LM34 RSO Installation instructions

aci

aci LM34 RSO Installation instructions

aci A/CTA2 Series Installation instructions

aci

aci A/CTA2 Series Installation instructions

aci WPR2-300 Series User manual

aci

aci WPR2-300 Series User manual

aci DUCT TEMPERATURE Series Installation instructions

aci

aci DUCT TEMPERATURE Series Installation instructions

aci A/TT Remote Probe Series Installation instructions

aci

aci A/TT Remote Probe Series Installation instructions

aci DUCT Series User manual

aci

aci DUCT Series User manual

aci A/ASCS User manual

aci

aci A/ASCS User manual

aci HAZARDOUS ROOM Series Installation instructions

aci

aci HAZARDOUS ROOM Series Installation instructions

aci DRN3.1 User manual

aci

aci DRN3.1 User manual

aci RTD Freezer Series User manual

aci

aci RTD Freezer Series User manual

Popular Accessories manuals by other brands

Hydreon RG-11 manual

Hydreon

Hydreon RG-11 manual

ring VIDEO DOORBELL Setup and installation guide

ring

ring VIDEO DOORBELL Setup and installation guide

Vega VEGAPULS 67 Quick setup guide

Vega

Vega VEGAPULS 67 Quick setup guide

FUTABA SBC-1 instruction manual

FUTABA

FUTABA SBC-1 instruction manual

Baumer OADM 260I1101/S14C manual

Baumer

Baumer OADM 260I1101/S14C manual

Byron SX-54 quick start guide

Byron

Byron SX-54 quick start guide

Halfords 456686 instructions

Halfords

Halfords 456686 instructions

Advantech WISE-2410 user manual

Advantech

Advantech WISE-2410 user manual

Anker PowerCore+ 19000 PD Welcome guide

Anker

Anker PowerCore+ 19000 PD Welcome guide

nedis DOORB211WT quick start guide

nedis

nedis DOORB211WT quick start guide

Audient iD44 user manual

Audient

Audient iD44 user manual

SICK WS16 operating instructions

SICK

SICK WS16 operating instructions

Vega VEGAPULS 69 Quick setup guide

Vega

Vega VEGAPULS 69 Quick setup guide

Russell Hobbs RH8WC2-SB user guide

Russell Hobbs

Russell Hobbs RH8WC2-SB user guide

Siemens SIWAREX WT241 manual

Siemens

Siemens SIWAREX WT241 manual

Universal Audio Apollo Hardware manual

Universal Audio

Universal Audio Apollo Hardware manual

Nortel 1000BASE-XD Using

Nortel

Nortel 1000BASE-XD Using

Mid Ocean Brands MO8642 user manual

Mid Ocean Brands

Mid Ocean Brands MO8642 user manual

manuals.online logo
manuals.online logoBrands
  • About & Mission
  • Contact us
  • Privacy Policy
  • Terms and Conditions

Copyright 2025 Manuals.Online. All Rights Reserved.