ACME VD-T User manual

VD-T
User Manual
Please read the instruction carefully before use

TABLE OF CONTENTS
1. Technical Specifications....................................................................................................................2
2. Control Panel....................................................................................................................................2
3. Main Function ..................................................................................................................................3
3.1 Manual Setting ...........................................................................................................................3
3.2 Auto Setting................................................................................................................................5
3.3 Quit Settings...............................................................................................................................6
1D

1. Technical Specifications
VD-T is a specially designed handy confirm tool for all ACME integral fixtures and Controllers. By
connecting VD-T to any fixture via XLR, user can easily confirm DMX address, Channel modes,
White Balance, Manual Colors, Fade Speed and other functions on the ACME LED fixtures.
Power Input
:
6F22 9V battery
Weight: 0.158 kg
Dimension: 128 x 23 x 70mm
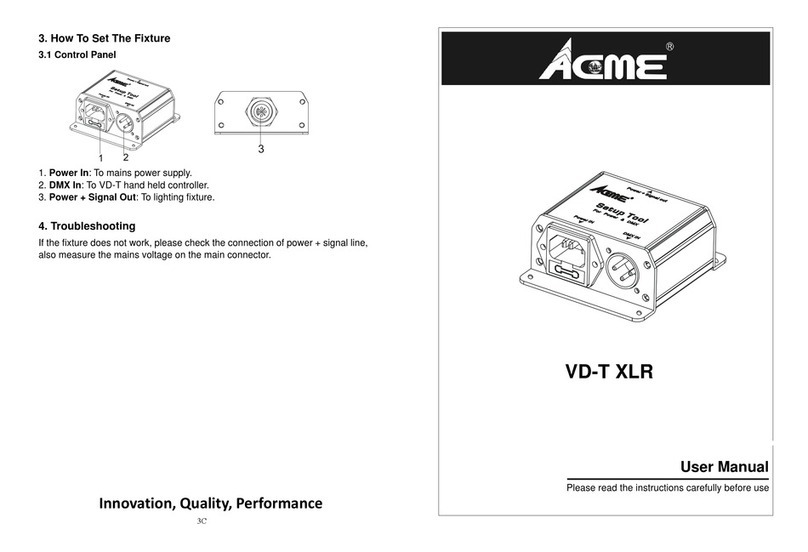
2. Control Panel
POWER:
ON/OFF, power on or power off (In the condition of automatically power off, press MENU button
to power the VD-T)
DMX OUTPUT:
Connectors for DMX input
MENU:
To show the programming functions
ENTER:
To confirm the selected functions
FUNCTION:
To select the functions
DATA:
To select the data
2D

3. Main Function
Every time you turn the unit on, it will show the version on the display, press ENTER button the
unit will carry out “Set Addr”, equipment will set extemporaneous address on light, after
performing 8 seconds, it will show “Setting Manual” on the display, press FUNCTION or
button and “setting Auto” will show on the display. Select the model you desired, press ENTER
button to enter function which you want. Afterward press ENTER, it will automatically power off to
prolong battery life without any change after 30 seconds. If you choose “Setting Manual”, you can
set up address, channel mode, white balance, manual color, and fade speed manually. In “Setting
Auto” mode, you can automatically set up address and channel mode. Press MENU button until
“Quit Set” is shown on the display to exit settings.
3.1 Manual Setting
For the Manual Setting you can operate the unit in two ways:
1. Choose one operation step, to set up fixture by fixture.
2. Choose one fixture, to set up the functions step by step.
We will have instructions as below.
3D

1. Choose one operation step, to set up fixture by fixture.
Press FUNCTION or button to select “Setting Manual”, press ENTER button to confirm. We
can press FUNCTION or to choose 1-9999 lights in every step, then set up the fixture.
DMX 512 Address Setting
In “Setting Manual” model, use the FUNCTION or to select the Address setting, the unit
you selected will lighting in green once press ENTER button, it will be displayed “Address 0001”
and press FUNCTION or to choose 1-9999 lights, use DATA or button to select the
DMX 512 address, once the address has been selected, press ENTER button to confirm, then
schedule bar will be showed 1-2 seconds, while light display green which lighted some times,
that’s be OK.
Channel Mode
In “Setting Manual” model, press ENTER button to confirm, use the FUNCTION or to
select the channel mode, it will be showed “CH Mode 0001”, and press FUNCTION or to
choose 1-9999 lights, use DATA or button to select the DMX 512 address, once the
address has been selected, press ENTER button to confirm, then schedule bar will be showed 1-2
seconds, while light display green which lighted some times, that’s be OK.
White Balance
In “Setting Manual” model, use the FUNCTION or to select the white balance model, press
ENTER button, it will be showed “W-Balace 0001,” the unit you select 1-9999 lights will lighting in
green once press FUNCTION or , press DATA or to select NO or YES, once YES
showed need select, NO showed DON’T select, press ENTER button after enter YES, it will be
showed “W-Balance gro up ”, Use DATA or button to select the fixture group that you need
adjust White Balance: GROUP: 0-31, then press enter button to confirm. Use FUNCTION or
to select the red, green, blue, cool, warm and amber. Then use DATA or button to adjust
the white balance (125-255), once selected, press ENTER button to confirm, then schedule bar will
be showed 1-2 seconds, while light display green which lighted some times, that’s be OK.
Manual Color
Press the MENU button, press ENTER button to enter, use the FUNCTION or to select the
4D

manual color, the unit you selected will lighting in green, it will be showed “Manual-C 0001: OFF”
the unit you select 1-9999 lights will lighting in green once press FUNCTION or , press DATA
or to select NO or YES, once YES showed need select, NO showed DON’T select, press
ENTER button after enter YES, it will be showed “Manual-C Red: 255”, use FUNCTION or
to select the red, green, blue, cool, warm, amber and strobe. Then use DATA or button to
adjust the manual color (0-255), once selected, press ENTER button to confirm, then schedule bar
will be showed 1-2 seconds, while light display green which lighted some times, that’s be OK.
Fade Speed
Press the MENU button, press ENTER button to enter, use the FUNCTION or to select
the1-9999 lights, press DATA or to select NO or YES, once YES showed need select, NO
showed DON’T select, press ENTER button after enter YES, it will be showed “Fade SP 0001: ***”,
use DATA or button to adjust the Fade Speed (0-255), once selected, press ENTER button
to confirm, then schedule bar will be showed 1-2 seconds, while light display green which lighted
some times, that’s be OK.
2. Choose one fixture, to set up the functions step by step
Press FUNCTION or button to select “Setting Manual”, press ENTER button to confirm,
then press FUNCTION and button in the same time. Press FUNCTION and button
to select the 1-9999 lights, press ENTER button to confirm. Then you can set up the functions step
by step like the first way.
3.2 Auto Setting
Select “Setting Auto” and press ENTER button to confirm, use Function or to select “Auto
Set ADDR: 001”, the unit you selected will lighting in green, Press ENTER button and use DATA
or button to change the DMX 512 address (001-512), once selected, press ENTER button to
5D

confirm, use FUNCTION or to select “Auto Set CHMD: 1”, the unit you selected will lighting
in green, Press ENTER button and use DATA or button to change the channel mode, once
selected, press ENTER button to confirm, use FUNCTION or to select whether carry out
automatically setting, press YES save the settings or NO for giving up.
3.3 Quit Settings
When “Setting Manual” shows on the display, press MENU button, it will show “Quit Set” then
press ENTER button to quit settings, and it will show the version on the display and automatically
power off without any change after 25 seconds.
Declaration of Conformity
We declare that our products (lighting equipments) comply with the following
specification and bears CE mark in accordance with the provision of the
Electromagnetic Compatibility (EMC) Directive 89/336/EEC.
EN55103-1: 2009 ; EN55103-2: 2009; EN62471: 2008;
EN61000-3-2: 2006 + A1:2009 + A2:2009; EN61000-3-3: 2008.
&
Harmonized Standard
EN 60598-1:2008 + All:2009; EN 60598-2-17:1989 + A2:1991; EN 62471:2008;
EN 62493: 2010
Safety of household and similar electrical appliances
Part 1: General requirements
6D

Innovation, Quality, Performance
Table of contents
Other ACME Controllers manuals
Popular Controllers manuals by other brands

Watlow
Watlow Din-a-mite user manual

Carrier
Carrier CRDISKIT001A00 installation instructions

Omron
Omron SYSMAC CS Series Operation manual

AL-KO
AL-KO UP4 Translation of the original installation instructions

Samson
Samson 42-34 Mounting and operating instructions

Motorola solutions
Motorola solutions Openpath installation guide