8 Out of the Box
Using the remote
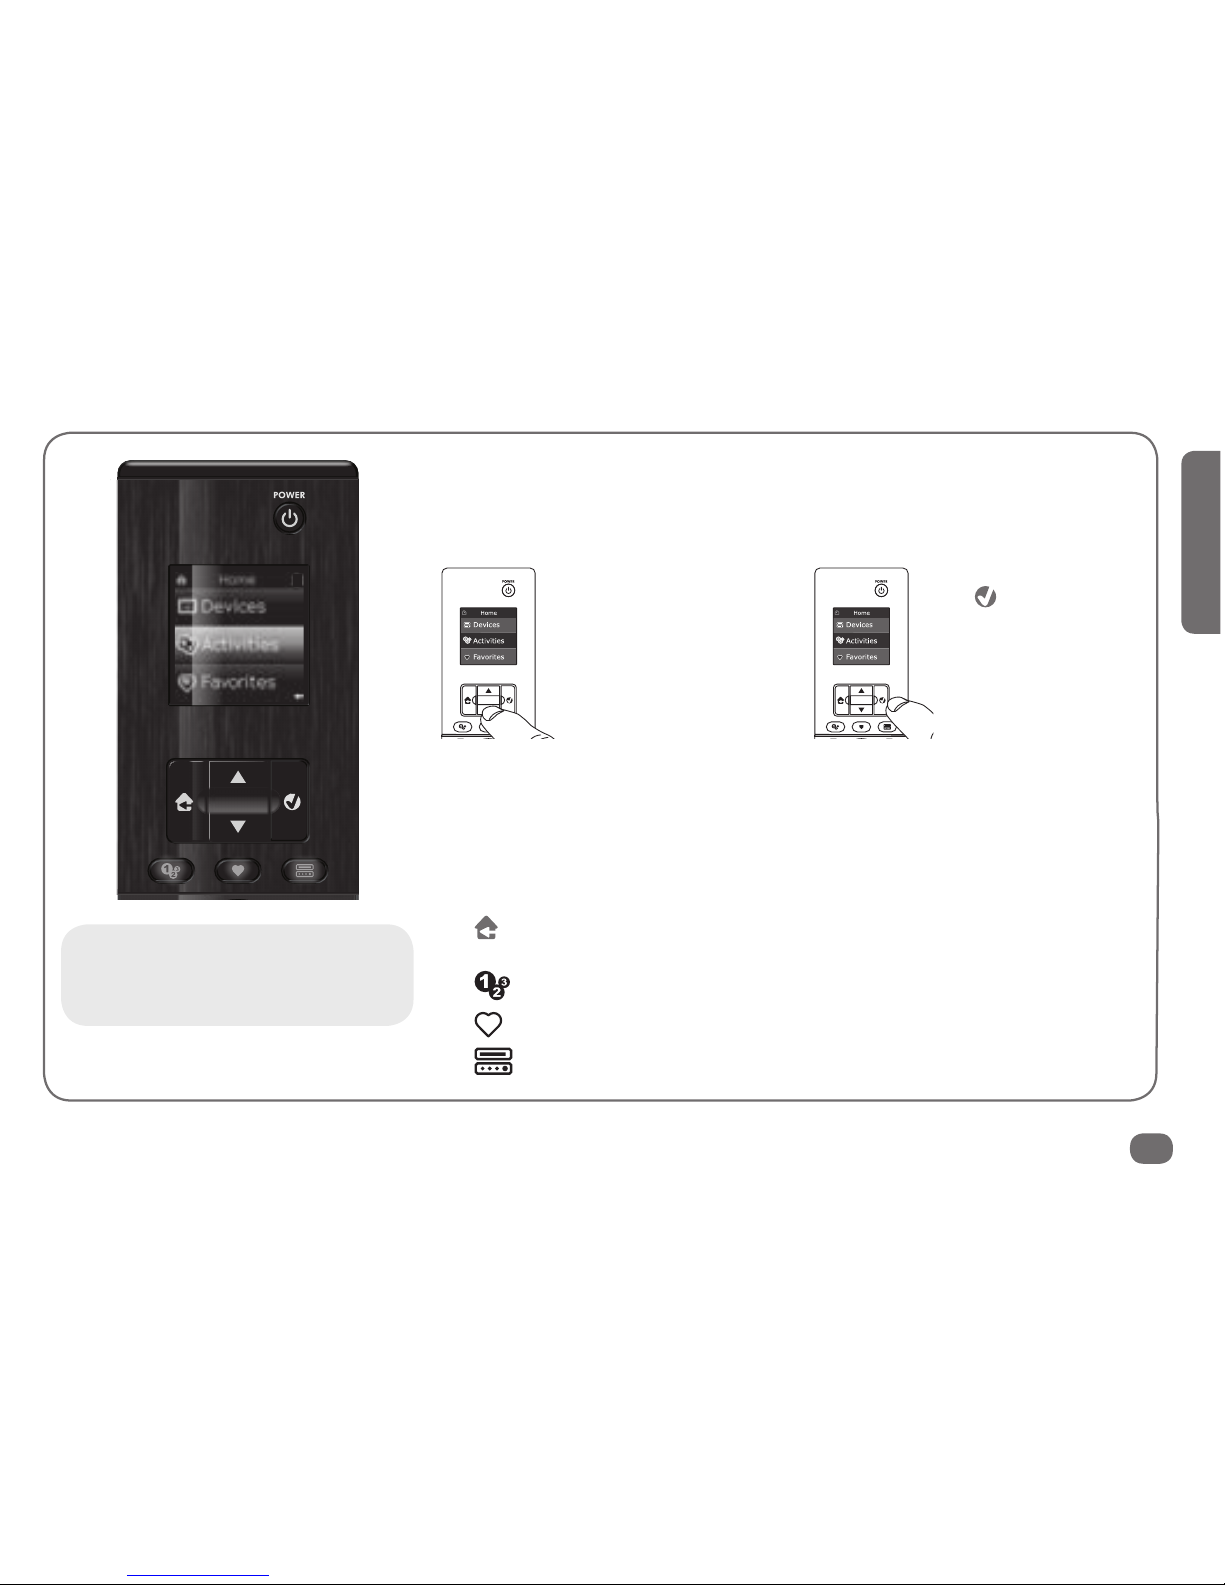
Now you’re ready to start using the Xsight™ Plus with your
home entertainment devices.
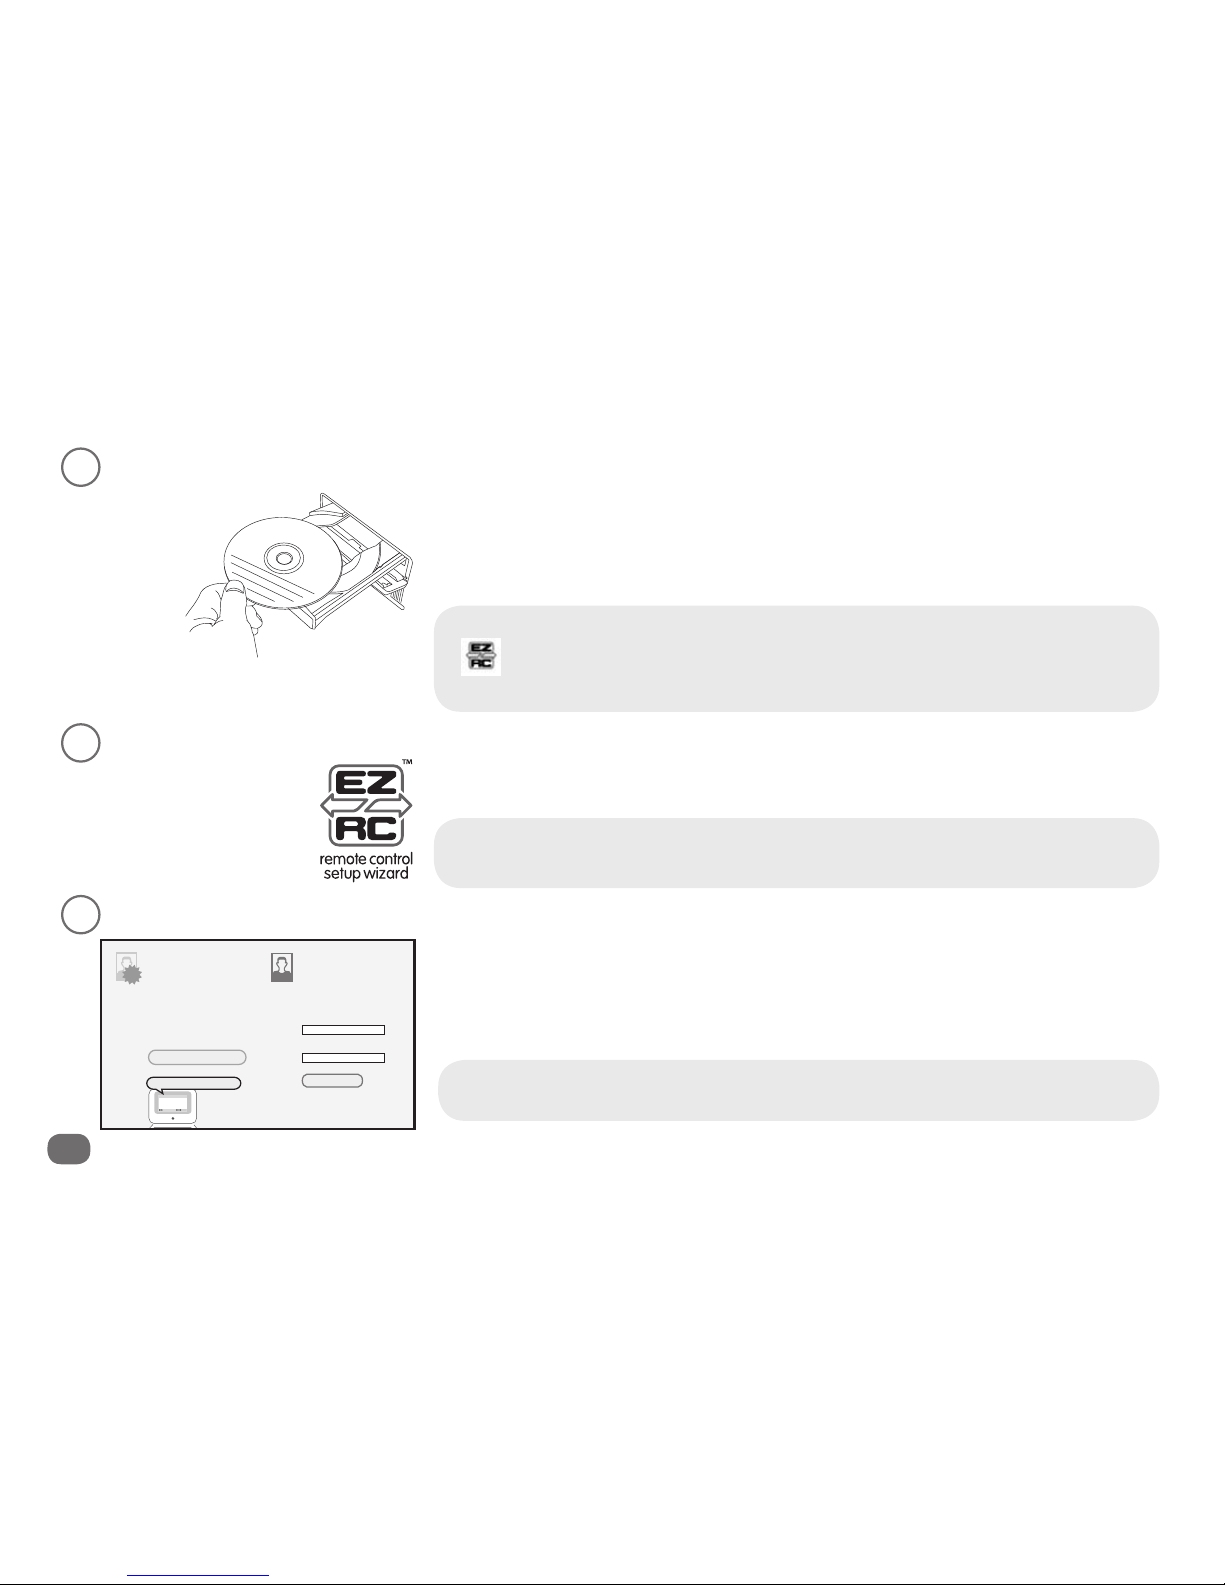
The home screen of the Xsight™ Plus is your gateway to
the remote’s full functionality. The home screen has the
following options:
• Favorites
• Activities
• Devices
• Settings (on the second page of the screen—use the
arrow keys below the screen to access this option)
The arrow keys highlight an item from the on-screen menu.
The key selects green-highlighted items.
The key takes you back one screen. (Press and hold to
return to the Home screen.) It also selects red-highlighted
items when these are available.
The shortcut keys access the home screen options directly.
The hard keys on the bottom of the remote work much like
the keys on your original remotes.
Home
screen
Shortcut
keys
Hard
keys
Arrow
keys
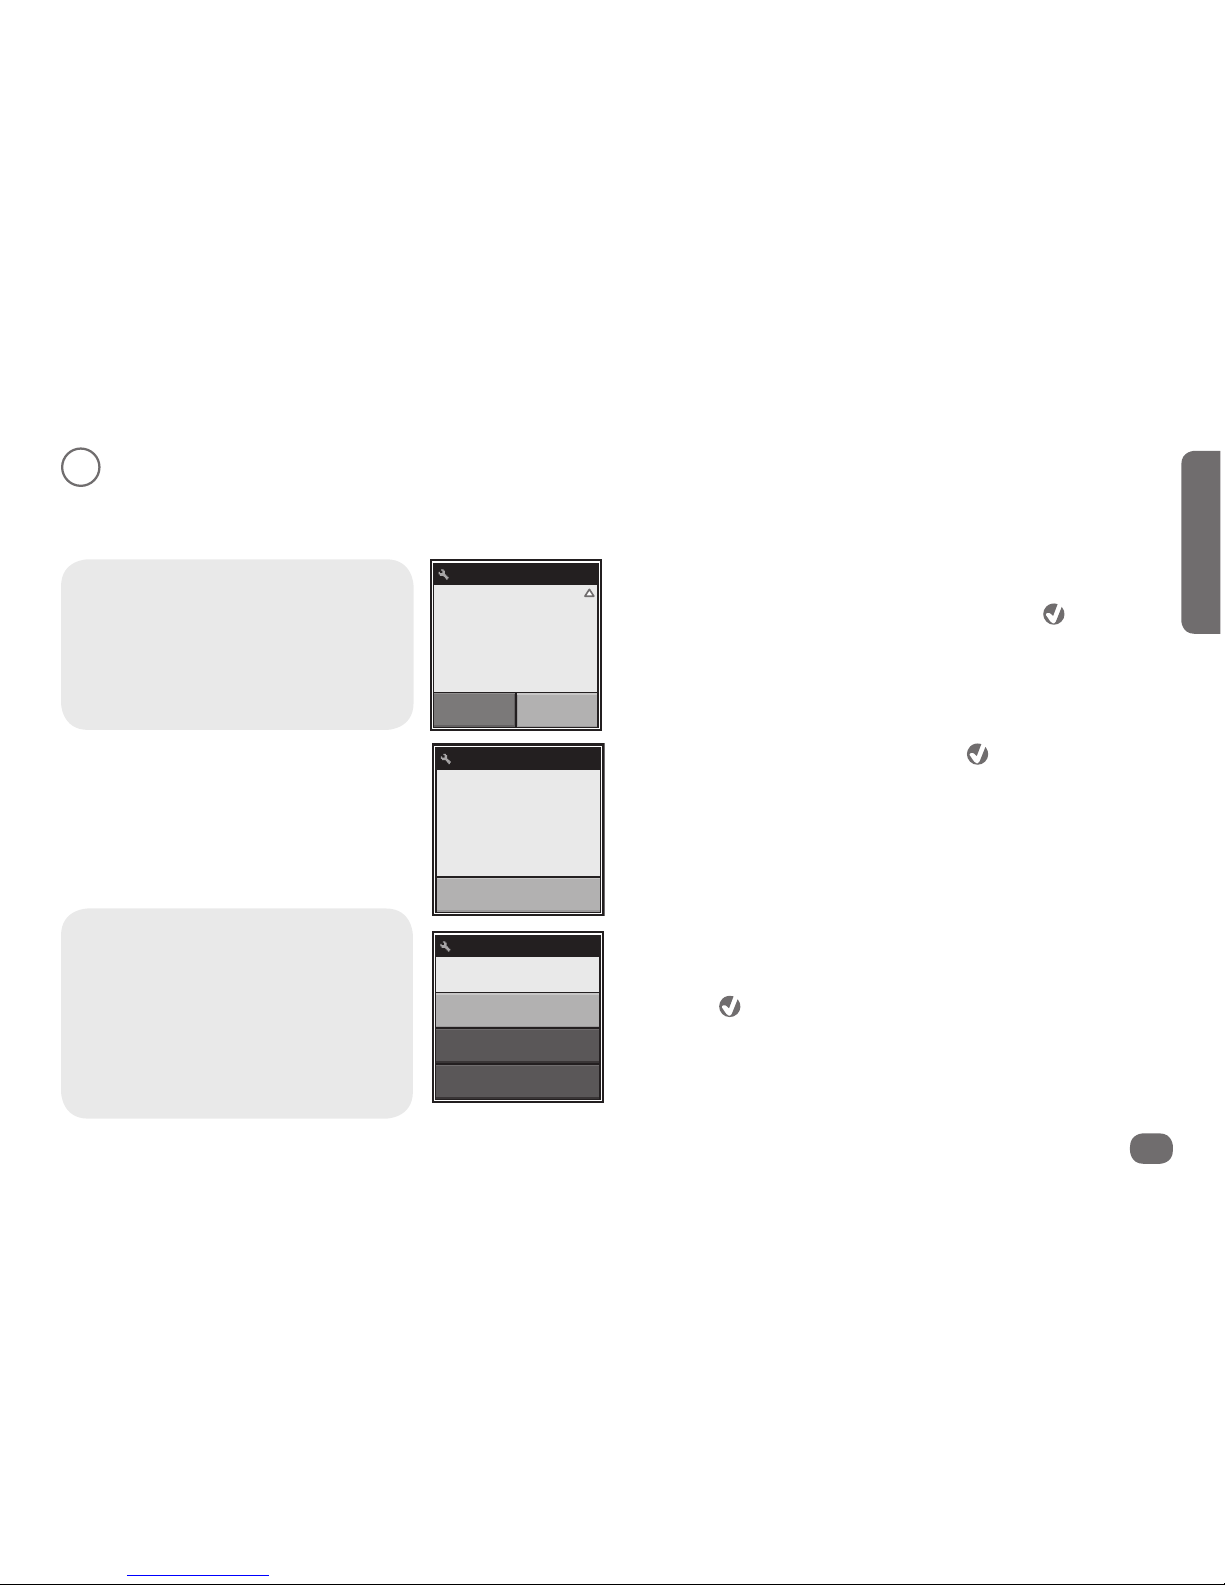
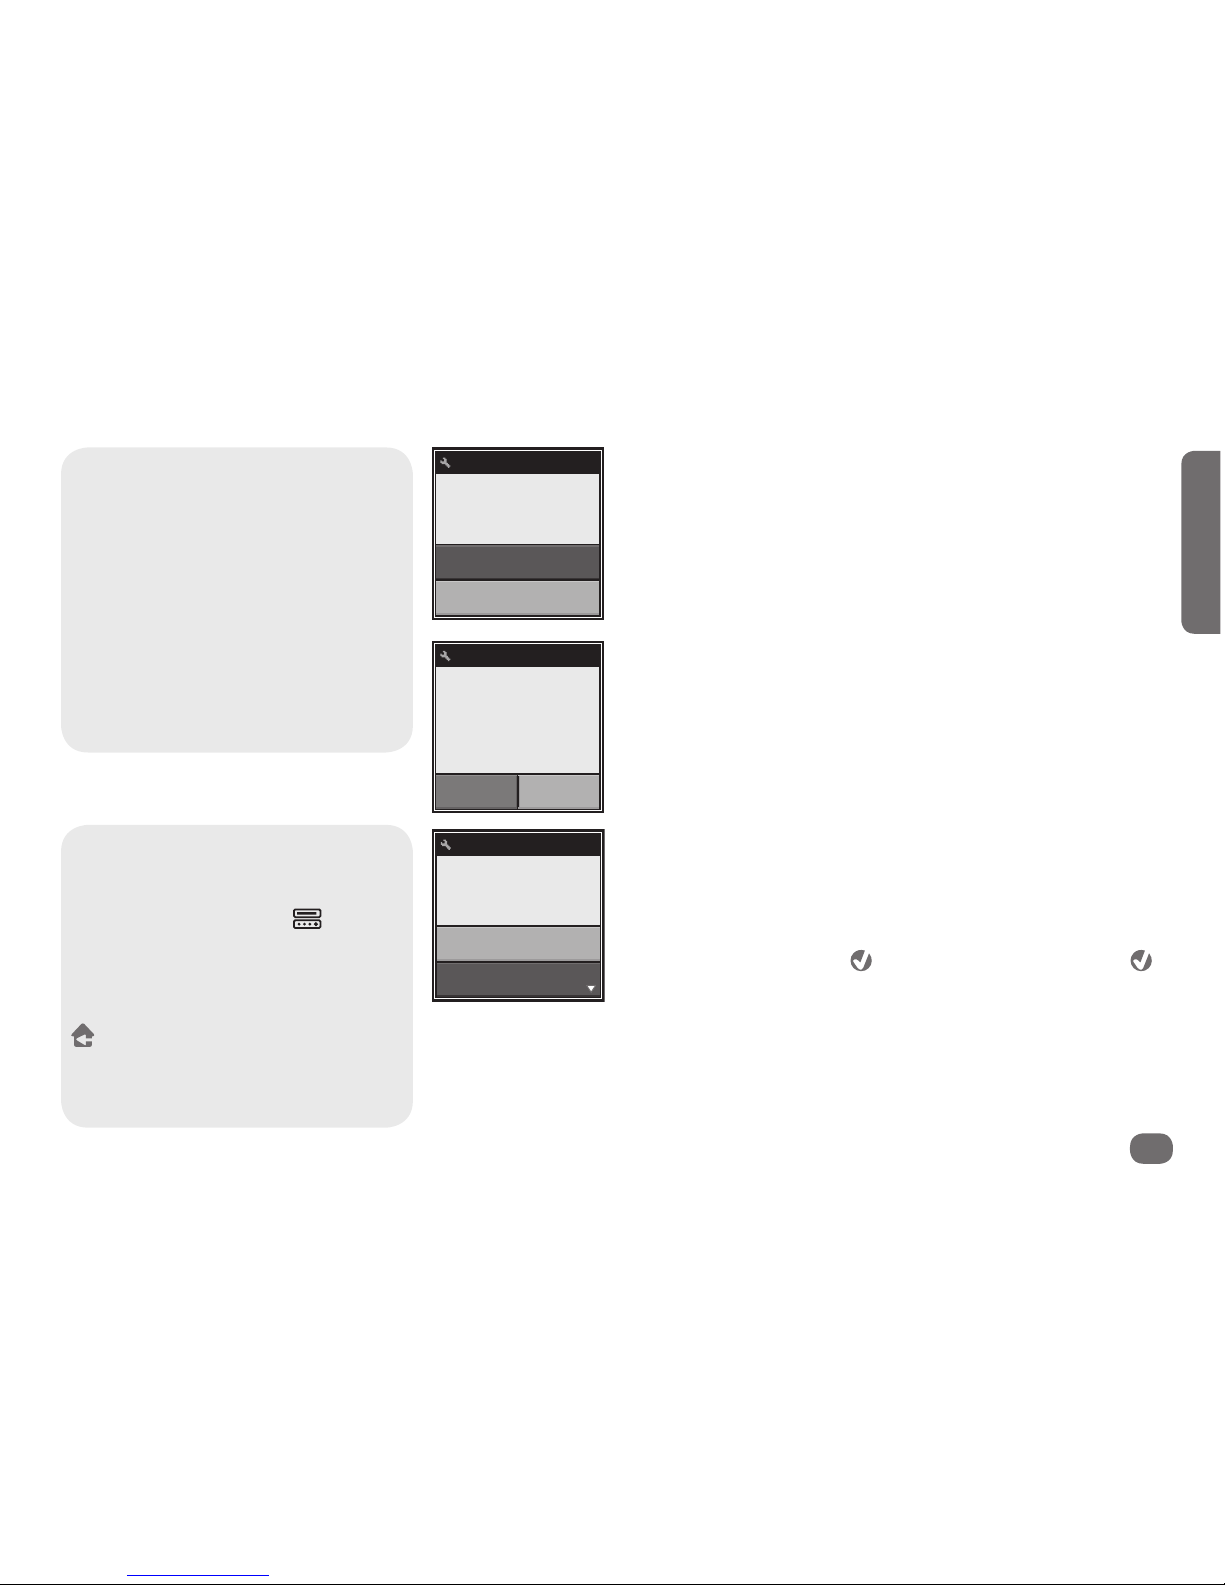
Want to start over?
You can reset the remote to its settings
when you rst unpacked it. This removes all
information about your devices, activities,
and other setup parameters.
1. Press the (Home/Back) key on the
remote to go to the Home screen.
2. Use the down arrow key to access
the second page of the Home screen.
Highlight Settings and press to select
it.
3. Use the arrow keys to go through the
pages of the Settings menu until you
see the Reset option. Select Reset. The
remote will display the Reset Screen.
4. Press the 9 - 8 - 1 number keys.
5. Press to select Factory Reset.
6. Select Yes in the conrmation screen
to delete all device programming,
activities, proles and favorites, and setup
information (the remote’s initial setup
program will start). Select No to cancel
the reset and retain all settings.