Acrosser Technology AND-DNV3N2-04PC User manual

AND-DNV3N2
User Manual
Acrosser Technology Co., Ltd.
www.acrosser.com
AND-DNV3N2
Networking Desktop
Intel®Denverton®SoC
4GbE Copper (2-pair bypass)
2GbE Copper (or Fibber)

AND-DNV3N2
2
Acrosser Technology Co., Ltd.
To read this User Manual on your smart phone, you will have to install an
APP that can read PDF le format rst. Please nd the APP you prefer from
the APP Market.
Ver: 100-001
Date: Nov. 5, 2018
Disclaimer
For the purpose of improving reliability, design and function, the information in this document
is subject to change without prior notice and does not represent a commitment on the part of
Acrosser Technology Co., Ltd.
In no event will Acrosser Technology Co., Ltd. be liable for direct, indirect, special, incidental, or
consequential damages arising out of the use or inability to use the product or documentation,
even if advised of the possibility of such damages.
Copyright
This document contains proprietary information protected by copyright. All rights are reserved.
No part of this manual may be reproduced by any mechanical, electronic, or other means in
any form without prior written permission of Acrosser Technology Co., Ltd.
Trademarks
The product names appear in this manual are for identication purpose only. The trademarks
and product names or brand names appear in this manual are the property of their respective
owners.
Purpose
This document is intended to provide the information about the features and use of the product.
Audience
The intended audiences are technical personnel, not for general audiences.

AND-DNV3N2
3www.acrosser.com
Table of Contents
1. System Introduction ...................................................................... 5
1.1. Specications ............................................................................................................. 5
1.2. Package Contents ...................................................................................................... 7
1.3. System Dissection...................................................................................................... 8
1.3.1. Dimensions ..................................................................................................... 8
1.3.2. Front I/O Panel.............................................................................................. 10
1.3.3. Rear I/O Panel ...............................................................................................11
2. Components Assembly ............................................................... 12
3. BIOS Settings ............................................................................... 22
3.1. Main Setup ............................................................................................................... 22
3.2. Advanced Setup ....................................................................................................... 23
3.2.1. Advanced Setup: Trusted Computing ........................................................... 24
3.2.2. Advanced Setup: Serial Port Console Redirection........................................ 25
3.2.3. Advanced Setup: USB Conguration ............................................................ 26
3.2.4. Advanced Setup: SDIO Conguration........................................................... 27
3.2.5. Advanced Setup: SIO Conguration ............................................................. 28
3.2.6. Advanced Setup: Hardware Monitor ............................................................. 28
3.2.7. Advanced Setup: LAN Bypass Conguration................................................ 29
3.2.8. Advanced Setup: Power Management.......................................................... 30
3.2.9. Advanced Setup: Digital IO Port Conguration ............................................. 31
3.3. Security Setup .......................................................................................................... 32
3.4. Boot Setup................................................................................................................ 33
3.5. Save & Exit Setup..................................................................................................... 34
3.6. IntelRCSetup ............................................................................................................ 35
3.6.1. IntelRCSetup: Power Conguration .............................................................. 35
3.6.2. IntelRCSetup: Server ME Conguration ....................................................... 36
3.6.3. IntelRCSetup: North Bridge Chipset Conguration ....................................... 37
3.6.4. IntelRCSetup: South Bridge Chipset Conguration ...................................... 37
4. Software Installation and Programming Guide ........................ 38
4.1. Introduction............................................................................................................... 38
4.1.1. Environment .................................................................................................. 38
4.1.2. GPIO ............................................................................................................. 38
4.1.3. Watchdog ...................................................................................................... 38
4.1.4. LAN Bypass Subsystem................................................................................ 38
4.2. File Descriptions....................................................................................................... 39
4.2.1. GPIO/Watchdog/LAN Bypass Subsystem..................................................... 39
4.3. API List and Descriptions ......................................................................................... 39
4.3.1. GPIO ............................................................................................................. 39

AND-DNV3N2
4
Acrosser Technology Co., Ltd.
4.3.2. Watchdog ...................................................................................................... 40
4.3.3. LAN Bypass Subsystem................................................................................ 40
4.3.4. Notes............................................................................................................. 41
5. FAQ ............................................................................................... 42
Q 1. Where is the serial number located on my system?................................................. 42
Q 2. Why does the system booting take so long?............................................................ 42

AND-DNV3N2
5www.acrosser.com
1. System Introduction
The AND-DNV3N2 series is a new product lines of Acrosser 2018. This network
appliance equips with the latest Intel®microserver SoC Atom C3558 (4 core).
The AND-DNV3N2 series provides a more exible system expansion versatility with
6x or 4x GbE copper LANs (with 2-pair bypass), optional 2x 1G ber networks (SFP),
Furthermore, in the system design, a 2.5-inch hot-swappable HDD/SSD and two
Mini PCIe slot to support latest WLAN function (IEEE 802.11 a/b/g/n/ac) and 4G LTE
feature as well.
1.1. Specifications
(Specications are subject to change without notice.)
System
Thermal Solution • PWM Smart Cooling Fans
CPU • Intel®Denverton®C3558 4 cores, 2.2GHz
Memory • 2x SO-DIMM DDR4-2400
BIOS • AMI UEFI BIOS
Storage
HDD • 1x 2.5” Internal HDD Bay, SATA 6.0Gb/s
Communication and I/O
Ethernet • Intel®X553 (Marvell 88E1543) (via LAN [3:6]) (Copper)
• AND-DNV3N2-04PC: Intel®i211-AT, LAN[1:2] (Copper)
• AND-DNV3N2-04PF: Intel®i210-AT, LAN[1:2] (Fiber)
LAN bypass (2-pair) • LAN bypass by LAN[3:4, 5:6]
USB • 2x USB 3.0
Serial Port • 1x Serial Console (RJ45)
LED • Ethernet Link LED x12 (LAN)
• Storage Active Link LED
• Power LED
• Status LED
• LAN Bypass LED x2

AND-DNV3N2
6
Acrosser Technology Co., Ltd.
Other Features
Watchdog Timer • Software programmable 0~255 Seconds, 0=disable
timer.
Battery • for RTC
Hardware Monitoring • CPU Temp.
• System Temp.
• VCORE
• VMEM
Security & Mgmt. • On-board TPM 2.0
Power Input • 12VDC, 40W Adapter
Software
OS Support • Linux Kernel 4.8 & above, (64-bit)
Mechanical & Environment
Dimension • 220(L) x 105(W) x 44(H) mm
Operating Temperature • 0 ~ 40°C (32 ~ 104°F)
Storage Temperature • -20 ~ 80°C (-4 ~ 176°F)
Relative Humidity • 10 to 80%, non-condensing
Anti-Vibration • IEC 60068-2-64, 5~500Hz, 3GRMS
Anti-Shock • 10 G peak acceleration (11 m sec. duration), operation
Certication • CE, FCC Class A, RoHS 2
Drop Test • ISTA-2A 2006

AND-DNV3N2
7www.acrosser.com
1.2. Package Contents
Check if the following items are included in the package.
Item Q’ty
�AND-DNV3N2-04PC
or AND-DNV3N2-04PF 1
�Driver CD 1
�Console Cable 1
�40W Power Adapter 1
�Power Cord 1
�Screw Pack 1
�SATA & SATA power cable 1
�Ear Bracket 2

AND-DNV3N2
8
Acrosser Technology Co., Ltd.
1.3. System Dissection
1.3.1. Dimensions
(Unit: mm)
AND-DNV3N2-04PC

AND-DNV3N2
9www.acrosser.com
AND-DNV3N2-04PF

AND-DNV3N2
10
Acrosser Technology Co., Ltd.
1.3.2. Front I/O Panel
ANT1, ANT2 SMA Antenna Hole
Reserved for optional Wi-Fi / BT, 4G LTE antenna.
LED1~6 LAN1~6 Link/Active LED
BP1, BP2 LAN Bypass LED
HDD Storage Active LED
STATUS Status LED
PWR Power LED

AND-DNV3N2
11www.acrosser.com
1.3.3. Rear I/O Panel
AND-DNV3N2-04PC
AND-DNV3N2-04PF
ANT3, ANT4 SMA Antenna Hole
Reserved for optional Wi-Fi / BT, 4G LTE antenna.
POWER Power Button
LAN1, LAN2 RJ45 LAN Port (AND-DNV3N2-04PC)
SFP1, SFP2 SFP LAN Port (AND-DNV3N2-04PF)
LAN3~LAN6 RJ45 LAN Port with Bypass
USB USB 3.0 Port
CONSOLE Console Port (Serial Port)
DC 12V DC12V Power Input

AND-DNV3N2
12
Acrosser Technology Co., Ltd.
2. Components Assembly
Please follow the instruction to install the inner modules.
Step 1: Loosen the screw that lock the top cover plate.
Step 2: Remove the top cover plate.

AND-DNV3N2
13www.acrosser.com
Step 3: Disonnect the FAN power connector.
Step 4: Loosen the screw that lock the inner bracket.
Step 5: Take out the whole module (including the bracket and mainboard).

AND-DNV3N2
14
Acrosser Technology Co., Ltd.
Step 6: Loosen the mainboard screws.
Step 7: Flip over the mainboard. Identify the memory slot.
Step 8: Install the memory module.

AND-DNV3N2
15www.acrosser.com
Step 9: Now ready to install your hard disk.
Step 10: Put in the yellow washer between hard disk and holder.
Step 11: Screw in to hold the hard disk into position

AND-DNV3N2
16
Acrosser Technology Co., Ltd.
Step 12: Install and fasten your WiFi module with screw.
Step 13: Connect the WiFi RF cable.
Step 14: Lock the mainboard to bracket with screws.

AND-DNV3N2
17www.acrosser.com
Step 15: Install the WiFi RF cable to the ANT3 hole on chassis.
Step 16: Install the WiFi RF cable to the ANT4 hole on chassis.

AND-DNV3N2
18
Acrosser Technology Co., Ltd.
Step 17: Insert the mainboard together with bracket into the chassis.
Step 18: Install and fasten your 4G module with screw.
Step 19: Connect the 4G RF cable to the 4G module.

AND-DNV3N2
19www.acrosser.com
Step 20: Connect the FAN power and SATA cable.
Step 21: Install the WiFi RF cable to the ANT1 and ANT2 hole on top cover plate.

AND-DNV3N2
20
Acrosser Technology Co., Ltd.
Step 22: Put back the top cover plate into position.
Step 23: Lock the bottom cover plate with screws.
This manual suits for next models
2
Table of contents
Other Acrosser Technology Network Hardware manuals
Acrosser Technology
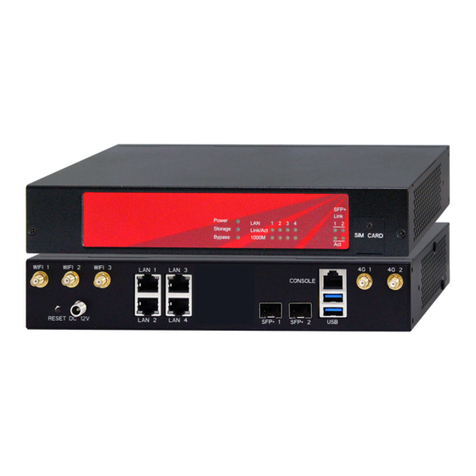
Acrosser Technology AND-DNV3N1Series User manual
Acrosser Technology
Acrosser Technology AND-DNV3N1 Series User manual
Acrosser Technology
Acrosser Technology AR-B5205 Series User manual
Acrosser Technology
Acrosser Technology ACM-TGLUE0-A Series User manual
Acrosser Technology
Acrosser Technology ACS-N5430FLT74/8PO User manual
