Action Fitness X100 User manual

F000009
Free Stride Elliptical X100
OWNER’S MANUAL
Call for service 1-800-465-070 www.actionsports.com.au

Exploded View
Call for service 1-800-465-070 www.actionsports.com.au
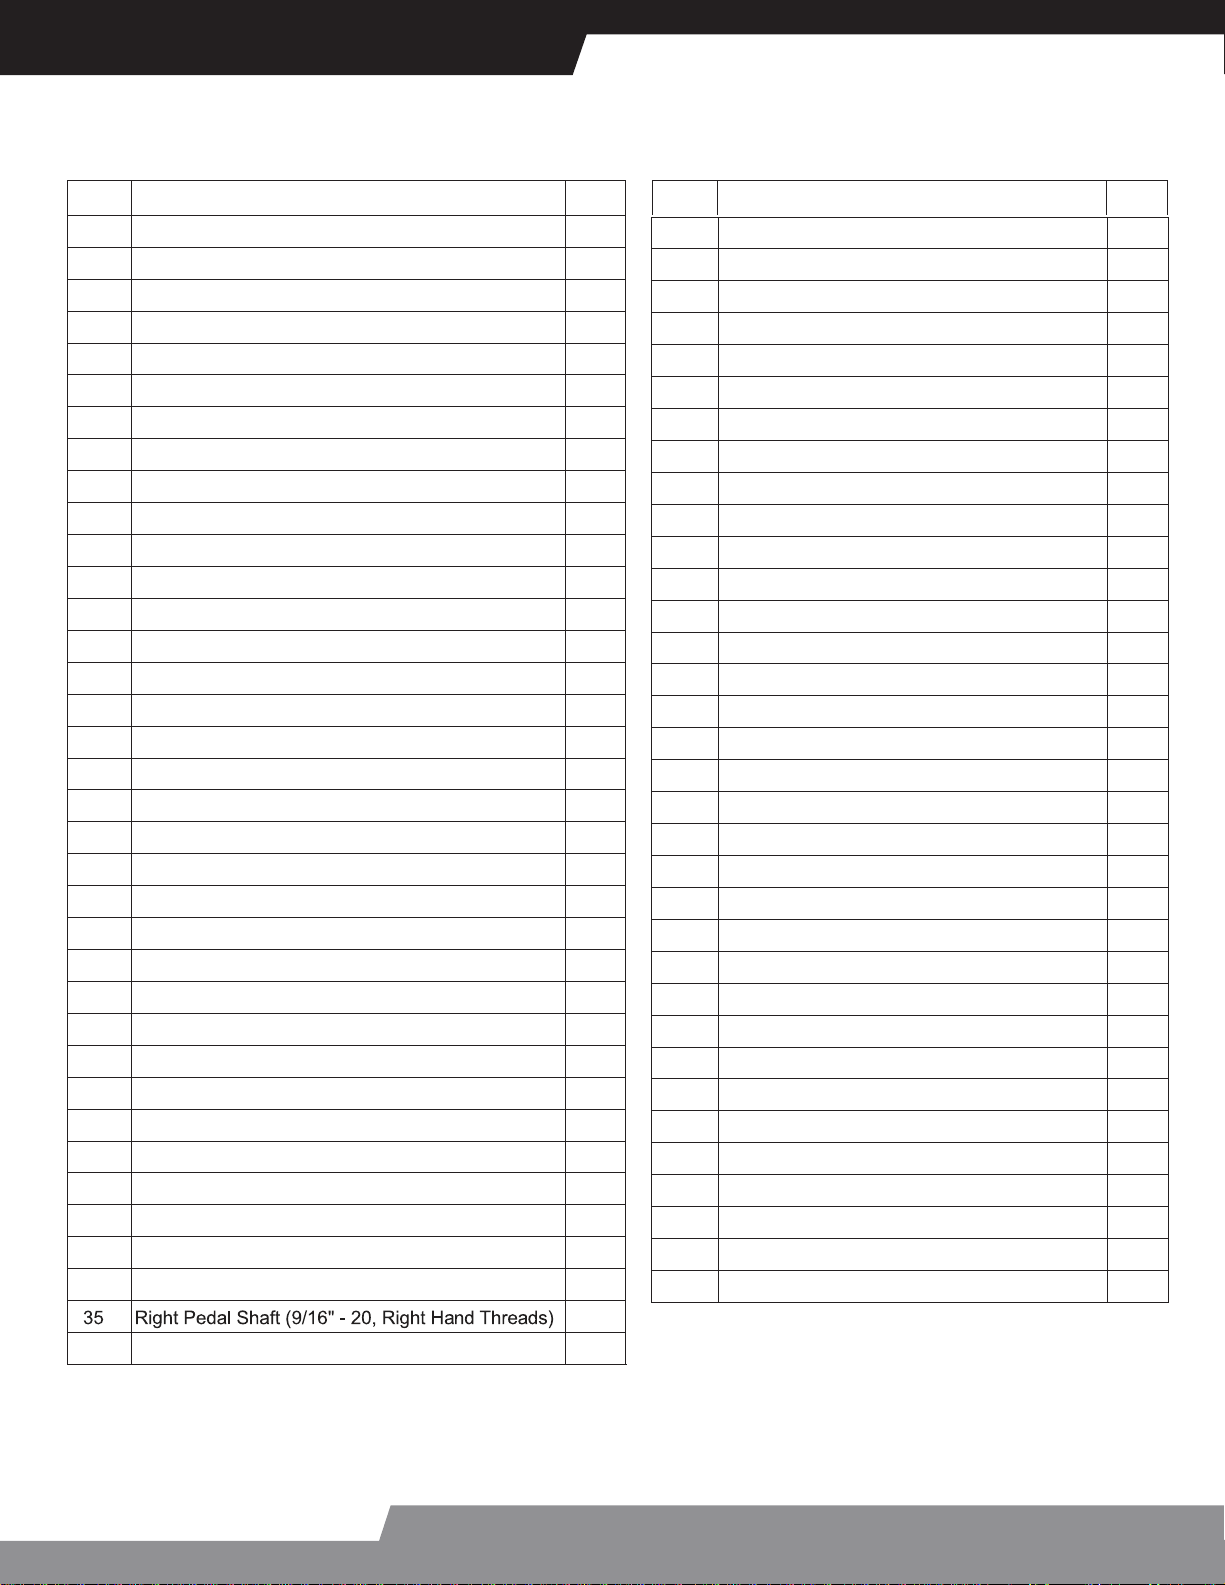
Part List
YT’QNOITPIRCSEDTRAP
YT’QNOITPIRCSEDTRAP
1emarFniaM1
1rezilibatStnorF2
1rezilibatSraeR3
1mrAladePtfeL4
1mrAladePthgiR5
1tsoPtnorF6
1rabeldnaH7
1elxAdnayelluP8
2)Z3006(gniraeB9
1)71M(rehsaWgniraeB01
1)mm71(gniRC11
1tleBV21
1leehwylF31
2)Z0096(gniraeB41
1elxAleehwylF51
2tlobeyE61
2tekcarBnoisneT71
1gnirpSnoisneT81
1partSnoisneT91
1elkcuB02
1elbaCnoisneT12
1bonKnoisneT22
1rotinoM32
24 1eriWrosneS
25 1tengaM
26 2daPmaoF
1revoCtfeL72
1revoCthgiR82
2ksiDknarC92
2paCksiD03
1knarCtfeL13
1knarCthgiR23
2)mm52x52.1x8M(tloBegnalF33
1)sdaerhTdnaHtfeL,02-"61/9(tfahSladePtfeL43
14gnihsuBmrAladeP63
2)8M(rehsaWelxA73
38 1paCladePtfeL
39 1paCladePthgiR
2relloR04
4gnihsuB14
1paCgniR24
1pirGmaoF34
44 Leveling Cap 2
2)mm54(paCdnE54
2)mm22(gulPdnuoR64
2)mm23(gulPdnuoR74 2)mm02x52.1x8M(daeHnottuB,tloB84
2)mm75x52.1x8M(daeHnottuB,tloB94 4)mm06x52.1x8M(daeHnottuB,tloB05 2)mm001x52.1x8M(daeHnottuB,tloB15 2)mm05x5.1x01M(daeHnottuB,tloB25 4)mm34x1x6M(daeHdnuoR,tloB35 6)mm52x4M(daeHdnuoR,wercS45
5)mm51x5M(daeHdnuoR,wercS55
1)mm21x5M(daeHtalF,wercS65
1)mm51x5M(daeHtalF,wercS75
4)mm51x8.0x5M(daeHdnuoR,wercS85
2)1x6M(tuN95
2)52.1x8M(tuNnolyN06
2)5.1x01M(tuNnolyN16
2)kciht"61.0x62-"8/3(tuNnihT26
2)kciht"82.0x62-"8/3(tuN36
6)52.1x8M(tuNpaC46
8)8M(rehsaWevruC56
66 Spring Washer (M8) 8
67 Wave Washer (ø16.5 x ø22.5 x 0.4mm Thick) 4
68 1hcnerW
69 1)mm6(hcnerWnellA
70 1launaM
Call for service 1-800-465-070 www.actionsports.com.au

Table of Contents
Exploded View _____________________
Parts List __________________________
Important Safety Information _____________
Before You Start _____________________
Assembly Instruction ___________________
Console ___________________________
Warranty / Service ___________________
Page
2
3
5
6
7
9
10
Call for service 1-800-465-070 www.actionsports.com.au

Important Safety Information
WARNING!
Before using this unit or starting any exercise program, consult your physician. This is
especially important for persons over the age of 35 and/or persons with pre-existing health
problems. The manufacturer or distributor assumes no responsibility for personal injury or
property damage sustained by or through the use of this product.
SAFETY PRECAUTIONS AND TIPS
1. It is the owner's responsibility to ensure that all users of this unit have read the Owner's
Manual and are familiar with warnings and safety precautions.
2. This unit has a user maximum capacity of 113 kg.
3. The unit should only be used on a level surface and is intended for indoor use only. The
unit should not be placed in a garage, patio, or near water and should never be used
while you are wet. We recommend a mat be placed under the unit to protect floor or
carpet and for easier cleaning.
4. Wear comfortable, good-quality walking or running shoes and appropriate clothing. Do
not wear sandals, socks or stockings.
5.Always examine your unit before using to ensure all parts are in working order.
6.Allow the unit to fully stop before dismounting.
7. Pets should never be allowed near the unit.
8. Do not leave children unsupervised near or on the unit.
9. Never operate the unit where oxygen is being administered, or where aerosol products
are being used.
10. Never insert any object or body parts into any opening.
11. For safety and to prevent damage to your unit, no more than one person should use the
unit at a time.
12. Service to your unit should only be performed by an authorized service representative,
unless authorized and/or instructed by the manufacturer.
13. Failure to follow these instructions will void the unit warranty.
Call for service 1-800-465-070 www.actionsports.com.au

Before You Start
Thank you for purchasing this newAction Mag Bike! This quality product you have chosen was
designed to meet your needs for cardiovascular exercise. Before you start, please read the
Owner's Manual and become familiar with the operation of your new unit.
Remember to take the time to perform the stretching exercises provided to avoid injury.
If you are taking medication, consult your physician to see if the medication will affect your
exercise heart rate. If you have heart problems, you are not active, and/or are over the age of
35 years, do not start an exercise program without first contacting and receiving approval from
your physician.
To avoid the risk of electrical shock, always keep the console dry. Do not spill liquids on the
console. We recommend a sealed water bottle for beverages consumed while using the unit
Please review the following drawing below to familiarize yourself with the listed parts.
HANDLEBAR
Call for service 1-800-465-070 www.actionsports.com.au
Assembly Instruction
REMOVEALL SECURITY TAPEAND WRAPPING BEFORE BEGINNING
L
L
RR
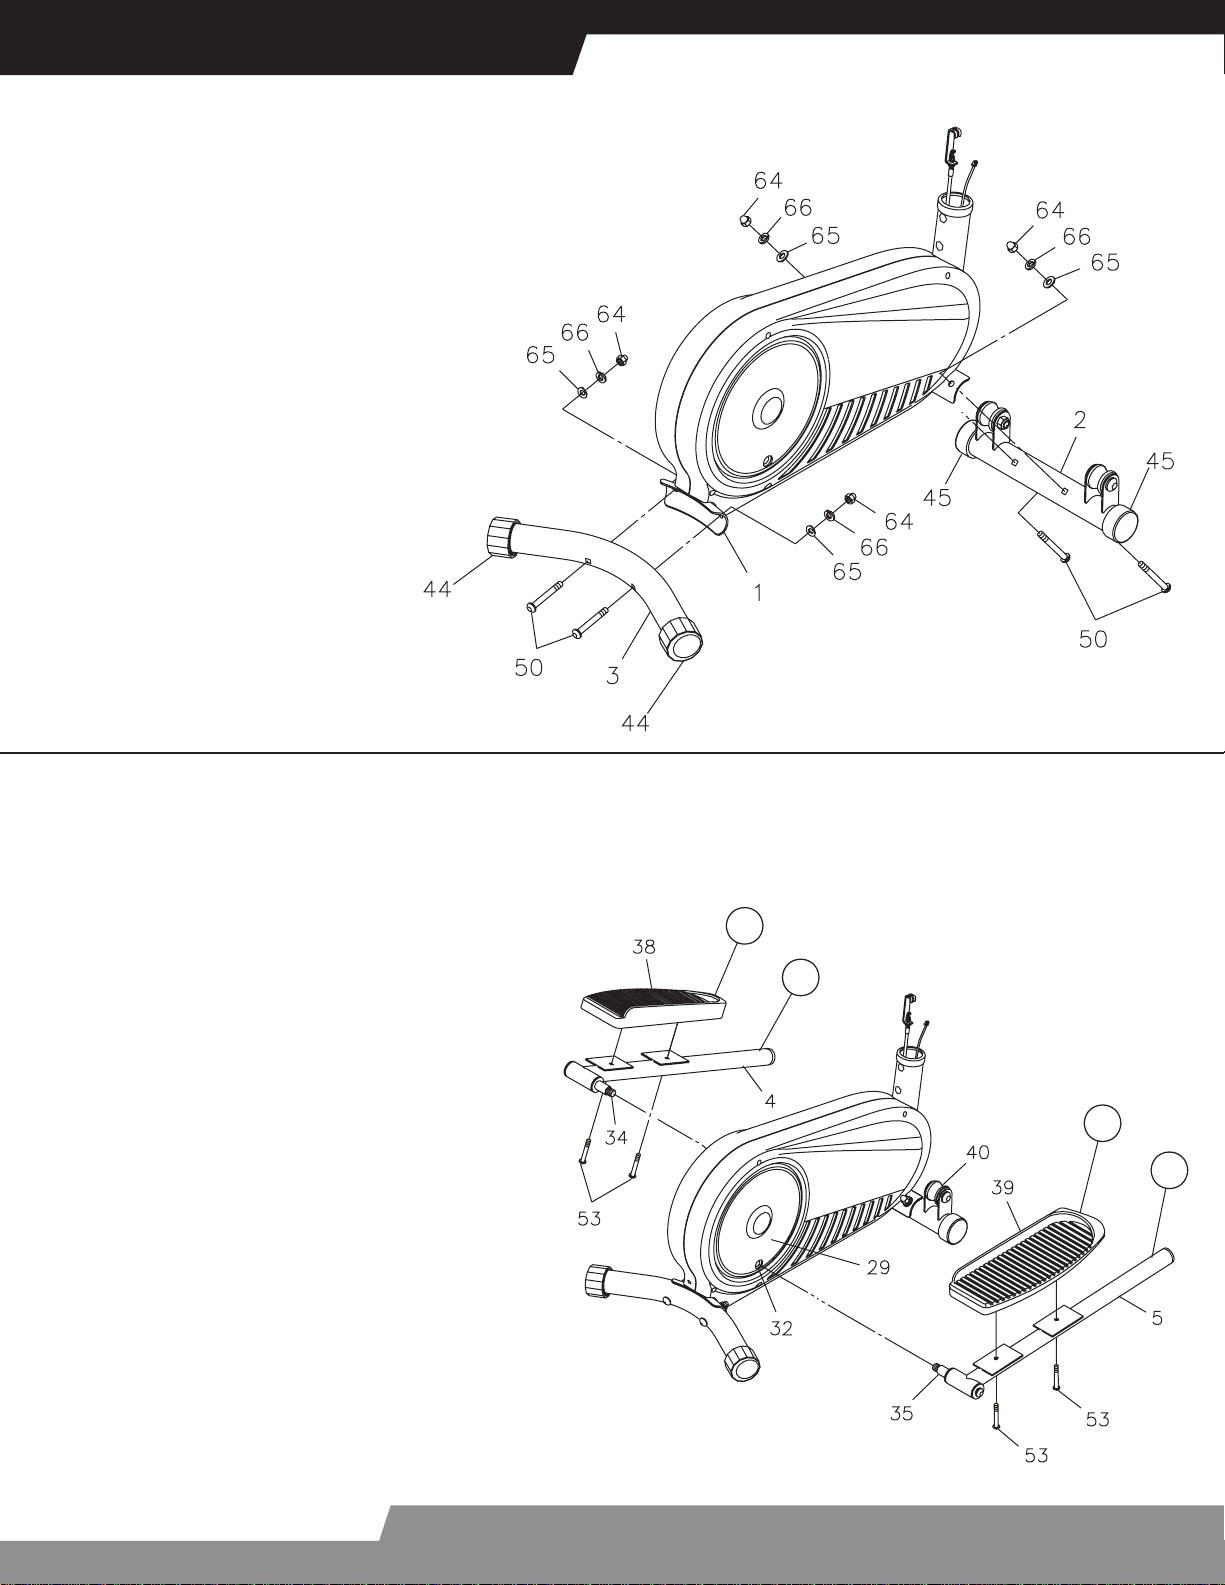
1. Attach the front stabilizer (2) with 2 end caps (45) onto
the main frame (1) with 2 button head bolts (50), 2 curve
washers (65), 2 spring washers (66) and 2 cap nuts (64).
Attach the rear stabilizer (3) with 2 leveling caps (44)
onto the main frame (1) with 2 button
head bolts (50), 2 curve washers (65),
2 spring washers (66) and 2 cap nuts
(64).
NOTE: Make sure you fasten the bolts
securely to avoid shaking and
discomfort when cycling.
2. NOTE: There is a "L" decal on the left pedal arm (4), and a "R" decal on the right pedal arm (5).
The right pedal shaft (35) has right hand threads and is tightened by turning clockwise. The left
pedal shaft (34) has left hand threads and is tightened by turning counter clockwise.
Please the front end of the right pedal arm
(5) on the roller (40). Connect the back end
of the right pedal arm (5) to the right crank
(35) located inside the crank disk (29) as
shown. Thread the right pedal shaft (35)
into the right crank (32) and tighten
securely. Repeat on the left side.
There is a "L" decal on the left pedal cap
(38), and a "R" decal on the right pedal cap
(39).Attach the right pedal cap (39) onto
the right pedal arm (5) with round head
bolts (53). Repeat on the left side.
NOTE: The left and right pedal caps (38,
39) have a raised lip on three sides.Attach
the left and right pedal caps (38, 39) to the
left and right pedal arms (4, 5) so that the
side without the raised lip is on the outside.
Call for service 1-800-465-070 www.actionsports.com.au

Assembly Instruction
3. Lay the front post (6) on the floor close to the front of the main frame (1).
Turn the tension knob (22) on the front post (6) counter clockwise as far as
it can go, so the cable end extends out of the metal fitting as far as pos-
sible. Connect the cable end of the tension knob (22) into the spring hook
on the end of the tension cable (21). Pull the cable on the tension knob
(22) firmly and insert the cable through the slot in the bracket. Then insert
the metal fitting on the end of the cable of the tension knob (22) into the
hole at the end of the slot in the bracket.Adjust the tension knob (22) and
verify that the spring hook moves when the tension knob (22) is adjusted.
There is a strap attached inside of the front post (6). This strap is to assist
in pulling the sensor wire (24) through the front post (6).
Tie the strap to plug end of the sensor wire (24). Pull
the strap from the top of the front post (6) to pull the
sensor wire (24) through the front post (6) as shown in
the above illustration. The sensor wire (24) must
extend out the top of the front post (6).
NOTE: Make sure the nylon nuts (60) fit into the hex
holes on the top of the main frame (1) before tightening
the button head bolts (49).
Be careful not to damage the sensor wire (24) when
assembling the front post (6).
Insert the front post (6) into the main frame (1) and
secure with 2 button head bolts (49), 2 curve washers
(65) and 2 nylon nuts (60).
4. Attach the handlebar (7) onto the front post (6) with
2 button head bolts (51), 2 curve washers (65), spring
washers (66), and 2 cap nuts (64).
Install anAAAbattery into the monitor (23). See pages
for detailed battery installation instructions. Connect
the sensor wire (24) to the monitor (23). Slide the
monitor (23) onto the bracket on the front post (6).
NOTE: Be careful not to damage the sensor wire (24)
when sliding the monitor (23).
Call for service 1-800-465-070 www.actionsports.com.au

Console
Auto On/Off
While the user starts to do exercise, the Display will
show the workout value automatically. Once stop
exercising over 4 minutes, the Display will turn off.
Auto Scan
After the monitor is powered on or pressed Mode key,
the LCD will display all functions values from Time -
Speed - Distance - Calorie - Odometer- RPM . Each
value will be held for 6 seconds.
_____________
Display Modes
SCAN: Automatically scans TIME, SPEED, DISTANCE,
and CALORIES in sequence with a change every four
seconds. Press and release the button until “SCAN”
appears on the display.
Time: Display the workout time from 00:00 to 99:59.
User also can press Mode key to display the workout
time value.
Speed: Display the current training speed from 0.0 to
99.9 KPH or MPH. User also can press Mode key to display the Speed value.
Distance: Display the trip distance from 0.0 to 999.9 Km or Mile. User also can press Mode key
to display the distance value.
Calories: Display the calories consumption during training from 0.0 to 999.9. User also can
press mode key to display the calories consumption value.
______________
To Reset
Press Mode key for 3 seconds, all the function value will be reset to zero.
Note:
1.If the computer displays abnormally, please re-install the battery and try again.
2.Battery Spec: 1.5V UM-3 orAA(2PCS).
3.The batteries must be removed from the console before it is scrapped and that they are
disposed safely.
Call for service 1-800-465-070 www.actionsports.com.au

Warranty / Service
IMPORTANT
Please read and retain this manual as it will assist with identification for parts and service.
LIMITED WARRANTY
ACTION FITNESS warrants its F000009 (X100) Free Stride Elliptical to be free from defects in material
and workmanship under normal use and service conditions for a period of 12 months from the date of
purchase of this article. Evidence of unfair usage or incorrect adjustment by the owner will void this
promise.
All warranty coverage extends only to the original retail purchaser from the date of purchase. ACTION
FITNESS obligation under this Warranty is limited to replacing or repairing the product, at the discretion
of our authorised service centre. Any enquiries relating to warranties or spare parts must first be directed
to our Freecall 1800 465 070 who will then assist you in the appropriate action to be taken. For efficient
processing of your enquiry please have proof of purchase, retailer name you purchased the item from
and the brand on the product.
This warranty does not extend to any damage to a product caused by abuse, improper or abnormal
usage, or repairs not provided by ACTION. Nor does this warranty extend to products used for commer-
cial or rental purposes.This warranty does not cover ordinary wear, tear and weathering, failure to follow
directions, improper installation, improper maintenance or acts of God (such as damage caused by
storms, lightning and by snow or ice). No other Warranty beyond that specifically set forth above is
authorised by ACTION.
Our sales and service centre has been set up to provide assembly assistance, replacement parts and
accessories, and to efficiently handle all warranty related matters.
Freecall 1800 465 070
Hours 9:00am – 5:00pm Monday to Friday (excluding Public Holidays)
9:00am – 3:00pm Saturday
Website: www.actionsports.com.au
Call for service 1-800-465-070 www.actionsports.com.au
Table of contents
Other Action Fitness Elliptical Trainer manuals


