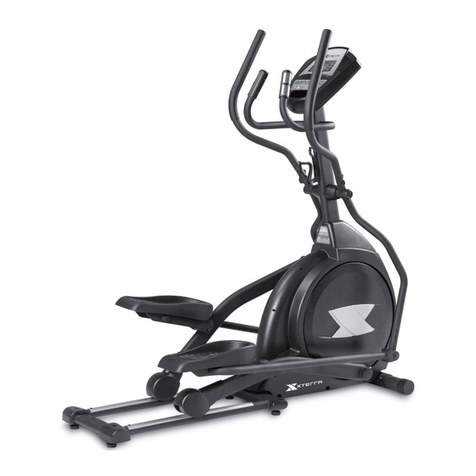
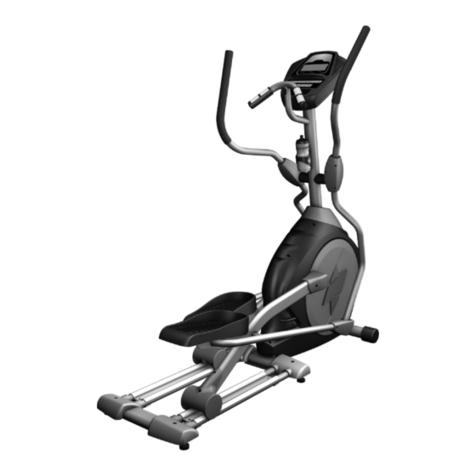
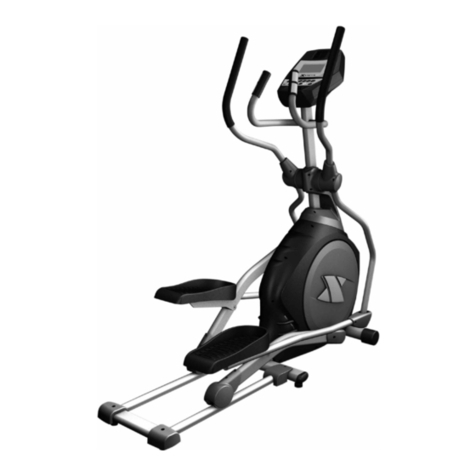
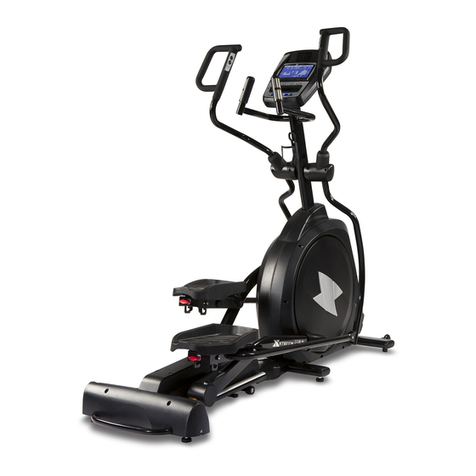
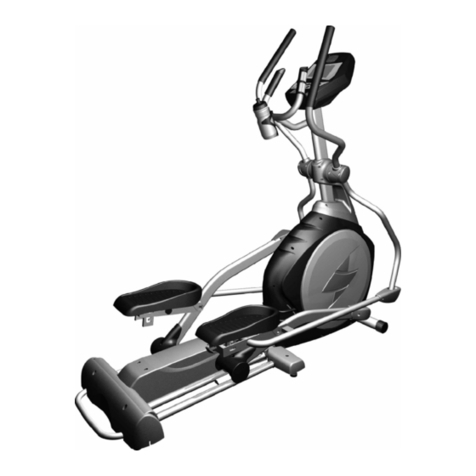
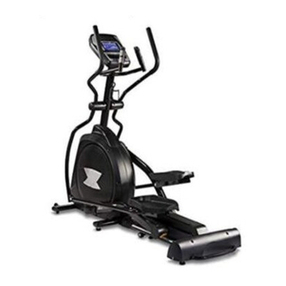
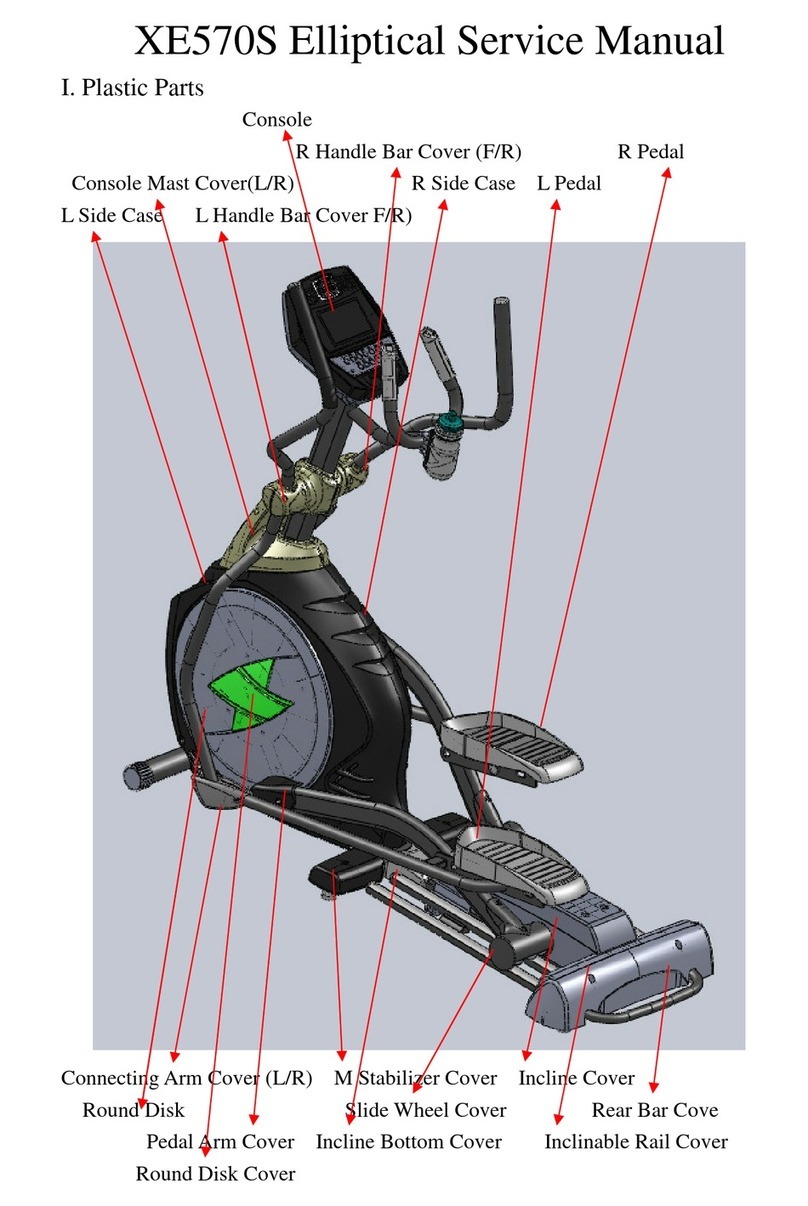
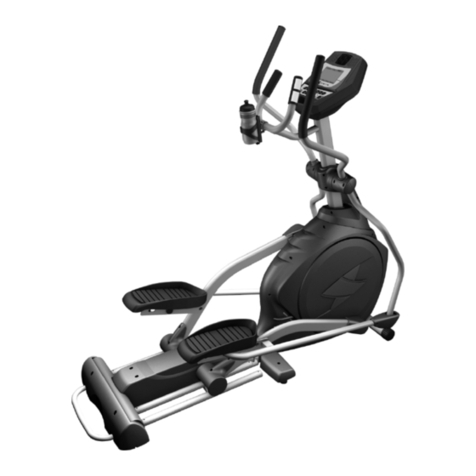
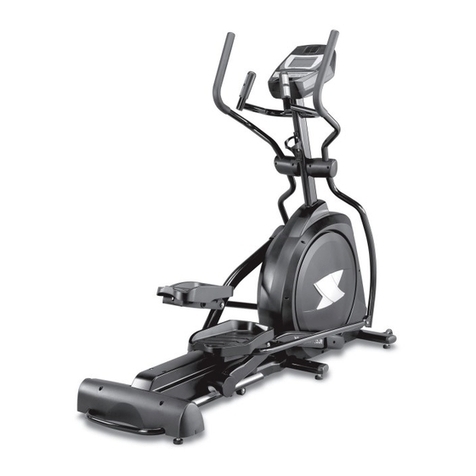
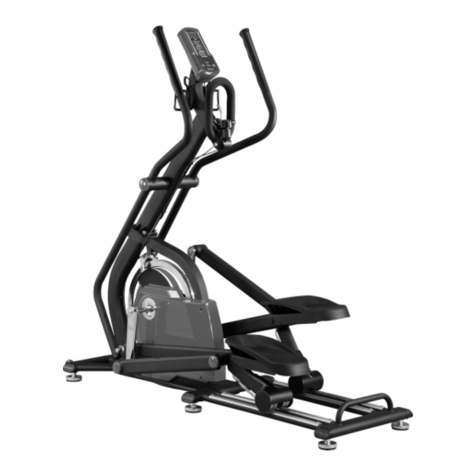
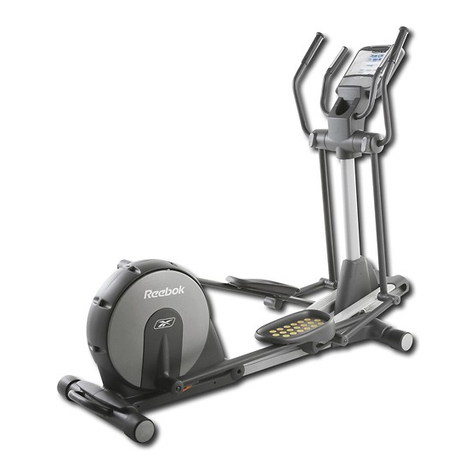
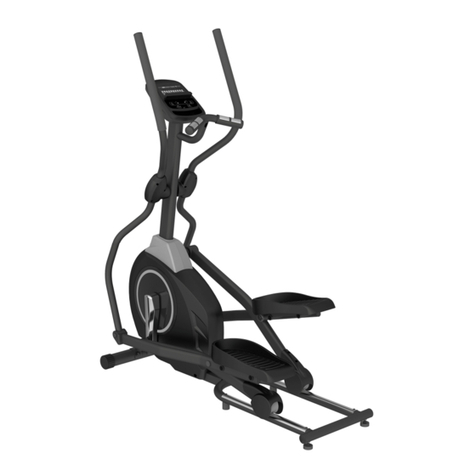
Xterra 16417220 User manual

OWNER’S MANUAL
MODEL NO.
16417220
Assembly
Operation
Trouble – hooting
Parts
Warranty
CAUTION:
You must read and
understand this owner’s
manual before operating
unit.

Customer Service 1-888-707-1880 Maurice Pincoffs Canada Inc. ©2009
1
Manufacture’s Limited Warranty
Maurice Pincoffs Canada Inc. warrants all its elliptical parts for a period of time listed below, from the date of
retail sale, as determined by a sales receipt or in the absence of a sales receipt. Maurice Pincoffs Canada
Inc.’s responsibilities include providin new or remanufactured parts, at Maurice Pincoffs Canada Inc.’s
option, and technical support to our independent dealers and servicin or anizations. In the absence of a
dealer or service or anization, these warranties will be administered by Maurice Pincoffs Canada Inc.
directly to a consumer. The warranty period applies to the followin components:
Limited WARRANTY
Frame Lifetime
All Other Components 2 Years
Labor 1 Year
This warranty is not transferable and is extended only to the ori inal owner.
The warranty shall not apply to exercise units which are (1) used for commercial or other income producin
purposes, or (2) subject to misuse, ne lect, accident or unauthorized repair and alterations.
This warranty provided herein is lieu of all other express warranties, any implied warranties, includin any
implied warranties of merchantability of fitness for particular purpose, are limited in duration to the first 12
months from date of purchase. All other obli ations or liabilities, includin liability for consequential
dama es are hereby excluded.
REPAIR PARTS AN SERVICE
All of the parts for the elliptical shown in fi ure can be ordered from Maurice Pincoffs Canada Inc. 6050 DON
MURIE STREET, NIAGARA FALLS, ONTARIO L2E 6X8. When orderin parts, the parts will be sent and
billed at the current prices. Prices may be subject to chan e without notice. Check or money order must
accompany all orders. Standard hardware items are available at your local hardware store.
To ensure prompt and correct handlin of any errors, or to answer any questions, please call our Toll
Free number: 1-888-707-1880, or local number 1-905-353-8955 or fax 1-905-353-8968 or email
customerservice@pincoffs.ca. Office hours are from 8:30 AM to 5:00 PM Monday to Friday Eastern
Standard Time.
Always include the followin information when orderin parts
Model number
Name of each part
Part number of each part
TABLE OF CONTENTS
WARRANTY 1 COMPUTER INSTRUCTIONS 12-18
SAFETY PRECAUTIONS 2-4 PARTS LIST & DIAGRAM 19-22
ASSEMBLY INSTRUCTION 5-10 TRAINING GUIDELINE 23-26
Features 11 STRETCHING 26-27

Customer Service 1-888-707-1880 Maurice Pincoffs Canada Inc. ©2009
2
IMPORTANT SAFETY INFORMATION
THIS UNIT IS INTENDED FOR HOUSEHOLD USE ONLY
READ ALL INSTRUCTIONS BEFORE USING THIS ELLIPTICAL
▲CAUTION: Before starting any exercise program, it is recommended that you consult your physician.
▲WARNING: Connect this unit to a properly grounded outlet only.
▲ ANGER: To reduce the risk of electric shock, always unplug the treadmill from the electrical outlet
immediately after using and before cleaning.
WARNING
To reduce the risk of burns, fire, electric shock, or injury to persons:
1. It is the responsibility of the owner to ensure that all users of this elliptical are adequately informed of all
warnin s and precautions.
2. The use of an extension cord with this product is not recommended. If an extension cord is needed, use
a short (less than 10 feet) heavy au e (14 au e or better) extension cord with a three pron ( rounded)
plu and receptacle.
3. Never leave the elliptical unattended when plu ed in. Always unplu the power cord immediately after
use and before cleanin the elliptical.
4. Never operate the treadmill if it has a dama ed cord or plu , if it is not workin properly, if it has been
dropped, dama ed, or exposed to water.
5. Do not pull the elliptical by the power supply cord or use cord as a handle. Keep cord away from heated
surfaces and open flames.
6. Fitness equipment must always be installed and used on a flat surface. Do not use outdoors or near
water. Do not place the unit on a loose ru or uneven surface. It is recommended to use an equipment
mat to prevent the unit from movin while it is bein used, which could possibly scratch or dama e the
surface of your floor. It is recommended to have a minimum of 3 metres safe clearance on all sides of
the elliptical while in use.
7. Keep the elliptical indoors, away from moisture and dust. Do not put the elliptical in a ara e, covered
patio or near water.
8. Do not operate the elliptical where aerosol products are used or where oxy en is bein administered.
9. Do not insert any objects into any openin s.
10.Inspect and properly ti hten all parts of the elliptical re ularly.
11.Keep children and pets away from this equipment at all times while exercisin .
12.Handicapped individuals should have medical approval and close supervision when usin this elliptical.
13.Do not place hands or feet under the elliptical. Always keep hands and le s off of the elliptical when
others are usin it.
14.Always hold the handlebars when mountin , dismountin , or usin the elliptical. Keep your back
strai ht when usin your elliptical; do not arch your back. When you stop exercisin , allow the pedals to
slowly come to a complete stop. The elliptical does not have a free wheel; the pedals will continue to
move until the flywheel stops.
15.To disconnect, turn all controls to the off position, then remove plu from outlet.

Customer Service 1-888-707-1880 Maurice Pincoffs Canada Inc. ©2009
3
16.Use the elliptical only for its intended use as described in this manual. Do not use any attachments that
are not recommended by the manufacturer.
17.User wei ht should not exceed 300lbs (136 k s).
18.Never allow more than one person on the elliptical at once.
19.Warm up 5 to 10 minutes before each workout and cool down 5 to 10 minutes afterward. This allows
your heart rate to radually increase and decrease and will help prevent strainin muscles.
20.Never hold your breath while exercisin . Breathin should remain at a normal rate in conjunction with
the level of exercise bein performed. If dizziness, nausea, chest pains, or any other abnormal
symptoms are experienced while usin this equipment, STOP the workout at once. CONSULT A
PHYSICIAN IMMEDIATELY.
21.The pulse sensor is not a medical device. Various factors, includin the user’s movement, may affect
the accuracy of heart rate readin s. The pulse sensor is intended only as an exercise aid in determinin
heart rate trends in eneral.
22.Start your pro ram slowly and very radually increase your speed and distance.
23.Always wear suitable clothin and footwear while exercisin . Do not wear loose fittin clothin that
could become entan led with the movin parts of your elliptical. Do not walk or jo barefoot, in stockin
feet or loose fittin shoes or slippers.
▲WARNING: Before be innin any exercise pro ram consult your physician. This is especially important
for individuals over the a e of 35 or persons with pre-existin health problems. Read all instructions before
usin any fitness equipment. We assume no responsibility from personal injury or property dama e
sustained by or throu h the use of this product.
SAVE THESE INSTRUCTIONS
▲WARNING!
● NEVER remove any cover without first disconnectin AC power supply.
● If A.C. volta e varies by ten percent (10%) or more, the performance of your elliptical may be
affected. Such conditions are not covered under your warranty. If you suspect the volta e
is low, contact your local power company or a licensed electrician for proper testin .
● NEVER expose this elliptical to rain or moisture. This product is NOT desi ned for Use
outdoors, near a pool or spa, or in any other hi h humidity environment. Maximum
environmental ratin s are 40-120 de rees Fahrenheit, 95% humidity non-condensin (no
water droplets formin on surfaces).

Customer Service 1-888-707-1880 Maurice Pincoffs Canada Inc. ©2009
4
WARNING!
●
NEVER remove any cover without first disconnectin AC power supply.
●
If A.C. volta e varies by ten percent (10%) or more, the performance of your elliptical may be
affected. Such conditions are not covered under your warranty. If you suspect the volta e
is low, contact your local power company or a licensed electrician for proper testin .
●
NEVER expose this
elliptical
to rain or moisture. This product is NOT desi ned for Use
outdoors, near a pool or spa, or in any other hi h humidity environment. Maximum
environmental ratin s are 40-120 de rees Fahrenheit, 95% humidity non-condensin (no
water droplets formin on surfaces).
●
NEVER operate this elliptical without readin and completely understandin the results of any
operational chan e you request from the computer.
●
Understand that chan es in resistance do not occur immediately. Set your desired level on
the computer console and release the adjustment key. The computer will obey the command
radually.
●
NEVER use your elliptical durin an electrical storm. Sur es may occur in your household
power supply that could dama e elliptical components.
●
Use caution while participatin in other activities while usin your elliptical such as watchin
television, readin , etc. These distractions may cause you to lose balance, resultin in
serious injury.
●
Always hold on to a handrail or hand bar while makin control chan es.
Your new elliptical is en ineered and manufactured to the strictest industry standards and
tolerances. All Elliptical trainers, no matter who the manufacturer, have a multitude of movin
linka es and parts. Be aware that even with the ti htest mechanical tolerances there still could
be a sli ht amount of play between some parts. This inherent play can result in sli ht noises
durin use such as clicks and small thumps. Please expect that the elliptical will not be
completely silent.
Important Electrical Information
Important Operation Instructions
Things To Know

Customer Service 1-888-707-1880 Maurice Pincoffs Canada Inc. ©2009
5
ASSEMBLY PACK CHECK LIST
Step 1
Step 2
#119 - 3/8" x 2"
Hex Head Bolt (1pc)
#121 - 3/8" x 3/4"
Hex Head Bolt (1pc)
#114 - 3/8" x 23mm
Curved Washer (1pc)
#78 - M5 x 10mm
Phillips Head Screw (4pcs)
#120 - 3/8"
Split Washer (3pcs)
#97 - 5/16" x 23mm
Flat Washer (2pcs)
#70 - 5/16" x 15mm
Hex Head Bolt (2pcs)
#101 – 17mm
Wave Washer (2pcs)
#75 - 5/16" x 15mm
Button Head Socket Bolt (6pcs)
#84 - 3.5mm × 12mm
Sheet Metal Screw (6pcs)

Customer Service 1-888-707-1880 Maurice Pincoffs Canada Inc. ©2009
6
ASSEMBLY PACK CHECK LIST
Step 3
Step 4
#71 - 5/16” x 32mm
Hex Head Bolt (2pcs)
#98 - 5/16" x 20mm
Flat Washer (2pcs)
#105 - 5/16"
Nyloc Nut (2pcs)
#89 - 3/8"
Nyloc Nut (2pcs)
#94 - 3/8" x 19mm
Flat Washer (2pcs)
#76 - 3/8 x 2-1/4"
Button Head Socket Bolt (6pcs)
#114 - 3/8" x 23mm
Curved Washer (4pcs)
#84 - 3.5mm x12mm
Sheet Metal Screw (8pcs)
#79 - M5 x 15mm
Phillips Head Screw (12pcs)
#108 - Combination M5 Allen Wrench
& Phillips Head Screw Driver (1pc)
#110 - 12mm Wrench (1pc)
#111 - 13/14mm Wrench (2pcs)
Tools

Customer Service 1-888-707-1880 Maurice Pincoffs Canada Inc. ©2009
7
STEP 1: CONSOLE MAST
• At the top openin of the main body locate the Computer Cable (32). Unravel the cable and feed the
computer cable into the bottom of the Console Mast tube (10) and out of the top openin . Install the
Console Mast into the receivin bracket on the top of the main body, pullin sli htly on the computer
cable at the top of the mast while installin ; this will ensure the cable does not et pinched and
shorted out durin assembly. There is one bolt that is pre-installed in the receivin tube that will slide
into the slots at the bottom of the console mast.
• Install the 3/8” X 3/4” bolt (121) and curved washer (114) throu h the front of the console mast; just
hand-ti hten for now. Install the 3/8” X 2-1/4” bolt (119) and split washer (120) throu h the left side of
the console mast, then ti hten all three installed bolts, and the pre-installed bolt, as ti ht as possible.
• There are three connectors at the top openin of the console mast, two Hand pulse wires (37) and
one Computer Cable (32). Connect these to the matin connectors on the back of the Console
Assembly (31). Store the excess wirin back into the Console Mast as you carefully install the Console
Assembly onto the mountin plate of Console Mast. Secure the console with four M5 x 10mm screws
(78). Be careful not to pinch any wires.
• Install the water bottle holder onto the handlebar in any position you like.

Customer Service 1-888-707-1880 Maurice Pincoffs Canada Inc. ©2009
8
STEP 2: Swin Arms
• Install the two Wave Washers (101) onto the Left and Ri ht sides of the Swin Arm axle.
• Slide the Left and Ri ht Swin Arms (4&5) onto the appropriate side of the axle. There is a
small sticker on each swin arm that shows L (Left) or R (Ri ht). Do not force the swin arms
onto the axles, they should slip on but may need to be ji led a little to ali n them properly. The
swin arms have been installed at the factory durin testin so they should fit properly.
• Install two 5/16" Flat Washers (97) onto the two 5/16" Hex Head bolts (70) and install and
ti hten in the threaded holes in the ends of the axle.
• Install the left and ri ht upper arms (13&14) to the lower arms with six 5/16” x 15mm bolts (75).

Customer Service 1-888-707-1880 Maurice Pincoffs Canada Inc. ©2009
9
STEP 3: CONNECTING ARMS AND REAR RAIL ASSEMBLY
• Ali n the hole in the rod end bearin s at the ends of the Connectin Arms (7&8) with the hole in
the bracket of the Swin Arms. There is a sleeve spacer (19) already installed in the rod ends
and held in place with a twist tie; make sure these spacers do not fall out durin assembly. The
rod end bearin should be positioned to the inside of the swin arm brackets. Install two 5/16"
Hex Head Bolts (71) throu h the left and ri ht swin arm brackets and the rod end and secure
with 5/16" Flat Washers (98) and 5/16" Nuts (105).
• Install the two Rear Rail Tubes (16) to the rear end of the Main Frame (1) and secure with two
3/8” x 2-1/4” Bolts (76), two 3/8” Flat Washers (94) and two 3/8” Nuts (89).
• Install the Rail Stabilizer (15) between the rearward ends of the Rail Tubes (16) and secure with
four 3/8” x 2-1/4” Bolts (76) and 3/8” Curved Washers (114).

Customer Service 1-888-707-1880 Maurice Pincoffs Canada Inc. ©2009
10
STEP 4: Beauty Covers
• Install the Connectin Arm Covers (59 & 60) over the connection of the rod end and Swin
Arms with four M5 Phillips Head Screws (79) and two 3.5x12mm Self Tappin Screws (84).
• Install the two Wheel Covers (52) on the pedal arms above the Wheels with four M5 Phillips
Head Screws (79).
• Install the Front Swin Arm Covers (54 & 56) and Rear Swin Arm Covers (55 & 57) over the
Swin Arm axle connections with six 3.5mm x 12mm Self Tappin Screws (84).
• Install the two Middle Stabilizer Covers (61) on the joint of the Rail Tubes (14) and the
Stabilizer. Secure the covers with two M5 x 15mm Phillips Head Screws (79).
• Install the Rear Stabilizer Covers (62 & 63) on the rearward end of the Rail Tubes (14) and
secure them with two M5 x 15mm Phillips Head Screws (79).

Customer Service 1-888-707-1880 Maurice Pincoffs Canada Inc. ©2009
11
Correctly ali ned orthopedic foot pads
Throu h research performed with a leadin sports scientist and physical rehabilitation expert, Xterra
en ineerin has developed a breakthrou h in pedal desi n. No other elliptical at any price offers these
unique features. The history of elliptical use over the past few years tells us that many users suffer from
numb toes while workin out on elliptical trainers. Many other users complain of ankle, Achilles tendon, knee
and/or hip pain. While researchin a solution to these common problems Xterra en ineers consulted
Richard DeKok, P.T., M.T.C., of St. Bernard’s Industrial Rehabilitation Center in Jonesboro Arkansas.
To ether we identified inherent problems found in elliptical desi ns and developed solutions to solve the
problems. What we found is that when you use an elliptical you tend to push outward durin the power
stroke and not just strai ht back. This causes stress on the outer part of the foot and throws off the natural
ali nment of the joints. The solution was to add a 2-de ree inward an le to the footpads. This mi ht sound
simple but what it does is strai hten the user’s joints back into a neutral ali nment. This eases the over
stressin of the ankles, knees and hips.
The second problem we identified is ‘Numb toe syndrome’ where the toes become numb after usin the
elliptical for extended periods. This problem can be rectified by standin upri ht and not leanin forward
durin use or chan in foot position on the pedals frequently.
We discovered that some users still
experience numb toes so we added
an adjustment that allows the an le of
the footpad to be chan ed.
Because everybody
is different, and there are
as many styles
to pedal
an elliptical as
there
are
people,
we
found there
is
no
one an le
that
fit every
user. Some users would be up on the balls of their
feet, resultin
in numb toes, so
we decided to let
the user adjust the
back of
the
foot pad upward
to
support the
heel,
takin the pressure off of the nerves
in the balls of the feet and the Achilles tendon. The result
was
no
more numb toes. Some users are uncomfortable at this an le so for them we desi ned in three different
adjustable an les so they could
find one that feels
best for them. There
are three
settin s available by
pullin on the red quick release handle under the rear of each footpad. The lowest settin will
set the
footpads at
zero (0) de rees, or
flat, at the bottom of
the elliptical
stroke. The
second position sets
the
footpad to
five
(5) de rees
and
the top position sets the footpads
to
ten
(10) de rees.
Transportation
The elliptical is equipped with two transport wheels, which are en a ed when the rear of the Elliptical is
lifted.
POWER CONNECTOR LOCATED ON
FRONT, LEFT HAND SIDE OF UNIT.
Features

Customer Service 1-888-707-1880 Maurice Pincoffs Canada Inc. ©2009
12
Power up
The Elliptical is supplied with an external power supply. When power is connected to the Elliptical,
the console will automatically power up. If there is no input to the console for 20 minutes the
console will o to stand-by mode to save ener y. To turn the console on press any key.
When initially powered on the console will perform an internal self-test. Durin this time all the li hts
will turn on. When the li hts o off the dot matrix display will show a software version (i.e.: VER 1.0)
and the time and distance windows will display an odometer readin . The odometer readin
displays how many hours the elliptical has been used and how many virtual miles the elliptical has
one.
The odometer will remain displayed for only a few seconds then the console will o to the start up
display. The dot matrix display will be scrollin throu h the different workout profiles of the
pro rams. You may now be in to use the console.
Operation of Your Elliptical

Customer Service 1-888-707-1880 Maurice Pincoffs Canada Inc. ©2009
13
Console Operation
Quick Start mode
This is the quickest way to start a workout. After the console powers up you just press the Start key
to be in. In Quick Start the Time will count up from zero and the workload may be adjusted
manually by pressin the Up or Down keys. Press the Enter key to switch between the Speed in
MPH or RPM readin s.
Basic information and functions:
The Data displays:
• Calories show an accumulation of calories burned (Kcal). The number shown is just an
estimate; your actual calorie burn most likely will be different. The only way to et an
accurate calorie readin is in a laboratory settin connected to a host of machines.
• Time shows elapsed time unless you set the timer to count down.
• Pulse indicates your heart rate if you are raspin the hand pulse sensors.
• RPM displays your pedalin speed in revolutions per minute.
• Speed shows your speed in miles per hour (or KM if units are set to metric, see
maintenance section pa e 18).
• Distance displays accumulated milea e. The Distance window will also display an M or KM
indicatin if the readout is in Kilometers (KM) or Miles (M).
The Elliptical has a built in heart rate monitorin system. Simply raspin the hand pulse sensors
on the stationary handle bars will start the heart Icon blinkin (this may take a few seconds). The
Pulse Display Window will display your heart rate, or Pulse, in beats per minute.
The Stop/Reset button actually has several functions. Pressin the Stop/Reset key once durin a
pro ram will Pause the pro ram for 5 minutes. If you need to et a drink, answer the phone or any
of the many thin s that could interrupt your workout, this is a reat feature. To resume your workout
durin Pause just press the Start key. If the Stop/Reset button is pressed twice durin a workout the
pro ram will end.
There is an Audio Input Jack on the front of the console and built-in speakers. You may plu any
low-level audio source si nal into this port. Audio sources include MP3, Ipod, portable radio, CD
player or even a TV or computer audio si nal.
Pro rammin the console
Each of the pro rams can be customized with your personal information and chan ed to suit your
needs. Some of the information asked for durin pro rammin is necessary to ensure the readouts
are correct. You will be asked for your A e and Wei ht. Enterin your A e is necessary durin the
Heart Rate control pro ram to ensure the correct settin s are entered in the pro ram. Enterin your
Wei ht aides in calculatin a more correct Calorie readin ; althou h we cannot provide an exact
calorie count we do want to be as close as possible.
A messa e about Calories: Calorie readin s on every piece of exercise equipment, whether it is
in a ym or at home, are not accurate and tend to vary widely. They are meant only as a uide to
monitor your pro ress from workout to workout. The only way to measure your calorie burn
accurately is in a clinical settin connected to a host of machines.

Customer Service 1-888-707-1880 Maurice Pincoffs Canada Inc. ©2009
14
Enterin a pro ram/Chan in Settin s
Press the pro ram keys to scroll throu h the pro ram selections. The profile for each pro ram will
be displayed in the dot matrix window. Press the enter key to select a pro ram and be in
customizin the settin s. If you want to workout without enterin new settin s then just press the
Start key. This will bypass the pro rammin of data and take you directly to the start of your
workout. If you want to chan e the personal settin s then just follow the instructions in the
messa e window. If you start a pro ram without chan in the settin s, the default settin s will be
used.
NOTE: A e and Wei ht default settin s will chan e when you enter a new number. So the last A e
and Wei ht entered will be saved as the new default settin s. If you enter an a e and wei ht the
first time you use the Elliptical you will not have to enter it every time you work out unless either
your a e or wei ht chan es or someone else enters a different a e and wei ht.
Manual
The Manual pro ram works as the name implies, manually. This means that you control the
workload yourself and not the computer.
1. Press the Manual pro ram button then press the Enter key.
2. The messa e window will ask you to enter your Wei ht. You may adjust the wei ht settin
usin the Up and Down keys, then press enter to continue.
3. The messa e window will ask you to enter your A e. You may adjust the a e settin usin
the Up and Down keys, then press the Enter key to accept the new number and proceed on
to the next screen.
4. Next is the Time. You may adjust the Time and press enter to continue.
5. Now you are finished editin the settin s and can be in your workout by pressin the Start
key.
6. Once the pro ram starts the elliptical will be set to level one. This is the easiest level and it is
a ood idea to stay at level one for a while to warm up. If you want to increase the work load
at any time press the Up key; the Down key will decrease the workload.
7. When the pro ram ends the messa e window will show a summary of your workout. The
summary will be displayed for a short time then the console will return to the start-up display.
Preset Pro rams
The Elliptical has seven different pro rams that have been desi ned for a variety of workouts.
These seven pro rams have factory preset profiles for achievin different oals.
P-1 Sunrise
The Sunrise pro ram simulates oin up and down a entle hill early in the mornin . The
resistance in the pedals will steadily increase and then decrease durin the pro ram.

Customer Service 1-888-707-1880 Maurice Pincoffs Canada Inc. ©2009
15
P-2 Journey
The Journey pro ram is desi ned to maximize the burnin of fat, a lifelon journey for some of us.
There are many schools of thou ht on the best way to burn fat, but most experts a ree that a lower
exertion level that stays at a steady workload is the best. The absolute best way to burn fat is to
keep your heart rate at around 60% to 70% of its maximum potential. This pro ram does not use
heart rate but simulates a lower, steady exertion workout.
P-3 Wild Ride
The Wild Ride pro ram is desi ned to increase your cardio vascular function; this is exercise for
your heart and lun s. It will build up your heart muscle and increase blood flow and lun capacity.
This is achieved by incorporatin a hi her level of exertion with sli ht fluctuations in work….a real
Wild Ride!
P-4 Xtreme
The Xtreme pro ram is desi ned to increase muscular stren th in your lower body with extreme
resistance. This pro ram will steadily increase in resistance to a hi h level and then keeps you
there. This is desi ned to stren then and tone your le s and lutes.
P-5 Canyons
The Canyons pro ram takes you throu h hi h levels of intensity followed by periods of low intensity.
This pro ram increases your endurance by depletin your oxy en level followed by periods of
recovery to replenish oxy en. Your cardio vascular system ets pro rammed to use oxy en more
efficiently this way.

Customer Service 1-888-707-1880 Maurice Pincoffs Canada Inc. ©2009
16
Pro rammin Preset Pro rams:
1. By pressin the pro ram up and down keys select the desired pro ram then press the Enter key.
2. The messa e window will ask you to enter your Wei ht. You may adjust the wei ht settin , usin the
Up and Down keys, then press the Enter key to accept the new number and proceed on to the next
screen.
3. You are now asked to enter your A e. You may adjust the a e number usin the Up and Down keys,
then press enter to continue.
4. Next is Time. You may adjust the Time and press enter to continue.
5. Now you can adjust the pro ram difficulty level. Press the up and down keys to adjust the whole profile
difficulty level then press enter.
6. Now you are finished editin the settin s and can be in your workout by pressin the Start key.
7. If you want to increase or decrease the workload at any time durin the pro ram press the Up or Down
key. This will chan e only the work level durin the current se ment.
8. When the pro ram ends the messa e window will show a summary of your workout. The summary will
be displayed for a short time then the console will return to the start-up display.
Custom User Defined Pro rams
The customizable User pro rams allow you to build and save your own workout. You can build your
own custom pro ram by followin the instructions below.
1. Select the User pro ram (U1 or U2) then press enter.
2. The messa e window will ask you to enter your Wei ht. You may enter your wei ht usin the
Up and Down keys, then press the Enter key to accept the new number and proceed on to the
next screen.
3. You are now asked to enter your A e. You may adjust the a e number usin the Up and Down
keys, then press enter to continue.
4. Next is Time. You may adjust the total pro ram time and press enter to continue.
5. Now the messa e window will ask you to adjust the first se ment level; use the up & down
keys to adjust. When you finish adjustin the first se ment, or if you don’t want to chan e it,
then press enter to continue to the next se ment.
6. The next se ment will show the same level as the previously adjusted se ment. Repeat the
same process as the last se ment then press enter. Continue this process until all twenty
se ments have been set.
7. The messa e window will ask you to press enter to save the pro ram. After savin the
pro ram, press start to be in.
8. If you want to increase or decrease the workload at any time durin the pro ram press the Up
or Down key. This will only affect the workload for the present position in the profile. When the
profile chan es to the next column it will return to the preset work level.
9. When the pro ram ends the messa e window will show a summary of your workout. The
summary will be displayed for a short time then the console will return to the start-up display.

Customer Service 1-888-707-1880 Maurice Pincoffs Canada Inc. ©2009
17
Heart Rate Control Pro ram operation
To start the HRC pro ram follow the instructions below or just select the HRC pro ram then the
Enter button and follow the directions in the messa e window.
1. Select the HRC pro ram then press the Enter key.
2. The messa e window will ask you to enter your A e. You may enter your a e usin the Up and
Down keys then press the Enter key to accept the new number and proceed.
3. You are now asked to enter your Wei ht. You may adjust the wei ht number usin the Up and
Down keys.
4. Next is Time. You may adjust the Time and press enter to continue.
5. You are now asked to select the Tar et heart rate Level. This is the heart rate level you will
experience durin the pro ram. Adjust the level and then press enter.
6. Now you are finished editin the settin s and can be in your workout by pressin the Start key.
You can also o back and modify your settin s by pressin the Stop key to o back one level, or
screen.
7. If you want to increase or decrease the tar et heart rate at any time durin the pro ram press
the Up or Down key.
When the pro ram ends the messa e window will show a summary of your workout. The summary
will be displayed for a short time then the console will return to the start-up display

Customer Service 1-888-707-1880 Maurice Pincoffs Canada Inc. ©2009
18
Maintenance:
1. Wipe down all areas in the sweat path with a damp cloth after each workout.
2. If a squeak, thump, clickin or rou h feelin develops the main cause is most likely one of two
reasons:
i. The hardware was not sufficiently ti htened durin assembly. All bolts that were
installed durin assembly need to be ti htened as much as possible. It may be
necessary to use a lar er wrench than the one provided if you cannot ti hten the bolts
sufficiently. I cannot stress this point enou h; 90% of calls to the service department
for noise issues can be traced to loose hardware or the rear rails bein dirty.
ii. Dirt build-up on the rear rails and polyurethane wheels are also a source of noise.
Noise from build-up on the rails can cause a thumpin sound that you would swear is
comin from inside the main body of the machine because noise travels, and is
amplified in the tubin of the frame. Clean the rails and wheels with a lint free cloth
and rubbin alcohol. Stubborn build-up can be removed with your thumbnail or a
non-metallic scraper, like the back ed e of a plastic knife. After cleanin , apply a
small amount of lubricant on the rails with your fin ers or a lint free cloth. You only
need a thin coat of lubrication, wipe off any excess.
3. If squeaks or other noises persist, check that the unit is properly leveled before callin the
service department.
Maintenance Menu in console software:
The console has built in maintenance/dia nostic software. The software will allow you to chan e
the console settin s from En lish to Metric and turn off the beepin of the speaker when a key is
pressed for example. To enter the Maintenance menu (may be called En ineerin mode,
dependin on version) press and hold down the Start, Stop and Enter keys. Keep holdin the keys
down for about 5 seconds and the messa e window will display “En ineerin mode”. Press the
enter button to access the menu below. Press the up and down keys to navi ate the menu.
a. Display test (tests all the display functions, press enter to perform test)
b. Key test (will allow you to test all the keys to make sure they are functionin )
c. Functions (Press enter to access settin s, use up/dn keys to scroll)
i. ODOMETER reset (reset the odometer)
ii. Units (Set to En lish or Metric display readin s)
iii. Bike or Elliptical (chan es settin s so the console can be used on an
Xterra bike or elliptical)
iv. Sleep mode Turns on/off sleep mode.
v. Motor test (continually runs the tensionin ear motor)
vi. Manual (Allows steppin of the ear motor)
vii. Key tone (Turn on or off the beep when a key is pressed)
d. Security (Allows you to lock the keypad so no unauthorized use is allowed) When
the child lock is enabled, the console will not allow the keypad to operate unless
you press and hold the Start and Enter buttons for 3 seconds to unlock the
console.
e. Clear EEPROM for en ineerin use only

Customer Service 1-888-707-1880 Maurice Pincoffs Canada Inc. ©2009
19
PARTS LIST
NO.
Part Number
DESCRIPTION
O'TY
1
1722001X
Main Frame 1
2
17220
02X
Pedal Arm(L) 1
3
17220
03X
Pedal Arm(R) 1
4
17220
04X
Lower Handle Bar (L) 1
5
17220
05X
Lower Handle Bar (R) 1
6
17220
06X
Bushing Housing, Pedal Arm 2
7
17220
07X
onnecting Arm (L) 1
8
17220
08X
onnecting Arm (R) 1
9
17220
09X
ross Bar 2
10
17220
10X
onsole Mast 1
11
17220
11X
Idler Wheel Assembly 1
12
1722
0
12X
rank Axle 1
13
17220
13X
Handle Bar (L) 1
14
17220
14X
Handle Bar (R) 1
15
17220
15X
Rail Assembly 1
16
17220
16X
Rail Tube 2
17
17220
17X
Axle for Pedal 2
18
17220
18X
Axle for Slide Wheel 2
19
17220
19X
Fish-eye Sleeve 3
20
17220
20X
Bearing, rank Axle 2
21
17220
21X
Bearing for Idler Arm 6
22
17220
22X
Bearing for Slide Wheel 8
23
17220
23X
Fish-eye Bearing 2
24
17220
24X
Ø31 ר25.5 ר 19 × 16+3T_Bushing 4
25
17220
25X
Steel Rope 1
26
17220
26X
Belt 1
27
17220
27X
Drive Pulley 1
28
17220
28X
F
lywheel
(
Brake
)
1
29
17220
29X
Magnet 1
30
17220
30X
Woodruff Key 2
31
17220
31X
onsole 1
31~1
17220
31
-
1X
Top onsole over 1
31~2
17220
31
-
2X
Bottom onsole over 1
31~3
17220
31
-
3X
Inner onsole over 1
31~4
17220
31
-
4X
Deflector Fan Grill 1
31~5
17220
31
-
5X
onsole P B Board 1
31~6
17220
31
-
6X
onsole Key Board 1
31~7
17220
31
-
7X
Amplifier 1
31~8
17220
31
-
8X
300m/m_Earphone onnecting able 1
31~9
17220
31
-
9X
250m/m_Speaker W/ able 2
31~10
17220
31
-
10X
200m/m_Power ord Of Amplifier 1
31~11
17220
31
-
11X
Interface Daughter Board 1
31~13
17220
31
-
13X
400m/m_Fan 1
32
17220
32X
1300m/m_ omputer able 1
33
17220
33X
750m/m_D Power ord 1
34
17220
34X
Gear Motor
1
Table of contents
Other Xterra Elliptical Trainer manuals
Xterra
Xterra FS3.0 User manual

Xterra
Xterra FS3.0 User manual

Xterra
Xterra FS1.5 ELLIPTICAL User manual

Xterra
Xterra FS5.9e User manual

Xterra
Xterra FSX3500 User manual

Xterra
Xterra FS5.8e User manual

Xterra
Xterra FS400 User manual

Xterra
Xterra XTR0003 CARDIOFIT 2000 User manual

Xterra
Xterra 164174535US User manual
Xterra
Xterra 16417320 User manual

Xterra
Xterra FS5.25e User manual

Xterra
Xterra FS2.5 User manual

Xterra
Xterra EU150 User manual

Xterra
Xterra FS4.0e User manual
Xterra
Xterra 16604701500 User manual

Xterra
Xterra FS3.9e User manual

Xterra
Xterra 164174500US User manual

Xterra
Xterra 16417681US User manual

Xterra
Xterra FS420e User manual
Xterra
Xterra FS220e User manual