Addictive Desert Designs Bomber User manual

2017-Current Ford SuperDuty
Bomber™ Front Bumper Installation Instructions
Addictive Desert Designs® | Page 1
ADDICTIVE DESERT DESIGNSADDICTIVE DESERT DESIGNS®®
Preparation:
• Disconnect the negative battery terminal. Park the vehicle on level ground and set the emergency brake.
• We recommend reading through the installation instructions in whole before performing the work.
• When button head bolts are being used, install the supplied washer on the nut side. en, hold the bolt station-
ary and only turn the nut to tighten. Do not turn the bolt to tighten hardware assembly, unless otherwise noted.
• Estimated Installation Time: 2 Hours for OEM Removal/Bumper Installation
1 Additional Hour to Wire Center Lights
1 Additional Hour to Wire Side Lights
**This installation requires 2 people for best results**
**Labor Rates are based on a vehicle with no pre-existing damage. Wiring labor is based on a standard wiring procedure
with light switches installed in an easily accessible location. Custom light triggering or switch mounting location will
result in a greater labor charge.**
You will need the following tools:
- Ratchet - 15mm Socket - 18mm Socket
- 9/16" Socket - 13/16" Socket - 9/16" Wrench
- 3/4" Wrench - 7/8" Wrench - 7/32" Allen Wrench/Socket
- 5/16" Allen
Included in Kit:
4 - Hex Head Bolts
(3/8-16 x 1")
6- Fender Washers
(3/8")
4 - U-Nuts
(3/8"-16)
4 - Hex Head Bolts
(9/16-12 x 2")
8 - Flat Washers
(9/16")
4 - Nylon Lock Nuts
(9/16"-12)
4 - Hex Head Bolts
(1/2-13 x 1 1/2")
8 - Flat Washers
(1/2")
4 - Nylon Lock Nuts
(1/2"-13)
4 - Black Button Head Bolts
(1/2-13 x 1 1/2")
4 - Black Washers
(1/2")
4 - Black Nylon Lock Nuts
(1/2"-13)
2 - Black Button Head Bolts
(3/8-16 x 1")
2 - Black Washers
(3/8")
2 - Black Nylon Lock Nuts
(3/8"-16)
2 - Hex Head Bolts
(3/8-16 x 1 1/4")
2 - Flat Washers
(3/8")
2 - Nylon Lock Nuts
(3/8"-16)
2 - Bumper Mounting Brackets 4 - Carriage Bolts
(3/8-16 x 1")
(20 Model Only)
4 - Flat Washers
(3/8")
(20 Model Only)
4 - Nylon Lock Nuts
(3/8"-16)
(20 Model Only)
2 - Light Mount Tabs
(for 20" LED Bar)
(20 Model Only)

2017-Current Ford SuperDuty
Bomber™ Front Bumper Installation Instructions
Addictive Desert Designs® | Page 2
ADDICTIVE DESERT DESIGNSADDICTIVE DESERT DESIGNS®®
2. Use a 15mm Socket to remove the two bolts (per side) that secure the OEM bumper side supports. ese
bolts can be seen when looking into the wheel well, towards the front of the truck. Save these bolts for reuse. (Fig
B)
Fig BFig B
3. Remove the two plastic covers that sit around the tow hooks by unclipping the two top clips that hold them
on. (Fig C) If you have a 2020-Up these will look slightly dierent but still need to be removed.
Fig CFig C
1. Unplug the main fog light harness connector. is connector is located along the driver side frame rail un-
derneath the truck. (Fig A)
Fig AFig A
Removal:

2017-Current Ford SuperDuty
Bomber™ Front Bumper Installation Instructions
Addictive Desert Designs® | Page 3
ADDICTIVE DESERT DESIGNSADDICTIVE DESERT DESIGNS®®
4. Use an 18mm Socket to remove the OEM bumper mounting bolts (4 per side) that are visible aer removing
the two plastic covers. (Fig D)
Fig DFig D
5. Remove the OEM Bumper.
6. Use an 18mm to remove the tow hook mounting bolts (4 per side), then remove the tow hooks. (Fig E)
Fig EFig E

2017-Current Ford SuperDuty
Bomber™ Front Bumper Installation Instructions
Addictive Desert Designs® | Page 4
ADDICTIVE DESERT DESIGNSADDICTIVE DESERT DESIGNS®®
7. Use an 18mm Socket to remove the mounting nuts (4 per side) for the lower brackets on each frame rail.
en, remove these brackets. Save these bolts for reuse. (Fig F)
Fig FFig F

2017-Current Ford SuperDuty
Bomber™ Front Bumper Installation Instructions
Addictive Desert Designs® | Page 5
ADDICTIVE DESERT DESIGNSADDICTIVE DESERT DESIGNS®®
Installation:
8. If you have the dual 20" light bar version of this bumper, follow this step. If not, skip this step. Use the
supplied 3/8" Carriage Bolts (x4), 3/8" Washers (x4), and 3/8" Lock Nuts (x4) to loosely install the onto the
bumper. en, install the light bars using the hardware supplied by the light manufacturer. e nal product will
look like (Fig G).
Fig GFig G
9. If you have the Baja LP6 version of this bumper, follow the next 3 steps. If not, skip to step ?. Remove the 6
bolts that hold the light bracket to the bumper. en, remove this bracket from the bumper. (Fig H)
Fig HFig H

2017-Current Ford SuperDuty
Bomber™ Front Bumper Installation Instructions
Addictive Desert Designs® | Page 6
ADDICTIVE DESERT DESIGNSADDICTIVE DESERT DESIGNS®®
10. Install your Baja LP6 lights using the light manufacturer's mounting hardware. (Fig I)
11. Reinstall your light bracket onto the bumper by reversing Step 9.
Fig IFig I
12. If you have the Rigid 360 Series version of this bumper, you can install your lights onto the bumper without
removing the light bracket.
13. Install the supplied U-Nuts (x4) onto your bumper as shown in (Fig J).
Fig JFig J

2017-Current Ford SuperDuty
Bomber™ Front Bumper Installation Instructions
Addictive Desert Designs® | Page 7
ADDICTIVE DESERT DESIGNSADDICTIVE DESERT DESIGNS®®
14. Set the supplied Bumper Mounting Brackets in place on the vehicle. en, install the supplied 9/16" Bolts
(2 per side), 9/16" Washers (4 per side), and 9/16" Lock Nuts (2 per side) in the top mounting holes. Install the
supplied 1/2" Hex Head Bolts (2 per side), 1/2" Washers (4 per side), and 1/2" Lock Nuts (2 per side) in the side
mounting holes. Install the supplied 1/2" Black Button Head Bolts (1 per side), Black 1/2" Washers (1 per side),
and Black 1/2" Lock Nut (1 per side) in the back mounting tab. (Fig K)
Install the 9/16" Bolts Here
Install the 1/2" Hex Head
Bolts Here Install the 1/2" Button
Head Bolt Here
Fig KFig K
15. Install the supplied 3/8" x 1 1/4" Hex Head Bolt (1 per side) with one regular washer (to be installed on the
bottom side of the mount) and one fender washer (to be installed inside the frame rail) in the bottom mounting
hole on the bumper brackets. (Fig L)
Install the nut and fenderInstall the nut and fender
washer herewasher here
Install the bolt and normalInstall the bolt and normal
washer herewasher here
Fig LFig L

2017-Current Ford SuperDuty
Bomber™ Front Bumper Installation Instructions
Addictive Desert Designs® | Page 8
ADDICTIVE DESERT DESIGNSADDICTIVE DESERT DESIGNS®®
16. If you have a li kit with a sway bar bracket similar to what is pictured, loosen the sway bar bracket, slide
the bumper bracket into place, then tighten the sway bar bracket so that the sway bar bracket sandwiches the
bumper bracket between it and the frame as shown. (Fig M)
17. Set the bumper in place on the vehicle. Install the supplied 1/2" Black Button Head Bolts (1 per side), 1/2"
Black Washers (1 per side), and 1/2" Black Lock Nuts (1 per side) on the outer/lower mounting holes of the
frame horns. en, install the supplied 3/8" Hex Head Bolts (2 per side) and 3/8" Fender Washers (2 per side)
from the back side of the frame horns. Leave these bolts loose for now. (Fig N)
Sandwich the bumper bracketSandwich the bumper bracket
between the frame and the swaybetween the frame and the sway
bar bracket.bar bracket.
Fig MFig M
Fig NFig N

2017-Current Ford SuperDuty
Bomber™ Front Bumper Installation Instructions
Addictive Desert Designs® | Page 9
ADDICTIVE DESERT DESIGNSADDICTIVE DESERT DESIGNS®®
18. Install the supplied 3/8" Black Button Head Bolt (1 per side), 3/8" Black Washer (1 per side), and 3/8" Black
Lock Nut (1 per side) into the skid plate mounting hole. Leave these bolts loose for now. (Fig O)
Fig OFig O
19. Align the bumper so it is centered le to right and straight in relation to the headlights/grille. en, tighten
the 3/8" Mounting Bolts to 25 foot pounds and the 1/2" Mounting Bolts to 70 foot pounds.
20. Stand back and enjoy your new ADD Bomber™ Front Bumper.
21. Check and re-tighten, if needed, all mounting bolts aer 100 miles and periodically thereaer.

2017-Current Ford SuperDuty
Bomber™ Front Bumper Installation Instructions
Addictive Desert Designs® | Page 10
ADDICTIVE DESERT DESIGNSADDICTIVE DESERT DESIGNS®®
For Additional Support or Technical Questions,
Please Call 480-671-0820 or
Email I[email protected]
is product is protected by one or more U.S. patents
www.addictivedesertdesigns.com/patents
Table of contents
Other Addictive Desert Designs Automobile Accessories manuals
Addictive Desert Designs
Addictive Desert Designs ADD-Lander User manual
Addictive Desert Designs
Addictive Desert Designs ADD-Lander User manual

Addictive Desert Designs
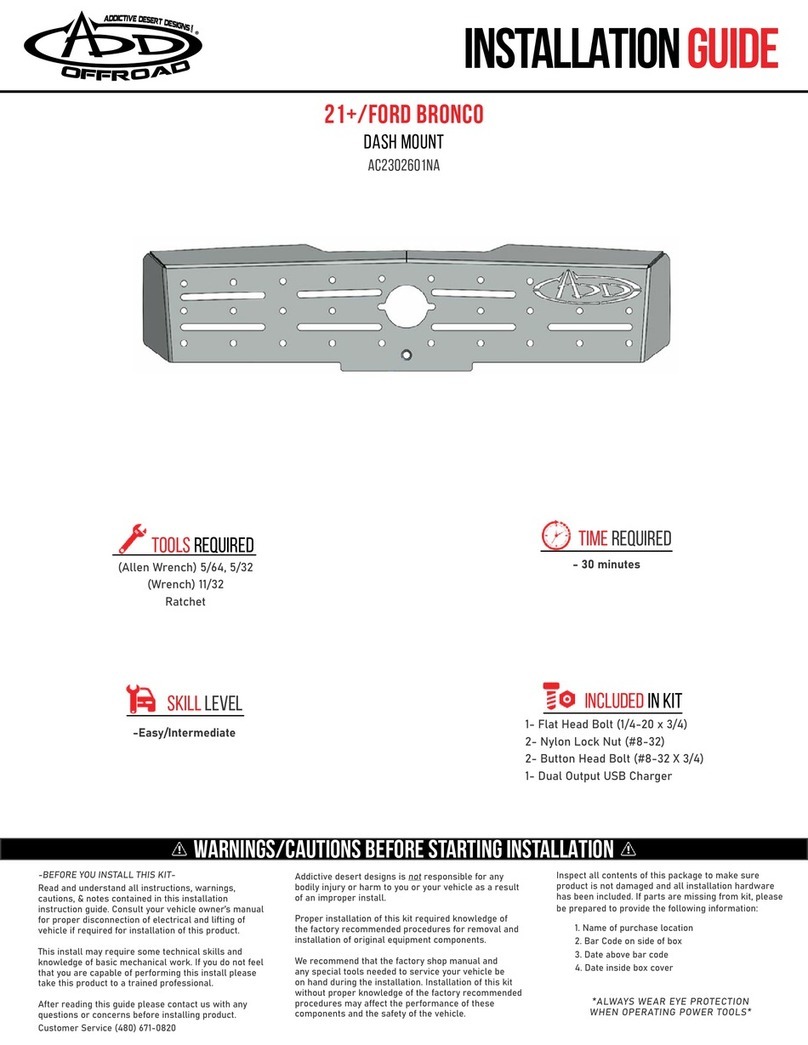
Addictive Desert Designs AC2302601NA User manual

Addictive Desert Designs
Addictive Desert Designs F1503452580103 User manual
Addictive Desert Designs
Addictive Desert Designs Venom Side Steps User manual