AddPac IPNext190 User manual

IPNext190
[System Installation Guide]
AddPac Technology Co., Ltd.
www.addpac.com

IPNext 190 System Installation Guide
AddPac Technology Proprietary & Documentation 132 - 2
IPNext190
Note:
The specification and information in this document are subject to change without notice. All statements, information, and
recommendations in this document are believed to be accurate but are presented without warranty of any kind, express or implied.
In no event shall AddPac or its suppliers disclaim all warranties, expressed or implied, including, without limitation, lost profits or
loss or damage to data arising out of the use or inability to use this manual. For detail specification, information or sales and
warranty, please contact Technical Sales division of AddPac.

IPNext 190 System Installation Guide
AddPac Technology Proprietary & Documentation 132 - 3
[CONTENTS]
CHAPTER 1. INTRODUCTION ............................................................................................................................. 11
OVERVIEW.................................................................................................................................................................... 11
Features.................................................................................................................................................................. 11
Main Features........................................................................................................................................................15
System Architecture..............................................................................................................................................18
HARDWARE FEATURES................................................................................................................................................. 19
SOFTWARE FEATURE ................................................................................................................................................... 20
INPUT/OUTPUT COMPONENTS..................................................................................................................................... 23
Components of the Front Panel..........................................................................................................................23
Components of the Rear Panel...........................................................................................................................24
CHAPTER 2. INSTALLING ....................................................................................................................................25
PREPARING FOR INSTALLATION.................................................................................................................................... 25
Safety Recommendations....................................................................................................................................25
Maintaining Safety with Electricity ......................................................................................................................25
Site Requirements in General.............................................................................................................................26
Required Tools and Equipment...........................................................................................................................26
Package contents..................................................................................................................................................28
INSTALLING ................................................................................................................................................................... 30
Connecting Async Serial interface......................................................................................................................30
Connecting Ethernet.............................................................................................................................................31
Connecting Analog Voice Interface (option)......................................................................................................32
Connecting Digital E1 Interface (optional).........................................................................................................33
BOOTING PROCESS AND OPERATION FUNDAMENTALS............................................................................................... 34
CHAPTER 3. CONSOLE COMMANDS...............................................................................................................37
OVERVIEW.................................................................................................................................................................... 37
Using Hyper-Terminal on the Console Port for Initial Setups.........................................................................37
APOS Command Instructions.............................................................................................................................41
User Mode Commands ........................................................................................................................................42
Administrator Mode Commands .........................................................................................................................43
SYSTEM-LEVEL BASIC CONFIGURATION SETTINGS..................................................................................................... 45
Login........................................................................................................................................................................45
Password................................................................................................................................................................49
hostname................................................................................................................................................................50
clock........................................................................................................................................................................51

IPNext 190 System Installation Guide
AddPac Technology Proprietary & Documentation 132 - 4
Line vty/console.....................................................................................................................................................52
Utilization................................................................................................................................................................54
interface..................................................................................................................................................................57
Default Route.........................................................................................................................................................60
voip-interface .........................................................................................................................................................62
dns...........................................................................................................................................................................64
logging ....................................................................................................................................................................66
SYSTEM SERVICE CONFIGURATION............................................................................................................................. 68
telnet server ...........................................................................................................................................................68
ftp server.................................................................................................................................................................70
snmp........................................................................................................................................................................72
IP TCP Keep-alive.................................................................................................................................................74
call-manager sscp store-event............................................................................................................................77
CALL-MANAGER SERVICE CONFIGURATION................................................................................................................ 80
http server...............................................................................................................................................................80
network-domain interface.....................................................................................................................................82
LDAP.......................................................................................................................................................................84
Presence Server....................................................................................................................................................88
Media Server..........................................................................................................................................................90
LDAP Client............................................................................................................................................................92
VERIFYING NETWORK CONFIGURATION SETTINGS ..................................................................................................... 95
Displaying the Status of Configuration Settings................................................................................................95
Verifying IP, Default Route Configuration Settings...........................................................................................99
Verifying LDAP Configuration Settings.............................................................................................................100
UPGRADING APOS.................................................................................................................................................... 104
Enabling FTP Service.........................................................................................................................................104
Uploading APOS .................................................................................................................................................105
CHAPTER 4. INITIALIZING .................................................................................................................................107
BASIC SYSTEM CONFIGURATION ............................................................................................................................... 107
Step1. Initialize ....................................................................................................................................................107
Step2. Configure the interface...........................................................................................................................108
Step3. Configure Default Route........................................................................................................................108
CONFIGURING SYSTEM SERVICE............................................................................................................................... 109
http server.............................................................................................................................................................109
ftp server............................................................................................................................................................... 110
INITIALIZING FILE SYSTEM (OPTIONAL)..................................................................................................................... 111
INITIALIZING CALL-MANAGER..................................................................................................................................... 112
Step4. Execute and Process Initialization of System Maintenance Tool..................................................... 112

IPNext 190 System Installation Guide
AddPac Technology Proprietary & Documentation 132 - 5
Step5. Configure Presence Server................................................................................................................... 112
Step6. Configure Media Server......................................................................................................................... 112
Step7. Configure ldapclient................................................................................................................................ 113
Step8. Verify the Status of Call Manager Service........................................................................................... 113
Step9. Access to Web-based SMM.................................................................................................................. 115
CHAPTER 5. APPENDIX ..................................................................................................................................... 119
Console Port Signal and Pinout........................................................................................................................ 119
Pinout of UTP Cable (RJ-45 to RJ-45).............................................................................................................120
Pinout of E1/T1 Cable (RJ-45 to PBX).............................................................................................................121
ABBREVIATION AND GLOSSARY.................................................................................................................................. 122

IPNext 190 System Installation Guide
AddPac Technology Proprietary & Documentation 132 - 6
[FIGURES]
Figure 1-1 Network Diagram for the System Architecture of IPNext190............................................................................18
Figure 1-2 Front View........................................................................................................................................................23
Figure 1-3 IPNext190 Rear View.......................................................................................................................................24
Figure 2-1 Connecting Async Serial Interface ...................................................................................................................30
Figure 2-2 Connecting LAN0/LAN1...................................................................................................................................31
Figure 2-3 Connecting PSTN Interface..............................................................................................................................32
Figure 2-4 Connecting Digital E1.......................................................................................................................................33
Figure 3-1 MS-Windows의Terminal Emulator HyperTerminal..........................................................................................37
Figure 3-2 Connection Name Entry for HyperTerminal......................................................................................................38
Figure 3-3 Settings for Connecting the Console Cable to Serial port ................................................................................39
Figure 3-4 COM1 Setup Example......................................................................................................................................40
Figure 3-5 APOS Image File Upgrade Using FTP...........................................................................................................104
Figure 4-1 Web Based SMM Access Screen 1................................................................................................................ 115
Figure 4-2 Web Based SMM Access Screen 2................................................................................................................ 116
Figure 4-3 Web Based SMM Access Screen 3................................................................................................................ 117
Figure 4-4 Web Based SMM Access Screen 4................................................................................................................ 118
Figure 5-1 100Base-TX RJ-45 Connector.......................................................................................................................120
Figure 5-2 Digital E1/T1 RJ-45 Pinout.............................................................................................................................121

IPNext 190 System Installation Guide
AddPac Technology Proprietary & Documentation 132 - 7
[TABLES]
Table 1-1 IPNext190: Collaborative Features....................................................................................................................17
Table 1-2 IPNext190 Hardware Specifications...................................................................................................................19
Table 1-3 IPNext190 Software Specifications....................................................................................................................20
Table 1-4 Description for the Components of the Front Panel...........................................................................................23
Table 1-5 Description for the Components of the Rear Panel............................................................................................24
Table 2-1 IPNext190 Product Package..............................................................................................................................28
Table 3-1 User Mode Commands......................................................................................................................................42
Table 3-2 Administrator Mode Commands.........................................................................................................................43
Table 3-3 Logging in as Root.............................................................................................................................................45
Table 3-4 Verifying the User Account Information..............................................................................................................46
Table 3-5 Registering a New User.....................................................................................................................................46
Table 3-6 Logging into General User Account ...................................................................................................................47
Table 3-7 Deleting User.....................................................................................................................................................47
Table 3-8 Creating a Password .........................................................................................................................................49
Table 3-9 Enable Mode Entry ............................................................................................................................................49
Table 3-10 Verifying the Created Password.......................................................................................................................49
Table 3-11 Disabling Password..........................................................................................................................................50
Table 3-12 Creating a Hostname.......................................................................................................................................50
Table 3-13 Initializing Hostname........................................................................................................................................50
Table 3-14 Clock Configuration Settings............................................................................................................................51
Table 3-15 Verifying clock Settings....................................................................................................................................51
Table 3-16 Line vty/console Configuration Settings...........................................................................................................52
Table 3-17 Verifying Line vty/console Settings ..................................................................................................................52
Table 3-18 Initializing Line vty/console Settings ................................................................................................................53
Table 3-19 Utilization Configuration Settings.....................................................................................................................54
Table 3-20 Verifying Utilization Settings.............................................................................................................................54
Table 3-21 Disabling Utilization .........................................................................................................................................56
Table 3-22 Configuring Fastethernet .................................................................................................................................57
3-23 Configuring IPv6 Interface.........................................................................................................................................57
Table 3-24 Configuring IPv4 Interface ...............................................................................................................................57
Table 3-25 Configuring IPv6 Interface ...............................................................................................................................58
Table 3-26 Deleting IPv4 Interface.....................................................................................................................................58
Table 3-27 IPv6 Deleting Interface.....................................................................................................................................59
Table 3-28 Specifying IPv4 Default route...........................................................................................................................60
Table 3-29 Specifying IPv6 Default route...........................................................................................................................60

IPNext 190 System Installation Guide
AddPac Technology Proprietary & Documentation 132 - 8
Table 3-30 Verifying IPv4 Default route .............................................................................................................................60
Table 3-31 Verifying IPv6 Default route .............................................................................................................................61
Table 3-32 IPv4 Default route Deleting..............................................................................................................................61
Table 3-33 Deleting IPv6 Default route..............................................................................................................................61
Table 3-34 Configuring VoIP-Interface...............................................................................................................................62
Table 3-35 Verifying the Settings of VoIP-Interface............................................................................................................62
Table 3-37 Initializing VoIP-Interface Settings ...................................................................................................................63
Table 3-38 Configuring DNS..............................................................................................................................................64
Table 3-39 Verifying DNS Settings.....................................................................................................................................64
Table 3-40 Disabling DNS .................................................................................................................................................65
Table 3-41 Configuring Logging.........................................................................................................................................66
Table 3-42 Verifying Logging Configuration Settings.........................................................................................................67
Table 3-43 Disable Logging...............................................................................................................................................67
Table 3-44 Telnet Configuration ......................................................................................................................................68
Table 3-45 Verifying Telnet Settings...................................................................................................................................68
Table 3-46 Disabling Telnet ...............................................................................................................................................69
Table 3-47 FTP Server Configuration................................................................................................................................70
Table 3-48 Verifying FTP Settings .....................................................................................................................................70
Table 3-49 Disabling FTP ..................................................................................................................................................71
Table 3-50 SNMP Configuration........................................................................................................................................72
Table 3-51 Verifying SNMP Settings..................................................................................................................................73
Table 3-52 Disabling SNMP...............................................................................................................................................73
Table 3-53 IP TCP Keep-alive ...........................................................................................................................................74
Table 3-54 Verifying IP TCP Keep-alive.............................................................................................................................75
Table 3-55 Initializing IP TCP Keep-alive...........................................................................................................................76
Table 3-56 call-manager sscp store-event Settings...........................................................................................................77
Table 3-57 Verifying call-manager sscp store-event Settings ............................................................................................78
Table 3-58 Initializing call-manager sscp store-event Settings ..........................................................................................79
Table 3-59 Configuring http ...............................................................................................................................................80
Table 3-60 Verifying http Configuration Settings................................................................................................................80
Table 3-61 Disabling http...................................................................................................................................................81
Table 3-62 Configuring the Settings of network-domain interface .....................................................................................82
Table 3-63 Verifying network domain interface Configuration Settings..............................................................................83
Table 3-64 Initializing network-domain interface Settings..................................................................................................83
Table 3-65 Configuring LDAP............................................................................................................................................84
Table 3-66 Configuring LDAP Notification Server..............................................................................................................84
Table 3-65 Changing LDAP Port........................................................................................................................................85
Table 3-67 Verifying LDAP and Notification Server Configuration Settings .......................................................................85

IPNext 190 System Installation Guide
AddPac Technology Proprietary & Documentation 132 - 9
Table 3-68 Disabling LDAP and Notification Server Configuration Settings ......................................................................87
Table 3-69 Enabling Presence Server...............................................................................................................................88
Table 3-70 Verifying Presence Server Configuration Settings...........................................................................................88
Table 3-71 Disabling Presence Server ..............................................................................................................................89
Table 3-72 Media Server Configuration Settings ...............................................................................................................90
Table 3-73 Verifying Media Server Configuration Settings.................................................................................................90
Table 3-74 Disabling Media Server....................................................................................................................................91
Table 3-75 LDAP Client Configuration Settings.................................................................................................................92
Table 3-76 Verifying LDAP Client Configuration Settings ..................................................................................................92
Table 3-77 Disabling LDAP Client......................................................................................................................................94
Table 3-78 show running-config Command.......................................................................................................................95
Table 3-79 IP, Default Route Configuration Settings..........................................................................................................99
Table 3-80 Running and Verifying LDAP .........................................................................................................................100
Table 3-81 Running FTP..................................................................................................................................................104
Table 3-82 APOS Upgrade (DOS Screen).......................................................................................................................105
Table 3-83 APOS Upgrade (Console Screen) .................................................................................................................106
Table 4-1 Initializing.........................................................................................................................................................107
Table 4-1 Configure the interface.....................................................................................................................................108
Table 4-2 Configuring Default Route................................................................................................................................108
Table 4-3 Configuring HTTP Server.................................................................................................................................109
Table 4-4 Configuring FTP Server................................................................................................................................... 110
Table 4-5 Initializing File System ......................................................................................................................................111
Table 4-5 Configuring Presence Server........................................................................................................................... 112
Table 4-6 Configuring Media Server................................................................................................................................ 112
Table 4-7 Configuring Ldap Client ................................................................................................................................... 113
Table 4-8 Verifying the Status Call-Manager Service....................................................................................................... 113
Table 5-1 Console Port Pinout......................................................................................................................................... 119
Table 5-2 Signals and Pinout of Serial Ethernet Cable....................................................................................................120

IPNext 190 System Installation Guide
AddPac Technology Proprietary & Documentation 132 - 10
If you have any questions regarding AP-VP200 or your product has any failures, please contact AddPac Technology
Co., Ltd.
AddPac Technology Co., Ltd.
Floor Nos. 2/3/5, Jeong Am Bldg., 769-12, Yoksam-dong, Kangnam-ku, Seoul
Phone (02) 568-3848 (Rep.)
Facsimile (02) 568-3847
E-mail Address: info@addpac.com
http://www.addpac.com
The revision history of the IPNext PBX Installation and Operation Manual is listed in the followings:
Version Date Revision Action Prepared by
Version 1.00 August 25, 2008 Initial Released R&D, AddPac Technology

IPNext 190 System Installation Guide
AddPac Technology Proprietary & Documentation 132 - 11
Chapter 1. Introduction
Overview
IPNext190 is a next-generation IP Keyphone System and a new IP telephony solution for all IP
environments. IPNext190 inter-works with various IP terminals of AddPac (e.g. AP-VP300, AP-VP250,
AP-VP200, AP-VP150, AP-VP120 IP Video Phone, and AP-IP300, AP-IP150, AP-IP100 IP Phone) and
analog phones(low cost compared with IP terminals, also reused) to provide multimedia IP telephony
services as well as the traditional voice-based PBX features. This product is based on the advanced
embedded RISC that enables firmware upgrade, and can be equipped with various VoIP interfaces (FXS,
FXO, etc) depending on module options. IPNext190 is suitable for small and medium size companies, and
inter-works with the VoIP and video products of AddPac Technology to provide a variety of IPapplication
services appropriate for your network. Also, IPNext190 supports H.323 VoIP inter-working as well as SIP
protocol for outbound call.
Features
1) Next Generation IP Keyphone System
The front panel of IPNext190 IP Keyphone System supports LED displays of device status and has
two(2) 10/100 Mbps Fast Ethernet ports, the RS-232C console port for Command Line Interface (CLI),
Power Inlet and Power ON/OFF Switch. Its rear panel supports various VoIP interfaces such as FXO,
FXS depending on module options. IPNext190 can support maximum 32 port VoIP interface ( 4 slots x
8Port VoIP Module). The call scenarios supported by IPNext190 provide SIP-based basic calls, color
ring services, music on hold, blind transfer, call pickup, group call pickup, consult calls, switching calls,
consult transfer, call waiting, call waiting notification, call park, call pickup remote, and hunt group.
This product is designed to provide application services that require much memory such as voice mail
using internal memory.
2) RTP Proxy Service Features for Private IP and IPv6 Address
Since the enterprise network environments configured with a Call Manager like as IP keyphone system
and IP terminals require larger number IP address, either IPv6 or a private IP address in the NAT
environment must be supported to the enterprise networks due to the deficient resources of a public IP

IPNext 190 System Installation Guide
AddPac Technology Proprietary & Documentation 132 - 12
address. In such a private IP address environment, the RTP proxy feature is required for reliable
multimedia communications between endpoint terminals. The RTP proxy feature of IPNext190 is used to
make a communication between a private IP terminal and a public IP terminal among endpoint terminals
such as IP phones, make a communication between a private IP terminal and a public IP terminal in the
NAT environment, make a communication between private IP terminals, make audio/video broadcasting
in private and public IP environments, and to enable audio/video conference calls in private and public IP
environments. The RTP proxy feature can operate regardless of VoIP signaling protocols such as H.323
and SIP, and supports dual address systems such as IP version 4 and IP version 6 addresses.
3) User Presence Service for Unified Communication
For enterprise with small number of employee, IPNext190 IP keyphone system supports the user
presence server function beside call manager function. But, in case of large enterprise, external User
Presence Server should be used with IP-PBX due to performance issue independently. In order to support
user presence features on real-time basis, such as user busy, on-line, user away, etc, user presence service
function should be provided on IP telephony solution. User presence service function in a Call Manager
gathers user information (on-line, busy, etc) of each IP terminals, and broadcasts user information to all
or group IP terminals with speed-dial keys (built-in presence indication lamp) , AP-PT100 User Presence
dedicate terminal, Smart Messenger Program at every second.
4) Intelligent IVR Features
One of the most important IP telephony service features is either ARS or IVR. Different IVR features are
required by regular companies, government offices, and call centers respectively. IPNext190 IP
Keyphone System provides an IVR tool to meet your requirements. Also, this solution provides an IVR
scenario editor to allow you to make and enable a desired call scenario.
5) Built-in Network based Media Service
AddPac Technology’s IPNext190 supports network-based media service. Together with IP terminals,
Video Terminals and VoIP gateways, IPNext190 supports various media service like as Announcement,
Ring Back Tone Service, and Music on Hold.
The media service of IPNext190 provides Ring Back Tone and Music on Hold either individually or by
group. Ring Back Tone and Music on Hold files can be changed by Schedule. The media service has
been designed to support the video codec of MPEG-4 basically, the services of multimedia Ring Back
Tone and multimedia CID (MCID)*.
6) Unified Messaging Service
IPNext190 supports network based unified messaging service like as IP phone voice mailing service, E-
mail notification, and web based Mailbox browsing service, etc. Basically, this service supports SIP

IPNext 190 System Installation Guide
AddPac Technology Proprietary & Documentation 132 - 13
VoIP signaling and IVR scenario managing tool for voice/video message recording/retrieval. Using
VXML based IVR scenario editor software (AddPac Technology provided), user can make new IVR
scenario and edit the pre-existed IVR scenario for new service addition, service modification, etc.
IPNext190 supports memory (NAND Flash Memory, etc) Quota functions for each user’s voice/video
mailbox, etc and e-mail notification function via internet. On business travel, user can monitor IP phone
or video phone’s leaving message in office via internet e-mail check and using MS window media
player software. Also, user can play voice/video message under various environments such as PSTN
phone via VoIP gateway, E-mail, Web, Smart Messenger (AddPac) in addition to IP terminals (IP phone,
IP video phone).
7) Firmware Upgradable System
Since the high-performance RISC CPU of IPNext190 is programmable, the service features of
IPNext190 can continue to be improved, changed, or added. If you download an added or changed
feature from the home page directly or set an automatic upgrade option whenever feature addition or
change is done, you can use the latest features without further operations.
8) Reliable IP-PBX Solution with Outstanding Network Service Capability
IPNext190 is an integrated network device that supports routing services, NAT/PAT, DHCP Server/Relay,
and Quality of Service (QoS). If you want to adapt to a variety of network environments such as Metro
Ethernet, Metro ATM, dedicated lines, flexible IP environments, and high-speed private subscriber
networks such as xDSL, cable networks, and FTTH, advanced QoS and security features in addition to
multiple network services should be supported. In this regard, IPNext190 supports two 10/100 Mbps Fast
Ethernet interfaces. Based on this feature, IPNext 190 supports advanced LAN-to-LAN routing and
bridge services as well as various network and security services such as NAT/PAT. IPNext190 IP
keyphone system is a reliable solution built by using excellent technologies.
9) Now more worries for keeping Privacy
'Standard & Extended IP Access List' of the IPNext190 supports beyond the network security, but also
service security. IPNext190 can support VPN, Secure RTP to secure data, voice and video, as to
collaborate with the AddPac IP terminals.
10) AddPac IP-PBX Total Solution
AddPac Technology is not just another vendor of IP-PBX, but provides various product families
appropriate for your network environment. To meet your needs, AddPac supports VoIP and media
gateways, audio/video terminals, audio/video MCU, IP audio/video broadcast, VoD solutions, network
DVR solution, audio/video recording solutions, and traffic controller QoS device solutions. In the

IPNext 190 System Installation Guide
AddPac Technology Proprietary & Documentation 132 - 14
future all IP-based multimedia telephony environment, various audio/video resources should be shared
on an IP network; thus, the integration of the entire solution and that of solutions for each area are
very important. AddPac IP-PBX is designed considering the integrated multimedia solution, and can
meet your various needs.
The performance and reliability of AddPac VoIP gateway series and multimedia network devices have
been recognized in global markets. IPNext190, which is a collection of experiences and know-how
accumulated in the enterprise and service provider markets, would meet the needs of customers who
ask for a next-generation IP-PBX solution.

IPNext 190 System Installation Guide
AddPac Technology Proprietary & Documentation 132 - 15
Main Features
High Performance RISC Microprocessor
Four (4) VoIP Module Slots for FXS, FXO, Digital E1
Network Interface: 2-port 10/100 Mbps Fast Ethernet interface
1-port RS-232C serial console interface
User Terminals : AP-VP500, AP-VP300, AP-VP250, AP-VP150, AP-VP120, AP-IP300, AP-IP150, AP-IP100,
Smart Messenger
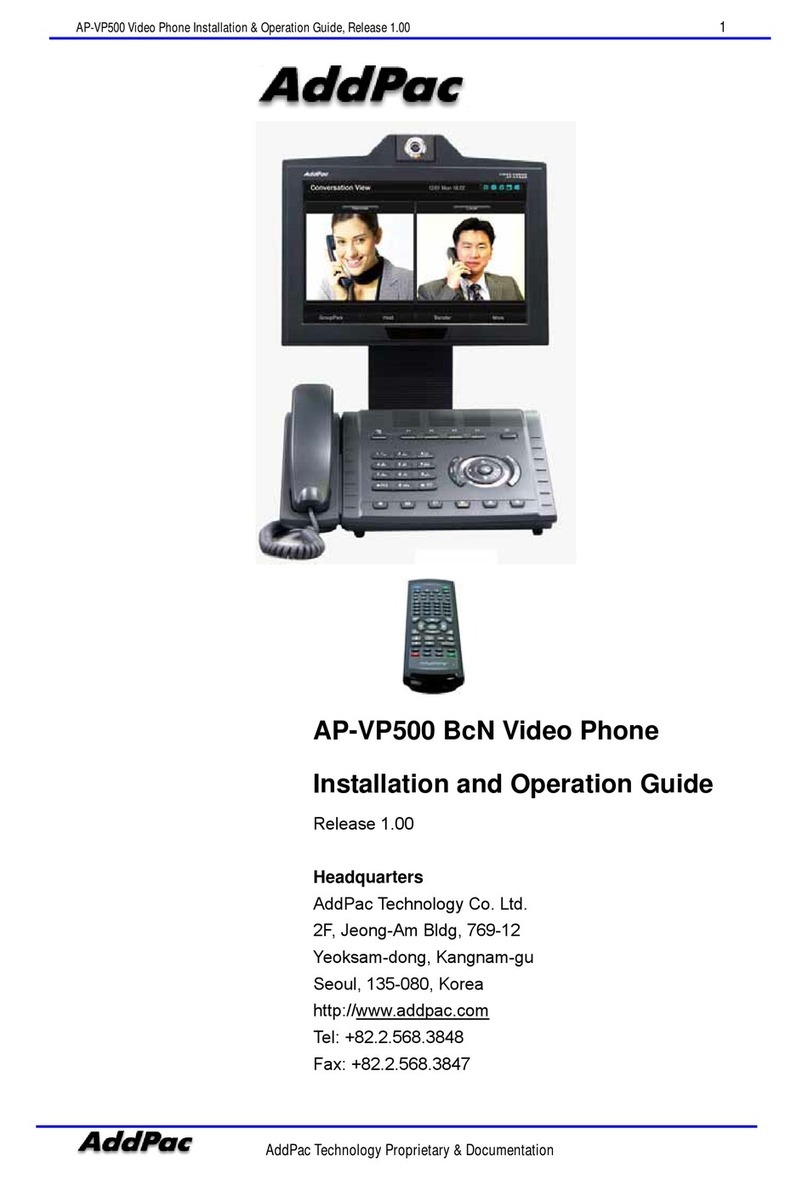
AP-VP500
AP-VP500 Video Phone
High Performance & Powerful
Communication Method
AP-VP300
AP-VP300 Video Phone
High Performance & Powerful
Communication Method
AP-VP250
AP-VP250 Video Phone
High Performance & Powerful
Communication Method
AP-VP150
AP-VP150 Video Phone
High Performance & Powerful
Communication Method
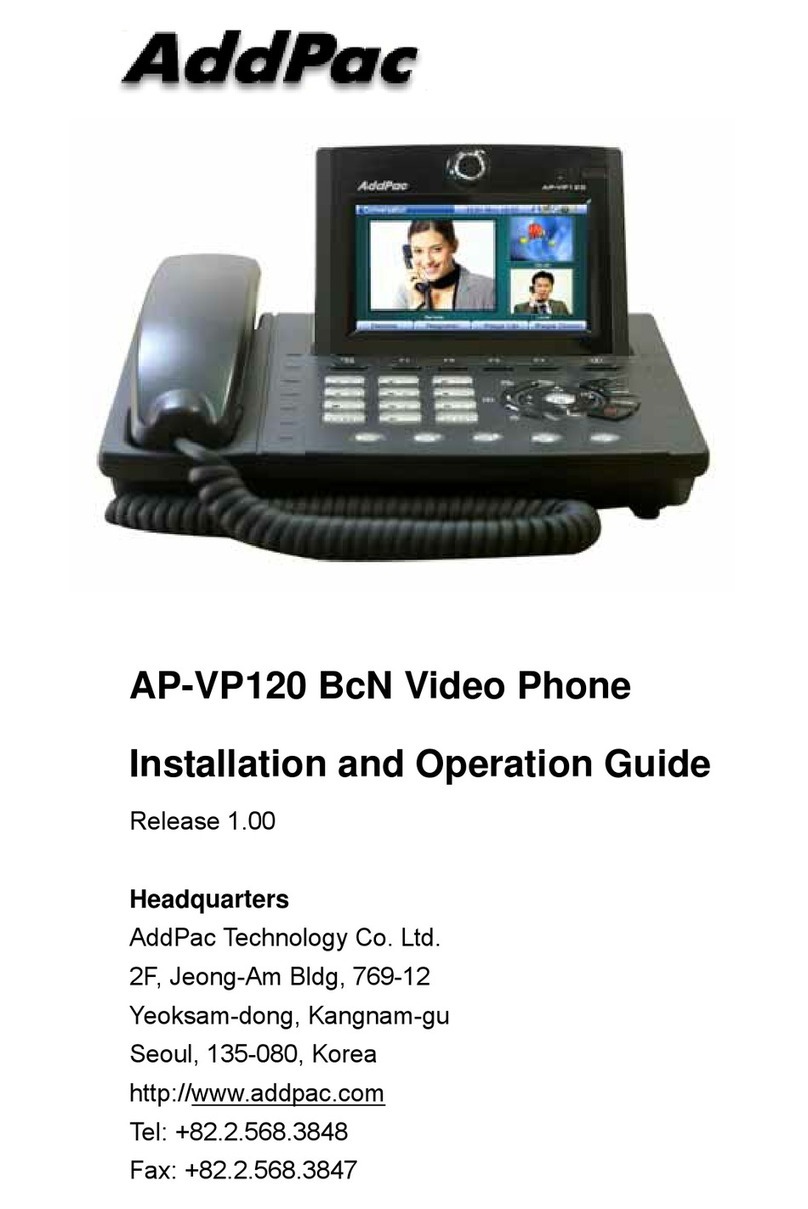
AP-VP120
AP-VP120 Video Phone
High Performance & Powerful
Communication Method

IPNext 190 System Installation Guide
AddPac Technology Proprietary & Documentation 132 - 16
AP-IP300
AP-IP300 IP Phone
High Performance & Powerful
Communication Solution
AP-IP150
AP-IP150 IP Phone
High Performance & Powerful
Communication Solution
AP-IP100
AP-IP100 IP Phone
High Performance & Powerful
Communication Solution
High Performance RISC Microprocessor
IP Key Phone: Various call scenarios, color ring service, and music on hold, etc.
SIP, H.323 Signaling
Scenario editor for IVR services and supporting tools.
Voice Mail and Unified Messaging Service
Voice Media Service: Announcement, Ring Back Tone, Music on Hold
3-Party Voice Conferencing (optional: DSP-based hardware voice MCU module)
Media Gateway for PSTN Interface (the interface for PSTN line and analog phone)
Fault tolerant and Scalability

IPNext 190 System Installation Guide
AddPac Technology Proprietary & Documentation 132 - 17
Table 1-1 IPNext190: Collaborative Features
Service Feature Description of Service Feature Required Devices for Connection
IP Key Phone
Features
zBasic SIP-based call features and call transfer,
call pickup and various call scenarios
zColoring Service.
zMusic on Hold.
z3-Party Audio-Conferencing
zVoice Mail, IVR
zAP-VP300:Video Phone (Advanced Model)
zAP-VP150: Video Phone (Distribution Model)
zAP-IP300 IP Phone (Advanced Model)
zAP-IP150 IP Phone (Distribution Model)
zAP-IP100 IP Phone (Distribution Model)
zSmart Messenger
PSTN Line
Interface
E1, FXO interface with VoIP Gateway
functionality for the incoming PSTN call
zAddPac AP-N1-FXO8 8-Port PSTN
Interface Module (optional)
zAddPac AP-N1-E1T1 Digital E1/T1
PSTN Interface Module (optional)
PSTN Phone
Interface
FXS Interface with VoIP Gateway
functionality for connection with analog
phone
zAddPac AP-N1-FXS8 8-Port FXS
Analog Interface Module

IPNext 190 System Installation Guide
AddPac Technology Proprietary & Documentation 132 - 18
System Architecture
Figure 1-1 Network Diagram for the System Architecture of IPNext190

IPNext 190 System Installation Guide
AddPac Technology Proprietary & Documentation 132 - 19
Hardware Features
Table 1-2 IPNext190 Hardware Specifications
Category Specification
Microprocessor CPU High Performance RISC Integrated Host Processor
Memory Flash Memory 2Gbyte
Main Memory 128Mbyte
Boot Memory 512Kbyte Flash Memory
Fixed Network
Interface
Fixed LAN0 Port One(1) 10/100Mbps Fast Ethernet
Fixed LAN1 Port One(1) 10/100Mbps Fast Ethernet
Console Port One(1) RS-232C Interface for CLI
Voice Interface
Module
AP-N1-FXS8 8-Port FXS Voice Interface Module (8 x RJ11)
AP-N1-FXO8 8-Port FXO Voice Interface Module (8 x RJ11)
AP-N1-FXS4O4 4-FXO & 4-FXS Voice Interface Module (8 x RJ11)
AP-N1-E1/T1 1-Port PBX Digital E1/T1 Module (1 x RJ45)
Power Requirement Power VAC 110~220 VAC, 50/60Hz, 40 Watt
Operating
Temperature 0°C ~ + 50°C (32° to 122°F)
Storage
Temperatures -40°C ~ +85°C (-40° to 176°F)
Relative Humidity 5% ~ 95% (Non-condensing)
Dimensions 55 x 340 x 267(mm) - 19" Rack Mountable Chassis
Weight 2.5Kg

IPNext 190 System Installation Guide
AddPac Technology Proprietary & Documentation 132 - 20
Software Feature
Table 1-3 IPNext190 Software Specifications
Category Specification
Number & Call
Routing
Trunk Hunting by Preference or Sequential
Calling Hunting by Preference, Simultaneous, Random
Calling Hunting by Chained Hunting Group
Partition for Address Grading
Call Class for Call Access Control
Number Translation Rule for Inbound/Outbound Call
Centrex with Prefix Support
Multiple Shared Devices with One Number
Multiple Numbers on One Device
Individual Call Park within Park Number Pool
Group Call Park within a Group or Other Group
Call Pickup of Ringing Call of Same Group or Other Group
Call Pickup of Parked Call
Call Transfer- Blind, Consult
Call Forwarding – Unconditional, Busy, No Answer, Voice Mail
Call Waiting
Call Swapping
Call Hold
Advanced Features
with AddPac IP
phone, Video Phone,
etc
Multiple Call Handling with Call Status and Calling Line Number and Name
Plug and Play with Auto Discovery Function
Softkey Map Download and Control
Telephony and
Service
&
Features
Voice Mail List View
Parked Call List View
Call Forwarding Setting
Recent Call List View
Calling Number and Name Identification
Individual Call Park within a Group or Other Group by Softkey
Group Call Park within a Group or Other Group by Softkey
Call Pickup of Ringing Call of Same Group or Other Group by Softkey
Call Pickup of Parked Call by Softkey
Call Transfer - Blind, Consult by Softkey
Call Waiting Indication
Call Swapping by Softkey
Conference Control
Signaling Protocols SIP Application Server, Proxy, Registrar and Location Server(RFC3261)
Table of contents
Other AddPac Telephone manuals


