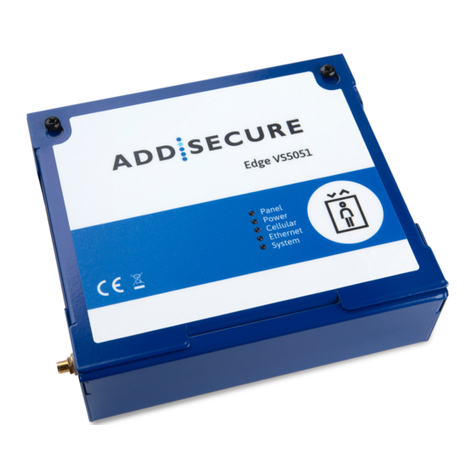
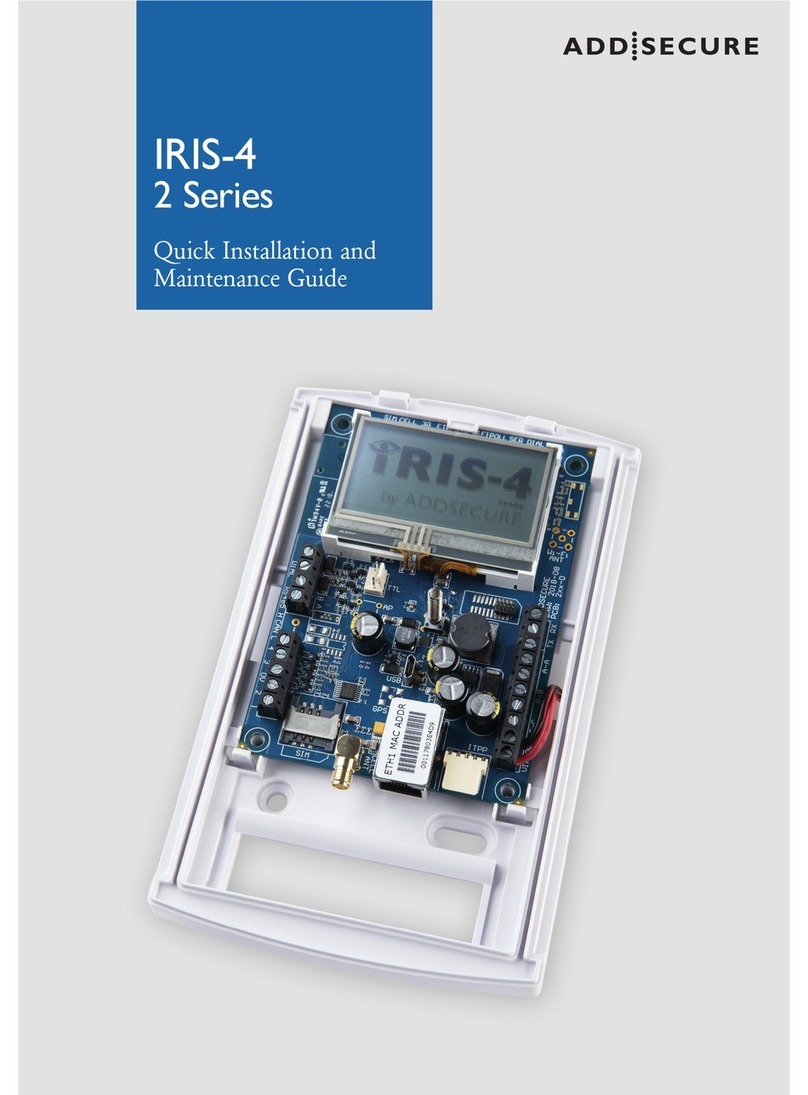
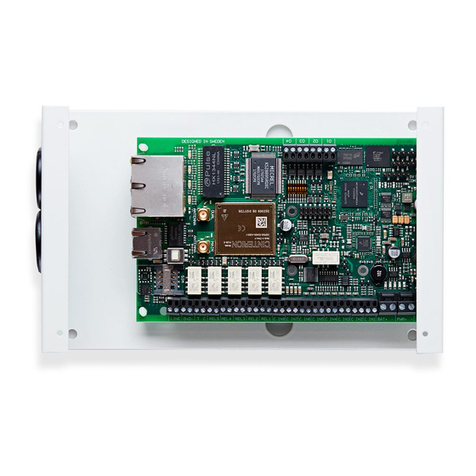
AddSecure IRIS-4 160 Product manual

INNEHOLD:
•Airborne DC kretskort
Mål (BxHxD): 58x105x25 mm
•Ladekort
•Plastkabinett,sabotasjesikret.
Mål (BxHxD): 170x160x60 mm
•1stk. NiMH 2200 mAh batteri
•Ekstern15 VDC strømadapter
•Integrert SIM-kort (e-SIM) med
tilhørendeAddSecure abonnement
•Hurtigmanual
•Informasjonog support
•Internantenne
•Monteringsskruer
•Alarmetikett
AIRBORNE
DC MEDIUM
Hurtigmanual/
Snabbguide
INNEHÅLL:
•Airborne DC kretskort
Mått(BxHxD): 58x105x25mm
•Laddkort
•Plastkapsling,sabotagesäker.
Mått (BxHxD):170x160x60mm
•1st. NiMH2200 mAh batteri
•Extern15 VDC strömadapter
•Integrerat SIM-kort (e-SIM)med
tillhörande AddSecureabonnemang
•Snabbguide
•Informationoch support
•Internantenn
•Monteringsskruvar
•Dekaler
GODKJENNELSER/GODKÄNNANDE
2544-CPr -P20727-F03-16
EN54-21:2006Type 1
EN50136-1:2012 ATS: SP4
EN50136-2:2013
EN50131-1:2006/A1:2009 gR2ECII
UMTS:ATS5
EN50130-4:2011
EN50130-5:2011
SBF110:7
SSF114:2 Larmklass 2
IRIS-4 160
Quick Installation and
Maintenance Guide

IRIS-4 160
Quick Installation and
Maintenance Guide
3
2
IRIS-4 160
CONTENTS
1. Introduction.......................................................................................3
2. Product Features ..................................................................................3
3. Package Contents. . . . . . . . . . . . . . . . . . . . . . . . . . . . . . . . . . . . . . . . . . . . . . . . . . . . . . . . . . . . . . . . . . . . . . . . . . . . . . . . . . 4
4. BoardConguration ...............................................................................4
5. BeforeYou Start ...................................................................................5
6. Installing the IRIS-4 160 Dialler .....................................................................6
6.1. Mounting ....................................................................................6
6.2. Power ........................................................................................6
6.3. Backup Batteries (optional) ....................................................................6
6.4. Connections..................................................................................7
6.5. 4G/3G/2G SIM Card .........................................................................8
6.6. Dial Capture .................................................................................8
6.7. Pin Inputs ....................................................................................8
6.8. Switch On....................................................................................9
6.9. Configuration ................................................................................9
6.10. Panel Configuration ..........................................................................14
6.11. Testing ......................................................................................14
7. Maintenance......................................................................................15
7.1. Confirm Current Status ......................................................................16
7.2. Checking Battery Status ......................................................................16
7.3. Replacing Batteries ...........................................................................16
7.4. Check Software Version/Reflash...............................................................17
7.5. Communication Path Checks.................................................................17
7.6. Test Alarm Panel Alarms and Communication to Monitoring Centre ............................17
8. Specications .....................................................................................18
1. INTRODUCTION
2. PRODUCT FEATURES
FEATURES
Fire retardant enclosure
NiMH battery backup
Ethernet
4G/3G/2G
Dial capture
Relays
Inputs (Pins)
Serial RS485
Serial TTL
RS232 (Basic)
Text messaging
Multi language menus
VoIP & SIP services
IRIS-4
160
•
>15 hrs
1
•
•
3
4
•
•
•
•
•
•
The IRIS-4 160 offers a new concept in Alarm over
IP (AoIP) providing cost effective AoIP for the
residential sector. IRIS-4 160 is certified as suitable
for all Grade 2 systems with an Alarm Transmission
System (ATS) configuration up to SP3 for single path,
or ATS configuration DP2 for dual path.
The IRIS-4 160 is based on the successful IRIS Touch
NG range of AoIP diallers with the same hardware
and software used in all IRIS diallers; with the same
level of security and features provided to military,
governments, banks and commercial industry but
now also available to the residential sector.
Polling and alarm transmission are performed via the
Ethernet, Wi-Fi or 4G/3G/2G communications to
the monitoring centre using the IRIS Secure Apps
monitoring software.
Using AddSecure’s advances in hardware and soft-
ware, the IRIS-4 160 is unique in providing battery
backup for mains over 15 hours support in the case
of mains power source failure. This backup is pro-
vided with only 4 NiMH AA rechargeable batteries,
which allow a longer replacement life and a smaller
design.
Note 1: The 15 hours standby is based on 15 min-
ute polling with the recommended quality batteries.
May reduce performance using a faster polling or
other system loading.
Note 2: You can fit the IRIS-4 160 without batteries
and will run as a standalone device without battery
backup.
This manual gives a quick guide to the installation
of products from the IRIS-4 160. For the full
engineering manual, including multi-lingual versions,
please visit our website http://www.addsecure.com

IRIS-4 160
Quick Installation and
Maintenance Guide
5
4
IRIS-4 160
3. PACKAGE CONTENTS
Contents:
• Diallerboardinplastichousing
• 3xscrewsandplugsforxingthehousingtoaatsurface
• 2xscrewsandwashersforxingPCBtoplastics
• Ethernetcable
• 18kOhmssenseresistorfordialcapturetamperdetection
4. BOARD CONFIGURATION
5. BEFOREYOU START
Monitoring Centre (ARC)
Make sure that the monitoring centre to which the IRIS-4 160 device will send alarm signals is equipped with
the appropriate IRIS Secure Apps receiving system. The following information should be obtain from the
Monitoring Centre.
Dialler account number:
Monitoring centre IP address:
Ethernet Connection Details
The customer’s Ethernet (LAN) network details are required in order to connect the IRIS-4 160.
Obtain the following information from the customer.
Fixed IP address or DHCP: Fixed DHCP
If using DHCP then the following information will not be required
as it will be assigned by the network.
IP address:
Gateway address:
Subnet mask address:
Wi-Fi Connection Details
The customer’s Wi-Fi network details are required in order to connect the IRIS-4 160 and the configuration
device (e.g. Smart Phone). Obtain the following information from the customer.
Network name (SSID):
Security type:
(WEP/WPA/WPA2)
Password:
4G/3G/2G SIM Card and Access Point Name
If the installation uses 4G/3G/2G then a SIM card will be required. The IRIS-4 160 will also need to be given
a 4G/3G/2G ‘Access Point Name’ (APN) and other possible configurations as shown below. Obtain these from
the SIM card provider.
Access Point Name (APN):
User name (USR):
Password (PWD):
SIM Pin:
Due to the lack of space on this page, I suggest putting
LED INDICATION-tabell into another suitable location.
I suggest on page 15.
13141516 12
11
1
962 31 54 7 8 10
①= Release clip
②= Sense
③= DC power
④= Micro USB
⑤= Serial (TTL)
⑥= RS485
⑦= RS232
⑧= Relays
⑨= Dial capture port
screw terminals
⑩= Pin inputs
⑪= AP Button
⑫= Ethernet
⑬= Battery case
⑭= SIM card holder
⑮= 4G/3G/2G antenna
⑯= SYS LED

IRIS-4 160
Quick Installation and
Maintenance Guide
IRIS-4 160
7
6
6.1. Mounting
Choose a suitable location, taking into consideration
the routing of both power and dialler interface cables.
To remove the cover push the two release prongs on
the underside of the plastic case as indicated on the
back of the case.
Once released, lift the lid slightly and push up until
lid comes off, remove the dialler PCB (retained by
two clips to left and right off the board). Position the
housing on the wall and drill three holes. Feed the ca-
bles through the opening at the base of the plate, or
via the ‘knockouts’, and secure the plate to the wall
with the three screws supplied.
Slide the PCB back into the top retainers and within
the side pillar and then gently secure the dialler back
in place using the release clips.
Now secure the bottom part of the PCB using the 2
screws and washers supplied as shown in the image
below, to comply with EN 50131-1:2006+A2:2017:
6. INSTALLING THE IRIS-4 160 DIALLER
6.2. Power
Power using a 9-17V DC power supply specified to
deliver a minimum of 1A current, and can use either
screw terminals or TTL header indicated in Section 4
“Board Configuration”.
Note: For Radio Equipment Directive compliance,
the power cable must be no longer than 3 meters
in length.
Fit the power cable. DO NOT APPLY POWER TO
THE DIALLER UNTIL INDICATED.
6.3. Backup Batteries (optional)
Designed to continue reporting to the IRIS Secure
Apps System at the Monitoring Centre to maintain
confidence of link status in the case of a main power
source failure. The design provides over 15 hours
battery support with 15 minute polling across either
Ethernet, Wi-Fi or 4G/3G/2G.
Note: Battery support could be shorter than the 15
hours if the polling period is shortened or other
activities such as alarm alerting by the panel at
regular intervals.
If batteries are required, DO NOT FIT until indicated
in Section 6.9 “Configuration”.
Use Batteries approved to IEC61951-2 (EN 61951-2).
The IRIS-4 160 requires 4 x 1.5V NiMh AA size
rechargeable batteries (not included).
Recommended manufacturers/types are:
• GPReCyko210AAHCB
• AnnsmanmaxE2100
Note: Do not use other battery types – including
non-rechargeable batteries.
The required battery capacity is 2000mAH minimum
and ideally they should feature low self-discharge.
Maximum time to recharge to 80% = 32 Hours.
Overvoltage protection triggered at 6.5V DC, with a
deep discharge protection of 4V DC.
Note: Reduced system standby life and battery life
if lower quality batteries fitted, not recommended.
6.4. Connections
Connect cables to the PCB for the system as shown
on in Section 4 “Board Configuration”:
• Ethernetenabledsystems:Connectthe‘ETH’
connector using the Ethernet cable to the local
IP router/switch or socket that allocated for the
LAN/WAN network IP connection.
• Wi-Fi:Wi-Fi(wireless)2.4GHzb/g/ninternal
PCB chip antenna.
• 4G/3G/2Genabledsystems:4G/3G/2Gantenna
already fitted to board.
• Dialcaptureport(optionalandformore
information see section below).
• 4xPininputs(optionalformoreinformation
see section below).
Optional Serial Connection
The following three connections to alarm panel are
available.
• RS485currentlyavailableforHoneywellGalaxy
data bus (Alarms and Upload/download) or
Risco ProSys bus (Upload/download) connec-
tions (optional).
• Serial(TTL)currentlyavailableforTexecom
Com1 connections (optional).
• RS232screwterminal(optional).
Note 1: For Radio Equipment Directive compliance,
any interconnecting cable (Dial capture, Pin inputs
or Serial connection) must be no longer than 3
meters in length.
Note 2: Please refer to the IRIS-4 160 Engineering
Manual for wiring and connections information
available from http://www.addsecure.com
Fixing Screw

IRIS-4 160
Quick Installation and
Maintenance Guide
IRIS-4 160
9
8
6.5. 4G/3G/2G SIM Card
DO NOT FIT SIM card until after you have
performed the 4G/3G/2G Network Scan detailed in
the Section 6.9 “Configuration”. You will be prompt-
ed when to insert the SIM card.
6.6. Dial Capture
Dial Capture enabled systems: Connect the two dial
screw terminals to the alarm panel dialler telecoms
line connection. If the alarm panel has screw connec-
tions.
Note: Polarity is not important in this instance.
For EN 50136-2: 2013 compliance fit the supplied
18K sense resistor in parallel with the dialler output
of the alarm panel, at the alarm panel end of the
cable.
Note: This resistor enables the dialler to detect
cable faults and/or tampers, the Monitoring Centre
will also need to enable the dial port monitoring
on the IRIS Secure Apps software to receive alarm
notifications.
6.7. Pin Inputs
The IRIS-4 160 dialler has four pin inputs that can be
used to generate messages, These can be:
• TextmessagesviaSMS(4G/3G/2G).
• SIA,ContactIDorFastFormatalarmmessages
over IP to the monitoring centre.
Note: You can also use the Pin alarm inputs in
addition when directly connected to an alarm panel
via the dial capture, serial or RS485 connections.
Via Open/Close Contact Source
Each pin input is designed to be connected in a loop
via an open/close contact source from an alarm pan-
el, or other device, to a reference ground pin available
on the IRIS-4 160 dialler, as shown below.
Opening the contact (i.e. loop is open circuit)
generates an alarm signal. Closing the contact gener-
ates the equivalent restore signal.
Via Sense Resistors
It is also possible to link the contacts to the IRIS-4
160 dialler via sense resistors so that an open or short
circuit tamper on the loop is detectable and the
Monitoring Centre alerted. In this case, the connec-
tions made should be as shown below.
Note: For this feature to work correctly it is
essential to connect the resistor at the contact end
of the loop and not the dialler end. The Monitoring
Centre must also enable the monitoring of this
facility on the dialler within the IRIS Secure Apps
receiving system.
6.8. Switch On
To confirm power is applied, look for the indicator
‘SYS LED’ flashing red on the IRIS-4 160 dialler
board, top left hand corner.
6.9.Conguration
To configure the dialler, use any of the following the
methods:
• WebbrowserviaWi-Fi.
• AddSecureIRISBluetoothApp.
• Alarmpanelintegratione.g.HoneywellGalaxy
(RS485 connection) Texecom Premier range
(RS232 TTL connection).
Note: Please configure the alarm panel first for
connections to Honeywell Galaxy or Texecom
Premier on the serial integration, as these will
transmit configuration to the IRIS-4 160 dialler.
For more details on the alarm panel integration,
download the full panel installation manual from
http://www.addsecure.com.
• Connecttheboard’sMicroUSBconnectorto
a laptop/PC running the IRIS Toolbox soft-
ware. Download the IRIS Toolbox user guide
from http://www.addsecure.com.
Defaulting
If at any point a complete default of the dialler is
required, use the following procedure:
1. Completely power down the IRIS-4 160 by
removing the power and one of the batteries
(if fitted).
2. Now press and hold down the AP button.
3. Reconnect the batteries if needed and reapply
power whilst still holding down the AP button
for 10 seconds.

IRIS-4 160
Quick Installation and
Maintenance Guide
IRIS-4 160
11
10
To initiate the Wi-Fi connection ensure that the
IRIS-4 160 has power and then depending whether
the front cover is on you have two options:
• Frontcoveron;useaphysical‘TapTap’onthe
cover around ½-second interval between.
• Frontcoverremoved;pressthebuttonlabelled
AP on the IRIS-4 160.
Press or perform either the AP button or the ‘Tap
Tap’ and the SYS LED will change colour. For a
local access point connection via Wi-Fi the SYS LED
should be flashing ‘purple’, this indicates AP mode
activated and is awaiting a connection. You now
have a 30-minute time window to search and find the
‘IRIS’ network using either a smartphone, tablet or
laptop’s Wi-Fi connect search function.
Once the smartphone, tablet or laptop’s Wi-Fi
connects to this network, you will need to enter the
password; by default, the password is ‘password’ all
lower case.
Connecting to this should turn the SYS LED solid
‘purple’ and using the web browser connect to the
IRIS-4 160 web interface by browsing to ‘iris.local’.
CongurationviaWebBrowser
usingWi-Fi Connection
Can be configured using the Wi-Fi connection using
a standard Web browser from any smartphone/tablet
or laptop device and supports the following network
security WEP/WPA/WPA2.
The IRIS Web browser interface currently supports
the following operating systems.
Note: You may be required to install some
additional software for some operating systems:
Microsoft Windows.
Microsoft Windows based operating system (PC or
laptop device) will require the initial installation of
the Apple Bonjour service. Downloaded from the
following link:
http://support.apple.com/kb/DL999
Android and Window phones.
Android operating system and Microsoft Windows
phones will require the IRIS Connect App.
Available for Windows Phone or Android from the
App Store, simply search for ‘IRIS Connect’.
Apple iOS.
Apple iOS operation system will work using the
Safari Web interface and already has the Apple
Bonjour service installed.
Once connected enter the default installer code:
111111 and then click Logon. You will be
prompted to change the password, please record
the new password. Enter and confirm a new
password and press Submit.
Note: Currently only communicating
with the IRIS-4 160 via its internal
Wi-Fi Access Point.

IRIS-4 160
Quick Installation and
Maintenance Guide
IRIS-4 160
13
12
For a reliable 4G/3G/2G connection it is recom-
mended that for the chosen network (SIM card) used
there should be at least two base stations with signal
strength (CSQ ) of 10 or more.
If the signal strength is below or close to minimum
then try to reposition the IRIS-4 160 or use an exter-
nal building or high gain antenna (if necessary), and
rerun the network scan to check signal strength.
Once you have the required 4G/3G/2G signal
strength power down the dialler and insert the SIM
card into the SIM card holder.
Insert the 4 x AA batteries if required
and power the dialler back up.
Now press the button labelled AP again and on the
connection device connect to the ‘IRIS’ network and
using the web browser connect to the IRIS-4 160 web
interface again by browsing to ‘iris.local’.
Enter in the installer code setup beforehand and then
select the Installation Wizard as indicated next.
IRIS-4 160 not using 4G/3G/2G or using
Ethernet/Wi-Fi after network scan completed:
Installation Wizard
Select the Installation Wizard and follow the on
screen prompts.
Note 1: If installing the IRIS-4 160 without batteries
then please untick the ‘Use battery backup’ option.
Note 2: During the Installation Wizard the Wi-Fi
status screen and the signal strength will be
displayed. For a reliable Wi-Fi connection it is
recommended that the Wi-Fi network used should
have a signal strength of 20 or more. If this signal
strength is lower than suggested try moving the
IRIS-4 160 nearer the Wi-Fi router.
Once Installation Wizard is completed and any
additional panel interface configuration setup via
the settings menu, check/configure the panel for
the connection method being used and the current
battery status.
IRIS-4 160 using 4G/3G/2G connection:
4G/3G/2G Network Scan
Select the ‘4G/3G/2G network scan’.
The scan must be carried out without the SIM card
fitted. The dialler listens for every base station in
range, requests operator name and records the signal
strength. This will take a few minutes to complete.
To check the current battery status go to the option
‘Battery status’ in the main menu and this will indi-
cate the current status of the batteries.
Please go into the ‘Battery status’ option and confirm
that the Health status is showing as “Good” before
leaving site, as shown:
This will take a few minutes to complete.

IRIS-4 160
Quick Installation and
Maintenance Guide
IRIS-4 160
15
14
6.11.Testing
Once all configurations are complete, perform a full
commissioning test with the Monitoring Centre.
This will normally involve testing normal alarm
transmissions from the alarm panel over all commu-
nication paths to the Monitoring Centre. Verifying
acknowledgement of these alarms with the operators
at the Monitoring Centre.
6.10.PanelConguration
Panel Configuration for Dial Capture
If connecting the IRIS-4 160 dialler via the dial
capture method which is connecting the Telecoms
module of the panel to the dial port of the IRIS-4
160, the following options will need to be config-
ured:
Telephone Number = the 12 digit format of the
Monitoring Centre IP address
(e.g. 192.168.0.34 would become 192168000034).
Account Number: 4 – 6 digit account number
allocated by the Monitoring Centre.
Note: If the ‘Alarm Override’ mode is selected,
the IRIS-4 160 dialler replaces the phone number
and the account number used by the alarm dialler
with the IP address of the Monitoring Centre and
account number entered during configuration, so
there is no need to change any settings on the
alarm panel.
Alarm panel integration e.g. Honeywell Galaxy
(RS485 connection) Texecom Premier range
(RS232 TTL connection).
If you have not already made the changes to the
relevant configurations in the panel for the integra-
tion, and require further details on these configura-
tions then please download the full panel installation
manual from http://www.addsecure.com.
7. MAINTENANCE
Inspect the dialler on an annual basis.
At each inspection, please perform the following:
• ConrmthestatusoftheIRIS-4160unit.
• Clearanyfaultsonthedialler.
• Checkbatterystatusandreplaceifbelow
required level.
• ReashIRIS-4160softwaretolatestversion.
• Testtheconguredcommunicationpaths
(Ethernet/Wi-Fi/4G/3G/2G).
• Performfulltestofalarmsfromthealarmpanel
and confirm acknowledgement of these by the
operators at the Monitoring Centre.
The IRIS-4 160 will give a visual indication of the
current system status via the SYS LED on top left
side of case. If this is green the dialler is all reporting
ok, if red the dialler has some trouble events being
reported.
Engineers have the option via the Web Browser
screen, or in the AddSecure Bluetooth app (coming
soon), to see current faults, reflash to latest software
and perform communication path checks.
To initiate the Wi-Fi connection engineers will need
to ensure the IRIS-4 160 has power and then perform
a Tap Tap (1/2 second gap between) on the front
cover to put the dialler in Wi-Fi Access Point or
Bluetooth mode (SYS LED flashing Purple or Blue
depending on the desired connection).
You now have a 30 minute time window to search
and find the ‘IRIS’ using either a smartphone, tablet
or laptop’s Wi-Fi/Bluetooth connect search function.
For Wi-Fi an ‘IRIS’ network should appear. Please
connect to this which should turn the SYS LED
solid ‘blue’ and using the web browser connect to the
IRIS-4 160 web interface by browsing to ‘iris.local’.
LED COLOUR INDICATION
Red Flashing
Red Constant
Blue Flashing
Blue Constant
Purple Flashing
Purple Constant
Green Constant
Default state not currently configured
Wi-Fi successfully connected but still outstanding faults
In Bluetooth mode for configuration but with no current connection
In Bluetooth mode for configuration and a device is connected
In Access point mode (AP) for configuration but with no current connection
In Access point mode for configuration and a device is connected (AP)
Communicating and no current faults (flickers on every poll)

IRIS-4 160
Quick Installation and
Maintenance Guide
IRIS-4 160
17
16
Once the smartphone, tablet or laptop’s Wi-Fi
connects to this network, you will need to enter the
password; check installation notes to see if this has
been changed, the default password is ‘password’ all
lower case.
Note: If engineers have never used/connected to an
IRIS-4 160 before it may be necessary to download/
install some application software to connect via
the Wi-Fi Web browser, please refer to Section 6.9
“Configuration”.
Enter the installer code (should be noted somewhere,
possibly installation notes) and then click Logon.
Engineers will now be in the Main Menu and can
perform the following checks:
7.1.ConrmCurrentStatus
Green SYS LED status is being reported ok go
straight to Section 7.2 “Checking battery status”.
Red SYS LED indicates a trouble reported go to the
option for “Trouble report”.
Check the reported system troubles via the
“Trouble report” menu. Please refer to the IRIS-4 160
Engineering Manual for more details available from
http://www.addsecure.com.
7.2. Checking Battery Status
The IRIS-4 160 dialler will indicate any issues with
the batteries. Engineers can check the current battery
status via the “Battery Status” option and confirm
that the Health Status is showing as “Good” before
leaving site.
7.3. Replacing Batteries
If batteries fitted for backup purpose replaced them
every two years.
7.4.CheckSoftwareVersion/Reash
Go to the settings menu and then select “Latest
software?” this will then check with the AddSecure
Reflash server if there is a later version available.
If a later version is available, the engineer will see the
option to press the reflash button.
On first entry to the reflash option, which could be
during installation or maintenance, the engineer need
to change the password as required for EN50136-2
compliance. Please record the password on the instal-
lation documentation.
The reflash will take up to 15 minutes if via
4G/3G/2G and approximately 2 minutes with the
Ethernet connection. Once completed the dialler will
reboot and switch to the new software.
Note: All configurations for the IRIS-4 160 dialler
are stored and there is no need to reconfigure.
7.5. Communication Path Checks
The engineers can test the communication paths for
both polling and alarm communications using the
‘Connection Test’ option in the Main Menu. This
will perform communication path checks for each
path configured. Please refer to the IRIS-4 160
Engineer Manual for more detail available from
http://www.addsecure.com.
7.6.Test Alarm Panel Alarms and
Communication to Monitoring Centre
Depending on the monitoring centre, engineers will
now be required to perform alarm test and possibly
other tests to the Monitoring Centre. Before leaving
site, the engineer should obtain confirmation from
the Monitoring Centre that all is working correctly.

IRIS-4 160
Quick Installation and
Maintenance Guide
IRIS-4 160
19
18
8. SPECIFICATIONS
Transmission paths IRIS-4 160
Ethernet
Standard UTP 10/100 Base T with auto-negotiation
Connection RJ45 socket for CAT5 cabling
IP addressing Dynamic (DHCP) or fixed
Fault detection Loss of Ethernet synchronisation
Wi-Fi
Standard IEEE 802.11 b/g
Connection 2.4GHz b/g/n with internal PCB chip antenna
Fault detection Loss of association/data
4G/3G/2G
Frequencies Penta band LTE (4G)
800/900/1800 MHz
2100/2600 MHz
Dual band UMTS (3G)
900/2100 MHz
Dual band GSM (2G)
900/1800 MHz
Connection SMA socket for antenna
Fault detection Loss of registration with network
IP
TCP ports (outbound) 53165 (Alarms & Polling), 51292 (Diagnostic & Reflashing),
10001 (Upload/Download)
Alarm transmission
Interface to Monitoring Centre IRIS Secure Apps or IRIS Management Suite via
EN 50136-2 pass-through mode
Dial capture interface to alarm panel Two wire interface via terminal block
Note: Cabling must not exceed 3 meters
Serial interface to alarm panel RS485, TTL, RS232 Note: RS232 cabling must not exceed 3 meters
Transmission paths IRIS-4 160
Alarm transmission
PIN Inputs interface to alarm panel Maximum input voltage range 0V to +24V
Input ‘low’ (alarm) threshold < 1V
Input ‘high’ (restore) threshold > 2V
Internal pull-up impedance 10K to 3.3V supply
Alarm protocols SIA (level 1 to 3) reference SIA DC-03-1990.01(R2003.10)
Contact ID reference SIA DC-05-1999.09
Fast format (Scancom) for dial capture and serial connections
Robofon (Dial capture only)
Telim (Dial capture only)
CESA (Dial capture only)
Tamper detection reporting to Dial capture interface, lid & back tamper, serial interface, pin inputs
Monitoring Centre
Fault reporting to Monitoring Centre External power supply fail, low battery, transmission interface/path fault
Relay outputs
Maximum operating voltage 24V DC
Maximum current rating 100mA DC
Power supply
Supply voltage 9V to 17V DC
Typical current 83mA @ 12V DC
Maximum current 1A @ 12V DC
Recommended external PSU 12V DC 1A 12 Watt
Note: For Radio Equipment Directive the power cable needs to be
no longer than 3 meters in length
Power storage
Storage device type 4 x AA NiMH rechargeable batteries
Storage device capacity 2000mAh
Storage device time to recharge to 80% capacity 32 hours
Storage device – voltage at which fault is reported 4.5V DC
Storage device – voltage at which fault is restored 5V DC
Storage device – over voltage protection triggered 6.5V DC
Storage device – deep discharge protection 4V DC
Environmental
Operating temperature range -10°C to 55°C
Operating humidity range 95% max., non-condensing
Weights and Dimensions
Physical dimensions (L x W x D) 11.5 cm x 17.5 cm x 4.5 cm
PCB weight 400 grams
Fully packaged weight 600 grams
Note:
Cabling must not
exceed 3 meters

INNEHOLD:
•Airborne DC kretskort
Mål (BxHxD): 58x105x25 mm
•Ladekort
•Plastkabinett,sabotasjesikret.
Mål (BxHxD): 170x160x60 mm
•1stk. NiMH 2200 mAh batteri
•Ekstern15 VDC strømadapter
•Integrert SIM-kort (e-SIM) med
tilhørendeAddSecure abonnement
•Hurtigmanual
•Informasjonog support
•Internantenne
•Monteringsskruer
•Alarmetikett
AIRBORNE
DC MEDIUM
Hurtigmanual/
Snabbguide
INNEHÅLL:
•Airborne DC kretskort
Mått(BxHxD): 58x105x25mm
•Laddkort
•Plastkapsling,sabotagesäker.
Mått (BxHxD):170x160x60mm
•1st. NiMH2200 mAh batteri
•Extern15 VDC strömadapter
•Integrerat SIM-kort (e-SIM)med
tillhörande AddSecureabonnemang
•Snabbguide
•Informationoch support
•Internantenn
•Monteringsskruvar
•Dekaler
GODKJENNELSER/GODKÄNNANDE
2544-CPr -P20727-F03-16
EN54-21:2006Type 1
EN50136-1:2012 ATS: SP4
EN50136-2:2013
EN50131-1:2006/A1:2009 gR2ECII
UMTS:ATS5
EN50130-4:2011
EN50130-5:2011
SBF110:7
SSF114:2 Larmklass 2
SAFETY
Care should be taken when connecting telecommunications equipment to ensure only like inter-
faces are connected to avoid safety hazards.
SELV: SELV (Safety Extra-Low Voltage) is defined as a secondary circuit which is so designed
and protected that under normal and single fault conditions the voltage between any
two accessible parts does not exceed a safe value (42.4V peak or 60V dc maximum)
The interfaces on the IRIS-4 160 have the following safety classifications:
• Dialcaptureinterface:SELVsuitableforconnectiontotheTNVinterfaceofsingleline
telecommunications equipment such as telephones, alarm panels, etc.
• PowerInterface:SELVforconnectiontoaDCsupply
• Inputs:SELVforconnectiontoalarmoutputpin.
CONFORMANCE
EuropeanDirectives
The IRIS-4 160 complies with the following European Directives:
• 2014/53/EU(RadioEquipmentDirective)
• 2013/35/EU(ElectromagneticFields)
• 2004/108/EC(CEdirective)
• 2002/96/EC(WEEE)
• 2011/65/EC(ROHS)
EN50131, EN50136 (VdS Certified)
The dialler is compliant with the requirements of European Standards:
EN 50131-1: 2006+A2:2017 & EN 50131-10:2014
EN 50136-1: 2012 & EN 50136-2: 2013
Security Grade 2
ATS-SP3 over Ethernet or Wi-Fi, ATS-SP3 over 4G/3G/2G, and ATS-DP2
Environmental Class II
Table of contents
Other AddSecure Security System manuals
