Adexa GG360 User manual

Instruction Manual
2
Safety and Warranty
GAS PRESSURE
The appliance and its individual shutoff valve (to be supplied by user) must be disconnected from the gas supply
piping system during any pressure testing of that system at test pressures in excess of ½psi (3.45 kPa). The
appliance must be isolated from the gas supply piping system by closing its individual manual shut-off valve during
any pressure testing of the gas supply piping system at test pressures equal to or less than ½psi (3.45 kPa).
•For your safety, do not store or use gasoline or other flammable vapors or liquids in the vicinity of this or any
other appliances. Keep the area free and clear of combustible.
•Improper installation, adjustment, alteration, service or maintenance can cause property damage, injury, or
death. Read the installation operating and maintenance instructions thoroughly before installing, or servicing
this equipment.
•Instructions must be posted in a prominent location. All safety precautions must be taken in the event the
user smells gas. Safety information can be obtained from your local gas supplier.
•These models are designed, built, and sold for commercial use only. If these models are positioned so the
general public can use the equipment, make sure that cautions, warnings, and operating instructions are
clearly posted near each unit so that anyone using the equipment will use it correctly and not injure
themselves or harm the equipment.
•A factory authorized agent should handle all maintenance and repair. Before doing any maintenance or
repair, contact your authorized service representative.
•This product is intended for commercial use only. Not for household use.
•Installation must comply with all local codes.
DANGER: This warns of imminent hazard, which could result in serious injury or death.
WARNING: This refers to a potential hazard or unsafe practice, which could result in serious injury or death.
Installation
•If the U burner does not ignite, open the pilot valve more.
•If the pilot flame appears larger than necessary, turn it down and reset burner ignition.
•The pilot flame should be as small as possible but large enough to guarantee reliable ignition of the burners
when the knobs are turned to “I”
Note: Please check leakage before re-installing the control-panel.

Instruction Manual
3
Operation
LIGHTING INSTRUCTIONS
FOR THERMOSTAT MODELS
Lighting the Main Burners
These Griddles are fitted with individual standing pilots for each burner. Flame Failure Protection is
incorporated for each burner by way of a thermo-electric system which will shut off the gas supply to that
burner in the event that the burner goes out, so that un-burnt gas is not expelled.
•Select the burner required, depress and turn the corresponding gas control knob anti-clockwise to the
‘PILOT’position.
•With the gas control knob depressed, manually light the pilot burner.
•Release the gas control knob after approximately 10-20 seconds after lighting the pilot burner.
•The pilot burner should stay alight - if not, repeat the above steps.
•Rotate the gas control knob anti-clockwise to the desired temperature mark.
•The main burner will be now ignited automatically.
Turning ‘OFF’the Main Burners / Pilots
•To turn ‘OFF’the main burner, but keep the pilot burner lit, rotate the gas control knob to the ‘PILOT’
position. The main burner will extinguish and the pilot will remain lit.
•To turn ‘OFF’the ‘PILOT’, depress and turn the gas control knob clockwise back to the ‘OFF’position. The
‘PILOT’burner will extinguish.
Note: Please wait at least 15 seconds to restart the main burners to maintain the best function of the
thermostat valve after turning off the main burners.
CAUTION: All burners are lit from constantly burning pilots. Turning the valve to the desired flame height is all that
is required to put the unit in service. Do not permit fans to blow directly at the unit. Wherever possible, avoid open
windows next to the unit’s sides or back. Avoid wall-type fans, which create air crosscurrents within a room.
It is also necessary that sufficient air should be allowed to enter the room to compensate for the amount of air
removed by any ventilating system. Otherwise, a subnormal atmospheric pressure will occur, affecting
operation and causing undesirable working conditions.
A properly designed and installed hood will act as the heart of the ventilating system for the room or area in
which the unit is installed, and will leave the unit independent of changing draft conditions.
All valves must be checked and lubricated periodically. This must be done by an authorized service
representative in your area.
OPERATION
Turn the burners on about 15-20 minutes before cooking for preheating. Set the knobs to the desired flame height
or temperature. Each valve will control the gas flow to the burner to bring that area of the unit up to the set
temperature. If different temperature settings are to be used, adjoining areas should be set at progressively higher
temperatures using the lowest temperatures on the outside burners. A uniform and systematic approach to the
loading of the unit will produce the most consistent product results.

Instruction Manual
4
Technical Specifications
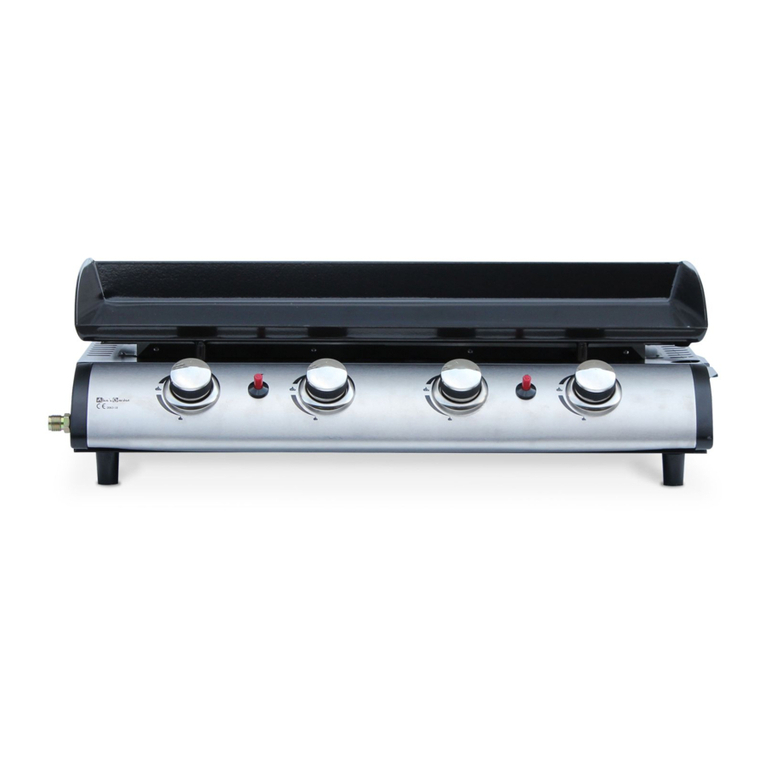
Diagram (Model: GG-600/750)
MODEL
BURNERS
PRODUT SIZE (WxDxH)
GAS TYPE
GG360
1
360x580x345mm
Natural Gas
GGN6002
2
600x580x305mm
Natural Gas
GGN10002
2
1000x580x305mm
Natural Gas
NO.
ITEM NAME
1
COOKING PLATE
2
SIDE BOARD
3
FRONT BOARD
4
COUNTERTOP BOARD
5
CHIMNEY
6
OIL CONTAINER
7
KNOB
8
IGNITER
9
GAS NOZZLE
10
METAL FEET
11
CONTROL VALVE
12
FIXED BRACKET
13
THERMOCOUPLE
14
IGNITION PROBE
15
GAS INLET PIPE
16
BACK FIXED PLATE
17
FRONT FIXED PLATE
18
GAS BURNER

Instruction Manual
5
INITIAL CLEANING
Prior to operating your new griddle, thoroughly wash the griddle surface and the exterior with a mild detergent or
soap solution. Do not use abrasive cleaners since this might damage the cabinet finish. If the stainless steel surfaces
become discolored, scrub by rubbing only in the direction of the finished grain.
DAILY CLEANING
1. Always turn unit off and allow it to cool completely before cleaning. Clean thoroughly before first use.
2. After each use, clean the griddle with wire brush or flexible spatula.
3. Once a day, thoroughly clean splash back, sides and front. Remove the grease drawer, empty it and wash it out.
4. Once a week, clean the griddle surface thoroughly. If necessary, use a griddle stone, wire brush or steel wool on the
surface. Rub with the grain of the metal while the griddle is still warm. A detergent may be used on the plate surface
to help clean it; but, care must be taken to be sure the detergent is thoroughly removed. After removal of the
detergent, the surface of the plate should then be covered with a thin film of oil to prevent rusting. Clean stainless
surfaces with a damp cloth and polish with a soft dry cloth. To remove discoloration, use a nonabrasive cleaner. After
each “weekly”cleaning, the griddle must be seasoned again. If the griddle usage is very high, the “weekly”cleaning
procedures may be done more often than
once a week.
NOTE: Unless the installer is an authorized service agent, the installer must not adjust parts protected by the
manufacturer or its age
Troubleshooting
Troubles
Possible Causes
Pilot burner cannot be lit.
The pilot valve is obstructed.
Pilot gas turned off pilot valve.
The pilot valve is bad.
Fat appears to smoke excessively.
Griddle plate is too hot.
Moisture in the food may be turning into steam.
Food sticks to griddle.
Griddle plate is too hot.
Griddle surface needs cleaning and/or seasoning.
Surface under food may not have been covered with enough cooking
oil.
Food burned around edges or
Griddle plate is too hot.
contains dark specks.
Griddle surface needs cleaning and/or seasoning.
Surface under food may not have been covered with enough cooking
oil.
Food is under cooked inside.
Griddle plate is too hot
Food may not have been cooked for long enough time.
Food tastes greasy or has
Griddle plate is too hot.
objectionable off-flavor.
Food itself may have off flavor.
Food may have been stored improperly before cooking.
Too much fat used.
Noticeable build-up of gum on
Griddle plate is too hot.
griddle.
Griddle surface needs cleaning and/or seasoning.
Too much fat used.
This manual suits for next models
4
Table of contents
Other Adexa Griddle manuals
Popular Griddle manuals by other brands
Presto
Presto Slimline 07072 instructions
KBS Gastrotechnik
KBS Gastrotechnik NFT74ED Instructions for installation, operation and maintenance

Toastmaster
Toastmaster TMDG24 brochure
Presto
Presto Tilt’nDrain 7045 instructions

George Foreman
George Foreman GFG21 owner's manual
Toastmaster
Toastmaster A710 instruction manual
Oster
Oster DuraCeramic CKSTGRFM18WM-ECO user guide

Bella
Bella 14464 instruction manual
Garland
Garland ECG-36R Brochure & specs

Toastmaster
Toastmaster ACCU-MISER AM24 Operation and installation manual

Star
Star Ultra Max 724T Installation and operation instruction
Alice's Garden
Alice's Garden PORTHOS PH1004SB instructions

