Adler BOOST-18/1 User manual


PARAMETERS
Model
BOOST-18/1
BOOST-20/1
Voltage
230V/50Hz
230V/50Hz
Power (min/max)
200W
300W
Charging Current
12/24V
12/24V
Max. Charging Current
8/5A
12/8A
Fast Charge
14A
16A
Battery Capacity
(min/max) Ah 15h
25÷120
max –120 Ah 15h
(min/max) Ah 15h
60÷200
Isolation Class
H
H
Protection Class
IP20
IP20
Weight
6,8kg
7,0kg
Dimensions
27,5x23x19,5cm
27,5x23x19,5

WARNINGS:
Electric Shock
Poisonous Fumes
Danger of Explosion
Non-Ionizing Radiation
Face Shield and Eye Protection
Personal Protection Equipment
General hazard
Separation of electrical and electronic appliances for refuse collection. The
user is not allowed to dispose of these appliances as solid, mixed urban
refuse, and must do it through authorised refuse collection centres
PLEASE, CAREFULLY READ THIS MANUAL BEFORE OPERATION

1. DEVICE OUTLOOK
2. GENERAL APPLICATION
ThIs battery charger is dedicated for regular and boost charging and starting engine-driven vehicles (petrol and
diesel), equipped with free electrolyte lead acid batteries (WET).
The body has an IP 20 protection class and is protected from indirect contact by grounding (for class I equipment)
WARNING! Before you start the charger, make sure the available power supply voltage corresponds with
the battery charger rating plate. Always use plugs with the earth protection.
2.1 SAFETY RULES
During the charge, the battery produces explosive gases - avoid formation of flames and sparkes. DO
NOT SMOKE.
- Position the batteries to be charged in a well-ventilated place.
- Inexperience and untrained people should be properly instructed before using the appliance.
- People (children included) whose physical, sensoric or mental capacities would prevent them from
using the appliance correctly, must be supervised by a person who is responsible for their
safety while the appliance is in use.
- Use the battery charger only indoors and make sure that you start it in airy places. DO NOT SET IN
THE RAIN OR SNOW.
- Disconnect the mains cable before connecting to or disconnecting the charging cables from the
battery.
- Do not connect or disconnect the clamps to or from the battery with the battery charger operating.
- Never use the battery charger inside the car or in the bonnet.
- Substitute the mains cable only with an original one.
- Do not use the battery charger to charge batteries which are not rechargeable.
- To prevent damaging the vehicle electronics, scrupulously respect warnings given by the producer of
the vehicle or the batteries used.
- This battery charger has components such as switches and relays which can cause arcs or sparks.
Therefore when using it in a garage or in a similar place, set the battery charger in a suitable case.
- Repair or maintenance of the inside of the battery charger can be executed only by skilled
technicians.
- WARNING: ALWAYS DISCONNECT THE POWER SUPPLY CABLE FROM THE MAINS BEFORE
CARRYING OUT ANY SIMPLE MAINTENANCE OPERATION ON THE BATTERY CHARGER.
1. Main switch
2. Charge/start switch
3. Fuse
4. 12/24V switch
5. fuse
6. Ammeter
7. Black cable with clamp (-)
8. Red cable with clamp (+)
9. Power supply
1
2
3
4
5
6
7
8
9
(back)

3. GETTING READY
- Before charging, make sure the capacity of the battery (Ah) corresponds to the range given on the
rating plate.
- Remove tha caps of the battery (if present) to let the fumes out.
- Check that the level of electrolyte covers the plates of the battery. You can add distilled water,
following marks on the battery. The most accurate to test the state of charge of a battery is to
determine the specific gravity of the battery electrolyte. The higher gravity, the higher charge.
Please see reference value (kg/l at 20*C):
1.28 = battery fully charged
1.21 = half-charged battery
1.14 = discharged battery
WARNING!
USE THE MAXIMUM CAUTION DURING THIS OPERATION, AS ELECTROLYTE IS A HIGHLY
CORROSIVE ACID.
4. CHARGING
Connect the red charge clamp to the positive terminal of the battery ( + symbol). If the symbols are
indistinguishable, remember that the positive terminal is the one not connected to the vehicle chassis.
Connect the black charge clamp to the negative terminal of the battery (- symbol). Connect the power
supply.
The ammemter will show charging current. You may notice the indicator goes down to reach low
values, depending on the type of battery.
Once the WET battery is being charged, you may note the liquid inside starting to “boil”. It is
recommended to stop charging to prevent damage of the battery.
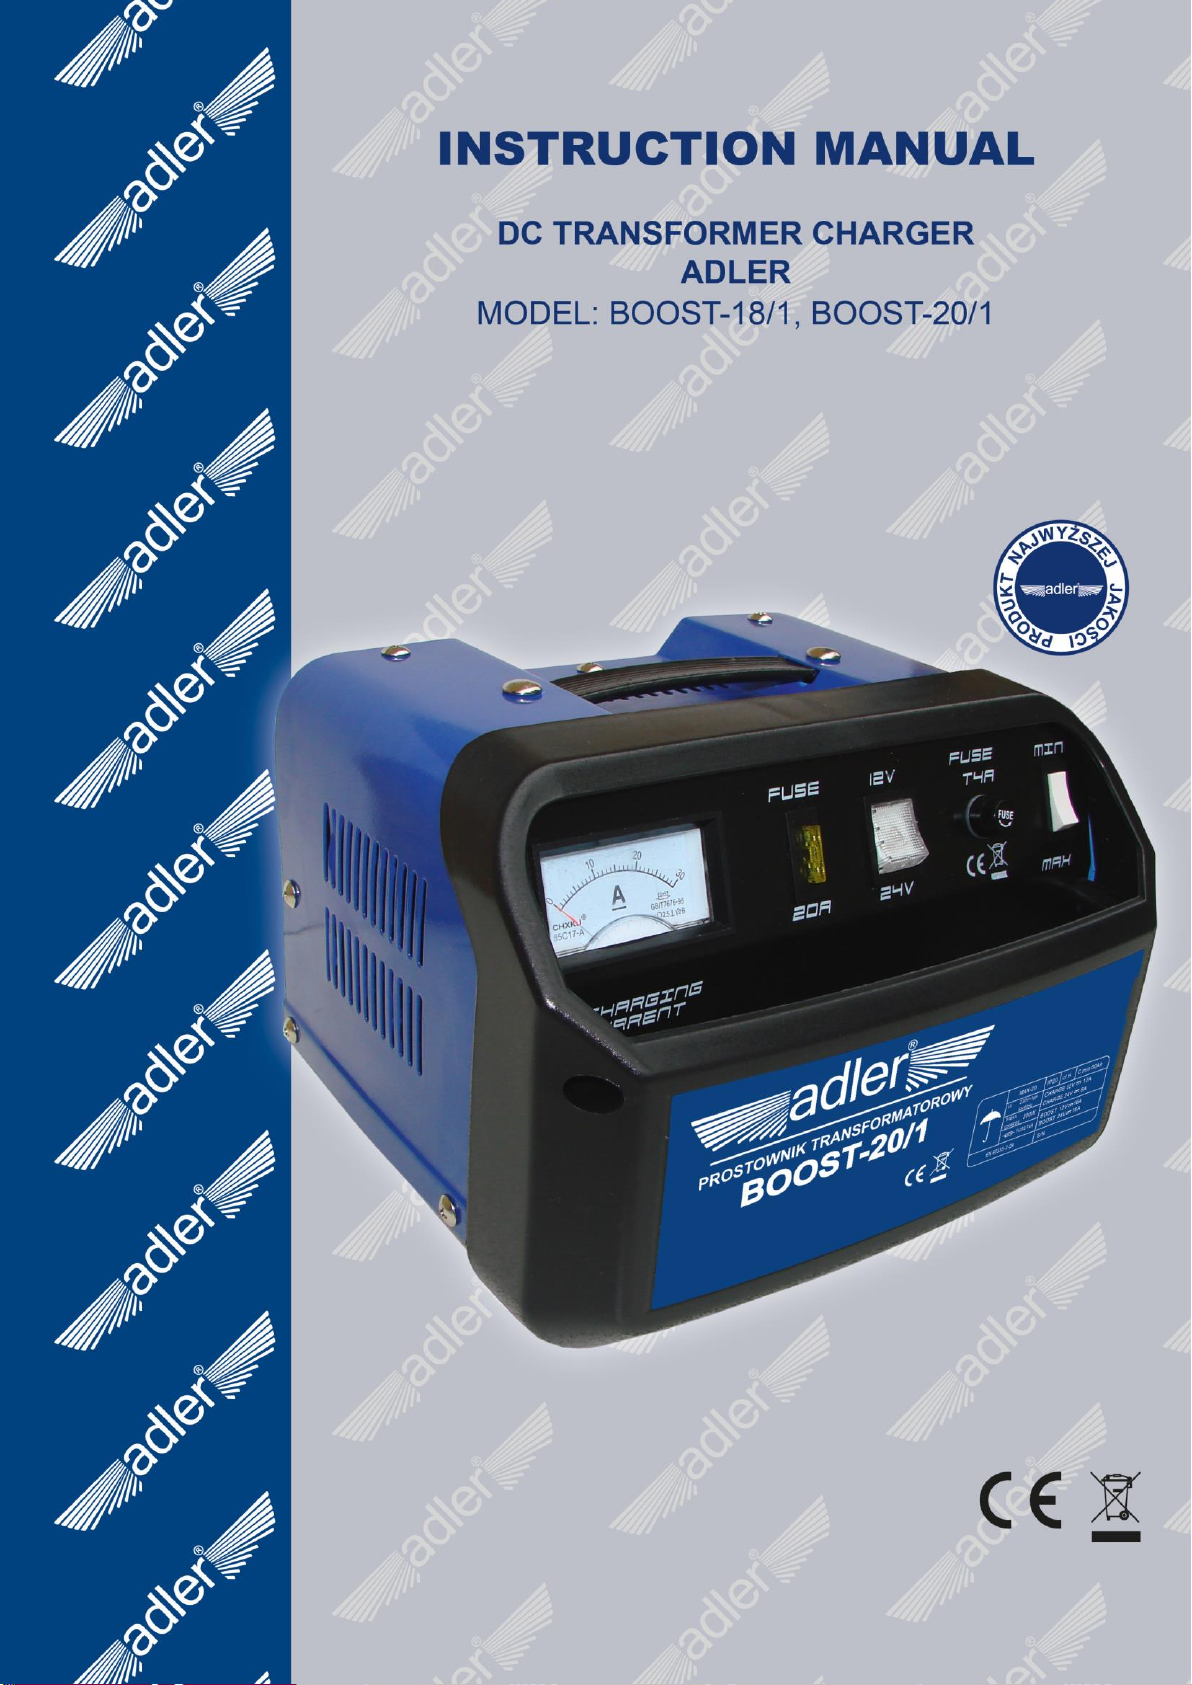
5.1 Regular charging.
- Select charging voltage and assemble the cable to 12V or 24V socket.
- Select charging mode switch "2" in MIN. pos (upper).
- Adjust main switch in ON pos and start charging.
5.2 BOOST charging
- Select charging voltage and assemble the cable to 12V or 24V socket.
-Select charging mode switch "2” in „BOOST” position (lower); boost charging in ca. 10-15 min.
- Adjust main switch in ON pos and start charging.
5. SIMULTANEOUS CHARGING OF SEVERAL BATTERIES
If you have to charge more than one battery at the same time, you can connect them “in series” or “in
parallel. For “parallel” connection batteries must have the same nominal voltage (Volt), which
corresponds to the battery charger output voltage, and the total of Ah must be within the charge range
of the battery charger. For “serial” connection, batteries must have the same capacity (Ah) and the sum
of the nominal voltages of all the batteries must correspond to the battery charger output voltage.
WARNING!
In serial connection of two 12V batteries, switch charging voltage to 24V.
Parallel connection Serial connection

6. END OF CHARGE
- Remove the power supply from the battery charger by turning the switch to OFF and/or removing the
power supply cable from the mains outlet.
- Disconnect the black charge clamp from the chassis of the vehicle or from the negative terminal of
the battery (- symbol).
- Disconnect the red charge clamp from the positive terminal of the battery (+ symbol).
- Store the battery charger in a dry place.
7. PROTECTION
The battery charger protects itself from:
- Overcharge (too much current supplied to the battery).
- Short-circuit (loading clips placed in contact with each other).
- Polarity inversion on the battery clamps.
WARNING!
For appliances fitted with fuses, when replaced, always use the same kind of fuse with the same rated
size. For the same reason, never ever replace the fuse with a bridge in copper or other material. The
power supply cable should always be DISCONNECTED from the mains supply while the fuse is being
changed. When replacing the ribbon fuse, if present, carefully fasten the nuts.
8. USEFUL ADVICE
- Control electrolyte level.
- If the terminals are incrusted with oxide, clean them to ensure good contacts with the clamps.
- Never ever allow the two clamps to come into contact when the battery charger is connected to the
mains. In this case the fuse will blow.
- If the battery to which this battery charger is to be connected, is permanently installed in the vehicle,
disconnect the positive cable that connects the vehicle installation.
- Check the battery voltage and the polarity.
- After operation, disconnect the charger from the power suppy, disconnect the clamps from the
battery.
- Store the battery charger in a dry and clean place.
This manual suits for next models
1
Table of contents
Other Adler Batteries Charger manuals
Popular Batteries Charger manuals by other brands

VENOM
VENOM VS3504 user guide

Enelion
Enelion Vertica manual

Parkside
Parkside PAP 20 A1 Translation of the original instructions

Manson Engineering Industrial
Manson Engineering Industrial SBC-2215 user manual

Avaya
Avaya Quick Charger PTQ360 user guide

Benjamin Heating products
Benjamin Heating products 81002 Operating/safety instructions