ADVANCE-EQUIPMENT.COM
Left handed strap installation
right handed strap installation
Release latch to open Banjo Taper door. Install ” screw from inside out, through hole closest
to the front of banjo, on the banjo body. On the outside of the banjo body, place the thumb
rest closest to the banjo body, then the strap, then the nut, and turn to tighten.
Install ” screw from inside out, through hole closest to the rear of banjo, on the banjo body.
On the outisde of the banjo body place the strap, then the nut, and turn to tighten.
Ta p e
Installation
Strap installation
ADVANCE-EQUIPMENT.COM
RIGHT HANDED STRAP INSTALLATION
• Release latch to open Banjo Taper door. Install ½" screw from inside out, through hole closest
to the front of banjo, on the banjo body. On the outside of the banjo body, place the thumb rest
closest to the banjo body, then the strap, then the nut, and turn to tighten.
• Install 3/8" screw from inside out, through hole closest to the rear of banjo, on the banjo body.
On the outside of the banjo body place the strap, then the nut, and turn to tighten.
BANJO TAPER INSTRUCTIONS
• Use a standard joint compound (mud), in the Banjo Taper. The compound mix should be similar to
the consistency of heavy texture paint, or slightly thinner than usual hand-taping mix. Your joint
compound should pour from the mixing container easily.
• Before putting the mud in the Banjo Taper, push the tape clear up to the roof of the machine, near
the handle. Then pour your mud into the body of the Banjo Taper. In this way, the tape will pull the
mud with it as it comes out the nozzle of the Banjo Taper. As the mud becomes used up, the tape
will pull down against it.
• The thumbscrew at the front of the machine is used to adjust the mud-flow with tape before the
cut off plate. Experiment until you have the appropriate adjustment for your mud.
IMPORTANT: KEEP THE BANJO TAPER CLEAN AT ALL TIMES. DO NOT ALLOW MUD TO STAY IN MACHINE
FOR MORE THAN A 2 HOUR PERIOD.
INCLUDES:
Outside thumb rest
Strap
1/2" Plastic Plug10-24 Nut
3/8"
BA
E
F
C D
tape
installation
strap installation
INCLUDES:
A. 1/2” E. Outside Thumb Rest
F. Strap
B. 3/8” C. 10-24 Nut D. Plastic Plug
Use a standard joint compound (mud), in the Banjo Taper. The compound mix should be
simular to the consistency of heavy texture paint, or slightly thinner than usual hand-taping
mix. Your joint compound should pour from the mixing container easily.
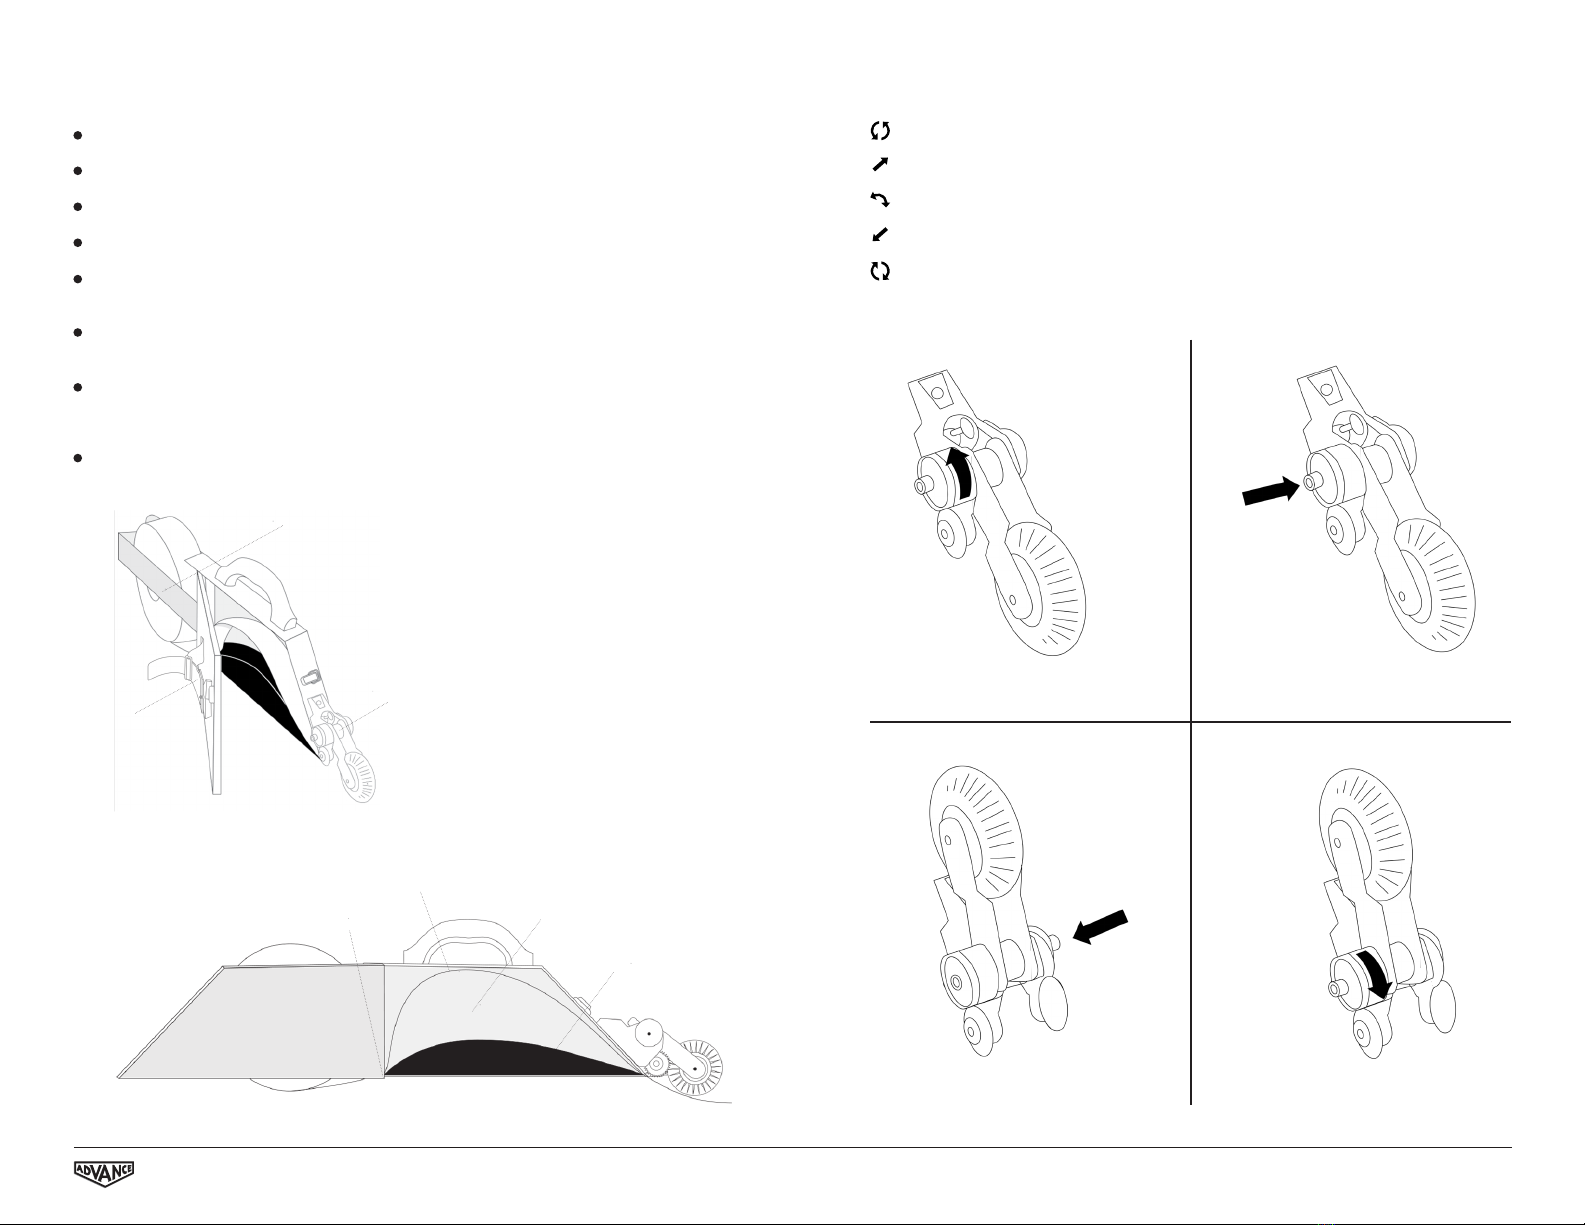
Before putting the mud in the Banjo Taper
A. Push the tape clear up to the roof of the machine, near the handle
B. Pour your mud into the body of the banjo taper.
C. As the mud becomes used up, the tape will pull down against the curved belly.
The belly rolls the mud forward to prevent dry spots on the tape.
The thumbscrew at the front of the machine is used to adjust the mud-flow. Experiment until
you have the appropriate adjustment for your mud.
I M P O RTA NT:
KEEP THE BANJO TAPER CLEAN AT ALL TIMES.
DO NOT ALLOW MUD TO STAY IN MACHINE FOR MORE
THAN A 2 HOUR PERIOD.