AEG EZS 5502 User manual

Schalter und Leuchte (4)
Das Handstück hat zwei Schalter und drei Funktionen.
• Mit dem Schalter (3) können Sie das Gerät ein- und
ausschalten.
• Drücken Sie den Schalter (2), um eine Funktion
auszuwählen.
• Die Funktion wird Ihnen an der Leuchte (4) angezeigt.
Leuchte 4: Rot = hohe Geschwindigkeit
Grün = niedrige Geschwindigkeit
Orange = Intervall/Massage
Benutzung der Zahnbürste
• Spülen Sie Ihren Mund vor dem Zähneputzen.
• Feuchten Sie den Bürstenkopf an und tragen Sie
Zahnpasta auf.
• Führen Sie den Bürstenkopf sorgfältig von Zahn zu
Zahn.
• Beginnen Sie mit den Außenseiten, gehen Sie dann
zu den Innenächen und putzen Sie zum Schluss die
Kauächen.
Hinweis
:
ႫBei den ersten Anwendungen kann es zu leichtem
Zahneischbluten kommen.
ႫSie sollten aber unbedingt einen Zahnarzt aufsu-
chen, falls die Beschwerden länger als 2 Wochen
anhalten.
ႫWechseln Sie den Bürstenkopf nach ca. 2 Monaten
aus.
Putzzeitbetrieb
Die empfohlene Putzzeit beträgt 2-Minuten.
• Nach Ablauf dieser Zeit unterbricht das Handstück
den Putzbetrieb kurzzeitig.
• Schalten Sie das Gerät dann aus.
Reinigung
Benutzen Sie keine scharfen oder scheuernden
Reinigungsmittel.
• Lösen Sie den Aufsatz vom Handstück.
• Reinigen Sie das Handstück mit einem feuchten Tuch
und die Aufsätze unter ießendem Wasser.
Technische Daten
Modell: EZS 5502
Spannungsversorgung: 100-240 V, 50 - 60Hz
Leistungsaufnahme: Watt
Ladestation: IPX 7, Schutzklasse II
Nettogewicht: 0,276 kg
Akku: 2,4 V DC, NI MH
Dieses Gerät entspricht den einschlägigen CE-
Richtlinien und ist nach den neuesten sicherheitstech-
nischen Vorschriften gebaut.
Technische Änderungen vorbehalten!
Ersatz-Zahnbürsten
für Ihre elektrische Zahnbürste EZS 5502 können Sie
unter folgender Telefon-Hotline bestellen:
02152/2006-888
Service
Im Service-/Garantiefall wenden Sie sich bitte an
unseren Dienstleister
SLI (Service Logistik International).
Internet-Serviceportal WWW.SLI24.DE
Sie können sich dort direkt anmelden und erhalten
alle Informationen zur weiteren Vorgehensweise Ihrer
Reklamation.
Über einen persönlichen Zugangscode, der Ihnen direkt
nach Ihrer Anmeldung per E-Mail übermittelt wird,
können Sie den Bearbeitungsablauf Ihrer Reklamation
auf unserem Serviceportal online verfolgen.
Alternativ können Sie uns den Servicefall per E-Mail
hotline@etv.de
oder per Fax
0 21 52 – 20 06 15 97
mitteilen.
ETV Elektro-Technische Vertriebsgesellschaft
Industriering Ost 40
D-47906 Kempen
Garantie
• Wir übernehmen für das von uns vertriebene Gerät
eine Garantie von 24 Monaten ab Kaufdatum
(Kassenbon). Als Garantienachweis gilt der Kaufbeleg.
• Durch Garantieleistungen wird die Garantiezeit
nicht verlängert. Es besteht auch kein Anspruch auf
neue Garantieleistungen. Diese Garantieerklärung
ist eine freiwillige Leistung von uns als Hersteller
des Geräts. Die gesetzlichen Gewährleistungsrechte
(Nacherfüllung, Rücktritt, Schadensersatz und
Minderung) werden durch diese Garantie nicht
berührt.
5
Deutsch
1

Batterieentsorgung
Das von Ihnen erworbene Produkt enthält
einen Nickel-Metallhydrid Akku.
Hat Ihr Gerät das Ende seiner Lebensdauer
erreicht, beachten Sie Folgendes:
Achtung
:
ႫAkkus dürfen nicht mit dem normalen Hausmüll
entsorgt werden!
ႫAls Verbraucher sind Sie gesetzlich verpichtet,
gebrauchte Batterien/Akkus zurückzugeben.
• Der Akku muss aus dem Gerät entnommen werden.
Wenden Sie sich ggf. an unseren Service.
1. Lösen Sie, mit einem Schraubenzieher, die
Schraube am unteren Teil der elektrischen
Zahnbürste.
2. Entfernen Sie, falls noch aufgesteckt, den
Bürstenkopfaufsatz. Pressen Sie anschließend
kräftig den Metallstift auf eine stabile Unterlage,
um das Innenleben herauszudrücken.
3. Entfernen Sie die Plastik-Akkuabdeckung,
indem Sie die Arretierung beidseitig mit einem
Schraubenzieher lösen. Entnehmen Sie anschlie-
ßend den Akku.
• Sie können Ihre alten Batterien/Akkus überall dort
unentgeltlich abgeben, wo die Batterien/Akkus
gekauft wurden.
• Informationen über öentlichen Sammelstellen
erhalten in Ihrer Stadt oder Gemeinde.
Umweltschutz
Geben Sie das Gerät am Ende der
Lebensdauer nicht in den normalen
Hausmüll. Bringen Sie es zum Recycling zu
einer oziellen Sammelstelle. Auf diese
Weise helfen Sie die Umwelt zu schonen.
6Deutsch

7
Nederlands
Veiligheidsinstructies
Lees deze handleiding zorgvuldig door voordat u dit
product gaat gebruiken. Indien u het apparaat aan ie-
mand anders geeft, geef dan ook deze handleiding mee.
• Dit apparaat is bedoeld voor het reinigen van het
gebit en de mondholte van volwassenen.
• Kinderen vanaf 7 jaar mogen dit apparaat gebruiken
zonder toezicht van volwassenen.
• Gebruik dit apparaat alleen privé en voor de doelein-
den waarvoor het ontworpen is.
• Controleer regelmatig of het apparaat en het elektri-
citeitsnoer geen beschadigingen vertonen.
• Indien het apparaat niet meer werkt of beschadigd
is, schakel het dan uit en verwijder de stekker uit het
wandcontact.
• Probeer het apparaat niet zelf te repareren. Neem
contact op met een geautoriseerde onderhoudsdienst.
• Gebruik alleen originele onderdelen.
Kinderen en licht gehandicapte personen
• Denk om de veiligheid van uw kinderen en houd het
verpakkingsmateriaal (plastic zakken, dozen, polysty-
reen, enz.) buiten hun bereik.
Waarschuwing
:
ႫLaat kleine kinderen niet spelen met plasticfolie. Dit
kan leiden tot verstikking!
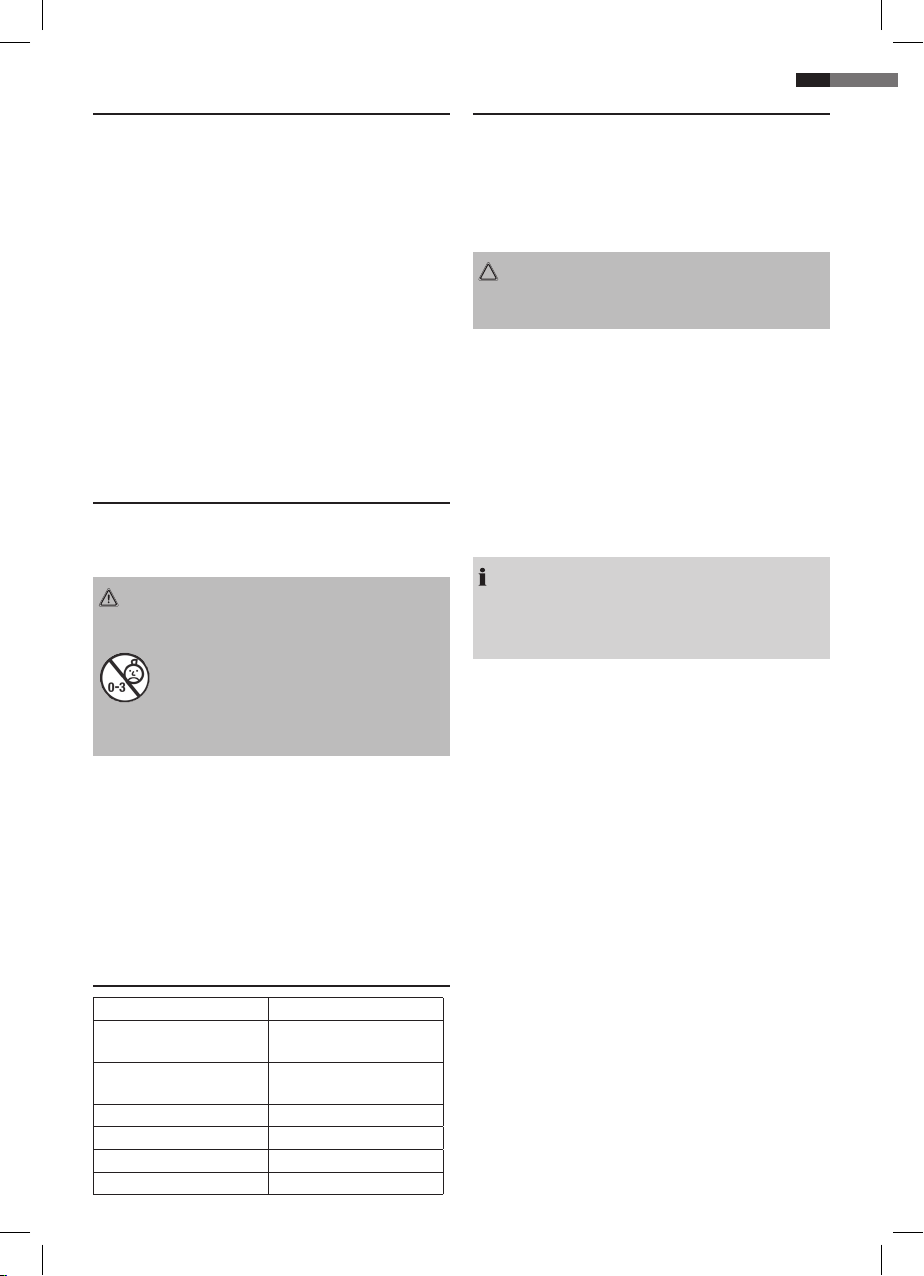
Dit apparaat is niet bedoeld voor kinderen
beneden de 3 jaar omdat kleine onderdelen
af kunnen breken en ingeslikt kunnen worden.
• Dit apparaat is niet bedoeld voor gebruik door perso-
nen (inclusief kinderen) met een lichamelijke, zintuig-
lijke of geestelijke handicap, of met een gebrek aan
kennis en ervaring, tenzij deze personen het apparaat
onder toezicht gebruiken of als deze personen door
iemand, die voor hun veiligheid verantwoordelijk is,
betreende het gebruik van het apparaat geïnstrueerd
zijn. Op kinderen dient toezicht gehouden te worden
om er zeker van te zijn dat ze niet met het apparaat
spelen.
Onderdelenoverzicht
1 Tandenborstel, normaal 2 Snelheidsschakelaar
3 Aan/uit schakelaar 4 Snelheidsaanduiding,
drie kleuren
5 Oplaadlicht 6 Handvat
7 Laadstation 8 Behuizing
9 Deksel 10 Wandbevestiging
11 Flosser 12 Tongreiniger
13 Tandvleesmassageborstel
Gebruiksaanwijzing
Wandbevestiging
U kunt het laadstation aan een muur bevestigen. Denk
erom dat er een wandcontact nabij dient te zijn.
• Meet de afstand tussen de inkepingen aan de achter-
kant (9) en boor twee gaten voor de pluggen op deze
afstand van elkaar in de muur.
Attentie:
Denk erom dat u de bedrading in de muur niet
beschadigd!
Elektrische aansluiting
Steek de stekker in een geaard 230 V, 50 Hz wandcon-
tact dat volgens de regels is geplaatst.
Opladen
• Plaats de tandenborstel in het laadstation.
• Het opladen wordt aangeduid met de rode led.
• Het opladen duurt ongeveer 12 uur.
• Wanneer de batterij is opgeladen zal de led groen
worden.
Opmerking
:
ႫPlaats de tandenborstel in de houder wanneer u
klaar bent met poetsen.
ႫZo zal uw tandenborstel altijd klaar zijn voor
gebruik.
ႫHet is niet mogelijk om dit apparaat te overladen.
Batterijonderhoud
• Om de capaciteit van de batterij te behouden dient
u de tandenborstel eenmaal per 6 maanden te
ontladen.
• Haal de stekker uit het wandcontact en ontlaad de
batterij door deze normaal te gebruiken.
Schakelaars en functieled (4)
De tandenborstel heeft twee schakelaars en drie
functies.
• Met schakelaar 3 kunt u het apparaat aan- of
uitschakelen.
• Met schakelaar 2 kunt u een functie selecteren.
• De functie zal worden aangeduid door led (4).
Led 4: rood = hoge snelheid
Groen = lage snelheid
Oranje = puls/massage

8Nederlands
Gebruik van de tandenborstel
• Spoel uw mond voordat u uw tanden gaat borstelen.
• Maak de kop van de tandenborstel nat en breng
tandpasta aan.
• Beweeg de kop langzaam van tand naar tand.
• Begin aan de buitenkant, ga dan naar de binnenkant
en borstel uiteindelijk het kauwoppervlak.
Opmerking
:
ႫEen lichte bloeding van uw tandvlees kan optreden
wanneer u deze borstel de eerste keer gebruikt.
ႫU dient een tandarts te raadplegen wanneer dit
langer dan twee weken aanhoudt.
ႫVervang de borstelkop ongeveer elke 2 maanden.
Borsteltijd
De aanbevolen borsteltijd is 2 minuten.
• Wanneer deze tijd is bereikt zal het borstelen kort
worden onderbroken.
• Schakel het apparaat uit.
Reinigen
Gebruik nooit scherpe of schurende
reinigingsproducten.
• Verwijder de borstel van het handvat.
• Reinig de handgreep met een vochtige doek en de
borstels onder stromend water.
Technische gegevens
Model: EZS 5502
Voedingsspanning: 100-240V, 50 - 60Hz
Energieverbruik: Watt
Oplaadstation: IPX 7, beschermingsklasse II
Netto gewicht: 0,276 kg
Batterij: 2.4 V DC, NI MH
Dit apparaat voldoet aan alle betreende CE-
richtlijnen en is vervaardigd volgens de nieuwste
veiligheidsbepalingen.
Onderworpen aan technische aanpassingen.
Afvoeren van de batterij
Dit product bevat een nikkel-metaalhydride
batterij.
Wanneer dit product het einde van de ge-
bruiksduur heeft bereikt dient u de volgende
instructies te volgen:
Waarschuwing
:
ႫBatterijen mogen niet bij het huishoudelijk afval
worden gegooid!
ႫAls een consument wordt u geacht gebruikte bat-
terijen te retourneren.
• De batterij moet worden verwijderd uit het apparaat.
Raadpleeg indien nodig uw onderhoudsdienst.
1. Gebruik een schroevendraaier om de schroef in het
onderste gedeelte van de elektrische tandenborstel
te verwijderen.
2. Verwijder de borstelkop, als u dat nog niet gedaan
heeft. Druk vervolgens op een stevige ondergrond
krachtig op de metalen staaf om het binnenwerk
eruit te drukken.
3. Verwijder de kunststof accu-afdekking terwijl
u de vergrendeling aan beide kanten met een
schroevendraaier openmaakt. Verwijder vervolgens
de accu.
• U kunt batterijen kosteloos inleveren waar u ze had
aangeschaft.
• Neem contact op met uw lokale overheid voor infor-
matie over afvalscheiding of -inzameling.
Bescherming van het milieu
Wanneer dit product het einde van de
gebruiksduur heeft bereikt mag het niet bij
het huishoudelijk afval worden gegooid.
Breng het naar een afvalinzamelingstation
zodat het kan worden gerecycled. Dit draagt
bij aan het beschermen van ons milieu.
1

9
Français
Consignes de sécurité
Lisez attentivement ce manuel de l'utilisateur avant
d'utiliser le produit. Si vous cédez cet appareil à
quelqu'un d'autre, n'oubliez pas de lui transmettre le
manuel de l'utilisateur.
• Cet appareil est prévu pour l'hygiène dentaire et orale
des adultes.
• Les enfants d'au moins 7 ans peuvent utiliser l'appa-
reil sous la surveillance d'un adulte.
• Utilisez cet appareil dans un cadre privé et unique-
ment pour les buts prévus.
• Contrôlez régulièrement le bon état de l'appareil et
de son câble.
• Si l'appareil cesse de fonctionner ou s'il est endom-
magé, éteignez-le et débranchez-le.
• Ne tenez pas de réparer vous-même l'appareil.
Coner les réparations à un spécialiste autorisé.
• N'utilisez que l'équipement d'origine.
Enfants et personnes handicapées
• Par mesure de sécurité vis-à-vis des enfants, ne
laissez pas les emballages (sac en plastique, carton,
polystyrène) à leur portée.
Avertissement
:
ႫNe laissez pas les enfants jouer avec le lm plasti-
que. Risque de suocation !
Cet appareil n‘est pas prévu pour les enfants
de moins de 3 ans, car de petites pièces peu-
vent être cassées et avalées.
• L’utilisation de l’appareil n’est pas prévue pour les
personnes (y compris les enfants) ayant des capacités
physiques, sensorielles ou mentales réduites, ou
manquant d’expérience et de connaissance, sauf si
elles sont sous la surveillance d’une personne respon-
sable de leur sécurité ou qu’elles ont été instruites
sur l’utilisation de l’appareil par cette dernière. Les
enfants doivent être surveillés an de garantir qu'ils
ne jouent pas avec l'appareil.
Vue d'ensemble des composants
1 Brosse à dent, normale 2 Interrupteur de vitesse
3 Interrupteur
Marche/Arrêt
4 Éclairage de vitesse,
trois couleurs
5 Voyant de CHARGE du
support
6 Manche
7 Support 8 Boîtier
9 Plaque frontale 10 Montage mural
11 Fil dentaire 12 Gratte-langue
13 Massage-gencives
Mode d'emploi
Montage mural
Vous pouvez monter le support au mur. Souvenez-vous
qu'une prise de courant doit se trouver à proximité.
• Mesurez la distance entre les encoches au dos (9)
et percez deux trous ayant cet intervalle pour les
ancrages.
Attention :
Assurez-vous à l'avance que vous n'endommagerez
pas le câblage caché dans le mur !
Branchement électrique
Insérez la che dans une prise de 230 V, 50 Hz reliée à
la terre et installée conformément aux normes.
Charge
• Placez le manche dans le support.
• La charge est indiquée par le voyant CHARGE en
rouge.
• La charge dure environ 12 heures.
• Lorsque la batterie est chargée, le voyant CHARGE
devient vert.
Remarque
:
ႫAprès l'utilisation, placez le manche dans le support.
ႫVotre brosse à dents sera ainsi prête à l'emploi.
ႫIl est impossible de surcharger l'appareil.
Entretien de la batterie
• Pour maintenir la capacité de la batterie, déchargez
le manche au moins une fois tous les 6 mois.
• Débranchez le support et déchargez la batterie en
utilisant l'appareil normalement.
Interrupteurs et voyants (4)
Le manche possède deux interrupteurs et trois
fonctions.
• L'interrupteur 3 vous permet de mettre en marche et
d'arrêter l'appareil.
• Appuyez sur l'interrupteur 2 pour choisir une
fonction.
• La fonction sera indiquée par le voyant (4).
Voyants 4 : Rouge = vitesse rapide
Vert = vitesse lente
Orange = pulsation/massage

10 Français
Utilisation de la brosse à dents
• Rincez-vous la bouche avant de vous brosser les
dents.
• Mouillez la tête de la brosse et appliquez le dentifrice.
• Déplacez attentivement la tête de la brosse d'une
dent à l'autre.
• Commencez par les côtés extérieurs, puis passez aux
surfaces intérieures et brossez enn les surfaces de
mastication.
Remarque
:
ႫLors de la première utilisation, vos gencives peuvent
présenter un léger saignement.
ႫVeuillez consulter un dentiste si cette condition
dure plus de 2 semaines.
ႫRemplacez la tête de la brosse au bout de 2 mois
environ.
Durée du brossage
La durée de brossage recommandée est de 2 minutes.
• Lorsque ce délai est écoulé, le manche interrompt
temporairement le brossage.
• Arrêtez l'appareil.
Nettoyage
N'utilisez jamais d'agents de nettoyage acides ou
abrasifs.
• Retirez l'accessoire de la brosse du manche.
• Nettoyez le manche avec un chion humide et les
soies sous l'eau courante.
Données techniques
Modèle : EZS 5502
Alimentation électrique : 100-240V, 50 - 60Hz
Consommation électrique : Watts
Support de charge : IPX 7, protection de classe II
Poids net : 0,276 kg
Batterie : 2,4 V DC, NI MH
Cet appareil est conforme à toutes les directives CE
correspondantes et il est fabriqué conformément aux
dernières normes de sécurité.
Peut faire l'objet de modications techniques.
Mise au rebut de la batterie
Votre produit contient une batterie au Nickel
Métal Hydrure.
Lorsque votre appareil a atteint la n de sa
durée de vie, suivez ces instructions :
Attention
:
ႫLes batteries ne doivent pas être jetées avec les
déchets domestiques ordinaires !
ႫEn tant que consommateur, vous êtes tenu par la
loi de consigner les batteries usagées.
• La batterie doit être retirée de l'appareil. Si nécessaire,
consultez notre centre de service.
1. Utilisez un tournevis pour retirer la vis sur la partie
inférieure de la brosse à dent électrique.
2. Retirez l'ensemble de la tête de la brosse, s'il est
encore en place. Ensuite, appuyez fortement la tige
métallique sur une surface stable pour faire sortir
le mécanisme interne.
3. Retirez le couvercle en plastique des piles en déta-
chant les deux côtés à l'aide d'un tournevis. Retirez
ensuite les piles.
• Vous pouvez mettre au rebut vos anciennes batteries
gratuitement au point d'achat.
• Contactez vos autorités locales pour obtenir des
informations sur les centres de récolte publics.
Protection de l'environnement
Lorsque l'appareil a atteint la n de sa durée
de vie, ne le jetez pas avec les déchets
domestiques ordinaires. Portez-le à un centre
de récolte agréé pour le recyclage. Vous
contribuerez ainsi à la protection de
l'environnement.
1

11
Español
Instrucciones de seguridad
Lea el presente manual de usuario detenidamente antes
de utilizar el producto. Si da el dispositivo a alguien,
dele también el manual de usuario.
• Este dispositivo se ha previsto para el cuidado dental
y oral de los adultos.
• Los niños de 7 años o más podrán utilizar el dispositi-
vo con la vigilancia de un adulto.
• Utilice el dispositivo exclusivamente para nes priva-
dos y para los nes previstos en la presente.
• Compruebe regularmente el aparato y el cable en
búsqueda de daños.
• Si el dispositivo deja de funcionar o está dañado,
apáguelo y desconéctelo.
• No intente reparar el dispositivo por sí mismo. Acuda
a un especialista autorizado para realizar las repara-
ciones oportunas.
• Utilice sólo el equipo original.
Niños y personas discapacitadas
• Con vistas a garantizar la seguridad de sus niños, no
deje material de embalaje (bolsas de plástico, cartón,
poliestireno, etc.) a su alcance.
Advertencia
:
ႫNo deje jugar a los niños pequeños con la película
de plástico. ¡Esto podrá provocarles la asxia!
Este aparato no está destinado a niños de
menos de 3 años, ya que las piezas pequeñas
podrían romperse y ser ingeridas.
• Este aparato no se destina al uso por personas (inclu-
yendo los niños) con capacidades físicas, mentales o
sensoriales reducidas, o con falta de experiencia y de co-
nocimientos, a menos que hayan recibido la supervisión
o las instrucciones correspondientes al uso del aparato
por parte de una persona encargada de su seguridad.
Los niños tendrán que ser vigilados para garantizar que
no juegan con este aparato.
Presentación general de los componentes
1 Cepillo de dientes,
normal
2 Interruptor de
velocidades
3 Interruptor de
Encendido/Apagado
4 Luces de velocidad, tres
colores
5 Luz de RECARGA de
la base
6 Asa
7 Base 8 Carcasa
9 Placa frontal 10 Instalación en pared
11 Hilo dental 12 Limpiador de lengua
13 Masaje de goma
Instrucciones de uso
Instalación en pared
Podrá montar la base en la pared. No obstante, tenga
en cuenta que deberá contar con una toma eléctrica en
las proximidades del aparato.
• Mida la distancia comprendida entre los cortes trase-
ros (9) y en su intervalo, realice dos oricios para los
anclajes.
Atención:
Asegúrese con suciente adelanto que no dañará el
cableado unido a la pared.
Conexión eléctrica
Introduzca la toma en un enchufe de tierra de 230 V,
50 Hz que haya sido instalado de conformidad con la
normativa vigente.
Recarga
• Coloque el asa en la base.
• La recarga estará indicada mediante una pantalla roja
de RECARGA.
• La recarga dura unas 12 horas.
• Una vez recargada la batería, el indicador de
RECARGA cambiará a verde.
Nota:
ႫTras su uso, je el asa en la base.
ႫEsto mantendrá su cepillo listo para volver a ser
utilizado.
ႫEs imposible sobrecargar el dispositivo.
Mantenimiento de la batería
• Para mantener la capacidad de la batería, descargue
el asa al menos una vez cada 6 meses.
• Desconecte la base y utilice la batería mediante un
uso normal.
Interruptores y luces (4)
El asa tiene dos interruptores y tres funciones.
• El interruptor 3 le permite apagar y encender el
dispositivo.
• Pulse el interruptor 2 para seleccionar una función.
• La función estará indicada mediante la luz (4).
Luces 4: Roja= alta velocidad
Verde = baja velocidad
Naranja = pulso/masaje

12 Español
Uso del cepillo de dientes
• Enjuague su boca antes de cepillarse los dientes.
• Humedezca el cabezal del cepillo y aplique la pasta
dental.
• Mueva con cuidado el cabezal del cepillo de un
diente a otro.
• Empiece con las partes exteriores, y a continuación,
vaya a las supercies interiores, y nalmente cepille
las supercies de las muelas.
Nota:
ႫTras utilizarlo por primera vez, quizás note una
ligera pérdida de las gomas.
ႫNo obstante, podrá consultar a su dentista si este
estado dura más de 2 semanas.
ႫCambie el cabezal del cepillo al cabo de aproxima-
damente 2 meses.
Tiempo de cepillado
El tiempo aconsejado para el cepillado es de 2 minutos.
• Una vez transcurrido dicho tiempo, el asa deja de
cepillar momentáneamente.
• Apague el aparato.
Limpieza
No utilice nunca agentes de limpieza abrasivos ni
agudos.
• Saque la unión del cepillo del asa.
• Limpie el asa con un paño húmedo y los restos con
agua corriente.
Especicaciones
Modelo: EZS 5502
Alimentación: 100-240V, 50 - 60Hz
Consumo de energía: Watt
Base de recarga: IPX 7, Clase de protección II
Peso neto: 0.276 kg
Batería: 2.4 V DC, NI MH
Este dispositivo cumple con todas las directivas corres-
pondientes de la CE y ha sido diseñado de conformidad
con las últimas normativas en materia de seguridad.
El presente manual podrá sufrir cambios técnicos.
Eliminación de baterías
Su producto incluye una batería de hídrico
metálico de níquel.
Una vez que su dispositivo haya llegado al
nal de su vida de uso, siga las indicaciones
mostradas a continuación:
Cuidado
:
ႫLas baterías no deberán eliminarse con la basura
doméstica habitual.
ႫComo consumidor, está legalmente obligado a
devolver las baterías usadas.
• La batería deberá sacarse del dispositivo. Si es necesa-
rio, consulte con nuestro servicio de reparaciones.
1. Utilice un desatornillador para sacar los tornillos de
la parte inferior del cepillo dental eléctrico.
2. Saque el montaje del cabezal del cepillo, si aún
sigue funcionando. A continuación, en una super-
cie estable, pulse fuertemente la rueda metálica
con vistas a sacar los elementos internos.
3. Saque la cubierta de batería de plástico mientras
que deshace la placa por ambos lados con el des-
atornillador. A continuación, saque la pila.
• Podrá colocar sus baterías antiguas de forma comple-
tamente gratuita en el lugar en donde las compró.
• Póngase en contacto con sus autoridades locales para
obtener más información acerca de los centros de
recogida pública.
Protección medioambiental
Cuando el dispositivo haya alcanzado el nal
de su vida de uso, no se deshaga del mismo
tirándolo a la basura doméstica normal.
Llévelo a un centro de recogida ocial para
que lo reciclen. Esto ayudará a conservar el
medioambiente.
1

13
Português
Instruções de segurança
Leia este manual de utilizador atentamente antes de
utilizar o produto. Se fornecer este dispositivo a outra
pessoa, entregue também o manual do utilizador.
• Este dispositivo destina-se a cuidados de higiene den-
tal e oral de adultos.
• As crianças de 7 anos ou mais velhas podem utilizar o
dispositivo com autorização dos adultos.
• Utilize este dispositivo apenas para ns privados e
para os ns a que se destinam.
• Verique regularmente se o aparelho e o cabo apre-
sentam danos.
• Se o dispositivo deixar de funcionar ou apresentar
danos, desligue-o e retire a tomada da cha.
• Não tente reparar o aparelho sozinho. As reparações
devem ser efectuadas por um especialista autorizado.
• Utilize apenas equipamento original.
Crianças e pessoas com deciências
• Para garantir a segurança das suas crianças, mante-
nha todas as embalagens (sacos de plástico, embala-
gens, polistireno, etc.) fora do seu alcance.
Aviso
:
ႫNão permita que as crianças brinquem com a
película de plástico. Isto pode causar asxia!
Este aparelho não se destina a crianças com
menos de 3 anos, porque as peças pequenas
podem partir-se e ser engolidas.
• Este aparelho não se destina-se a ser utilizado por pesso-
as (incluindo crianças) com capacidades físicas, sensoriais
ou mentais reduzidas ou com falta de experiência e
conhecimentos, a menos que lhes tenha sido atribuído
supervisão ou instruções relacionadas com a utiliza-
ção do aparelho por uma pessoa responsável pela sua
segurança. As crianças devem estar acompanhadas para
garantir que não brincam com o aparelho.
Descrição geral dos componentes
1 escova de dentes,
normal
2 Interruptor de
velocidade
3 Interruptor On/O
(Ligar/desligar)
4 Luzes de velocidade,
três cores
5 Luz de carga do suporte 6 Suporte
7 Suporte 8 Estojo
9 Base 10 Sistema de montagem
na parede
11 Sistema de o dental 12 Limpeza da língua
13 Sistema de massagem
de gengivas
Instruções de utilização
Sistema de montagem na parede
Pode montar o suporte na parede. No entanto, deve ter
em conta que deve ter por perto uma tomada eléctrica.
• Meça a distância entre as ranhuras na parte de trás
(9) e, neste intervalo, faça dois furos para as âncoras.
Atenção:
Certique-se antecipadamente de que a cablagem
dentro da parede não é danicada!
Ligação eléctrica
Insira a cha numa tomada de 230 V, 50 Hz de
ligação à terra que tenha sido instalada de acordo as
regulamentações.
Carga
• Coloque a pega no suporte.
• A carga é indicada no visor CHARGE (Carga)
vermelho.
• O processo de carga demora cerca de 12 horas.
• Depois da carga estar concluída, o indicador CHARGE
(Carga) muda para verde.
Indicação
:
ႫApós a utilização, coloque a pega no suporte.
ႫIsto irá manter a sua escova pronta a utilizar.
ႫÉ impossível sobrecarregar o dispositivo.
Manutenção da pilha
• Para manter a capacidade da pilha, descarregue a
pega pelo menos uma vez de 6 em 6 meses.
• Desligue o suporte e drene a pilha através de utiliza-
ção normal.
Interruptores e luzes (4)
A pega tem dois interruptores e três funções.
• O interruptor 3 permite ligar e desligar o dispositivo.
• Prima o interruptor 2 para seleccionar uma função.
• A função é indicada pela luz (4).
Luzes 4: Vermelho = alta velocidade
Verde = baixa velocidade
Laranja = impulso/massagem

14 Português
Utilizar a escova de dentes
• Lave a boca antes de escovar os dentes.
• Molhe a cabeça da escova e coloque pasta de dentes.
• Mova cuidadosamente a cabeça da escova entre os
dentes.
• Comece pela parte de fora e depois avance para a
parte de dentro e, por último, escove as coroas dos
dentes.
Indicação
:
ႫAté a primeira utilização, as suas gengivas podem
sangrar ligeiramente.
ႫNo entanto, deve consultar um dentista se essa
situação se prolongar durante mais de 2 semanas.
ႫSubstitua a cabeça da escova de 2 em 2 meses.
Tempo de escovagem
O tempo de escovagem recomendado é de 2 minutos.
• Depois de decorrer esse período, a pega pára tempo-
rariamente de escovar.
• Desligue o aparelho.
Limpeza
Nunca utilize agentes de limpeza aados ou abrasivos.
• Retire o acessório da escova da pega.
• Limpe a pega com um pano húmido e lave os pêlos
debaixo de água corrente.
Características técnicas
Modelo: EZS 5502
Fonte de alimentação: 100-240 V, 50 - 60 Hz
Consumo de energia: Watt
Suporte de carga: IPX 7, Classe de protecção II
Peso líquido: 0,276 kg
Pilha: 2,4 V CC, NI MH
Este dispositivo está em conformidade com todas as
directivas CE relevantes e foi concebido de acordo com
as mais recentes regulamentações de segurança.
Sujeito a alterações técnicas.
Eliminação da pilha
O aparelho contém uma pilha de hidreto de
níquel-metal.
Quando o dispositivo atingir o nal da res-
pectiva vida útil, siga as seguintes instruções:
Atenção
:
ႫAs pilhas não devem ser eliminadas juntamente
com resíduos domésticos normais!
ႫComo consumidor, é obrigado por lei a devolver as
pilhas gastas.
• A pilha deve ser removida do dispositivo. Se necessá-
rio, consulte o nosso serviço de apoio ao cliente.
1. Use uma chave de parafusos para desapertar o
parafuso na parte inferior da escova de dentes
eléctrica.
2. Retire o conjunto da cabeça da escova, caso ainda
esteja montado. Em seguida, numa superfície es-
tável, prima com força a haste metálica para puxar
as faixas internas.
3. Retire a tampa de plástico da pilha, retirando a
patilha em ambos os lados com uma chave de
parafusos. Em seguida, retire a pilha.
• Pode eliminar as suas pilhas antigas gratuitamente no
local onde as adquiriu.
• Contacte as autoridades locais para obter infor-
mações sobre os centros de recolha pública.
Protecção ambiental
Quando o dispositivo atingir o nal da
respectiva vida útil, não o elimine juntamen-
te resíduos domésticos normais. Leve-o para
um centro de recolha ocial para reciclagem.
Isto ajuda a preservar o meio-ambiente.
1

15
Italiano
Istruzioni di sicurezza
Leggere attentamente questo manuale d'uso prima di
usare il prodotto. Se si passa il dispositivo a qualcun
altro, includere anche il manuale d'uso.
• Questo dispositivo è progettato per l'igiene dentale e
orale degli adulti.
• I bambini di età dai 7 anni in su possono usare il
dispositivo con la supervisione di un adulto.
• Usare questo dispositivo solo privatamente e per gli
scopi indicati.
• Controllare regolarmente l'apparecchio e il cavo per
eventuali danni.
• Se il dispositivo smette di funzionare o è danneggia-
to, spegnerlo e scollegarlo dalla corrente.
• Non tentare di riparare l'apparecchio da soli.
Consultare uno specialista autorizzato per le
riparazioni.
• Utilizzare solo apparecchi originali.
Bambini e persone con disabilità
• Per sicurezza tenere l'imballaggio (sacchetto di pla-
stica, scatola, polistirolo, ecc) fuori dalla portata dei
bambini.
Avvertenza:
ႫNon permettere ai bambini piccoli di giocare con la
pellicola di plastica. Può causare soocamento!
Questo apparecchio non è adatto per bambini
sotto i 3 anni di età, perché le parti piccole si
possono rompere e possono essere ingerite.
• Questo apparecchio non è progettato per essere uti-
lizzato da persone (compresi i bambini) con capacità
siche, sensoriali o mentali ridotte, o con mancanza
di esperienza e conoscenza, a meno che non sia
stata fornita loro supervisione o istruzioni riguardo
all'utilizzo dell'apparecchio da una persona respon-
sabile della loro sicurezza. I bambini necessitano di
supervisione per assicurarsi che non giochino con
l'apparecchio.
Panoramica dei componenti
1 Spazzolino, normale 2 Interruttore di velocità
3 Interruttore On/O 4 Spie di velocità, tre
colori
5 Spia di carica
dell'alloggiamento
6 Manico
7 Alloggiamento 8 Custodia
9 Piastra anteriore 10 Montaggio a muro
11 Filo interdentale 12 Dispositivo di pulizia
della lingua
13 Massaggiatore delle
gengive
Istruzioni per l'uso
Montaggio a muro
E' possibile montare l'alloggiamento nel muro. Tenere
presente, tuttavia, che deve esserci una presa elettrica
nelle vicinanze.
• Misurare la distanza tra le tacche sul retro (9) e a
questo intervallo trapanare due fori per gli ancoraggi.
Attenzione:
Assicurarsi per tempo che non si danneggeranno i cavi
nascosti nel muro!
Collegamento elettrico
Inserire la spina in una presa di terra da 230 V, 50 Hz
installata secondo la normativa vigente.
Caricamento
• Posizionare il manico nell'alloggiamento.
• Il caricamento verrà indicato con il display rosso
CARICA.
• Il caricamento richiede circa 12 ore.
• Una volta che la batteria è caricata, l'indicatore di
CARICA diventerà verde.
Nota
:
ႫDopo l'uso, rimettere il manico nel proprio
alloggiamento.
ႫQuesto manterrà lo spazzolino pronto per l'uso.
ႫNon è possibile sovraccaricare il dispositivo.
Manutenzione della batteria
• Per mantenere la capacità della batteria, far scaricare
il manico almeno una volta ogni 6 mesi.
• Scollegare l'alloggiamento e far scaricare la batteria
con il normale utilizzo.
Interruttori e spie (4)
Il manico ha due interruttori e tre funzioni.
• L'interruttore 3 consente di accendere e spegnere il
dispositivo.

16 Italiano
• Premere l'interruttore 2 per selezionare una funzione.
• La funzione verrà indicata dalla spia (4).
Spie 4: Rossa = alta velocità
Verde = bassa velocità
Arancione = impulso/massaggio
Utilizzo dello spazzolino
• Sciacquarsi la bocca prima di lavarsi i denti.
• Bagnare la testina dello spazzolino e applicare il
dentifricio.
• Spostare attentamente la testina dello spazzolino da
dente a dente.
• Iniziare con i lati esterni, quindi andare verso le
superci interne e inne spazzolare le superci delle
gengive.
Nota
:
ႫDopo il primo utilizzo, è possibile riscontrare un
leggero sanguinamento delle gengive.
ႫTuttavia, è necessario consultare un dentista se la
condizione persiste per oltre 2 settimane.
ႫSostituire la testina dello spazzolino dopo circa
2 mesi.
Tempo di pulizia
Il tempo di pulizia raccomandato è di 2 minuti.
• Quando questo tempo è passato, il manico smette di
spazzolare momentaneamente.
• Spegnere l'apparecchio.
Pulizia
Non usare mai detergenti aggressivi o abrasivi.
• Rimuovere l'accessorio dello spazzolino dal manico.
• Pulire la maniglia con un panno umido e le setole
sotto l'acqua corrente.
Speciche
Modello: EZS 5502
Alimentazione elettrica: 100-240V, 50 - 60Hz
Consumo elettrico: Watt
Alloggiamento di caricamento:
IPX 7, Classe di protezione II
Peso netto: 0,276 kg
Batteria: 2,4 V DC, NI MH
Questo dispositivo è conforme a tutte le pertinenti
direttive CE ed è costruito secondo le pù recenti norma-
tive di sicurezza.
Soggetto a modiche tecniche.
Smaltimento della batteria
Il prodotto contiene una batteria agli idruri
di nickel-metallo.
Una volta che il dispositivo ha raggiunto
la ne del proprio utilizzo, seguire queste
istruzioni:
Attenzione:
ႫLe batterie non devono essere smaltite insieme ai
normali riuti domestici!
ႫIn qualità di consumatore, hai l'obbligo legale di
restituire le batterie usate.
• La batteria deve essere rimossa dal dispositivo. Se
necessario, consultare il nostro servizio di assistenza.
1. Utilizzare un cacciavite per rimuovere la vite sulla
parte sottostante dello spazzolino elettrico.
2. Rimuovere l'asemblaggio della testina dello spaz-
zolino, se è ancora ssato. Quindi, su una supercie
stabile, premere con forza l'asta metallica per
spingere in fuori i meccanismi interni.
3. Rimuovere il coperchio della batteria in plastica
mentre si allenta la chiusura a scatto su entrambi i
lati con un cacciavite. Quindi rimuovere la batteria.
• E' possibile smaltire gratuitamente le batterie usate
dove si sono acquistate.
• Contattare le autorità locali per informazioni sui
centri di raccolta pubblici.
Protezione ambientale
Quando il dispositivo ha raggiunto la ne del
suo utilizzo, non smaltirlo insieme ai normali
riuti domestici. Portarlo a un centro di
raccolta uciale per il riciclaggio. Questo
contribuirà a salvare l'ambiente.
1

17
УКРАЇНСЬКА
Інструкції з техніки безпеки
Перед використанням продукту уважно прочитайте ке-
рівництво користувача. Якщо Ви передаєте цей пристрій
іншій особі, надайте також і керівництво користувача.
• Цей пристрій призначений для очищення зубів та
ротової порожнини дорослих.
• Діти віком старше 7 років можуть використовувати при-
стрій під наглядом дорослих.
• Використовуйте пристрій лише особисто для себе та за
призначенням.
• Регулярно перевіряйте пристрій та шнур на наявність
пошкоджень.
• Якщо пристрій перестає працювати або пошкоджений,
вимкніть його та від’єднайте від мережі живлення.
• Не намагайтесь самостійно ремонтувати пристрій. З
приводу ремонту звертайтесь до офіційних сервісних
центрів.
• Використовуйте лише оригінальні пристрої.
Діти та інваліди
• Для гарантії безпеки Ваших дітей, будь ласка, збері-
гайте все деталі упаковки (пластикові пакети, коробки,
полістирол, тощо) в місцях недоступних для дітей.
Попередження
:
ႫНе дозволяйте маленьким дітям гратися з пластико-
вою упаковкою. Це може призвести до задухи!
Цей пристрій не призначений для дітей до
3 років, тому що вони можуть відламати та про-
ковтнути маленькі деталі.
• Цей пристрій не призначений для використання
людьми (включаючи дітей) із зниженими фізичними,
сенсорними або розумовими можливостями, або з
відсутністю досвіду та знань, за винятком випадків,
коли вони використовують пристрій під наглядом або
отримали інструкції щодо його використання від люди-
ни, відповідальної за їх безпеку. Необхідно наглядати
за дітьми, стежачи, щоб вони не грали з пристроєм.
Огляд комплекту поставки
1 Щітка, звичайна 2 Перемикач швидкості
3 Перемикач Вкл./Викл. 4 Індикатор швидкості,
трикольоровий
5 Індикатор ЗАРЯДКИ,
коли щітка встановлена
в тримач
6 Ручка
7 Тримач 8 Коробка
9 Передня пластина 10 Отвір для монтування
на стіну
11 Насадка "зубна нитка" 12 Очищувач язику
13 Масажер ясен
Інструкції з використання
Монтування на стіну
Ви можете повісити тримач на стінку. Однак пам’ятайте,
що розетка повинна знаходитись неподалік.
• Виміряйте відстань між отворами на задній поверхні
(9) та просвердліть на цій відстані два отвори для
кріплення.
Увага:
переконайтесь, що Ви не пошкодите кабелі, сховані в
стіні!
Електричне з’єднання
Вставте вилку в заземлену розетку 230 В, 50 Гц, що була
встановлена згідно з відповідними нормами.
Зарядка
• Встановіть ручку в тримач.
• Процес зарядки буде відображений червоним індикато-
ром ЗАРЯДКА.
• Зарядка триває приблизно 12 годин.
• Після того, як батарея заряджена, індикатор ЗАРЯДКА
стане зеленим.
Примітка
:
ႫПісля використання встановіть ручку в тримач.
ႫТаким чином Ваша зубна щітка буде завжди готова
для використання.
ႫПристрій неможливо надмірно зарядити.
Обслуговування батареї
• Щоб зберегти ємність батареї, розряджайте ручку не
рідше, ніж кожні 6 місяців.
• Відключіть тримач від мережі живлення та розрядіть
батарею, використовуючи пристрій звичайним чином.
Перемикачі та індикатори (4)
Ручка має два перемикачі та три функції.
• Перемикач 3 дозволяє вмикати та вимикати пристрій.
• Натисніть на перемикач 2, щоб обрати функцію.

18 УКРАЇНСЬКА
• Функція буде підсвічена відповідним індикатором (4).
Індикатори 4: червоний = висока швидкість
зелений = низька швидкість
оранжевий = пульсація/масаж
Використання зубної щітки
• Промийте ротову порожнину перед очищенням зубів.
• Змочіть голівку щітки та нанесіть зубну пасту.
• Обережно пересувайте голівку щітки від зуба до зуба.
• Починайте очищення із зовнішньої поверхні, потім
переходьте до внутрішньої поверхні, та наприкінці
очищуйте жувальну поверхню зубів.
Примітка
:
ႫПісля першого використання Ви можете відчути не-
значну кровотечу ясен.
ႫОднак Ви повинні відвідати стоматолога, якщо цей
стан триватиме більше 2 тижнів.
ႫЗамініть голівку щітки приблизно через 2 місяці.
Час очищення
Рекомендований час очищення становить 2 хвилини.
• Коли цей час закінчується, ручка припиняє процес
очищення.
• Вимкніть пристрій.
Очищення
Ніколи не використовуйте гострі предмети та абразивні
миючі засоби.
• Зніміть насадку-щітку з ручки.
• Очищуйте ручку вологою ганчіркою, а щетину - під про-
точною водою.
Характеристики
Модель: EZS 5502
Електроживлення: 100-240В, 50 - 60Гц
Споживана потужність: Ват
Підставка для зарядки: IPX 7, клас захисту II
Вага без упаковки: 0,276 кг
Батарея: 2,4 В DC, NI MH
Цей пристрій відповідає всім відповідним директивам
Ради Європи та сконструйований згідно з останніми по-
ложеннями з техніки безпеки.
Підлягає технічним модифікаціям.
Утилізація батареї
Ваш продукт містить нікель-металогідридний
акумулятор.
Коли термін служби Вашого пристрою закін-
чився, виконайте наступні інструкції:
Застереження
:
ႫБатареї не можна викидати разом зі звичайним по-
бутовим сміттям!
ႫЯк споживач Ви юридично зобов’язані повернути
використані батареї.
• Необхідно витягнути батарею з пристрою. За необхід-
ності зверніться до нашого сервісного центру.
1. Скористайтесь викруткою, щоб відкрутити гвинт на
нижній частині електричної зубної щітки.
2. Зніміть голівку щітки, якщо вона ще ввімкнена. Потім
на надійній поверхні сильно натисніть на металеву
ручку, щоб виштовхнути вміст ручки.
3. Зніміть пластикову кришку батареї, відкручуючи
фіксатори з обох боків за допомогою викрутки. Потім
витягніть батарею.
• Ви можете утилізувати Вашу стару батарею безкоштов-
но в місці її покупки.
• Зверніться до місцевих органів влади для отримання
інформації щодо загальних центрів збирання відпра-
цьованого обладнання.
Захист навколишнього середовища
Коли закінчився термін служби пристрою, не
викидайте його разом зі звичайним побутовим
сміттям. Віддайте його в офіційний центр
збирання для переробки. Це допоможе
зберегти навколишнє середовище.
1

19
English
Safety instructions
Read this user manual thoroughly before using the
product. If you pass this device on to someone else,
include the user manual also.
• This device is intended for the dental and oral care of
adults.
• Children age 7 or older may use the device with adult
supervision.
• Use this device only privately and for the purposes
intended.
• Regularly check the appliance and cord for damage.
• If the device stops working or is damaged, turn it o
and unplug it.
• Do not attempt to repair the appliance yourself.
Refer repairs to an authorised specialist.
• Use only original equipment.
Children and disabled individuals
• To ensure your children’s safety, please keep all
packaging (plastic bags, boxes, polystyrene, etc.) out
of their reach.
Warning
:
ႫDo not let small children play with plastic lm. This
can cause suocation!
This appliance is not intended for children
under 3, because small parts can be broken
o and swallowed.
• This appliance is not intended for use by persons
(including children) with reduced physical, sensory
or mental capabilities, or lack of experience and
knowledge, unless they have been given supervision
or instruction concerning use oft the appliance by a
person responsible for their safety. Children should be
supervised to ensure that they do not play with the
appliance.
Component overview
1 Toothbrush, normal 2 Speed switch
3 On/O switch 4 Speed lights, three
colours
5 Cradle CHARGE light 6 Handle
7 Cradle 8 Case
9 Face plate 10 Wall mount
11 Flosser 12 Tongue cleaner
13 Gum massager
Instructions for use
Wall mount
You can mount the cradle to the wall. Keep in mind,
however, that an electrical outlet must be nearby.
• Measure the distance between the notches on the
back (9) and at this interval drill two holes for the
anchors.
Attention:
Make sure ahead of time that you will not damage
wiring that is concealed in the wall!
Electrical connection
Insert the plug into a grounded 230 V, 50 Hz socket
that has been installed according to regulation.
Charging
• Place the handle into the cradle.
• Charging will be indicated by the red CHARGE
display.
• Charging takes about 12 hours.
• Once the battery is charged, the CHARGE indicator
will change to green.
Note
:
ႫAfter use, set the handle into the cradle.
ႫThis will keep your toothbrush ready to use.
ႫIt is impossible to overcharge the device.
Battery maintenance
• To maintain battery capacity, discharge the handle at
least once every 6 months.
• Unplug the cradle and drain the battery through
normal use.
Switches and lights (4)
The handle has two switches and three functions.
• Switch 3 lets you turn the device on and o.
• Press switch 2 to select a function.
• The function will be indicated by the light (4).
Lights 4: Red = high speed
Green = low speed
Orange = pulse/massage

20 English
Using the toothbrush
• Rinse your mouth before brushing your teeth.
• Wet the brush head and apply toothpaste.
• Carefully move the brush head from tooth to tooth.
• Start with the outer sides, then go to the inner
surfaces, and nally brush the chewing surfaces.
Note
:
ႫUpon rst use, you may experience minor bleeding
of the gums.
ႫHowever, you must visit a dentist if the condition
lasts longer than 2 weeks.
ႫReplace the brush head after approximately
2 months.
Brushing time
The recommended brushing time is 2 minutes.
• When this time has passed, the handle momentarily
stops brushing.
• Switch o the appliance.
Cleaning
Never use sharp or abrasive cleaning agents.
• Remove the brush attachment from the handle.
• Clean the handle with a damp cloth and the bristles
under running water.
Specications
Model: EZS 5502
Power supply: 100-240V, 50 - 60Hz
Power consumption: Watt
Charging cradle: IPX 7, Protection class II
Net weight: 0.276 kg
Battery: 2.4 V DC, NI MH
This device complies with all relevant CE directives and
is built according to the latest safety regulations.
Subject to technical modication.
Battery disposal
Your product contains a nickel-metal hydride
battery.
Once your device has reached the end of its
life, follow these instructions:
Caution
:
ႫBatteries must not be discarded with ordinary
household waste!
ႫAs a consumer you are legally obligated to return
used batteries.
• The battery must be removed from the device. If
necessary, consult our service facility.
1. Use a screwdriver to remove the screw on the
under part of the electric toothbrush.
2. Remove the brush head assembly, if it is still on.
Then, on a stable surface, strongly press the metal
rod in order to push out the inner workings.
3. Remove the plastic battery cover while undoing
the latch on both sides with a screwdriver. Then
remove the battery.
• You can dispose of your old batteries free of charge
where they were purchased.
• Contact your local authorities for information on
public collection centres.
Environmental protection
When the device has reached the end of its
life, do not dispose of it with ordinary
household waste. Take it to an ocial
collection center for recycling. This helps
save the environment.
1

21
Polski
Instrukcje dotyczące bezpieczeństwa
Przed rozpoczęciem użytkowania produktu uważnie
przeczytaj tą instrukcję. Jeśli przekażesz komuś urzą-
dzenie, przekaż wraz z nim tę instrukcję.
• To urządzenie jest przeznaczone do pielęgnacji zębów
i jamy ustnej osób dorosłych.
• Dzieci w wieku 7 lat i starsze mogą korzystać z urzą-
dzenia pod nadzorem dorosłych.
• Korzystaj z tego urządzenia tylko prywatnie i zgodnie
z jego przeznaczeniem.
• Należy regularnie sprawdzać, czy urządzenie lub
kabel zasilania nie uległy uszkodzeniu.
• Jeśli urządzenie przestanie działać lub ulegnie uszko-
dzeniu, wyłącz je i odłącz od zasilania.
• Nie podejmuj prób własnoręcznej naprawy urzą-
dzenia. Zlecaj naprawy w autoryzowanym punkcie
serwisowym.
• Używaj tylko oryginalnych akcesoriów.
Dzieci oraz osoby niepełnosprawne
• Dla bezpieczeństwa dzieci proszę przechowywać czę-
ści opakowania (torby plastikowe, kartony, styropian
itp.) w miejscu dla nich niedostępnym.
Ostrzeżenie
:
ႫNie wolno pozwalać małym dzieciom bawić się
folią. Może dojść do uduszenia!
To urządzenie nie jest przeznaczone dla dzieci
poniżej 3 roku życia, ponieważ małe części
mogą zostać odłamane i połknięte.
• To urządzenie nie jest przeznaczone do użytku przez
osoby (w tym dzieci) o ograniczonych zdolnościach
zycznych, czuciowych lub umysłowych, lub braku
doświadczenia i wiedzy, chyba że pozostają one pod
nadzorem osoby odpowiadającej za ich bezpieczeń-
stwo lub zostały odpowiednio poinstruowane o
sposobie użytkowania urządzenia. Dzieci powinny po-
zostawać pod opieką, aby nie bawiły się urządzeniem.
Przegląd części
1 Szczoteczka, normalna 2 Przełącznik prędkości
3 Włącznik 4 Lampki prędkości, trzy
kolory
5 Lampka ładowania w
podstawce (CHARGE)
6 Uchwyt
7 Podstawka 8 Obudowa
9 Osłona 10 Mocowanie ścienne
11 Końcówka do
czyszczenia przestrzeni
międzyzębowej
12 Końcówka do
czyszczenia języka
13 Końcówka do masażu
dziąseł
Instrukcja eksploatacji
Mocowanie do ściany
Podstawkę można przymocować do ściany. Należy
przy tym pamiętać, że w pobliżu musi znajdować się
gniazdko elektryczne.
• Zmierz odległość pomiędzy nacięciami z tyłu (9) i
wywierć dwa otwory na zaczepy znajdujące się od
siebie o zmierzoną odległość.
Uwaga:
Z wyprzedzeniem sprawdź, czy nie uszkodzisz okablo-
wania ukrytego w ścianie!
Podłączenie do zasilania
Włóż wtyczkę do uziemionego gniazdka zasilania 230 V,
50 Hz zainstalowanego zgodnie z obowiązującymi
przepisami.
Ładowanie
• Wstaw uchwyt w podstawkę.
• O ładowaniu informuje czerwona lampka ładowania
CHARGE.
• Ładowanie trwa około 12 godzin.
• Po naładowaniu baterii, lampka CHARGE zmieni kolor
na zielony.
Wskazówka
:
ႫPo użyciu wstaw uchwyt w podstawkę.
ႫDzięki temu szczoteczka będzie naładowana i
gotowa do użytku.
ႫNadmierne naładowanie szczoteczki jest
niemożliwe.
Konserwacja baterii
• Aby utrzymać pojemność baterii, rozładowuj szczo-
teczkę całkowicie co najmniej raz na 6 miesięcy.
• Odłącz podstawkę od zasilania i rozładuj baterię
normalnie używając szczoteczki.

22 Polski
Przełączniki i lampki (4)
Na uchwycie znajdują się dwa przełączniki i trzy wskaź-
niki funkcji.
• Włącznik 3 służy do włączania i wyłączania
urządzenia.
• Przełącznik (przycisk) 2 służy do wyboru funkcji.
• O wybranej funkcji informuje lampka (4).
Lampka 4: Czerwona = wysoka prędkość
Zielona = niska prędkość
Pomarańczowa = impulsowanie/masaż
Używanie szczoteczki
• Przed rozpoczęciem mycia zębów szczoteczką prze-
płucz usta.
• Zmocz głowicę szczoteczki i nałóż na nią pastę do
zębów.
• Ostrożnie przesuwaj głowicę szczoteczki po kolei po
zębach.
• Rozpocznij od mycia bocznych i przednich
powierzchni zębów, następnie myj wewnętrzne
powierzchnie zębów, a na koniec umyj szczoteczką
powierzchnie zębów trzonowych.
Uwaga
:
ႫPodczas pierwszego użycia może wystąpić niewiel-
kie krwawienie dziąseł.
ႫJeśli krwawienie dziąseł podczas używania szczo-
teczki utrzymuje się przez ponad 2 tygodnie, idź do
dentysty.
ႫWymieniaj głowice szczoteczki co około 2 miesiące.
Czas mycia
Zalecany czas mycia zębów szczoteczką to 2 minuty.
• Po upływie tego czasu szczoteczka na chwilę przerwie
pracę.
• Wyłącz urządzenie.
Czyszczenie
Nigdy nie używaj trących ani ostrych środków
czyszczących.
• Odłącz końcówkę od uchwytu.
• Czyść rączkę wilgotną ściereczką i myj „włosie” szczo-
teczki pod bieżącą wodą.
Dane techniczne
Model: EZS 5502
Zasilanie: 100-240 V, 50 - 60Hz
Pobór mocy: W
Podstawka do ładowania IPX 7, klasa ochrony II
Ciężar netto: 0,276 kg
Bateria: 2,4 V prąd stały,
niklowo-wodorkowa
To urządzenie jest zgodne z wymogami odpowiednich
dyrektyw CE i zostało skonstruowane zgodnie z aktual-
nymi przepisami dotyczącymi bezpieczeństwa.
Podlega zmianom technicznym.
OGÓLNE WARUNKI GWARANCJI
Producent / Dystrybutor udziela 24 miesięcy gwarancji
na zakupione urządzenie. Okres gwarancji liczony jest
od daty zakupu urządzenia.
W tym okresie uszkodzone urządzenie będzie bezpłatnie
wymienione na wolne od wad. W przypadku, gdy
wymiana będzie niemożliwa do zrealizowania, Nabywca
otrzyma zwrot ceny zakupu urządzenia.
Za uszkodzone urządzenie uważa się takie, które nie
spełnia funkcji określonych w instrukcji obsługi, a przy-
czyną takiego stanu jest wewnętrzna wada fabryczna
lub materiałowa.
Gwarancją nie są objęte uszkodzenia mechaniczne,
chemiczne, termiczne, powstałe w wyniku działania
sił zewnętrznych (np. przepięcie w sieci energetycznej
czy wyładowania atmosferyczne), jak również wady
powstałe w wyniku obsługi niezgodnej z instrukcją
obsługi urządzenia.
Nabywcy przysługuje prawo do wymiany urządzenia na
wolne od wad lub, jeśli wymiana jest niemożliwa, zwro-
tu gotówki tylko po dostarczeniu do punktu zakupu
kompletnego urządzenia z oryginalnymi akcesoriami,
instrukcją obsługi i w oryginalnym opakowaniu wraz z
dowodem zakupu i prawidłowo wypełnioną kartą gwa-
rancyjną (pieczątka sklepu, data sprzedaży urządzenia).
Gwarancja oraz zawarte w niej warunki obowiązują na
terenie Rzeczpospolitej Polskiej.
Niniejsza gwarancja nie wyłącza, nie ogranicza ani nie
zawiesza uprawnień Nabywcy wynikających z przepisów
Ustawy z dnia 27 lipca 2002 r. o szczególnych warun-
kach sprzedaży konsumenckiej oraz o zmianie kodeksu
cywilnego (Dz. U. z 2002 r. Nr 141, poz. 1176).
1

23
Polski
Utylizacja baterii
Ten produkt zawiera akumulator (baterię)
niklowo-wodorkowy (NI MH).
Po zakończeniu użytkowania urządzenia,
postępuj zgodnie z poniższymi instrukcjami:
Przestroga
:
ႫBaterii nie wolno wyrzucać razem z normalnymi
odpadami z gospodarstw domowych!
ႫJako konsumenci jesteście Państwo prawnie zobo-
wiązani do zwrotu zużytych baterii.
• Baterię należy wyjąć z urządzenia. W razie potrzeby
skorzystaj z pomocy w naszym punkcie serwisowym.
1. Użyj wkrętaka do wykręcenia śruby umieszczonej w
dolnej części elektrycznej szczoteczki.
2. Zdejmij zespół głowicy szczoteczki, jeśli nadal jest
założony. Następnie, na stabilnym podłożu, silnie
naciśnij metalowy pręt, aby wypchnąć elementy
wewnętrzne.
3. Zdejmij plastikową osłonę akumulatora, jedno-
cześnie odblokowując zatrzask po obu stronach
wkrętakiem. Następnie wyjmij akumulator.
• Stare baterie można oddać bezpłatnie w miejscu
zakupu urządzenia.
• Aby uzyskać informacje o publicznych punktach
zbiórki, skontaktuj się z lokalnymi władzami.
Ochrona środowiska
W momencie zakończenia użytkowania
urządzenia, nie wyrzucaj go razem z
normalnymi odpadami z gospodarstw
domowych. Zanieś urządzenie do wyznaczo-
nego punktu zbiórki opadów w celu jego
ponownego przetworzenia. W ten sposób
przyczynisz się do ochrony środowiska.

24 Česky
Bezpečnostní pokyny
Před použitím si důkladně přečtěte návod k použití.
Pokud předáte nebo prodáte zařízení někomu jinému,
nezapomeňte k přístroji přiložit také návod.
• Zařízení je určeno k provádění hygienických potřeb
a čistění ústní dutiny dospělých.
• Děti starší 7 let mohou zařízení používat pod dohle-
dem dospělých.
• Zařízení je možno používat pouze pro vlastní potřebu
a pro účely, ke kterým bylo určeno.
• Pravidelně kontrolujte, zda nedošlo k poškození
přístroje nebo síťového kabelu.
• Pokud zařízení přestane pracovat nebo dojde k po-
škození, vypněte jej a odpojte síťový kabel ze zásuvky.
• Nesnažte se opravit zařízení sami. Obraťte se na
autorizovaný servis.
• Používejte pouze originální náhradní díly.
Děti a tělesně postižené osoby
• Aby byla zajištěna bezpečnost vašich dětí, nepo-
nechávejte v jejich dosahu žádné součásti obalu
(igelitové sáčky, krabice, polystyren, apod.).
Varování
:
ႫNedovolte dětem, aby si hrály s plastovou fólií.
Hrozí nebezpečí udušení!
Tento přístroj není určen pro dětí mladší
3 let. Hrozí nebezpečí odlomení malých částí
a spolknutí.
• Toto zařízení může být používáno dětmi nebo osoba-
mi se sníženými fyzickými schopnostmi, se sníženou
motorickou reakcí nebo jinak hendikepované nebo
mentálně postižené osoby, pouze pokud byli náležitě
poučeny o možném nebezpečí poranění nebo pokud
jsou pod dohledem způsobilé osoby, která je zodpo-
vědná za jejich bezpečnost. Zařízení není hračka. Děti
mohou používat toto zařízení pouze pod dohledem
dospělých.
Přehled součástí
1 Zubní kartáček
s běžným nástavcem
2 Přepínač rychlosti
3 Hlavní vypínač On/O 4 Trojbarevný, světelný
indikátor rychlosti
5 Kontrolní LED dioda
nabíjení
6 Rukojeť
7 Nabíjecí stojánek 8 Obal
9 Zadní kryt 10 Držák pro upevnění
na zeď
11 Nástavec na čištění
mezizubních mezer
12 Čistič jazyka
13 Masážní nástavec dásní
Pokyny pro použití
Nástěnný držák
Nabíjecí stojánek lze upevnit na stěnu. Pokud chcete
upevnit stojánek na stěnu, ujistěte se, že je v blízkosti
zásuvka.
• Změřte rozteč mezi upevňovacími otvory na zadním
panelu (9) a podle změřené vzdálenosti vyvrtejte dva
otvory do zdi pro ukotvení šroubů.
Pozor:
Před použitím se ujistěte, že nepoškodíte kabely, které
jsou ukryty pod krytem!
Elektrické zapojení
Zasuňte napájecí kabel do uzemněné zásuvky 230 V,
50 Hz. Zásuvka musí splňovat příslušené bezpečnostní
normy a předpisy.
Nabíjení
• Nasuňte kartáček do nabíjecího stojánku.
• Nabíjecí proces je indikován rozsvícením červené
kontrolky CHARGE.
• Nabíjení trvá asi 12 hodin.
• Je-li akumulátor plně nabitý, kontrolka CHARGE
začne zeleně svítit.
Poznámka
:
ႫPo použití vraťte kartáček zpět na stojánek.
ႫTím zajistíte nabíjení a váš kartáček bude připraven
k okamžitému použití.
ႫAkumulátor kartáčku nelze takzvaně „přebít“.
Péče o akumulátor
• Aby jste udrželi plnou kapacitu akumulátoru co
nejdéle, je nutné akumulátor zcela vybít každých
6 měsíců.
• Odpojte napájecí kabel ze zásuvky a používejte kartá-
ček, dokud se akumulátor zcela nevybije.
Table of contents
Languages:
Other AEG Electric Toothbrush manuals
Popular Electric Toothbrush manuals by other brands

Braun
Braun Oral-B Pulsonic Slim S 15.523.2 user manual

Nevadent
Nevadent DAZD 3.7 Li B2 operating instructions

SoWash Sonic
SoWash Sonic SWSO10001 Manual for use and maintenance

Oral-B
Oral-B Professional Black 7000 instructions

Nevadent
Nevadent NBZ 45 A1 operating instructions

Philips
Philips Sonicare Series Faqs