manuals.online logo
Brands
  1. Home
  2. •
  3. Brands
  4. •
  5. Aeotec
  6. •
  7. Accessories
  8. •
  9. Aeotec MULTISENSOR 6 User manual

Aeotec MULTISENSOR 6 User manual

For example, you can put it on the floor or
somewhere of your washroom or kitchen and
so on. In case, your washroom’s water pipe
is ruptured or the water leakage happens
without knowing it. However, the Water Sensor
detected this water leakage event, it sends out
the notification message immediately to tell your
home gateway to shut off the main water gate of
your home for avoiding water leakage accident.
At the same time, the buzzer keeps playing alarm
sounds to tell the people at home that the water
leak is detected.
1.
2.
3.
4.
5.
Water is detected by the Sensing point 2 and 4.
Water is detected by the Sensing point 1 and 3.
Water is detected by the Sensing point 1 and 2
Water is detected by the Sensing point 3 and 4
Water is detected by the Sensing point 1,2,3 and 4
View the expanded manual:
http://aeotec.com/support
Aeotec by Aeon Labs Water Sensor 6.
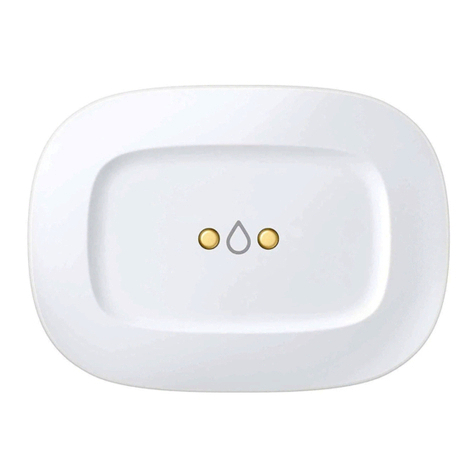
Aeotec by Aeon Labs Water Sensor 6 brings intelligence
to a new level, one that is suited to both safety and
convenience. It contains 4 sensing points, which would be
more accurately to detect the presence and absence of
water or detect whether there is water leak in some places
of your home. The Water Sensor 6 has an inbuilt buzzer that
can play alarm sounds to let you know when the water is
detected.
The Water Sensor 6 is also a security Z-Wave device that
supports Over The Air (OTA) for firmware updates.
Familiarize yourself with yourWater Sensor 6.
Quick start.
Installing your Water Sensor.
Water Sensor triggering.
1.
2.
Power on your Sensor.
With your Sensor now working as a part of your
smart home, you’ll be able to configure it from
your home control software or phone application.
Please refer to your software’s user guide for
precise instructions on configuring the Water
Sensor to your needs.
The installation of your Water Sensor is very
simple, since you just need to select where you'll
place your Water Sensor in your home to detect
whether there is water leakage.
The Water Sensor will be triggered when the water
leak or presence happens in below situations:
After complete the securing of the Sensor plate,
your Water Sensor unit will possess the high
waterproof level of IP65.
Your Water Sensor 6 also can be powered by the
Water Sensor 6 Dock and connect to external
sensor probes or ropes, if you want to know more
about it, please refer to the Water Sensor 6 Dock
manual.
If you want to detect whether or not there would
be water leakage from the fridge, you can put the
Water Senor near to the fridge. Just note that the
Water Sensor cannot be put inside the fridge or
other metal container, since the metal container
1. Let your Z-Wave primary controller/gateway
Remove the pull tab by pulling it away from the
Water Sensor.
Secure the Sensor plate using the screw
provided.
Now, you can try pressing the Sensor’s Action
Button, if you can see the RGB LED blinks, which
indicates that the Sensor is powered on.
Water Sensor 6
1
23
1
3
5
2
4
1.
2.
3.
Main sensor unit (×1).
CR123A battery (×1).
S crew (×2).
Main sensor unit CR123A battery Screw
(Front) (Back)
Buzzer
RGB
LED Action Button
Sensor probe 3
Pull it from the Water Sensor
Sensor probe 1 Sensor
probe 2
Sensor
probe 4
Adding your Sensor to your Z-Wave network.
With your sensor is powered on, it’s time to add it
to your Z-Wave network.
Water Water
Water
Water
Water
The above situations are the water leak or water
presence event is triggered by the Sensor, when
the water recedes from the Sensor, the water leak
event will be cleared and then the Sensor will
Package contents:
enter into adding/inclusion mode.
Take your Sensor near to your primary
controller.
Press the Action Button once on your Sensor,
the green LED will blink.
If your Water Sensor has been successfully
added to your Z-Wave network, its green LED
will be solid for 2 seconds and then the orange
LED will fast blink for 10 minutes if the Sensor
does not receive the Wake Up No More info
Command from Controller. If the adding was
unsuccessful and the red LED will be solid for
2 seconds and then become colourful gradient
for a few seconds before it turns off, repeat the
above steps.
2.
3.
4.
will affect the signal strength of the Sensor unit
and your main controller.
Do not dispose of electrical appliances as
unsorted municipal waste, use separate collection
facilities.
Contact your local government for information
regarding the collection systems available.
Warning.
Certications (regional):
Version: 501012200001-AA www.aeotec.com
Z-Wave and Z-Wave Plus
are registered trademarks
of Sigma Designs and its
subsidiaries in the United
States and other countries
FCC ID: XBAFT122
Advanced.
Send a wake up notification.
Removing your Sensor from your Z-Wave network.
Your sensor can be removed from your Z-Wave
network at any time. You'll need to use your Z-Wave
network's main controller/gateway. To do this,
please refer to the part of their respective manuals
that tell you how to remove devices from your
network.
Security or Non-security feature of your Sensor in
Z-Wave network.
Including Water Sensor as a non-secure device:
If you want your Sensor as a non-security device
in your Z-Wave network, you just need to press the
Action Button once on Water Sensor when you use
a controller/gateway to add/include your Sensor.
You can also open the battery cover through your
fingers if you are confident about this way.
Find the position of the screw side, see the
operating steps below:
In order to send your Sensor new configuration
commands from your Z-Wave controller or
gateway, it will need to be woken up.
4
1.
2.
1.
2.
3.
4.
Press the Action Button on the Sensor unit and
then release the Action Button. This will trigger
and send a wake up notification command to
your controller/gateway.
If you want your Sensor to keep awake for a
longer time, press and hold the Action Button
on the back of the Sensor unit for 3 seconds,
then your Sensor will wake up for 10 minutes
and the orange LED will fast blink while it is
awake.
Turn your primary controller into device removal
mode.
Take the Sensor unit near to your primary
controller.
Press the Action Button on your Sensor.
If your Water Sensor is successfully removed
from the Z-Wave network, the RGB LED
will become a colourful gradient for a few
seconds and then turn off. If the removing was
unsuccessful, the blue LED will be solid for 2
seconds and then turn off, repeat the above
steps.
Separate the battery cover from the Sensor
unit.
If you have a hard plastic board( about 0.8 to
1.0mm thickness) on hand, you can use it to
separate the battery cover directly:
Unscrew the 2 screws from the Sensor.
Pull open a small gap between the battery
cover and Sensor unit.
Push or move your fingernail along the gap
between battery cover and Sensor unit, as
below:
Battery cover is separated from the Sensor unit.
Model number: ZW122.
Power supply: CR123A lithium battery, 3V,
1500mAh.
Operating temperature: 0°C to 40°C.
Storage temperature: -20°C to 60°C.
Water proofing: IP65.
Max volume of buzzer: 60dB at 2 meters away.
Operating distance: Up to 100 feet/30 metres
indoors or 492 feet/150 metres outdoors.
Battery
Sensor unit Battery cover
2.
1.
a.
b.
3.
Technical specications.
(Water recedes from Sensor)
send out a notification report (the previous event
cleared or the absence of water event is triggered)
to your home gateway or the associated devices.
5
6
7
Water
The green LED will be on for 2 seconds and then
the orange LED will fast blink for 10 minutes (if the
Sensor does not receive the Wake Up No More
Info command from primary Controller) to indicate
the inclusion is successful.
Including Water Sensor as a secure device:
In order to take full advantage of all functionality
the Water Sensor , you may want your Sensor
is a security device that uses secure/encrypted
message to communicate in Z-wave network, so
a security enabled controller/gateway is needed
for the Water Sensor to be used as a security
device. You need to press the Sensor’s Action
Button 2 times within 1 second when your security
controller/gateway starts the network inclusion.
The blue LED will be on for 2 seconds and then
the orange LED will fast blink for 10 minutes (if the
Sensor does not receive the Wake Up No More
Info command from primary Controller) to indicate
the inclusion is successful.
Factory reset your Sensor.
If your primary controller is missing or inoperable,
you may wish to reset all of your Water Sensor’s
settings to their factory defaults. To do this, press
and hold the Action Button for 20 seconds and the
green LED will be solid for 2 seconds and then be
colourful gradient to confirm a success.
Your Sensor’s battery.
Your Water Sensor has a internal lithium battery
that will last about 2 years when it is in normal
use condition. If you find the Water Sensor’s
battery is drained, you will need to replace it with
a new CR123A battery, refer to the below steps to
replace the battery:
Push or move the plastic board along the gap
between battery cover and Sensor unit, refer to
the direction of arrows, see the figure below:
Association information Configuration parameters information

Other manuals for MULTISENSOR 6

5

Other Aeotec Accessories manuals

Aeotec AEO ZWA008-C User manual

Aeotec

Aeotec AEO ZWA008-C User manual

Aeotec AEOEZWA009 User manual

Aeotec

Aeotec AEOEZWA009 User manual

Aeotec TriSensor User manual

Aeotec

Aeotec TriSensor User manual

Aeotec Door / Window Sensor 7 User manual

Aeotec

Aeotec Door / Window Sensor 7 User manual

Aeotec Doorbell Gen5 User manual

Aeotec

Aeotec Doorbell Gen5 User manual

Aeotec ZW162 User manual

Aeotec

Aeotec ZW162 User manual

Aeotec Water Sensor 7 Pro User manual

Aeotec

Aeotec Water Sensor 7 Pro User manual

Aeotec Z-Wave MultiSensor  6 User manual

Aeotec

Aeotec Z-Wave MultiSensor 6 User manual

Aeotec GP-AEOWLSEU User manual

Aeotec

Aeotec GP-AEOWLSEU User manual

Aeotec TriSensor ZWA005 User manual

Aeotec

Aeotec TriSensor ZWA005 User manual

Aeotec Water Sensor 7 Pro User manual

Aeotec

Aeotec Water Sensor 7 Pro User manual

Aeotec AEOEZW120 User manual

Aeotec

Aeotec AEOEZW120 User manual

Aeotec ZW089 User manual

Aeotec

Aeotec ZW089 User manual

Aeotec AEOEZW112 User manual

Aeotec

Aeotec AEOEZW112 User manual

Aeotec MultiSensor User manual

Aeotec

Aeotec MultiSensor User manual

Aeotec MultiSensor 7 User manual

Aeotec

Aeotec MultiSensor 7 User manual

Aeotec GP-AEOMPSEU User manual

Aeotec

Aeotec GP-AEOMPSEU User manual

Aeotec MULTISENSOR 6 User manual

Aeotec

Aeotec MULTISENSOR 6 User manual

Aeotec ZWA005 User manual

Aeotec

Aeotec ZWA005 User manual

Aeotec Recessed Door Sensor 7 User manual

Aeotec

Aeotec Recessed Door Sensor 7 User manual

Aeotec Door / Window Sensor 7 User manual

Aeotec

Aeotec Door / Window Sensor 7 User manual

Aeotec MULTISENSOR 6 User manual

Aeotec

Aeotec MULTISENSOR 6 User manual

Aeotec Water Sensor 7 Pro User manual

Aeotec

Aeotec Water Sensor 7 Pro User manual

Aeotec Button User manual

Aeotec

Aeotec Button User manual

Popular Accessories manuals by other brands

Agilent Technologies 8481A Operating and service manual

Agilent Technologies

Agilent Technologies 8481A Operating and service manual

EVE Water Guard Get started

EVE

EVE Water Guard Get started

Focusrite Red 16Line user guide

Focusrite

Focusrite Red 16Line user guide

SECO-LARM RA-4961-MBQ manual

SECO-LARM

SECO-LARM RA-4961-MBQ manual

Guardian 5655 Description

Guardian

Guardian 5655 Description

nedis ZBSM10WT quick start guide

nedis

nedis ZBSM10WT quick start guide

Panasonic MA24D50 Specification sheet

Panasonic

Panasonic MA24D50 Specification sheet

Perenio PECLS01 Installation and operation manual

Perenio

Perenio PECLS01 Installation and operation manual

Oakley AIRWAVE 1.5 owner's manual

Oakley

Oakley AIRWAVE 1.5 owner's manual

HB Products HBLT-A1 instruction manual

HB Products

HB Products HBLT-A1 instruction manual

AMC 1022 D instructions

AMC

AMC 1022 D instructions

Polar Electro GE580 instruction manual

Polar Electro

Polar Electro GE580 instruction manual

VIRTUFIT Ultimate Pro 2 manual

VIRTUFIT

VIRTUFIT Ultimate Pro 2 manual

Lutron Electronics LOS-CDT Series manual

Lutron Electronics

Lutron Electronics LOS-CDT Series manual

Sensit PTS 310A instruction manual

Sensit

Sensit PTS 310A instruction manual

Tecnar accuraspray 4.0 Quick setup guide

Tecnar

Tecnar accuraspray 4.0 Quick setup guide

Jadever JWI-3100 user manual

Jadever

Jadever JWI-3100 user manual

Craftsman 316.792410 Operator's manual

Craftsman

Craftsman 316.792410 Operator's manual

manuals.online logo
manuals.online logoBrands
  • About & Mission
  • Contact us
  • Privacy Policy
  • Terms and Conditions

Copyright 2025 Manuals.Online. All Rights Reserved.