Aerial FreeRide User manual
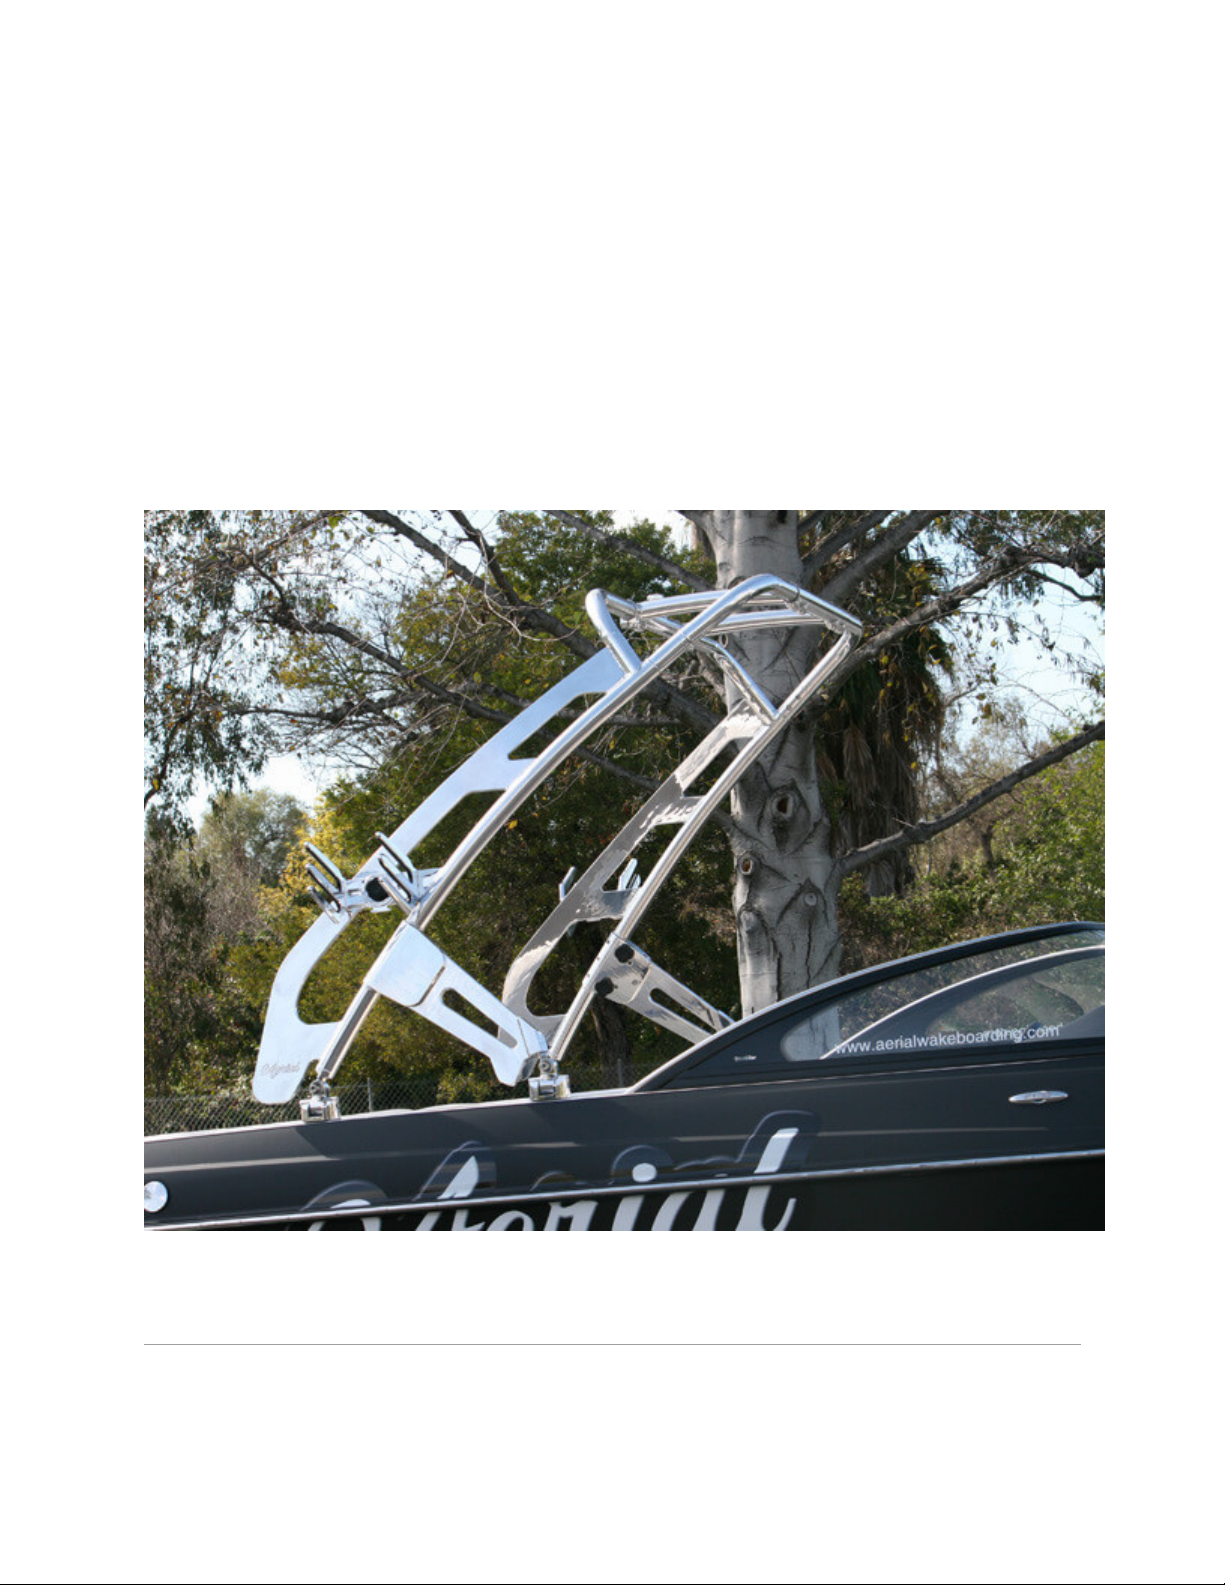
Installation Guide for FreeRide Wakeboard Tower:
All Aerial Wakeboard Towers have been carefully designed to allow anyone with average do-it-yourself
skills and access to a set of common tools to complete the installation with no problem in just a few
hours. There a just a few important but simple technical tips you'll want to use. Well over 90% of our
customers have installed the towers and accessories themselves and have reported back that it all went
very well.
Properly installed, the FreeRide tower is one of the strongest aftermarket wakeboard towers on the
market. It can absolutely go toe-to-toe with a factor made OEM tower.
Remember, if you get stuck, you can call our support team at (949) 407-5009 Monday through Friday
9am to 5pm Pacific time. We'll be happy to walk you though. Remember to scroll all the way to the
bottom of the page for a list of extra tips and reminders before getting started. You can do this!
Your FreeRide Wakeboarding Tower is designed for years of enjoyment. Please read through these
instructions before beginning installation.
Important Tower information

•The FreeRide tower fits boat with beam width of 75-100 inches. This measurement is taken from
the mounting points, so the side to side must be greater than 75 inches in the front and back.
•Do not fold the tower without having the top section bolted
•Do not fold the tower by your self
•Do not assemble tower on the ground and then try to put in on the boat
•Do not tow tubes or other types of inflatable towables!It makes your warranty null and void.
Every tower manufacturer and boat manufacturer with an OEM tower has a warning not to do
this. Inflatables and towables like these have a completely different hydrodynamic and friction
profile compared to slick wakeboards and skis. The increased stress transfers through the tower
to the mounting feet to a boat's fiberglass hull. Avoid damaging your boat and tower; avoid
hurting or injuring your boat's occupants- just use your boat's ski tower ring.
•Do not use impact drivers on any hardware - this will over-torque them and possible cause
damage
•Torque set screws to 35ft-lbs
•Torque shoulder bolts 50 ft-lbs
•Torque tower foot all thread to 65 ft-lbs
•All set screws should have red lock tite
•Check the top section for burr’s we are not liable for them
•You might notice your tower moving side to side when you tow your Boat, but, actually, the
boat on the trailer is actually moving too.
•If your fiberglass is less than ¼ you will need to purchase a backing Plate kit
•Please leave foam wrap on until finished installing the tower
•If you have any question during the install please contact Aerial Wakeboarding
CLEANING
•Wash with soap and clean water
•Use clean, soft micro fiber cloths to avoid scratching
•Mothers Mag & Aluminum polish will restore to original finish
IMPORTANT WARNING
•BE CAREFUL when assembling this product! We CANNOT be liable for any burring or scratching
that may occur when sliding sections in and out of each other. Before sliding on the top cross
section tubes, check the inside of the tube opening. If you find a rough edge, we recommend
filing and sanding them down smooth. Again, the point to to avoid scratching the nice polished
finish of the tubes you're sliding them over.

•NEVER modify this product in any way
•NEVER climb, ride or stand on this product
•NEVER pull tubes or inflatables from the tower
•ALWAYS use caution with approaching bridges and overpasses
•ALWAYS inspect this product for loose bolts and damage before each use
•CONSULT user manual for proper installation, maintenance and usage
•AERIAL WAKEBOARDING is not liable for personal injury or property damage from the use of this
product.
Determine placement of tower. This tower fits 75-100 inch wide hulls.

TUBE TRIMMING
Where a narrow fit is required the side section tubes may require trimming. Use a hacksaw to trim each
tube and then deburr the edges with a file.

Tower can be mounted as a top or side mount-see hull mounting section
Detail of how base installation on hull

Tower dimensions.

Exploded view.

Parts List
Start by carefully opening the plastic bags and inspecting all items. It is best to do so on a moving
blanket or a soft surface.
If you discover any defects (defined as marks more than 1 inch long), please contact Aerial
Wakeboarding immediately BEFORE installation. Note that wakeboarding towers are handcrafted metal
products. It is possible and acceptable for minor blemishes and marks to appear on the finish.
IMPORTANT: We recommend returning items to their plastic bags to protect them during installation.

Installation Checklist:
•Blue 3M tape
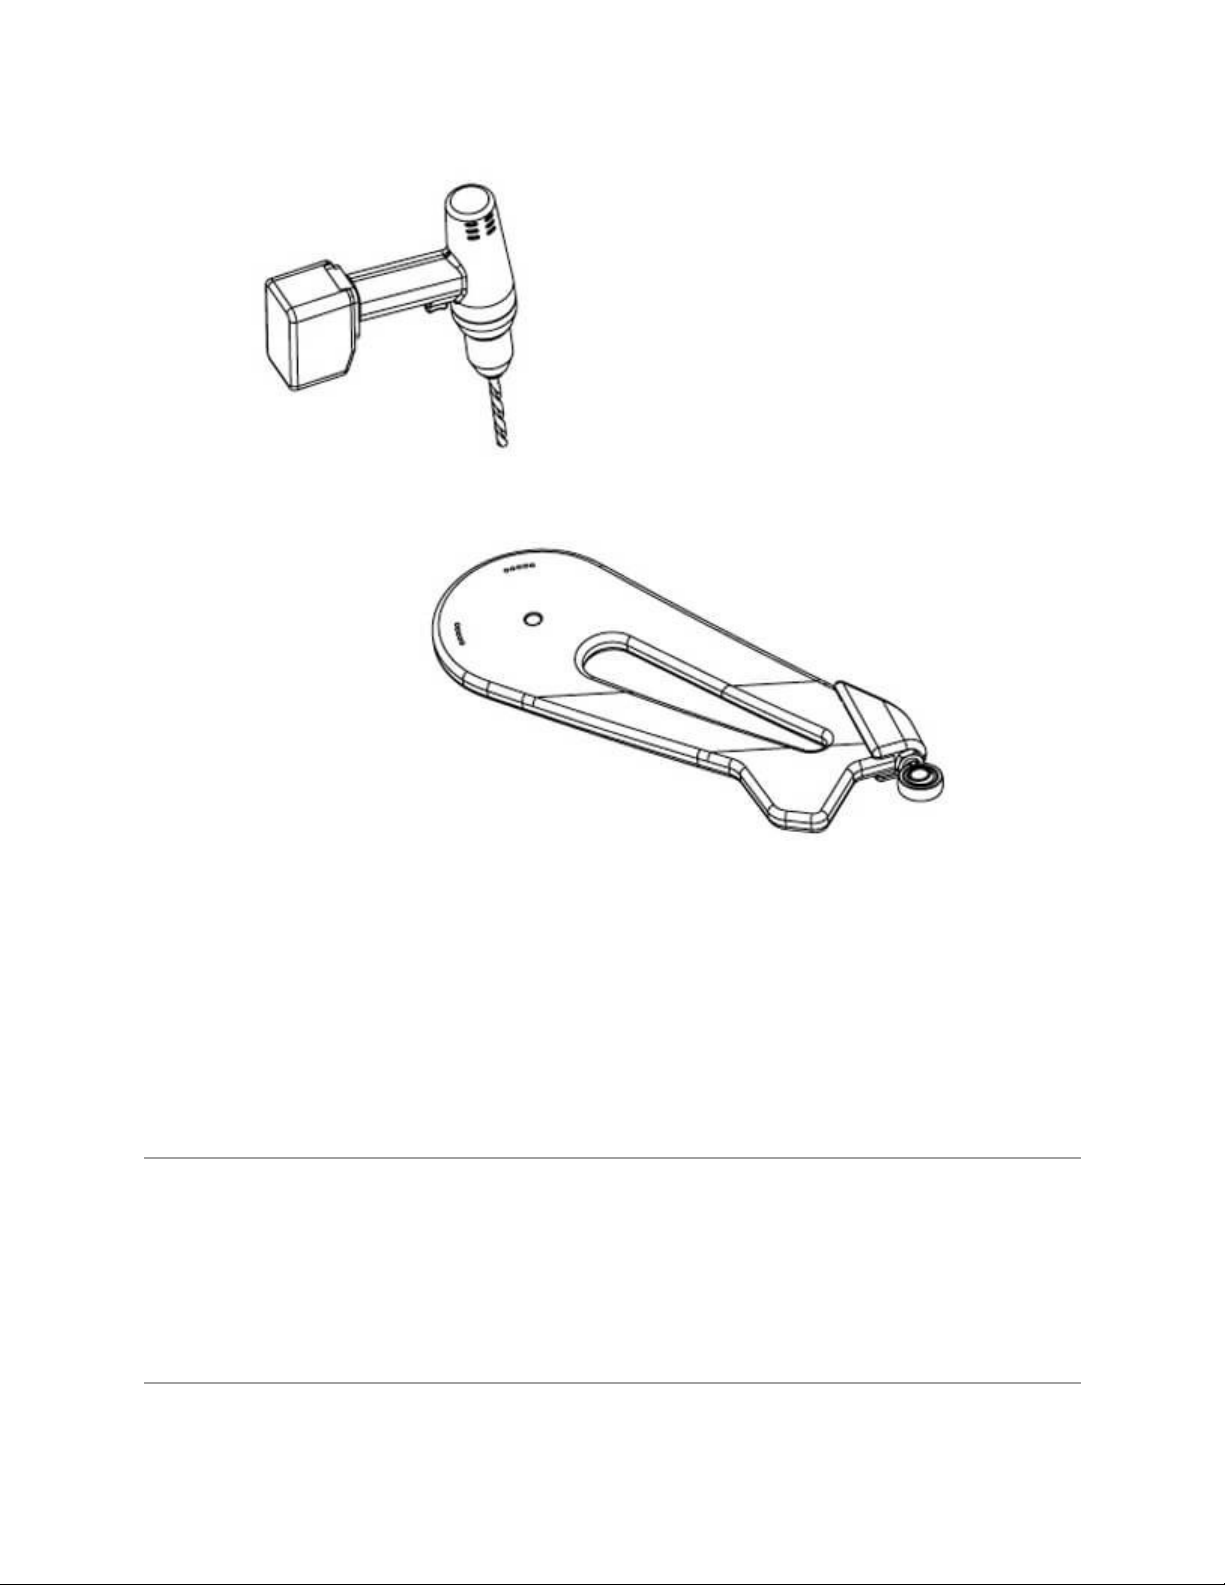
•Drill (capable of accepting bits up to 1/2 inch)
•File
•Drill bit set ranging from 1/4 - 5/8 inches
•Ratchet set
•A Permanent Marker
•A buddy to help out

Tape off all the areas that may potentially come into contact with the side rails

Arrange upper arms so you can identify items #20, 26, 19 and 27.

Upper Arm to side Rail
1. Please see diagram above to determine the upper arms.
2. They should bolt together very easily
3. Leave them one turn from being tight
4. This will help slide into the H-section #25
H-Section (#25)
1. Be sure to check the H-section for any burr or defects prior to inserting the upper arms Aerial is
not liable for burr’s
2. The clear Milar should be wrapped around the tube before you insert it into the H-section, once
your tower has been installed you will remove it. The Milar is there to help prevent any scratch’s
from sliding the tubes in and out.
3. You will just tuck the wire for the tower light into the tube for the time being.
4. When you get to the wiring step you will remove one of the upper arm and run the wire through
it.
Placement/Folding
1. Tower folding is always a 2 person job
2. Placement is key. Remember this tower folds forward.
3. Start by loosing the quick knobs on the main clamp.
4. Remove the shoulder bolt from the Heim joint and tower foot. Repeat for the other side. Swing
the from supports into the boat, and the tighten down the quick knobs.
5. It will now be free to fold forward/down. A boat fender or cushion works well for padding.
6. Always tow with you tower in the UP position (do NOT fold and tow).
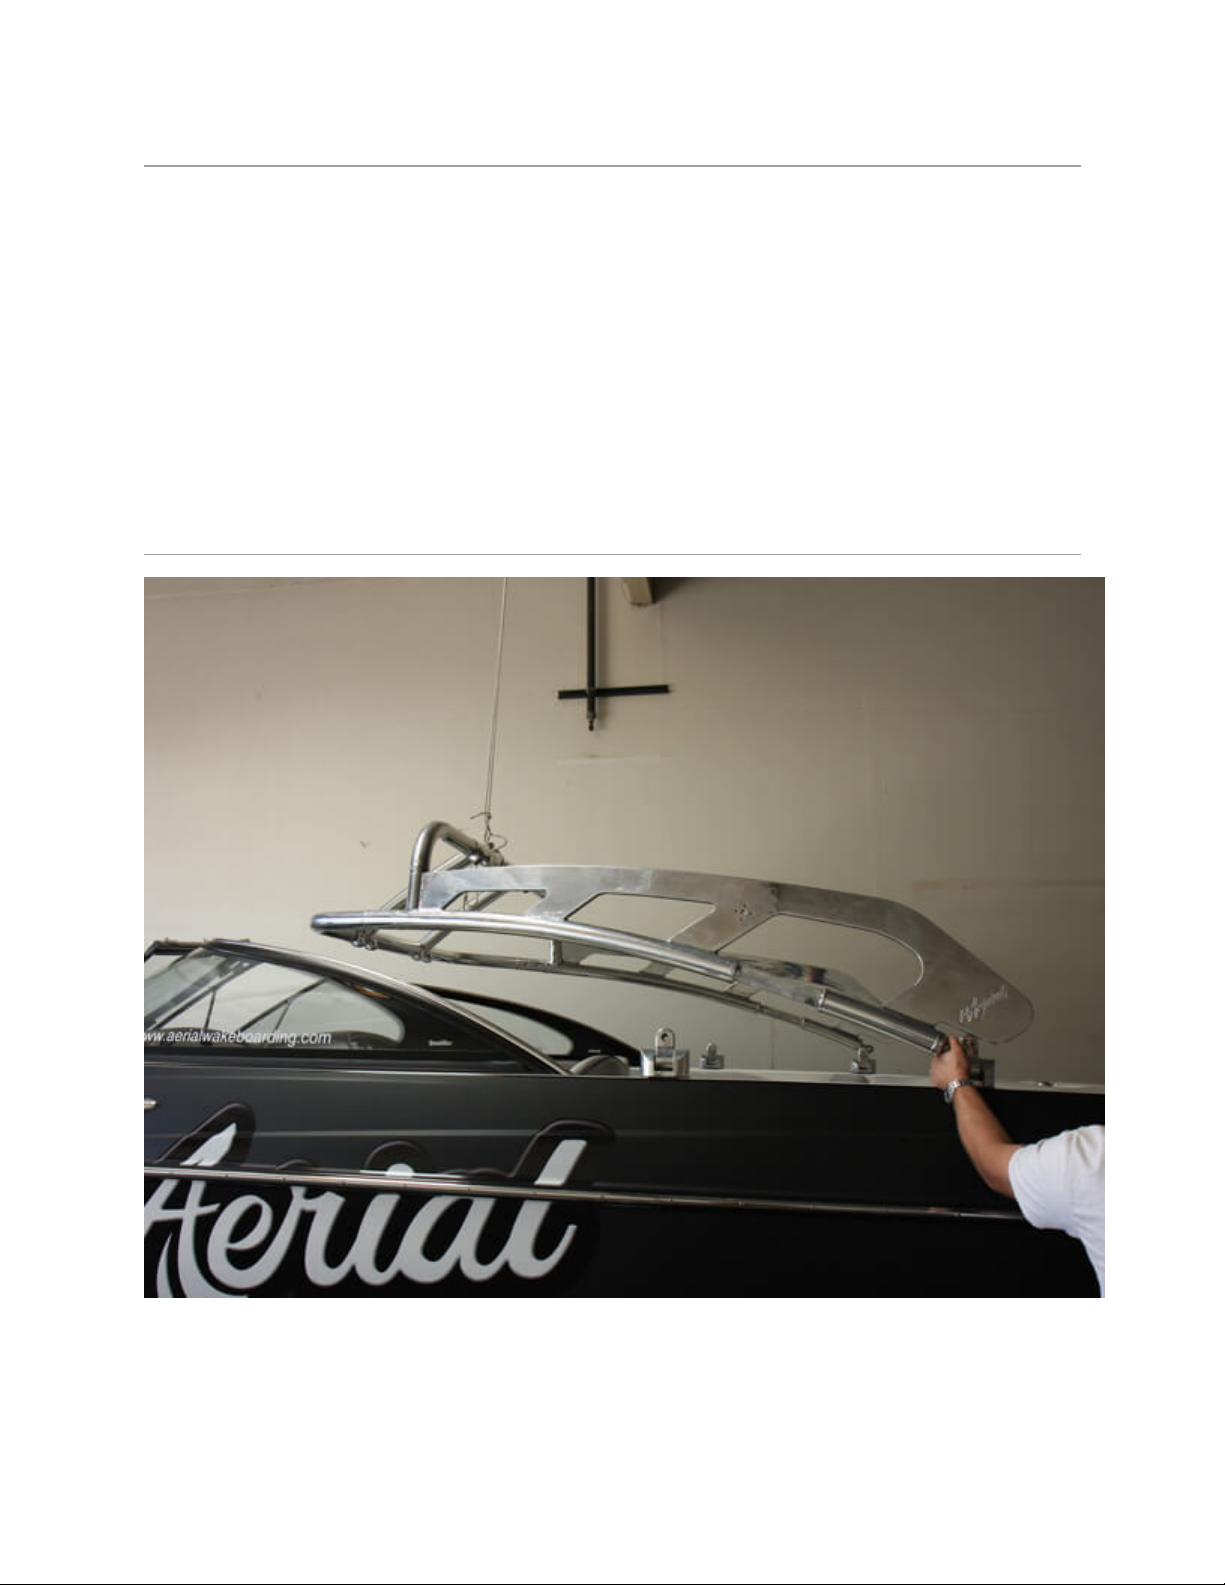
Tower Placement
1. Once you have put your tower together, go a head lift the tower on the boat. (just the main
frame)

2. If you have an over head garage or tree you might be able to use it to take up the weight.
3. This will help determine where the tower will fit on you boat. Remember to check the under
side prior to drill for wires, also make sure you have access to that area.
4. Once you have a general area for the rear tower feet, go a head and make some marks.
5. You will need to measure to make sure that you have the tower feet in the same place side to
side.
6. As a note some times cleats are not in the same place on your boat.
Drilling for the Rear Feet
1. Once you have marked your 4 holes, check the underside for wires.
2. If necessary, you should move the wires out of the way while you drill. We recommend drilling a
small pilot hole which will keep the 5/8” drill bit from walking (moving). A small rat tail file can
be used to ease the edge and keep the gel coat from chipping. Be careful of wires!

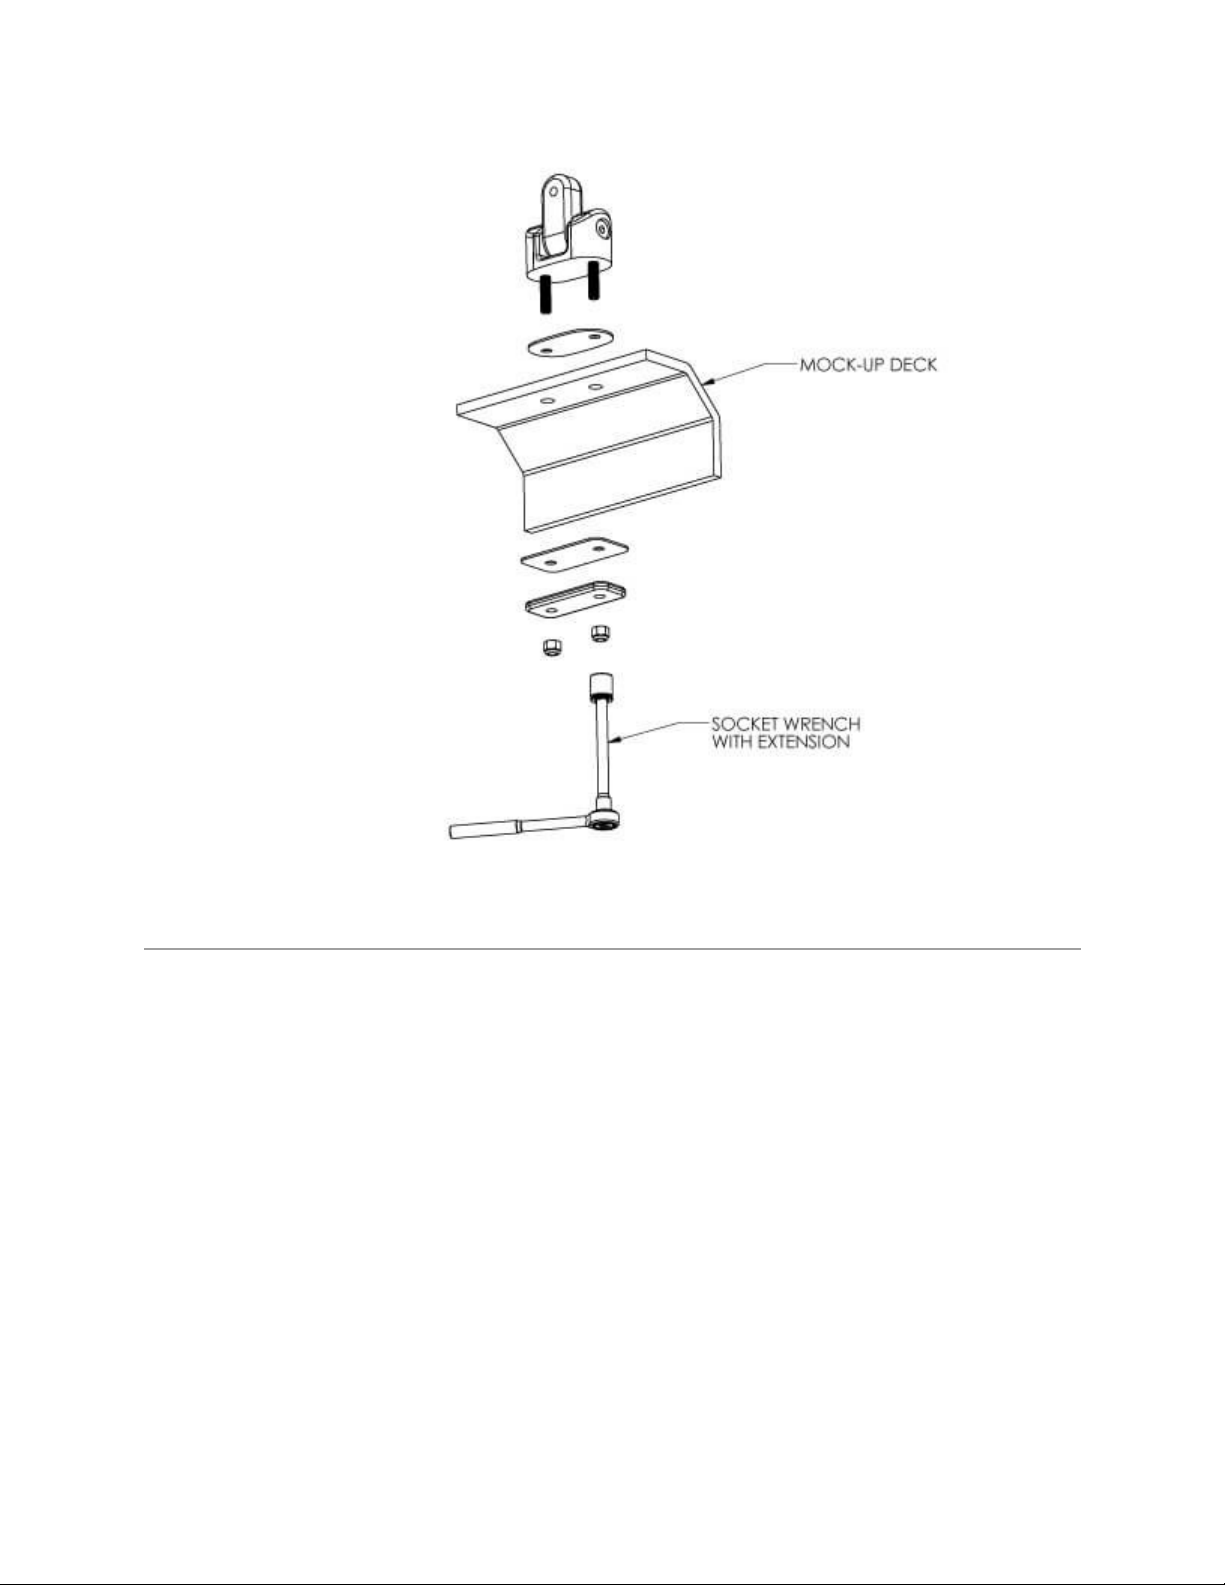
Assemble feet.
Backing Plates
On the inside of your boat will be the backing plate, a nylock nut. If your fiberglass is less than 1/4” thick,
we recommend reinforcing the areas where your tower will attach. Remove just enough blue tape for
your tower feet to snugged up to your boat. Aerial sells a backing plate kit with instructions, it will add
20 minutes to the install and is cheap insurance.

Bolting the Feet to the Deck
1. Use part number 11 with lock tite
2. Make sure you have chamfered the edge before inserting the foot to the deck. ( if you do not,
you will get gel coat cracking)
3. There is a rubber washer that goes between the base and the deck
4. Use the supplied the backing washer and nylock nuts
5. Get them snug, you will tighten after the tower is complete
Connect Tower Feet to Main Frame
1. Once both rear tower feet are secure go ahead and lift the main frame up.
2. You will use the shoulder bolts part #10 3. We recommend that you insert the shoulder bolt
from the inside of the boat.
3. The frame should be able to move up and down at this point.

Forward Support
1. 1Start by assembling parts- 7,8,9,10,15,16,17
2. Snap #3 on to the main frame
3. At our shop we have an over head lift, we used this to hold the tower in the “up position”
4. Put #1 and #7 together with part #14
5. It is easier to build the right & left together
6. With you friends help take the assembled front support and clamp it around the tower with
parts #4,& 6
7. By “hanging” the tower you can step back and find the “look” of you tower. You might want to
lower or raise it depending on your boat.
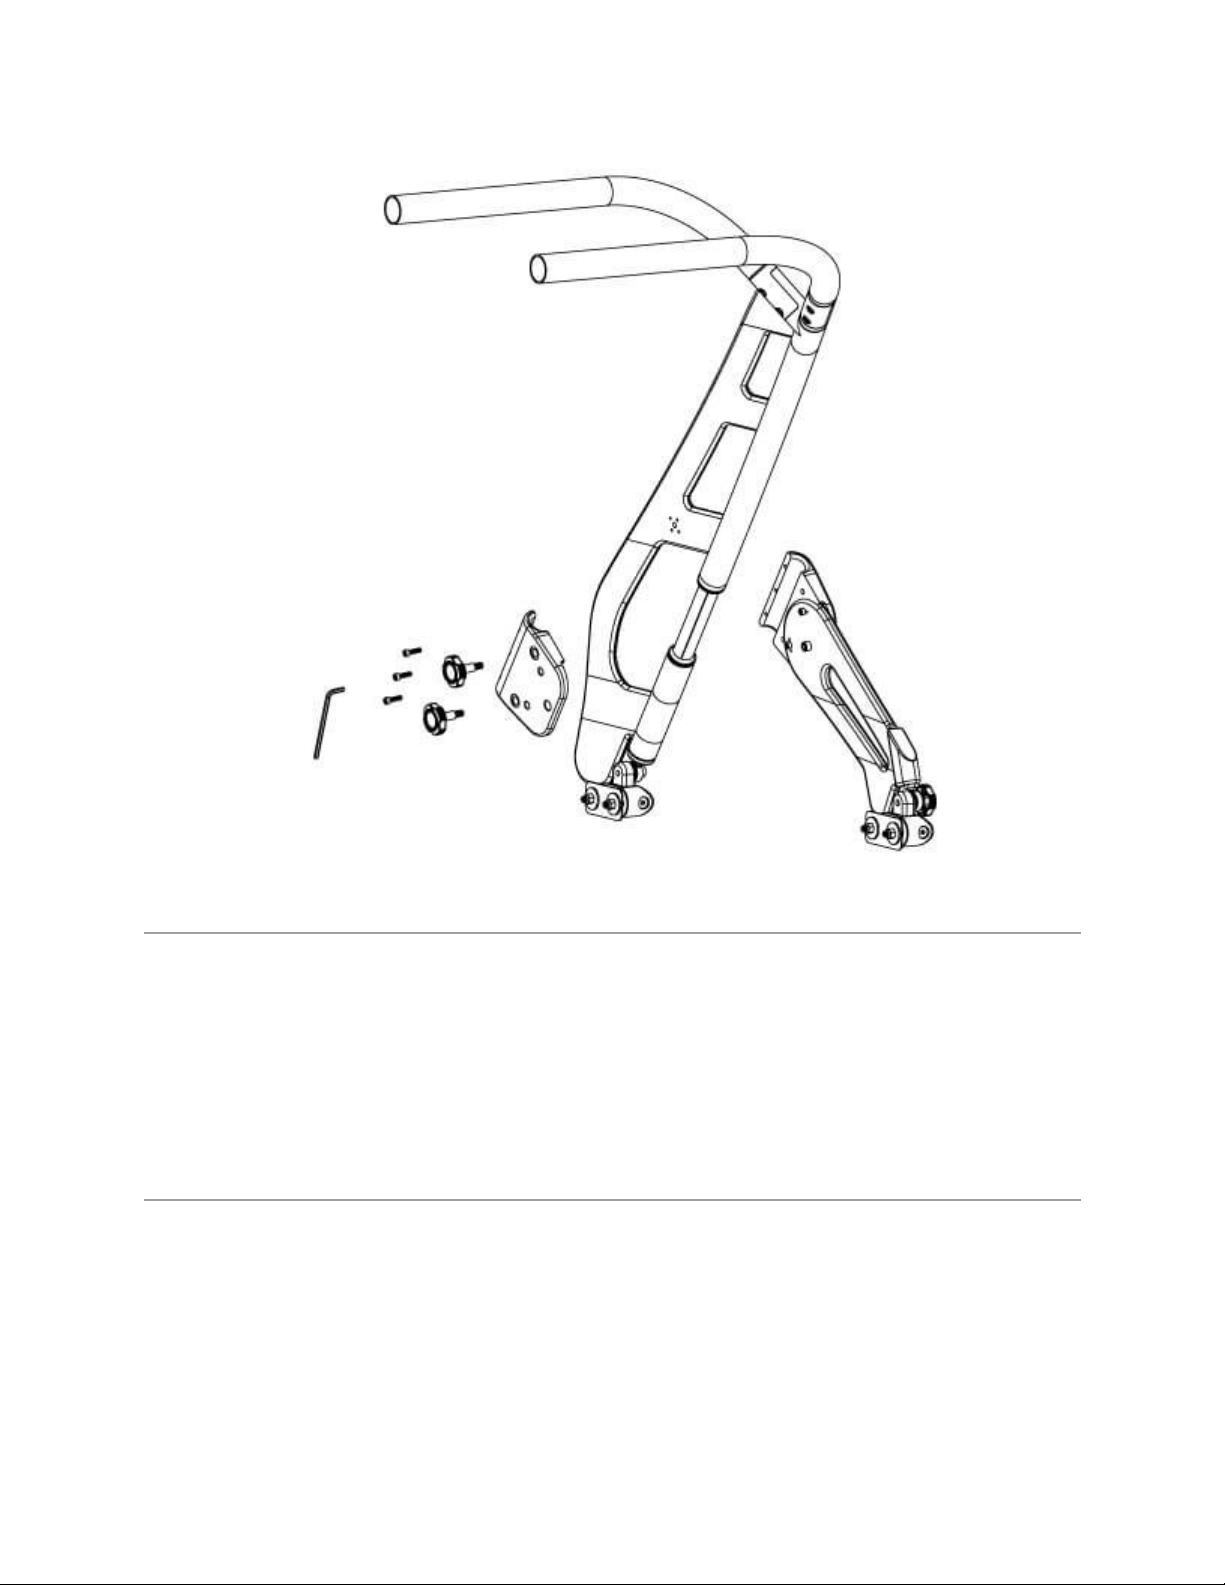
See illustration for side assembly.
Front Tower Foot
1. This step will be the same as the rear Once you have marked your 4 holes, check the underside
for wires.
2. If necessary, you should move the wires out ofthe way while you drill. We recommend drilling a
small pilot hole which will keep the 5/8” drill bit from walking (moving). A small rat tail file can
be used to ease the edge and keep the gel coat from chipping. Be careful of wires!
Drilling the Front Support
1. Once the tower is in the “air” you will need to mark the 2 holes that you will have to drill in the
front support. Use a 9mm drill bit or a 23/64 drill bit.
2. Use a sharpie to mark the holes on both sides.
3. Disassemble the front support apart to drill the holes.
4. Once drilled put the support back together and bolt it.
Drilling the Top Section
1. Once the tower is “up” mark the hole and drill them with a 3/8 drill bit
2. The FreeRide tower has parts # 24 which is the integrated nut.
3. Part #23 is the integrated speaker clamp.
Wiring
Table of contents
Other Aerial Boating Equipment manuals


Popular Boating Equipment manuals by other brands

Sleipner
Sleipner SH1000 installation guide

Twin Disc
Twin Disc TM 265 Service manual

SLEIPNER MOTOR AS
SLEIPNER MOTOR AS SIDE-POWER SX35 Instruction guide

Furuno
Furuno FCV-38 installation manual

SUSPENZ
SUSPENZ EZ Rack 12-9903 quick start guide

OCEANSOUTH
OCEANSOUTH MA080-5 Assembly and installation instructions

Regency
Regency Polaris MS5000 owner's manual

Garmin
Garmin GPSMAP 4000 Series owner's manual

tebben
tebben 7500-07 Owner's operation manual

Bearon Aquatics
Bearon Aquatics Ice Eater P250 owner's manual

Big Air
Big Air Fusion Tower Installation and instruction manual

Tele Radio
Tele Radio Tiger Shark Manual and installation instructions


