aerione AER-PUR807 User manual

USER MANUAL
Multistage Air Sanitizer
Please Read Manual Completely Before Using
AER-PUR807Model:

2
Multistage Air Sanitizer
Thank you for purchasing the
If you have any questions or concerns, please reach out to us at
We hope you enjoy your new air sanitizer!

3
Table of Contents
Package Contents 3
Specications 3
Safety Instructions 4
7-Stage Cleaning 6
Getting to Know your Air
Sanitizer
7
Control Buttons 8
Status Indicator 9
Getting Started 10
During Installation 11
Using Your Air Sanitizer 12
Keeping Things Clean 14
Troubleshooting 17
Warranty Information 18
Customer Support 19
Package Contents
1 x Air Sanitizer
1 x Pre-Filter (pre-installed)
1 x Cold Catalyst+Activated Carbon Filter (pre-in-
stalled)
1 x Anti Bacterial+High Eciency HEPA Filter
(pre-installed)
1 x Remote Control Unit
1 x Owner’s Manual
Specifications
Power Supply 220 VAC/50Hz -
240 VAC/60Hz
Rated Power 85 W
Noise Level 36-56 dB
Anion Concentration 10 Million/cm3
CADR (Particulate Matter) 350 m3/hr
CADR (Formaldehyde) 81.5 m3/hr
Applicable Area 24 - 42 m2
Product Dimensions 40 x 20 x 60 cm
Weight 9.8 kg
Cleaning Methods Pre-Filter
Cold Catalyst Filter
Formaldehyde Filter
Antibacterial Cotton
High Eciency HEPA
UV Light
Negative Ion

4
SAFETY INSTRUCTIONS
• Do not pick up or move the machine
while it is running. When moving or
storing, do not pull the power cord.
This may cause a short circuit or do
internal damage to the power cord
which may lead to a re or electric
shock.
General Safety
• Do not damage power cord or
outlet. Do not cut, excessively twist,
pull, or bend the power cord. If the
power cord is damaged, for your
safety please call the manufacturer,
service department, or a trained
professional to replace it.
• Do not use power supplies, universal
sockets, or connective devices that
exceed the recommended power
rating. Use only 220V~ 5A AC power.
Using a universal socket or connected
power source that exceeds this rating
may lead to overheating and cause a
re.
• Do not touch the plug with wet
hands. This may result in electrical
shock.
• Do not place your ngers or metal
objects into the air vents. This may
cause electrical shock or injury.
• This product cannot replace normal
ventilation equipment, vacuum
cleaners, or kitchen fans.
• Please do not use this product near
gas appliances, heating appliances,
or stoves.
• Do not use this product in a humid
or hot environment, such as the
shower, restroom, or kitchen.
• Make sure the remote is placed
somewhere children cannot reach to
avoid unintended damage.
• Do not place in the following
locations:
• Do not use the air sanitizer in a room
that is using an incense-type insect
killer.
Hot or humid places, such as
the shower: this may result in
electrical shock or re due to
electrical leakage.
Unstable places: this may cause
the product to topple or fall
down which may lead to injury,
electrical leakage, or re.
Places like the kitchen that emit
fumes.
Chemical residue may
accumulate in the machine and
then be released, causing harm
to physical health.
After using insect killer or
mosquito coils, allow the room to
be fully ventilated before using
the air sanitizer.
Do not use this product in a place
where you burn incense.
READ AND SAVE THESE INSTRUCTIONS
• Do not use the air sanitizer outdoors.

5
SAFETY INSTRUCTIONS (CONT.)
Mandatory
• Should any of the following
conditions occur, turn o the machine
immediately (as electrical shock,
sparks, or smoke may occur):
Strange noises or vibrations
during operation.
Product is unusually hot, or has a
burnt odor.
• Please clean the plug regularly. Any
dust or moisture on the plug can
cause damage that may result to a
re.
Unplug the power cord, and
wipe it with a dry cloth.
Unplug the power cord if the
appliance is not used for a long
period of time.
• Before any electrical maintenance,
make sure to unplug the device to
avoid the unit suddenly turning on.
• Please plug the power cord securely
into the power outlet to avoid
possiblity of overheating.
• Should any of the following
circumstances arise, please turn o
the machine power immediately and
contact the service department:
A switch does not work.
Power cord or plug is unusually
hot.
You detect an abnormal sound or
vibration.
Any other abnormalities or
malfunctions.
• To prevent the hazard of electrical
shock, only trained professionals
should disassemble the machine.

6
7-STAGE CLEANING
Stage 1:
Pre-Filter
The rst stage uses an aluminum
alloy lter material to stop and
capture dusts, pollen, pet dander,
mold pores, soot, and other
hazardous air particles that may
cause allergies and trigger various
respiratory problems.
Stage 2:
Cold Catalyst Filter
Low temperature catalyst lter that
helps to destroy formaldehyde,
benzene, xylene, TVOC and other
harmful gasses by transforming
these into harmless carbon dioxide
and water.
Stage 3:
Activated Carbon Filter
Stage 4:
Antibacteria Cotton Filter
Unwoven textile made of cotton with
small ber diameter that eectively traps
particles as small as 5 microns. Material
is moisture proof and mold resistant
and with the antibacterial agent added,
eectively destroys 99% of airborne
germs passing thru it.
Filtration using activated
carbon crystals scattered over a
honeycomb designed surface area
for a more ecient absorption of
toxins and harmful gases. This lter
uses coconut shells as activated
carbons which are far more
superior and cleaner compared to
charcoals made from coal, wood,
and other materials.
Stage 6:
UV Lighting
Stage 5:
HEPA13 Filter
Stage 7:
ANION Generation
Medical grade lter that traps
0.3 micron sized airborne germs,
viruses, smoke and dust particles
at an eciency rate of 99.95% or
more.
Sterilization using UV lights with
365 nanometer wavelengths
(UV-A). Kills a variety of airborne
bacteria and germs. Puries the
air, eliminates musty odors, as
well as produce a certain amount
of anions thereby making the air
fresh while avoiding the spread of
viruses in the air.
Produces large amounts of anions
that are released into the air.
These negatively charged ions
gets attached to air contaminants
that are usually positively charged,
clumping together until the
particles become heavy and fall to
the oor, thus making the air smell
fresher.

7
GETTING TO KNOW YOUR AIR SANITIZER
Control Panel Ambient Light Sensor
Digital Display
Control Buttons
Wind Speed Levels Replace Filter Indicator
F
A. Front Cover
B. Air Intake
C. Air Particle Sensor
D. Scent Infuser
E. Air Quality Indicator
F. Air Vent
G. Control Panel
A
B
A
C
D
E
G

8
CONTROL BUTTONS
On/O Button
• Turns the air sanitizer
on or o
Fan Speed Button
• Cycles speed thru low,
medium, and high
• Exits automatic mode
when speed is changed
• Hold for 3 secsto re-
enter automatic mode
Anion Button
• Turns on the anion
(negative ion) button
UV Sterilizer Button
• Turns on the UV light
function
Sleep Button
• Exits the automatic
mode and puts speed
to low. All lights and
displays will then
be o.
• To reset the lter
replacement indicator
light, hold for 3 secs.
Timer Button
• Sets time from 30
mins to 12 hrs in 30
minute increments.
• 5 seconds after
setup, display will
go back to PM2.5
value while timer
counts down on the
background
• Hold button for
5 secs to exit this
function.
• Press button to
display remaining
time left.
Child Lock Button
• Press to enter. Hold
for 5 secs to exit.
• Before entering
this mode, hold
for 5 secs to see
total time lter has
been used in hours
(between 0-1500
hrs)
• Press to enter
automatic mode.
Auto Button

9
STATUS INDICATOR
Light Sensor
• While in automatic
mode, the sanitizer will
enter into sleep mode
when ambient light is
<5 lux for 3 minutes.
• When the ambient
light is 5 lux or higher,
the sanitizer exits sleep
mode and continue
running in automatic
mode.
Digital Display
• Displays:
• Airborne ne particle count
in real time (PM2.5)
• Remaining time of operation
when timer is activated
(hours).
• No. of hours current lter is
in use (0 to 1500 hrs).
Air Quality Indicator
With the internally installed sensor, real time air quality condition is
shown thru the color changes in front of the unit with corresponding
actual count of ne particles as shown on the display panel.
Color Air Quality PM2.5 Count (ug/m3)
Good 120 or less
Moderate 121 to 250
Bad 250 and above
When in automatic mode, the motor wind speed will automatically
adjust to the air quality as it is measured by the air particle sensor.
When not in automatic mode, the air quality condition will still be
detected but without the air sanitizer making any adjustment on
wind speed.

10
GETTING STARTED
Open the front cover of the air
sanitizer then pull out one at a time all
three lters.
1.
Remove plastic packaging of the
lters
2.
Reinstall in sequence all 3 lters into
the air sanitizer with the Antibacterial/
HEPA lter rst (fan side), the Activated
Carbon/Cold Catalyst second, then the
Pre-Filter last (front cover side.
3.
Reinstall front cover.
4.
Note that the air sanitizer will not turn
on if the front cover is not properly
placed back.
All pull tabs should be facing out.

11
DURING INSTALLATION
Place the product on a hard at
surface with at least 30 cm clearance
from any wall or object.
1.
Make sure that there are no object
to obstruct air ow thru the inlet or
exhaust vents.
2.
Do not place in direct sunlight, facing air
conditioner vents, or any heated surfaces to
avoid the unit to warp, deteriorate, discolor,
or altogether malfunction.
3.
Place the air sanitizer at least 1 meter away
from TVs or radios as the unit may cause
interference.
4.
Sunshine
1m
Exhaust Vent
Supply Vent

12
USING YOUR AIR SANITIZER
Auto Mode
Press to turn on the air sanitizer.
The buttons , , and will all light up
together with to indicate that the unit is in
automatic mode.
Forced Mode
When power button is pressed,
click on to change to the desired
motor speed which at the same time
will turn o exit auto mode.
Depending on the preference, press
or to turn on or o any of
these cleaning features.
After a few seconds, the motor speed will
adjust accordingly based on the air quality
value displayed on the display panel.
For best results:
• Let the air sanitizer run rst to its maximum wind speed for about 20
minutes before going down to a lower speed or going into Auto Mode.
• Have all nearby doors and windows closed for a more eective
cleaning of the surrounding air.
Sleep Mode
When either on Auto or Forced mode,
clicking on the button will turn o
all the control panel lights and brings the
motor speed down to the lowest level.
To exit, just press any button.
Auto mode only applies to motor wind speed
which means that the Anion and UV features
can be turned o or on anytime when at this
mode.
Timer
Push the button to the desired run
time. Display will ash for a while then
goes back to the PM2.5 reading.
To exit, just press and hold for 5 secs.
Use this mode to create a quiet
environment and without any distracting
light.

13
USING YOUR SANITIZER (CONT.)
Remote Control
The air sanitizer comes together with a remote
control unit that uses regular button sized lithium
batteries. When this unit will not be used over
an extended period of time, please take out the
battery.
• The buttons on the remote unit correspond to the same buttons as in
the air sanitizer, with the same functions and operations.
Note:
Infuser
To add fragrance to the clean air from the
air sanitizer, pull out the infuser box found
at the side and apply essential oil to the
provided cloth inside. Push back the box
afterwards.
Safety Features
• CHILD LOCK OPERATION.
Push the button to go into this operation. When activated,
the operation panel and remote control will not function.
To exit this setting, hold down the button for 5 secs.
• AUTOMATIC SHUT DOWN
Unit will automatically turn o when (a) front cover is missing or
is improperly placed, and (b) when unit is lifted.

14
KEEPING THINGS CLEAN
Cleaning the Filters
Clean the Pre-Filter surface with a
vacuum cleaner or wash with water
to remove large particles like hair,
dust, pollen, and dander that may be
entangled. Do this approximately
twice per month.
12
3
1.
Gently clean the front side of the Cold
Catalyst+Activated Carbon Filter with a vacuum
cleaner. Do not press too hard as the lter is
delicate. Place the lter in a ventilated area to
allow harmful gasses and germs to dissipate. Do
this once every two months.
2.
Do not clean the Antibacterial Cotton+HEPA Filter to
prevent any ne dust or bacteria being released back
into the surrounding air.
3.

15
KEEPING THINGS CLEAN (CONT.)
When Should Filters Be Replaced?
When the air sanitizer is used regularly, it is
recommended that Filter #2 (Catalyst+Activated Carbon)
and Filter #3 (Antibacterial Cotton+HEPA) be replaced
every 6-8 months, while every 2 years for Filter #1 (Pre-
Filter).
New lters may be needed earlier if you notice an
increased noise when the unit is on, when there is a
considerable decrease in airow, unusual odors, or
when the lters are visibly clogged.
Check Filter Indicator
This air sanitizer has an indicator light to inform the user to check the
lters.
• Every 320 hours the check lter light will light up.
Press and hold the sleep button for 5 secs. to
clear this reminder.
• Once 1500 hours is reached, the check lter light
will ash. Press and hold the sleep button
for 5 secs. to reset the timer function.
• To see how long the lters have been used so far
(in hours), press and hold the button for a
few seconds.
It may however be necessary to replace lters earlier than
expected depending on where and how the air sanitizer
is used (ex. when used in an environment with relatively
high pollution).
Use only ocial Aerion lter replacements to
maintain proper operation of your air sanitizer.
Note:
• Filter #1: Pre-Filter (PN FLR_807A)
• Filter #2: Cold Catalyst+Activated Carbon Filter
(PN FLR_807B)
• Filter #3: Antibacterial Cotton+HEPA Filter
(PN FLR_807C)

16
Cleaning the Anion Generator
When you hear a creaking sound, this may indicate a dusty anion generator. To
clean, regularly brush o the dusts around the head using a #1 or #2 paint brush.
Cleaning the Air Particle Sensor
Approximately once every two months, wipe the lens with a cotton swab dipped
in water to remove any dirt as moisture or tobacco smoke residue may cause it
to no longer work properly. Wipe the lens with a dry cotton swab afterwards.
First remove the
particulate sensor
cover
Use a cotton swab
to clean the lens.
Notes on Cleaning:
• Always unplug the unit before cleaning and maintenance.
• Never operate the air sanitizer without the lters as the dusts taken in
will result to the motor being damaged.
• Unplug the unit when it will not be used over a long period. Power is
consumed even while in standby mode.
KEEPING THINGS CLEAN (CONT.)

17
TROUBLESHOOTING
Problem Possible Solution
Unit will not turn on or respond
to button controls.
Make sure that unit is plugged to a power outlet.
Make sure that power cable is not damaged.
Close the front cover properly.
Be sure that the unit is flat on the ground.
Unit may be in child lock mode (see page 8).
Air is poor but the air quality
indicator stays green.
Make sure that the air particle sensor is clean (see page
16).
Check that the unit is in a place or location where it can
properly absorb the air.
Air quality indicator is always
at red and motor speed stays
high.
Air sanitizer is unusually noisy
while the fan is on.
Make sure that filter plastic packagings were removed.
Check if filters are not clogged or need to be replaced.
Make sure that no large foreign object is inside.
Too much banging or chirping
sound while running
May need to clean up the anion generator due to too
much dusts (see page 16).
Smell of air coming out of vent
is unpleasant
Filter too dirty and may need replacement.
Sanitizer has been running
for a long time but has had no
significant improvement in air
quality
Ensure that any plastic packaging on the filters were
removed.
Check that filters are placed in their proper sequence.
Display panel shows F1 or F2. Please turn offpower and contact customer support.
Check filter light is still flashing
even after replacing filters. Press and hold the sleep button for 5 secs to reset
the check filter light (see page 15).
Air flow coming out is
significantly slow.
Make sure all filter plastic packagings were removed.
Make sure all sides of the sanitizer to the nearest wall
is 30 cm or more and there are no large obstruction in
between.
Filters may be too clogged and therefore may need to be
replaced.
Poor quality of air purification. Increase fan speed.
Make sure that all filter plastic packagings were removed.
Clean air particle sensor (see page 16).
Make sure that the unit is being used in a room that is 42
m2 or less. Also, close all doors and windows when the
unit is in operation.
Air sanitizer randomly turns off. Unit may be malfunctioning. Please call customer
support.

18
WARRANTY INFORMATION
Product Name Multi-Stage Air
Sanitizer
Model AER-PUR807
Default Warranty
Period
1 year
For proof of purchase purposes, please
provide the following information.
Date of Purchase
Order ID
Warranty Terms
AERIONE warrants to the original purchaser, with
proof of purchase, that its delivered products
shall be free from defects in material and
workmanship under normal use from date of
purchase to the end of the warranty period.
AERIONE will repair, or at its option, provide an
equivalent item or replace, the defective product
during the stated warranty period. Refunds are
available within the rst 30 days of purchase and
are only applicable to the original purchaser of
the product. This warranty applies only to the
repair or replacement of the product and only
when the product is properly handled, installed
and maintained according to the owner’s manual
guidelines. This warranty extends only to
personal use and does not extend to any product
that has been used for commercial, rental, or any
other use in which the product is not intended
for. There are no warranties other than the
warranties expressly set forth with each product.
The warranty contained herein applies only to
the original purchaser and are not assignable
or transferable to any subsequent purchaser or
end-user. AERIONE Inc. is not responsible in any
way for any damages, losses, or inconveniences
caused by user negligence, abuse, or use
noncompliant with the user manual or any
additional safety, use, or warnings included in
the product packaging and manual.
This warranty does not apply to the
following:
• Damage as a result of misuse,
accident, abuse, alteration,
tampering, or vandalism.
• Improper or non-conformance to
maintenance recommendations
to include use of non ocial
Aerion lters.
• Damage during return shipping.
• Unsupervised use by children
under 18 years of age.

19
CUSTOMER SUPPORT
For immediate support, please contact the local
reseller or distributor if your product was purchased
outside of the USA and Canada.
AERIONE Incorporated
77 City Centre Drive, Suite 501, E Tower
Mississauga, ON, L5M 6R1, Canada
Email: [email protected]
Please have your order invoice and order ID (or any proof of
purchase) ready before contacting Customer Support
AER-PUR807 User Manual V4R1.
Please check our website for the latest available version
For all other questions and inquiries, you may get in
touch with us at:

20
NOTES
Table of contents
Other aerione Accessories manuals
Popular Accessories manuals by other brands

ORION TELESCOPES & BINOCULARS
ORION TELESCOPES & BINOCULARS SkyLine 52136 instruction manual
NorthStar
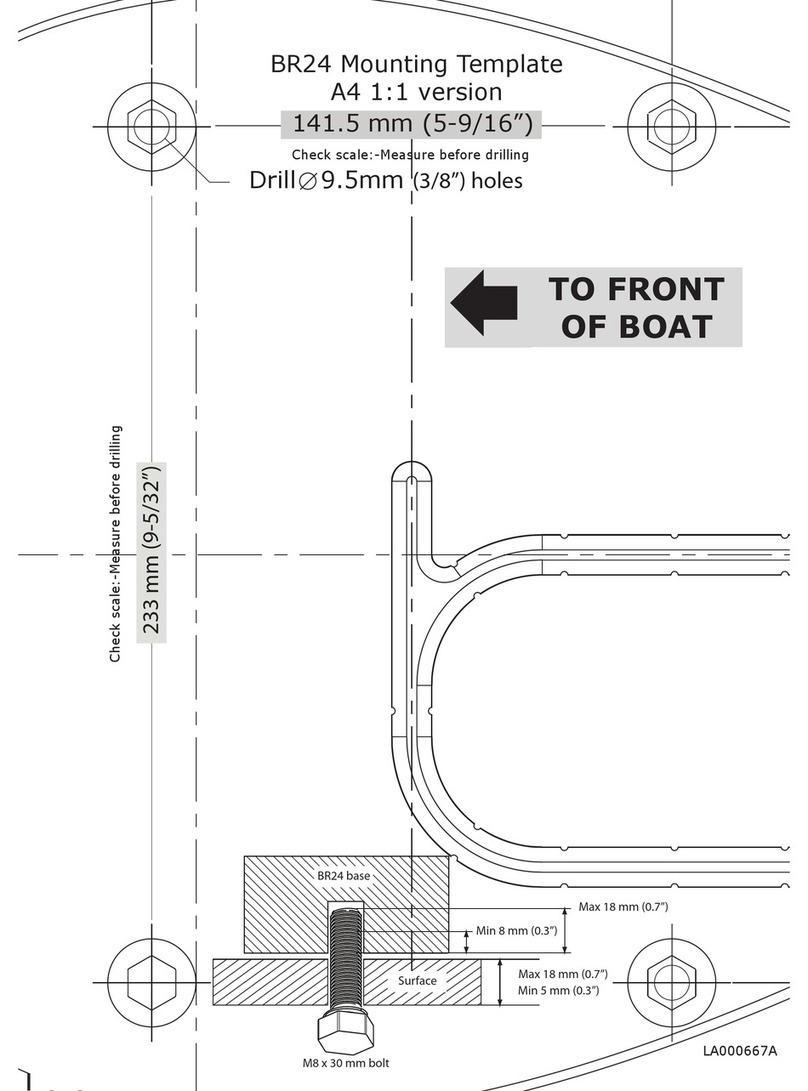
NorthStar BR24 - MOUNTING TEMPLATE A4 1-1 Mounting template

Nav TV
Nav TV ZEN-AUDIO manual
Romoss
Romoss PEA40 user manual
Thermo Scientific
Thermo Scientific 8000DH Series Operating and maintenance manual
Ecodhome
Ecodhome 01335-1910-00 installation manual


