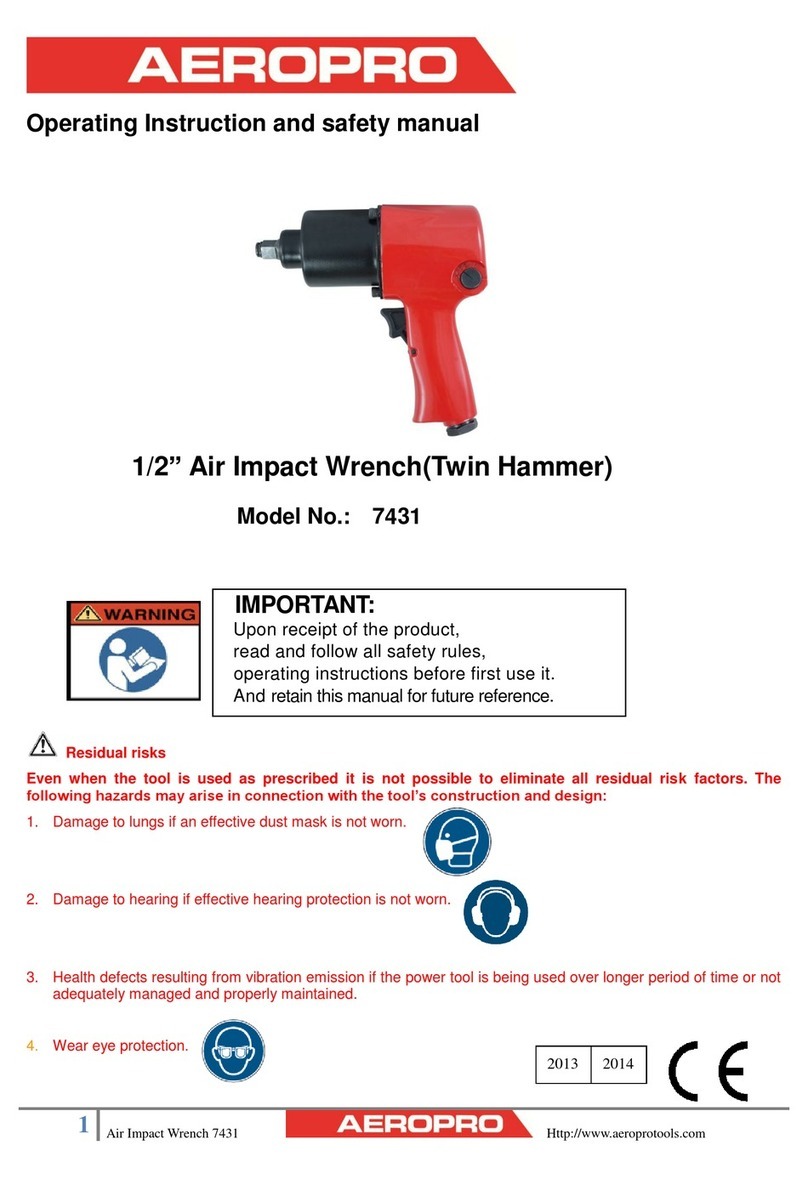
Aeropro A301 User manual

INSTRUCTION MANUAL
1/2”AIR-POWERED IMPACT WRENCH
A301
IMPORTANT:
Upon receipt of the product, read and follow all safety rules,
operating instructions before first use it. And retain this manual for
future reference.

TABLE OF CONTENTS:
TECHNICAL SPECIFICATIONS
SAFETY GUIDELINES
KEY PARTS DIAGRAM
IMPORTANT INFORMATION
OPERATING INSTRUCTIONS
MAINTENANCE
TROUBLESHOOTING
EXPLODED VIEW
PARTS LIST
TECHNICAL SPECIFICATIONS:
Square drive head:
1/2”(13mm)
Air hose required:
3/8”ID
Capacity Bolt size:
5/8”(16mm)
Air inlet: 1/4”ID(6.35mm)
SPEED (NO LOAD):
7000RPM±10%
A weighted sound pressure level: 106.6dB (A)
Working torque:
1000ft-lb(1350N.m)
Sound power level: 94.6dB (A)
SCFM Requirement:
7cfm(198 l/min)
Vibration in handle: 5.99m/s²,K=1.1 m/s²
Working pressure:
90PSI(6.3Bar)
Weight: 2.0kgs(4.4Lbs)
SCFM: Standard Cubic Feet per Minute (the volumetric flow rate of a far corrected to standardized conditions of
temperature and pressure).
NPT: National Pipe Thread
Environmental Responsibilities
Please recycle unwanted materials instead of disposing of them as waste. All tools, hoses and packaging should be sorted,
taken to the local recycling centre and disposed of in an environmentally safe way.
SAFETY GUIDELINES:
DANGER!
Potential hazard that will result in serious injury or loss of life.
WARNING!
Potential hazard that could result in serious injury or loss of life.
CAUTION!
Potential hazard that may result in moderate injury or damage to equipment.
NOTE: The world “Note”is used to inform the reader of something he/she needs to know about the tool.
PERSONAL SAFETY
These precautions are intended for the personal safety of the user and others working with the user. Please take time to
read and understand them.
DANGER!
Potential hazard that will result in serious injury or loss of life.
Keep children away from the work area. Do not allow children to handle power tools.
Do not use a tool that is leaking air, that has missing or damaged parts, or that requires repairs. Verify that all screws
are securely tightened.
Never attempt to override tool safety features.
Do not allow unskilled or untrained individuals to operate Air-powered impact wrench or any
other air-powered tools.
Do not use oxygen or any other combustible or bottled gas to power air powered tools. Failure to
observe this warning can cause explosion and serious personal injury or death. Use only
the compressed air to power air-powered tools, Use a minimum of 25’(7.6m) of hose to

connect the tool to the compressor. Failure to comply will result in serious injury or loss of life.
Risk of electric shock: Do not expose a compressor to rain. Store it indoors. Compressor must be grounded. Do not use
grounding adaptors.
Risk of personal injury: Do not direct compressed air from the air hose toward the user or other personnel.
Risk of inhalation: Never directly inhale the air produced by the compressor.
Risk of bursting: Do not adjust the pressure switch or safety valve for any reason. They have been preset at the factory
for this compressor’s maximum pressure. Tampering with the pressure switch or the safety valve may cause
personal injury or property damage.
Risk of burns: The pump and the manifold generate high temperatures. In order to avoid burns or other injuries, do not
touch the pump, the manifold, or the transfer tube while the compressor is running. Allow the parts to cool
down before handling or servicing. Keep children away from the compressor at all
times.
Risk of bursting: Make sure the regulator is adjusted so that the compressor outlet pressure is
set lower than the maximum operating pressure of the tool. Before starting the
compressor, pull the ring on the safety valve to make sure the valve moves freely. Drain
water from tank after each use. Do not weld or repair tank. Relieve all pressure in the
hose before removing or attaching accessories.
WARNING!
Potential hazard that will result in serious injury or loss of life.
Always ensure that the work piece is firmly secured leaving both hands free to control the tool.
Always keep your air tool clean and lubricated. Daily lubrication is essential to avoid internal corrosion and possible
failure.
Do not overload the tool. Allow the tool to operate at its optimum speed for maximum efficiency. Excessive overload
can cause the tool casing to split, and may also lead to excessive wear on moving parts and possible failure.
Use only the light weight coil hoses. For connecting the tool to the compressor coupling. Do not fit quick change
couplings onto the tool, as the vibration can lead to damage or failure of the coupling.
Always ensure that the tool has stopped before connecting it to the air supply.
Verify that grinding accessories that are used with this tools are rated at or above the tool’s speed rating (7000RPM).
Failure to properly match the accessory to the tool could result in serious personal injury.
Always ensure that the accessories are rated/ designed for use with the tool.
Ensure that the accessories are correctly and securely fastened before connecting the tool to the air supply.
Locate the compressor in a well-ventilated area. For cooling, at a minimum of 12”(31cm) away from the nearest wall.
Protect the air hose and the power cord from damage and puncture. Inspect them for weak or worn spots every week,
and replace them if necessary.
Always wear hearing protection when using the air compressor. Failure to do so may result in hearing loss.
Do not carry the compressor while it is running.
Do not operate the compressor if it is not in a stable position.
Do not operate the compressor on a rooftop or in an elevated position that could allow the unit to fall or be tipped over.
Always replace a damaged gauge before operating the unit again.
CAUTION!
Potential hazard that may result in moderate injury or damage to equipment.
Keep proper footing at all times in order to ensure correct balance.
Do not wear watches, rings, bracelets, or loose clothing when using any air tool.
For optimal safety and tool performance, inspect the tool daily in order to ensure free movement of the trigger, safety
mechanisms, and springs.

Keep the work area clean. A cluttered or dirty workbench may lead to an accident. Floors should be kept clear.
This tool is not a toy. Use it with caution.
Use the tool in a well-ventilated area.
Verity that the tool has stopped before putting it down after use.
Handling and storage of oil: Use with adequate ventilation. Avoid contact of oil with eyes, skin and clothing. Avoid
breathing spray or mist. Store in a tightly closed container in a cool, dry, well-ventilated area free from incompatible
substances.
Do not use the tool near or below freezing temperatures, as doing so may cause tool failure.
Do not store the tool in a freezing environment to prevent ice formation on the operating valves of the tool, as doing
may cause tool failure.
Disconnect the tool from the air supply and turn off the compressor before changing any accessories,
performing any maintenance, servicing, when the tool is not in use, when it is being handed to
another person, and when it is left unattended. Failure to comply may result in moderate injury or
damage to equipment.
Use safety goggles and ear protection: Wear safety glasses with side shields when operating the
tool/compressor and verify that others in the work area are also wearing safety glass.
requirements and must provide protection from flying particles from the front and the sides.
Air-powered tools are loud and the sound can cause hearing damage. Always wear ear
protection to help prevent hearing damage and loss. Failure to comply may result in moderate injury.
Note: Recycle unwanted materials rather than disposing of it as waste. Sort the tools, hoses, and package in specific
categories and take them to the local recycling center or dispose of them in an environmentally safe way.
KEY PARTS DIAGRAM
IMPORTANT INFORMATION
General usage description
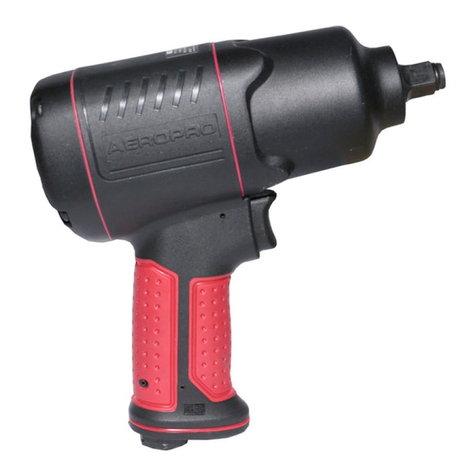
The AEROPRO air-powered impact wrench features Impact of job security, free from vibration, heat, electromagnetic, etc,
segmented in take structure design, handing more accurate. tool has the appearance of new, large torque, low noise
characteristics. knob to change the structure, the pros and cons easily manipulated, high alloy steel, ensuring a more
durable wear, greatly extend the service life. Best used for tire rotation, brake repairs, exhaust repairs, mechanical
equipment bolt etc.
Compatible compressor and air tool: GUIDELINES FOR PROPER USAGE AND POERATION
Always ensure the use of appropriately matched air tools and compressors. The compressor should be able to supply a
minimal air delivery of 5 SCFM@90PSI to ensure the compressor can run continuously with the AEROPRO Air-Powered
Impact wrench. Using tools or a combination of tools that together or separately require air pressure more than that of
which the air compressor can deliver will reduce performance and could void the compressor or tool guarantee/warranty.
Air compressor size & power
2HP
2-1/2 HP
3+ HP
5-6 Gallons
Light duty and intermittent
use
Light duty and intermittent
use
Medium duty and
intermittent use
8-11 Gallons
Light duty and intermittent
use
Medium duty and
intermittent use
Heavy duty and continuous
use
15+ Gallons
Medium duty and
intermittent use
Heavy duty and continuous
use
Heavy duty and continuous
use
1: Air inlet
4: Square
drive head
3: Trigger
2: Direction of
rotation knob

AIR SYSTEM
Always use clean, dry, regulated, compressed air at 4 to 7bar (60 to 100PSI).
Do not exceed the maximum and minimum pressure. Operating the tool at the wrong pressure (too low or too high)
will cause excessive noise or rapid wear.
It is recommended that a filter-regulator-lubricator be used and be located as close to the tool as possible.
If a filter-regulator-lubricator is not installed, place up to 6 drops of pneumatic tool oil into the air inlet plug before
each use.
If a filter-regulator-lubricator is installed, keep the air filter clean. A dirty filter will reduce the air pressure to the tool,
which will cause a reduction in power, efficiency, and general performance.
CAUTION!
Potential hazard that may result in moderate injury or damage to equipment.
Verify that all connections in the air supply system are sealed in order to prevent air from leaking. Failure to comply will
result in moderate injury or damage to equipment.
Read this instruction manual thoroughly or have tool operators read thoroughly before using the tool.
Read all safety guidelines (see section “Safety guidelines”) at the beginning of this manual.
Always inspect the air tool prior to each use to
-Ensure proper use of power source.
-Determine whether the tool is in proper working order.
Only use accessories which are specifically designed for use with this tool (see section ”technical specifications”).
Drain the compressor tank daily. Water in the air supply line will damage the tool.
Clean the air inlet and the filter weekly.
Line pressure should be increased to compensate for unusually long air hoses. The hose diameter should be 3/8”ID.
WARNING!
Potential hazard that will result in serious injury or loss of life.
Do not use the tool if it is not in proper working order.
Do not use oxygen or any other combustible or bottled gas to power this tool.
Do not use this tool in the presence of any flammable liquids or gases.
Keep hose away from heat, oil, and sharp edges. Check hose for wear and tear, and ensure that all connections are
secure. Failure to comply could lead to serious injury or loss of life.
Keep hands and other parts of the body away from the work areas when connecting the air supply. Failure to comply
could lead to serious injury or loss of life.
OPERATING INSTRUCTIONS
Loading and operation
Carefully read all instructions provided in this manual and understand them thoroughly before using the tool.
Do not use Impact wrench accessories other than those that are specifically designed for use with the Air-powered

impact wrench. Failure to comply will result in serious injury or loss of life.
Verify that the air supply is clean before operating the Air powered impact wrench.
1. Plug in compressor, turn it on set the pressure regulator to 90psi, attach one end of the air hose to the compressor and
the other end of the air hose to the tool. Use plumber’s tape to avoid air leak ( see section” Technical specifications”).
2. Place and lock the socket over the square drive of the Air-powered impact wrench.
3. Place the socket over a nut to be removed or installed and press the trigger at the top of the handle to operate the tool.
4. For reverse (R ) rotation, press the speed control knob on the left side of the tool; For forward (F) rotation, press the
speed control knob on the right side of the tool; Rotate the speed control knob on the left side of the tool during
reverse rotation to control the speed of the air flow as required. Rotate the speed control knob on the right side of the
tool during forward rotation to control the speed of the air flow as required.
5. After using the tool, disconnect the air hose from the tool.
WARNING!
Potential hazard that will result in serious injury or loss of life.
Hold the tool firmly with hands.
Do not apply additional or excessive force to the tool when working.
Do not allow the tool to run free for an extended period of time. Doing so will shorten the life of the tool.
Verify that the air supply is clean and air pressure does not exceed 90psi (6.3bar) while operating the tool. If the air
pressure is too high or unclean, it will shorten the life of the tool. Failure to comply could result in serious injury or loss
of life.
MAINTENANCE
WARNING!
Potential hazard that will result in serious injury or loss of life.
Disconnect the tool from the air supply before changing accessories, servicing, or performing maintenance.
Only use the tool after replacing or repairing the damaged parts or accessories.
Use only recommended and properly rated replacement parts and accessories. Failure to comply will lead to serious
injury or loss of life.
Repairs must be performed by a qualified service technician.
Maintenance required
Description
Tools or materials
required
Maximum service interval
Each use or every 2 hrs
Monthly
As needed
General inspection-free
movement
Trigger, spring, safety
mechanism
None
In-depth inspection
Worn or broken parts
Replace worn or broken
parts
Lubrication
See below
Pneumatic tool oil
Lubrication: If the Air-powered impact wrench and the compressor are not equipped with an
in –line lubrication system, place up to 6 drops of pneumatic tool oil into the air inlet before
each work day or after every 2 hours of continuous use, depending on the characteristics of
work piece.
Air-operated tools must be inspected periodically, and worn or broken parts must be replaced
in order to keep tools operating safety and efficiently.
Inspect and replace worn or damaged O-rings, seals, etc. Tighten all screws and caps frequently in order to help
prevent personal injury.
Loss of power or erratic action may be due to the following
-Excessive drain in the air line.

-Moisture or restriction in the air pipe.
-Incorrect size or type of hose connector. Check the air supply and follow instructions.
-Grit or gum deposits in the tool may also reduce performance.
Inspect the trigger, the spring, and the safety mechanism for free movement on a regular basis in order to ensure that
the safety system is fully functional.
Verify that no part is loose or missing and that no part is stuck or jammed.
Disconnect the tool from the air supply, clean, and store it in a sale, dry, and childproof location, when tool is not in
use.
When temperatures are below freezing, keep tools as warm as possible using any safe, convenient method.
Check the air supply for correct size and type of hose connectors. To avoid loss of power or erratic action, ensure that
there is no additional drain on the air line and no moisture or restriction in the air pipe.
Storage:
Apply an ample amount of lubrication before storing the tool.
Run the tool for approximately 30 seconds after lubricating, in order to ensure that the lubrication is uniformly
distributed throughout the tool.
Store the tool in a clean and dry environment.
TROUBLESHOOTING
The following chart lists common issues and solutions. Please read it carefully and follow all instructions closely.
WARNING!
Potential hazard that will result in serious injury or loss of life.
If any of the following symptoms appear while the tool is in use, turn it off and disconnect it from the air supply
immediately. Failure to heed this warning will result in serious personal injury.
Disconnect the tool from the air supply before making any adjustments.
Repairs must be performed by a qualified service technician only.
PROBLEMS
POSSIBLE CAUSES
REMEDIES
Tool runs at normal
speed but loses under
load
■Motor parts worn.
■Cam clutch worn or sticking due
to lack of lubricant.
■Lubricating clutch housing.
■Check for excess clutch oil. Clutch cases need only be half
full. Overfilling
can cause drag on high speed clutch parts, ie. a typical
oiled/lubricated wrench requires 1⁄2 ounce of oil.
GREASE LUBRICATED:NOTE: Heat usually indicates
insufficient grease in chamber. Severe operating conditions
may require more frequent lubrication.
Tool runs slowly. Air
flows slightly from
exhaust
■Motor parts jammed with dirt
particles
■Power regulator in closed
position
■Air flow blocked by dirt.
■Check air inlet filter for blockage.
■Pour air tool lubricating oil into air inlet as per
instructions.
■Operate tool in short bursts quickly reversing rotation back
and forth where applicable.
■Repeat above as needed.
Tools will not run. Air
flows freely from
exhaust
■One or more motor vanes stuck
due to material build up.
■Pour air tool lubricating tool into air inlet.
■Operate tool in short bursts of forward and/or reverse
rotation where applicable.
■Tap motor housing gently with plastic mallet.
■Disconnect supply. Free motor by rotating drive shank
manually where applicable
Tool will not shut off
■‘O’ rings throttle valve dislodged
from seat inlet valve.
■Replace O-rings or return to service center.
Note: Repairs should be carried out by a qualified person.

A301 Impact Wrench Explosive View and Parts list
Issue date:
Version no.:
No. Description Qty. No. Description Qty. No. Description Qty. No. Description Qty.
Note: If you need spare parts of this model, pls feel free to contact us or the distributor where you bought this tool. Tks!
Gun body cover
Press-oiling cup
Oilite bushing
Anvil collar
Oring 7.5×1.8
Anvil
Hammer Cage
Hammer Pin
Hammer Dog
Gasket
"Deep Groove Ball Bearing P6-C3ÿ"
Cylinder
Pin 2.5×20
Air Inlet Washer
Cylinder Gasket
Rotor
Blade
Back Cover
O-ring 30×1.8
Deep Groove Ball Bearing P6-C0
Spring Washer
Screw M3×12
Screw M5×90
Gun Body Assembly
Switch Lever
Regulating Valve
O-ring 8×1
O-ring 11.8×1.5
Directional valve
Gear Spring
Ball Dw=2.5
Direction Button
Gear Spring
Gear Adjustment Knob
Trigger
Trigger Washer
Pin 1.5×15
Air Inlet Plug
Switch Pin
Switch Pin Spring
Exhaust Cover
O-ring 15×1.8
Coupler Washer
Air Inlet Coupler
Other Aeropro Impact Driver manuals
