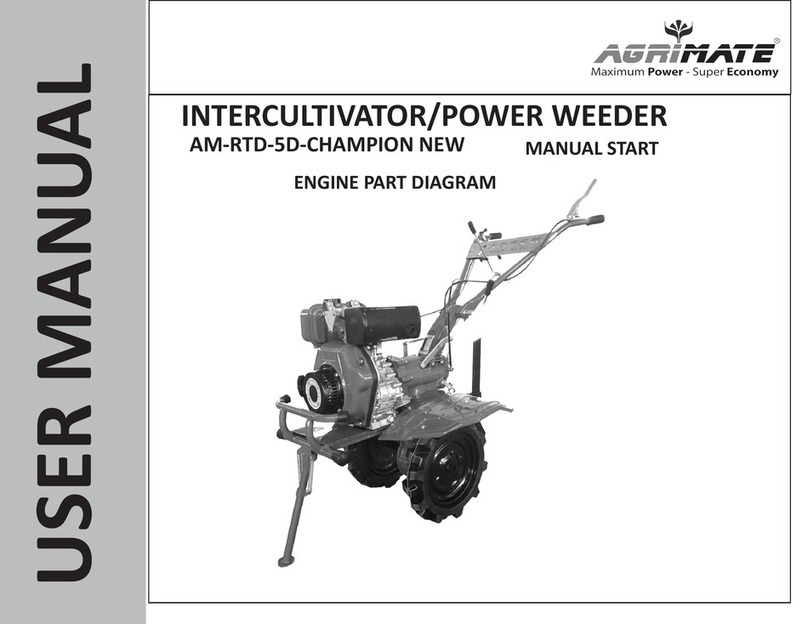
Agrimate AM-RTD-5D User manual

User Manual
BEFORE OPERATING THIS MACHINE,
PLEASE READ THESE INSTRUCTIONS CAREFULLY
AGRIMATE ROTARY TILLER
AM-RTD-5D
ROTARY WEEDER / POWER WEEDER / CULTIVATOR
DISCLAIMER: DUE TO CONSTANT UPGRADATION, FEATURES AND SPECIFICATIONS ARE
SUBJECT TO CHANGE WITHOUT NOTICE

2
FORWARD
Thank you for choosing our Rotary Tiller / Rotary Weeder / Power Weeder / Cultivator.
• Thismanualcontainsaboutoperationandmaintenanceof1000NRotaryTiller/RotaryWeeder
/ Power Weeder / Cultivator.
• Allcontentsinthismanualarebasedonthelatestinformationwhenthemanualisprinted.
• Themanufacturerhastherighttorevisethemanualwithoutanypriornoticeandwillnotbear
anylegalresponsibility.
• Nonepartsinthismanualcanbecopiedwithoutformalapproval.
• Thismanualshouldberegardedasapartofthetillers,soitshouldbehandedoverwhen
resold or lent.
Inordertosavethesafetyofyoursandothers,pleasepayattentiontoinformationonboththis
manualandtiller
• Payattentiontostatementsprecededbythefollowingword.
SAFETY INFORMATION
! Danger: Indicatesapossibilityofseverepersonalinjuryordeathifinstructionare
not followed.
! Warning: Indicatesapossibilityofequipmentdamageorpersonaldeathifinstruction
are not followed.
Damage prevention
Youcanseeotherimportantinformationaremarkedwith“NOTICE”.
Itmeansthatifnotworkupontheinstructions,itmaycausebrokenoftiller.
Attention
• Whentheengineisstarting,turntheshiftlevertothe“NeutralPosition”.
• Becarefulwhentillerisworking.
• Lookouttheblades.
• Thefuelandoilmustbequaliedandclean.
• Releaseclutchbefore gearshiftingandslowdowntheengine. Itismore safe
when engine is slow down.
• Fueliseasytocatchreandexploded.
• Whenworkinginpaddyeldorgoingslope,carefullyusingreversegear.
Because machines are improved always, so pictures are may be different from
practicality.

3
CONTENTS
SAFETY INFORMATION AND WARNING
1. SafetyInformationandWarning
2. ProleofRotaryTiller/RotaryWeeder/PowerWeeder/Cultivator
1. Specication
2. General Chart
3. ApplicableScope
1. Tilling
2. Ditching
4. OperationandUseofRotaryTiller/RotaryWeeder/PowerWeeder/Cultivator
1. Assembling
2. Operation
3. Engineoperation
5. Maintenance
1. Maintenanceofengine
2. Maintenance of tiller
3. Adjusting
6. Troubleshooting
7. Easily-damagedPartsofRotaryTiller/RotaryWeeder/PowerWeeder/Cultivator
1. Training
a). Carefullyreadthismanual,fullyknowallthecontrollingfunctionsandtheproper
operation,learnhowtoquicklystopandseparatethetiller.
b). Childrenarenotallowedtousetiller.Andadultswhodon’tlearnthismanualarealso
notallowedtousethismanual.
c). Keepworkingareawithoutotherpeople,especiallychildrenandpets.
2. Preparation
a). Checkworkingarea,andmoveawayallthesundries.
b). Disengagealltheclutchesandplacegeartoneutralpositionbeforestartingengine.
c). Donotusetillerwithoutsuitableclothesandskid-proofshoes.
d). Carefully deal with fuel which is tinder.
1).Usesuitablecontainertostorefuel.

4
2). Do not add fuel when engine is working or hot.
3).Carefullyaddoiloutdoor.Don’tallowtoaddoilindoor.
4).Wrestonfueltankcap,andcleanoutspillingfuel.
e). Whenengineisworking,donotdoanyadjustmentwhicharenotallowed.
f). Wearingeyeprotectglasseswhenpreparation,workingandservicing.
3. Operate
a). Neverusehandorfoottotouchrotarybladeswhenitisworking
b). Whengoacrosscobbledroad,crosswalk,androad,paymoreattentiontothelatent
danger.Donotletpeoplerideonthetiller.
c). Iftillerbumpssomething,stoptocheck.Ifitisbroken,repairitandthenstartit.
d). Becarefulwhenworking,donotfallorslip.
e). Iftillerhasabnormalnoise,itmeansthatitmayhaveproblems.Stopthetillerto
check reason.
f). Stopenginebeforeleaving,cleaningblades,servicing,adjustingandchecking.
g). Whennopeopleworkingonthetiller,shiftgeartotheneutralgearandstopthe
engine.
h). Beforecheck,cleanandrepairthetiller,stopengineandcheckifeverypartisstop.
i). Donotworktillerindoor,becauseexhaustispoisonous.
j). Donotworkwhenthereisn’tproperequipment.
k). Keepawayfromchildrenandpets.
l). Donotlettilleroverloadbecauseofdeeptillingdepthandfastspeed.
m). Donotlettillerrunonthesliproad.Becarefulwhenreverse.
n). Donotletlooker-oncomenearthetiller.
o). Onlytheseadditionalequipmentallowedbymanufacturecanbeused.
p). Donotusetillerwhenweatherisdark.
q). Whenworkonthehardland,bladesmayhitchthelandandpushtillerforward.Inthis
condition, release the tiller and let it go itself, do not try to control it. Or else, there
willbedanger.
r). Donotworkonthesharpslop.
s). Whentillergoacrossslope,becarefulanddonotlettillerfall.
4. Service and store
a). Keeptilleranditsadditionalequipmentinwellworkingcondition.
b). Periodicallycheckengineboltsandotherbolts,makesuretheyarexedwell,to
ensure tiller in good working condition.
c). Tillershouldbekeptindoorandawayfromre.Stopandcooltheenginebefore
storage.
d). Iftillerneedstobestoredforalongtime,thismanualshouldbealsokeptasan
importantpart.
e). Donottrytorepairthetillerunlessyouknowtheknowledge,andhavepropertools.
5
TECHNICAL SPECIFICATION
Specicationmaybechangedaccordingtoimprovingofmachines.
ENGINE SPECIFICATIONS
Engine Model AM173F
Type Single Cylinder, Vertical, Diesel Engine-4S, Air
Cooled
Starting Recoil Start
Fuel Diesel
EngineOil/Capacity SAE-20W-40/750ML
CapacityofFueltank 2.5L
Valve OHV
Bore/Stroke 73×59mm
Displacement 245CC
Rated Power 5HP@3600rpm
Max.speedatnoload(HighIdlingSpeed) 3750rpm
Lowidlingspeed 1400rpm
Speedatmaximumtorque 2880rpm
Air Cleaner Oilbathtype
Engine Weight 32Kg
TRANSMISSION SPECIFICATION
Weeding - Width 1050mm/42”
Weeding-depth 150-300mm/6”-12”
Gear Shifting 2Forward+1Reverse
Grade of oil SAE80W/90
GearBoxOilcapacity 1.5L
Productivity 0.4-0.6mu/h
Weight with Accessories with Engine 112Kg

6
General chart
1. Resistancerod
2. Gearbox
3. Towbar
4. Dust fender
5. Wheel
6. Walking case
7. Engine
8. Handlebar

7
APPLICABLE SCOPE
OPERATION AND USE
1. Tilling
Canbeusedformountainousarea,hill,paddyeld,orchard,garden,vegetableeld,shedand
so on.
Assemblebladesonbothsideoftillingsystem,andusepintoxedblades,thencandotilling
work.
2.Ditching
Takeoffresistancerod,canassembleditchingblade,andthencandoditchingwork.
1. Assembly
1. Assembling after packing
1.1 Fixedmachine,putwheelsonbothsideofmachines,andusepintoxwheels.
1.2 Handleassembling:Matchgearplateonhandlewithgearplateonhandleseat,andthen
adjuststraightpositionofhandle,andthenuselongbolt,springwasher,andlockedgripto
lockhandle.Thenusecablecliptoholdclutchcable,reversegearcable,andthrottlecable
on handle.
Throttlecable
Emergentstophandle
Flameoutcable
Clutch handle
Clutchcable
Bolt Locked nut
Reversecable Reverse handle
Throttle switch
Drawing 2

8
2.1 Adjustment of clutch cable. (Drawing 2 and Drawing 3)
2.2 Adjustment of reverse cable.
2.3 Adjusting of throttle cable. (Drawing 4)
Throttlecable
Flameoutcable
Clutcharm
Reverse clutch fork
Reversecable
Reversecable
Drawing 3
1. Looselockednut.
2. Deasilturnboltintoshortest.
3. Putcableheadintoclutchcableseatoftransmissionbox,andmakesurethatcableheadis
inthebighole.
4. PutsteelwireintoM8holeofclutcharmseat,pressclutcharmfork,andhangcableheadon
clutchcableseat.
5. TurnoffBolt,andholdittightly.Looseclutchhandleuntilspringinclutchcanreturnhandle,
and then locked nut.
1. Looselockednut.
2. Deasilturnboltintoshortest.
3. Putcableheadintoclutchcableseatoftransmissionbox,andmakesurethatcableheadis
inthebighole.
4. Anticlockwiseturnreverseforkaxle,andputcablethroughnarrowslot,andmakesurehead
intobigholeofseat.
5. TurnoffBolt,andholdittightly.Loosereversehandleuntilspringinclutchcanreturnhandle,
and then locked nut.
1. Turnthrottleswitchintomax.
2. Putsteelwireofthrottlecablethroughwireseatandxedseatwhichisoncontrolpanel.
3. Tight steel wire, locked screw on locked seat
4. Adjustfuelswitchsometime,untilfuelrodoncontrolpanelintomax.

9
Controlpanel
Drawing 7
Drawing 4
2.Operation
1. Check and add oil
1.1 Checkifconnectionsofeverywhereiftheyareloosen,andxeduponthemomentneed.
Name Moment(N.m)
Flange and gasoline engine 20-25
Flangeandtransmissionbox 35-40
Transmissionreverseaxlelockedbolt 26-40
Enginesupportframeandwalkingcaselockedbolt 35-40
Walkingcaseendcoverlockedbolt 10.6-15
Walkingcaseandtowbarlockedbolt 50-60
Transmissionboxandwalkingcaseconnectionbolt 35-40
Towbar 45-60
Enginebottomseatlockedbolt 35-40
Handlebarxedbolt 35-40

10
1.2 Checkifallrod(Oil,clutch,reverse,gearshift)areexible,andadjustthemwell.
1.3 Turngearshiftrodintonatural.
1.4 Addoil
1. AddSAE10W-40intocrankcaseofengine,drawing8.
2. AddNr.20oilintotransmissionbox.Puttillerhorizontal,takeoffoilruler.Andaddoilthrough
transmissionboxllinghole.Andinsertoilrulertocheckoillevel.Ifoillevelisbetweenup
limitandlowlimit,turnoffoilruler.(Drawing5)
3. Add oil to air cleaner.
4. Accordingtoworkingconditionchoosedifferentoil.(Drawing6)
!NOTE:Gearshiftrodmustbeatnaturalplace.
Uplimit
Lowlimit
Drawing 8
2. Start
Startengineaccordingtointroductionofengineoperation.
Engineshouldworkatidlingspeed(1450-1750r/min)fortwoorthreeminutes.
Checkifengineworkright,ifnot,stoptocheck.

11
Drawing 5
Flameoutswitch
Clutch rod
Lockclip
Drawing 6
3. Operate
!NOTE:Tillershouldbebreak-inbeforeusing,accordingtointroductionofSECTIONN
DrawingAStartplaceDrawingBStopplace
3.1Usingofameoutswitch
3.1.1 Start:TurnameoutswitchtotheplaceasdrawingA,anduselockcliptoblockswitch.
AndstartengineaccordingtoSECTIONFOUR/◆3/1.
3.1.2 Work:Whenwork,holdameoutswitch.Turnlockclipback.Andholdonclutchrodcan
changegear.Thenholdonameoutswitch,andreleaseclutchrodcandotillingwork.
3.1.3 Whenmeetemergencysituation,releaseameoutswitch,enginewillstop.
!WARNING:Whentillingorwalking,can’tturnlockclipasDrawingAshow.
3.2 Slow gear
3.2.1 Lefthandholdonclutchrod,andmeanwhilepressdownameoutswitchtodisengage
clutch.
3.2.2 Righthandpullbackshiftgearrod,andthenturntoslowgear.Aftershiftgear,useright
handtoholdhandlegrip.
!NOTE:Whenthisstep,don’tholdreversehandle.

12
3.2.3 Slowlyreleaseclutchrod,thenclutchwillengage,andtillercanworkatslowspeed.
3.2.4 Turnaccelerographtobigger,thentillercanworkonslowgearat5km/h.
3.3 Fast gear
3.3.1 Lefthandholdonclutchrod,andmeanwhilepressdownameoutswitchtodisengage
clutch.
3.3.2 Righthandpullbackshiftgearrod,andthenturntofastgear.Aftershiftgear,useright
handtoholdhandlegrip.
!NOTE:Whenthisstep,don’tholdreversehandle.
3.3.3 Slowlyreleaseclutchrod,thenclutchwillengage,andtillercanworkatslowspeed.
3.3.4 Turnaccelerographtobigger,thentillercanworkonfastgearat10km/h.
3.4 Reverse gear
3.4.1 Lefthandholdonclutchrod,andmeanwhilepressdownameoutswitchtodisengage
clutch.
3.4.2 Righthandpullbackshiftgearrod,andthenturntoneutralgear.Andthenuserighthand
to hold on reverse handle.
3.4.3 Then slowly release clutch rod, then tiller can go reverse.
!NOTE:Don’treleasereversehandle.Andbeforeturntoreversegear,mustturnaccelerographto
smaller(butenginenotstop,thespeedisabout2000r/min).Thiswillbemoresafe.
3.4.4 When no need reverse, left hand hold on clutch, and right handle release reverse handle.
3.5 Whentilleriswalking,don’tshiftgear.Firstturnaccelerographtosmaller,andthenrelease
clutch,untiltillerstopwalking,theshiftgear.
3.6 Turning. Turning handle to left or right can turn tiller.
!NOTE:Whenturning,don’tholdwronghandleorrod,orgearswillbedamaged.
3.7 Stop
3.7.1 Holdclutchrod,andmeanwhileholdameoutswitchtodisengageclutch.
3.7.2 Turn shift gear rod to neutral, loose clutch rod, the Rotary Tiller / Rotary Weeder / Power
Weeder/Cultivatorwillstopworking.
3.7.3 Ifengineneedtobestopped,pleaseseeSECTIONFOUR/3/2.
4. Connection of accessories
4.1Tilling.
Whenneedtilling,disassemblewalkingwheel,andthenputbladesontobothsideofaxle.And
usepinandcliptox.Afterbladesareassembled,mustassembledustfender.Dustfendercan
protect.Tillingdepthcanbeadjustedbydeepresistancerod.
4.2 Ditching
Whenneeddoditchingwork,takeoffdeepresistancerod,adjustditchingbladesheight,and
then can do ditching work.
Ditchingwidth:40cm
Ditchingdepth:11-25cm

13
5. Using notice
!NOTE:
• Whenworkingontiller,takecareifanystrangenoise.Ifstrangenoise,stopenginetocheck.
• Whentilleriscool,don’taddheavyload.Especiallynewmachineandmachinewhichisafter
bigrepaired.
• Takecareoilintransmissionbox,ifnooil,add.
• Notallowedtopurewatertocooldowntiller.
• Whenworkingontiller,don’tlettillerfallingdown.
• Don’tallowedtillerwithbladeswalkingonhardroad.
• Afterusing,cleantiller,willprolongusinglifeoftiller.
• Oftencleanaircleanerelement,andchangeitwhenneed.
3 Attentions of Operating Engine:
1. BREAK-INOFNEWENGINE :
Ifyourenginehasnotbreakinginyet,improperusagewillshortenthelifeofengine.theinitial
20hrsisthebreak-in-period.Theoperatormustobeythefollowingitems:
2. RUNNING IN FOR 5 MINS AFTER FIRST START.
Runningwithlowspeedandlowloadbeforetheenginegetshot.Avoidrunningwithhighspeed
andfullload,orlowspeedandnoload.
3. AVOID RUNNING WITH OVER LOAD.
Duringbreak-inperiod,theenginecan'trunwithfullload,butcanrunwith3000rpmand50%
load.
4. CHANGE ENGINE OIL REGULARLY.
Afterworkingfor20hrs,changetheoilwhenengineisstillwarm,otherwiseitwillbedifcultto
drain the residual oil in the engine.
IX.OilBathTypeAirFilter:
1. Checktheoillevelbeforeoperating.
2. Filloiluptoupperlimit.Ifoilisdirty,changeit.Pleaseusedieseltocleanoilbathelement
frequently,thendiptheelementintheoilandsqueezeoutextra.
Running
WARNING
• Besuretooperatetheengineinagoodventilatedplaceinordertoavoidexhaustpoisoning.
• Avoidlettinghands,body&clothesentangleinoutputshaft,beltpulley,V-typebeltpulley
andothermovingparts,soastopreventfromgettinginjured.
• Stoptheenginerstandthenmaintainthemovablepartsandotherpartsaroundit.Make
suretherearenotoolsandsundriesinthebodyoftheenginebeforeoperating.

14
Runenginefor5minstowarmup
NOTICE
• Themuferbecomesveryhotduringandimmediatelyafteroperation.Don'ttouchit.
• Theairlterwillinhaletheairarounditselfwhentheengineworks.Don'tletthehands,
bodyandclothesapproachtheairltertoavoidinjury.
Aftertheenginebecomeswarm,putthespeedleveronnecessarypositiontoruntheengine.
NOTICE
• Besuretousethespeedlevertoadjustthespeedofengine.
• Donotloosethespeedlimitscrewandfuelcontrolscrew;otherwisethespeedandoutputof
enginewillbeabnormal.
Running
a. Iftheenginegivesoutblacksmokecontinuously,itisbecausetheengineisoverloaded.The
beltpulleyoftheengineorthatofthepoweredequipmentmustbeadjusted.
b. Payattentiontothefollowingpointswhentheengineisrunning:
i.Whetherthereisabnormalsoundandvibration?
ii.Whethertheexhaustisnormal?
iii.Whethertheenginegivesoutwhiteorblacksmokecontinuously?
Ifanyoftheabovephenomenaisdetected,stoptheengineimmediatelyandcontactthenearby
dealer.
X. Methods of Starting the Agricultural Mini-tiller
a. StartingbyHand:
• Openfuelswitch.
• Putenginespeedleverinthestartposition
• LockAuto-cutoffswitch.
• Holdrecoilstarterhandle.
• Pullthestartinghandleslowlyuntilyoufeelresistance,thenreleaseitslowly.
• Pushthedecompressionleverdownbyhandtonocompressionposition.Itwillgetback
automaticallybyitselfaftertheenginegetsstarted.
• Starting:holdthestartinghandlewithtwohands,pulltheropelightlyuntilyoufeelthe
resistance,thenpulltheropefastwithstrength.
• Ifitisnoteasytostarttheenginewhentheweathergetscold.Youcouldtakedownthe
refuelscrewonthecylindercoverandllin2mloilbeforestarting.
Notice
Tightentherefuelscrewonthecylindercoverexceptllingoilinordertoavoidrainanddustto
getintheengineandwearingordamageoftheengine.

15
XI. Safety Instructions:
Do's...
• Dovisualcheckbeforestarting,everytime
• KeepAgriculturalMini-tillerClean
• DouserecommendedFuelandLubricantsOnly
• DoCheckFuelLevel
• DoCheckAirIntakeFilteroillevel
• DoCheckEngineOilandGearOillevels
• DoCheckforanyleakage
• DoCheckDecompressKnobbeforestarting
• DoCheckGearinNeutralpositionbeforestarting
• DouserecommendedattachmentsOnly
• Domaintaindistance(1ft)frombuildingsandotherequipmentswhenoperating,toavoidany
accidents
• Keepawayfromammablematerials
• Keepawayfromchildrenandpetstoavoidanyinjuriesoraccidents.
• Onlyoperatorwithknowledgeofmachineanditsoperationsmustbepermittedtooperate
Agricultrual Mini-tiller
• Muststopenginebeforerefueling,andrefuelingoodventilationplace
• MustcleanandspilledoroverownfueloftheAgricultrualMini-tiller
• LetAgriculturalMini-tillercooldownbeforestoringindoors.
Don't's...
• Don'toverowthefuel,butalsoneverletfueltankrunoutempty
• Don'tuseadulteratedfuel
• Don'tsmokeorallowameorsparkwhereAgriculturalMini-tillerisrefueledorwherefuelis
stored
• Don'tinhaleexhaustforitcancontainpoisonouscarbonmonoxide
• Don'trunAgriculturalMini-tillerwithoutadequateventilation
• Don'tlean/tiltDieselHalmorethan20°,otherwisefuelmayspill
• Don'tcoverAgriculturalMini-tillertopsoastoavoidre
• Don'ttouchmufer/exhaust,asitgetshotwhenoperatingandstayshotforsometimeafter
stopping
• Don'tdelayonserviceschedules
• Don'tOperateDieselHalcontinuouslymorethan2hrs.30minsforanygivenoperation(Give
breakof20mins)

16
• Don'tmakeanyalterationsinDesign,OperationsandFunctioningofFunctioningofAgricultural
Mini-tillerotherthanCompany'srecommendation.
1.3Slightlyturnoilcontrolrodtoright.
(1)Oilcontrolrod.
1.4Turnameoutswitchtotheplaceasdrawingshow,anduselockedcliptoxameoutswitch.
1.5Slightlypullrecoilstartergripuntilfeelresistance,andthenputitfast.

17
!NOTE:Don’tsuddenlyreleasestartergripletitbounceback,itmaybrokenengine.Needslowly
putthegripback.
1.6Afterpreheatingtheengine,graduallymovechoketoOPENposition.
1CHOKELEVER
1.7Adjustrotaryspeedofenginethroughthethrottleswitch(orthrottlehandle)
2. Stop engine
Inurgentsituation,turnoffengineswitch(ameoutswitch)tostop.
Usuallystopengineasfollowingway:
2.1Turnthrottleswitchtosmallest(orturnchokelevertomostright).
2.2Turnameoutswitchtothepositionasdrawingshow.
2.3 Turn fuel valve to OFF.
(1)Fuelvalve
(2)OFF

18
MAINTENANCE
1. Maintenance of engine
Doperiodicmaintenance tokeeptilleringoodworkingcondition. Pleasefollowthe schedule
below.
!WARNING:Stopenginebeforedoinganymaintenance.Iftheenginemustrun,keeptheplace
wellaeration.TheexhaustcontainsCO.
!NOTICE:Useoriginalsparepartsorotherqualiedsubstitute.Useunqualiedsparepartsmay
damageengine.
MAINTENANCE SCHEDULE
PERIOD
ITEM
Everyday
The1st
monthor
20hrs
Every 3
monthsor
50hrs
Every 6
monthsor
100hrs
Every year or
300hrs
Oil
Check
amount O
Replace O O
Air cleaner
element
Check O
Clean O(1)
Fuel strainer
cup Clean O
Sparkplug
Clean
Readjust
clearance
O
Valve
clearance
Check
Adjust O
Gearbox
oil
Check
amount O
Oilbox
drainer Clean O(2)
Clutchcable adjust O O
Oil throttle adjust O
Tension
pulley adjust O O
Fuelpipe adjust Everytwoyear(2)(Itisnecessarytoreplace)

19
! NOTICE:
(1)Checkmorefrequentlywhentillerworksinheavydustcircumstance.
(2)Ifusersneitherhavespecialtoolsnorknowmechanicalknowledgewell,thesemaintenance
shouldbedonebydealers.
1. Change oil
Drainoutoilwhenengineiswarm.
Screwdowndrainboltandloosenoilllercap.Rellwithrecommendedoilandcheckoillevel.
(Drawing7)
OILCAPACITY:0.6L
Drain Bolt OilFillerCap
Drawing 7
2. Air cleaner maintenance
Adirtyaircleanerwillrestrictairowingintothecarburetor.Checkthecarburetorregularlyto
preventcarburetormalfunction.Checkandcleanitmoreofteniftillerworksinheavydirtarea.
WARNINGNeverusegasolineorlowashpointsolventtocleanaircleanerelement.Oritmay
burntorexplode.
!NOTICE:Neverrunenginewithoutaircleaner.Impuritywilldirectlycomeintoengineandspeed
upwearing..
1. Takeoffbutterynutandplate,andthentakeoutelement.
2. Washelementinwarmsudsorhighashpointsolvent.Thennaturallyair-dryit.Dipitwith
farthingoil,andsqueezeittomakeitequablywettish.Enginemayexhaustheavysmokeifit
isdippedwithtoomuchoil.
3. Pourtheoilinbox,cleanthebox,andletitdry.
4. Addrecommendoilintobox.
5. Putbackaircleanerelementandplate.

20
2. Maintenance of tiller
Keeping the tiller in good condition will prolong the tiller's life, and help it Arrive optimum
performancewheneveryouwishtotillyougarden.
Tohelpyouproperlycarefortherototiller,thefollowingpagesincludeamaintenanceschedule,
routineinspectionprocedures,andsimplemaintenanceproceduresusingbasichandtools.Other
servicetasksthataremoredifcult,orrequirespecialtools,arebesthandledbyprofessionals
andarenormallyperformedbyaqualiedmechanic.
1. Brake-in
Newmachine,ormachineafterbigserviceneedrstworkwithoutloadforonehour.Andthen
workunderlowloadfor5hour.Anddrainoutoil,andaddcleanoil.Nextaddfreshgasolineto
clean.Andthenaddcleanoil,andthenbrake-infourhours.Thenmachinecanwrokrightly.
2. Maintenance
2.1. Goodmaintenanceisyourresponsibility.Poormaintenancemeanstroubles.
Followgoodshoppractices
Keepserviceareacleananddry
Besureelectricaloutletsandtoolsareproperlygrounded.
Useadequatelightforthejobathand.
2.2. Makesuretheengineisoffbeforeyoubeginanymaintenanceorrepairs.Thiswilleliminate
severalpotentialhazards:
Carbonmonoxidepoisoningfromengineexhaust.
Besurethereisadequateventilationwheneveryouoperatetheengine
Neveroperatetheengineinaclosedbuilding.
Lettheengineandexhaustsystemcoolbeforetouching
Do not run the engine unless instructed to do so.
2.3. Readtheinstructionsbeforeyoubegin,andmakesureyouhavetiletoolsandskillsrequired
2.4. Toreducethepossibilityofreorexplosion,becarefulwhenworkingaroundgasolineUse
onlyanonammablesolvent,notgasoline,tocleanparts.Keepsparksandamesawayfrom
allfuel-relatedparts.
2.5. Frequentlychecktillertines.Theyshouldbefreeofnicksandcracksandsecurelyfastened
inplace
2.6. Periodicallylightenallbolts,nuts,screw,andcheckthatallpillsateproperlyinstalledto
makecertainunitissafetooperate.
2.7. Wherereplacementpartsarenecessaryforperiodicmaintenanceandservicing,useonly
new,originalreplacementpartsortheirequivalentsforrepairandreplacementtorestore
yourequipmenttooriginalspecications.
2.8. Themanufacturerand/ordistributorwillnotberesponsibleforinjuriesordamagescaused
byuseofunapprovedpartsand/oraccessories.
2.9. A rst aid kit should be kept readily accessible while performing maintenance on this
equipment.
Table of contents
Other Agrimate Farm Equipment manuals

Agrimate
Agrimate AM-RTP-7P-CHAMPION-ELITE User manual

Agrimate
Agrimate AM-RT-212-7P-MAX User manual

Agrimate
Agrimate AM-MPTC-6500-6D User manual

Agrimate
Agrimate AM-RT-212-7P User manual

Agrimate
Agrimate AM-MT-320M-WT User manual

Agrimate
Agrimate AM-GR-4G-120GE User manual

Agrimate
Agrimate AM-RTD-5D-CHAMPION NEW User manual
Popular Farm Equipment manuals by other brands

SIP
SIP DISC 300 T RC Instruction for work

Powerfix Profi
Powerfix Profi PMT 1.1 A1 translation of original operation manual

J&M
J&M SpeedTender 500ST Operator's manual

EASY COOPS
EASY COOPS Chicken Coop Plan 20x40 Assembly instructions

Walker
Walker A10 Operator's manual

Yetter
Yetter TITAN Series Operator's manual