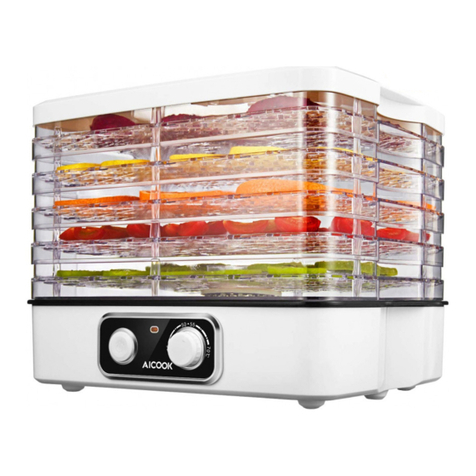
Aicok GGJ-320A User manual

Page 1of 8
Dehydrator
Model: GGJ-320A
AC220—240V/50Hz / 240W
Prior to use of this product, please read this operating manual carefully!
This product is only limited to use at home or similar places.

Page 2of 8
.Contents
Preface ………………………........................................ 1
Chapter 1 Safety Precautions ………………………… ...................................... 2
Chapter 2 Technical Information ………………………… ................ 2
Chapter 3 Parts and Their Names ………………………….................... 3
Chapter4 Operations of Products and Notes for Attention....................... ..... 3.4
Chapter 5 Method for Treatment before Drying of Food…… . ..... ............... 4.5
Chapter 6 Cleaning and Maintenance............................................. ...... .......... 6
Chapter 7 Trouble-shooting............................................................................... 6
Chapter 8 Packing List ............................................................ ..... ..... ..... ..... 6
Chapter I Safety Precautions
1. Check if the voltage specified for the product is consistent with that for power source.
2. This product is only for family use, and we assume no liability for any commercial use,
improper use and any fault as a result of using it not following this operating manual. Such
fault is not within the warranty scope.
3. A grounded socket shall be used, and the plug shall be properly inserted, or there may be
the possibility of poor contact and resulting in a fire. Do not use it in a multi-purpose socket
with other appliances simultaneously.
4. Be sure to hold the plug and pull it out, and do not pull or twist the power cable with force.
If the power cable is damaged, use a special-purpose power cable to replace it or discard it
directly.
5. This product is for long-time work, do not put it in a place within reach of children.
6. Do not put the product on an unstable, humid and not heat-resistant surface, and prevent it
from being damaged or resulting in a fault.
7. This product is an air-circulation heating product, and any foreign matter shall be
prohibited being put at the bottom of the product when the product is working for that may
block the air inlet, or the product may be damaged directly or any danger may occur.
8. Do not move the product when it is at work. The heat radiating hole at the upper cover
shall be prohibited when the product is at work to avoid any danger.
9. Do not put the product over the fire or nearby the heat or ignition source directly,
otherwise the product may be damaged or in fault, or even a fire or any other danger may
occur.
10. Do not clean the product in the water, instead, wipe it only with wet cloth. Before cleaning,
make sure to cool it to room temperature.
11. When the product is not used, do not leave the plug in the socket on a long-term basis. The
plug shall be taken off under the following circumstances: Any fault occurs after it is used,
before cleaning each time and when it is being overhauled.
12. When the product is on fire partially, do not put down the fire with water directly, instead,
use a fire extinguisher or cover the part on fire with a wet towel to put it down.
13. If the power cable is damaged, to avoid any danger, it shall be changed by a professional

Page 3of 8
assigned by the manufacturer or the maintenance department designated by it, or it can be
discarded directly.
Do not use this product under the following circumstances!!!
1. When the product or the power cable is damaged;
2. The product is damaged or does not work normally after it falls off accidentally.
In the event that any of the above circumstances occurs, send the product to the after-sales
service center of our company for handling. Be sure to use various accessories of the original
manufacturer.
Chapter II Technical information
Supply voltage, V………………………………………………………………………220V--240V
Grid frequency, Hz………………………………………………………………………50/60
Standard consumption power, W………………………………………………………210W—260W
Protection level for shock current…………………………………………………………Ⅱ
Working condition………………………………………………………………………Continuous
Air temperature over each tray……………………………………………………………±10
Drying efficiency, %, ≥…………………………………………………………………………80
Packing weight, kg, ≤…………………………………………………………………………3.5
Chapter III Parts and Their Names
Upper cover
Drying hopper
(The product is subject to actual object)
Main unit
Power button
Temperature adjustment knob
Power indicator

Page 4of 8
Chapter IV Operations of Products and Notes for Attention
I. Operation
1. Prior to first use of the dehydrator (electric dryer), clean the hopper, and wipe it off with dry cloth.
2. Put the pre-treated food on each layer of the hopper evenly, put the hopper with the food on the bottom
seat of the product, and put on the upper cover.
3.Plug the power cord into the socket, turn on the power and press the power button, and turn the
temperature adjustment knob to desired temperature.
4. Dry the food according to different food and personal taste.
5. After drying of the food is completed, adjust temperature to the minimum, turn off the power switch and
pull off the plug.
6. After the work is done, clean the hopper and juice accumulation plate and so on.
II. Notes for Attention
1. The long time for each use shall not exceed 72 hours to avoid affecting service life of the whole
machine.
2. After each use, adjust the temperature knob to the minimum, turn off the power switch and pull out the
plug.
3. When the product is connected to the power and in normal use, the red indicator of the switch and the
fan shall be in their working state, namely, the red indicator shall be on and there shall be evident air
blowing from the air outlet on the steam cover.
4. No water or any other liquid can be added into this product, and a few water drops on the food inside
the container are allowable.
5. While the food is being dried, keep hot air inside the machine circulating naturally. Do on put any
over-heavy food in the hopper, and food cannot be placed in an overlaying way. The drying time for
different food is different (Note: when the machine starts working, ensure the upper cover is in its correct
position. If the time for drying the food is not enough within a day, the food can be dried on the next day.
In this case, seal up the food that has not been dried in a container or a plastic bag).
6. The temperature on the baking bucket is the highest when the product is running, in order to make food
drying more uniform; steam stent position should be regularly exchanged.
7. After the food is dried, if it is not eaten, it shall be sealed up in a container or a plastic bag promptly for
storage, and it is recommended being stored in a refrigerator.
8. After the product is used, no matter there's any food in the hopper or not, it is suggested that all the
shelves be placed on the product after they are stacked properly.
9. The food shall be placed on the uppermost layer of the hopper to the ones downwards. After the food is
placed properly, put on the cover properly, otherwise, drying time and the flavor of dried food will be
affected.
10. Pre-treat the food before drying, such as clean, cut it into slices or dices and soak it. Pretreatment
of the food helps for the color of the food after drying and maintaining of its taste.

Page 5of 8
Chapter V Method for Treatment before Drying of Food
(Note: the following methods are only for reference)
A. Pre-treatment for fruits
1. Add 2 cups of water for 1/4 cup of fruit juice, soak the food to be dried in it for about 2
minutes. (Note, match fruit juice with food, such as apple juice for drying apple).
2. Food treatment table
Name of
food
Preparation
Criterion for
drying
Time/hour (approx.)
Apple
Stone, cut into pieces or peel
Pliable and
tough
5-6
Artichoke
Cut into strips of 1/8 inch
Crumbly
5-13
Almond
Cut into halves or pieces, stone
Pliable and
tough
12-38
Banana
Peel and cut into pieces of
3-4mm
Crispy
8-38
Cherry
Stone or not
Tough
8-34, stoned after
semi-dried
Huckleberry
Split or use the whole
Pliable and
tough
6-26
Date
Stone and cut into pieces (or use
the whole)
Tough
6-72
Fig
Cut into pieces
Tough
6-26
Grape
Use the whole
Pliable and
tough
8-72
Nectarine
Cut into valves with peel and
dry naturally, or semi-dried and
stoned
Pliable and
tough
8-26
Orange peel
Long-bar shape
Crumbly
8-16
Peach
Semi-dried and stoned, half or
1/4
Pliable and
tough
10-34
Pear
Peel and cut into pieces
Pliable and
tough
8-30
B. Pre-treatment of vegetable:
1. Treat with steam, boiled water or oil, recommended for green beans, cauliflower, broccoli,
asparagus and potato.
2. Put the prepared vegetable into the boiled water for 3-5 minutes, drain it and put it into the
hopper.
3. Put the vegetable into lemon juice and soak for about 2 minutes.
Name of food
Preparation
Criterion for
Time/hour

Page 6of 8
drying
Artichoke
Cut into strips of 1/3 inch and cook for
about 10 minutes
Crumbly
6-14
Asparagus
Cut into pieces of 1 inch
Crumbly
6-14
Beans
Cut open and steam to semi-transparent
Crumbly
8-26
Beet
Steam, cool, de-head and de-root
Crumbly
8-26
Brussels leaf
Pick leaves from stem
Crumbly
8-30
Broccoli
Cut open and steam soft for about 3-5
minutes
Crumbly
6-20
Cabbage
Open and cut into strips of 1/8 inch
Tough
6-14
Carrot
Steam soft and cut into thin strips or cut
into pieces
Ready-to-eat
6-12
Cauliflower
Steam soft ad cut open
Tough
6-16
Celery
Cut into pieces of 1/4 inch
Crumbly
6-14
Chinese chives
Cut open
Crumbly
6-10
Cucumber
Peel and cut into pieces of 1/2 inch
Tough
6-18
Eggplant
Cut into pieces of 1/4 inch, with
thickness of 1/3 inch
Crumbly
6-18
Garlic
Peel and cut into pieces
Crumbly
6-16
Pepper
Use the whole
Crumbly
8-14
Mushroom
Cut into pieces or use the whole
Tough
6-14
Onion
Cut into pieces
Crumbly
8-14
Pea
Steam for 3-5 minutes
Crumbly
8-14
Chili
De-seed and cut into strips or circles of
1/4 inch
Crumbly
4-14
Potato
Cut into slices or dices and steam for
8-10 minutes
Crumbly
6-18
Rhubarb
Peel and cut into pieces of 1/8 inch long
Non-water
8-38
Spinach
Steam to withered
Crumbly
6-16
Tomato
Peel, cut into halves or pieces
Tough
8-24
Pumpkin
Cut into piece of 1/4 inch
Crumbly
6-18
C. Pre-treatment for meat and fish
1. Lean meat (without fat): It is suggested that it be salted to keep its natural flavor and make it
tender. There shall be salt in the meat to help exhaust its moisture and keep it fresh.
Salting standard:
1/2 cup of bean sauce, 1 garlic, and mash it; 2 soup spoons of brown sugar, 2 soup spoons of
tomato sauce, 1/2 cup of Worcestershire sauce, 1 and 1/4 teaspoons of salt, 1/2 teaspoon of onion
powder, 1/2 teaspoon of pepper powder, and mix all the above seasonings. Cut meat into small
cubes and put them into the machine. Drying time is about 2-8 hours till all the moisture
evaporates.
2. Poultry meat:

Page 7of 8
All poultry meat shall be cooked beforehand prior to drying, and steam or baking is the
best way. Drying time is about 2-8 hours till all the moisture evaporates.
3. Fish:
It is recommended to steam or bake before drying (bake in the oven for 20 minutes at
200°C). Drying time is about 2-8 hours till all the moisture evaporates.
D. Vanilla and so on
Rinse with water and spin dry excessive moisture and remove stale leaves. Spread the
vanilla in the hopper in a loose way. Drying time is determined by different size and kind,
and it is about 2-6 hours.
E. Bread and so on
Cut it into small slices without crust. Spread them in the hopper in a loose way. Drying
time is about 30 minutes -2 hours.
F. Nut:
Stone and rinse with warm water. Spread them on the hopper in a loose way. The nuts can
only be stored after they are cooled. There's oil content inside the nuts may produce some
rotting smell, so they shall be kept fresh in the refrigerator. When they are needed, take them
out and put in normal room temperature. Drying time is about 18-26 hours.
Chapter VI Cleaning and Maintenance
1. Prior to cleaning, cut off the power source for the electric dryer.
2. After the food is dried, clean the shelves with warm water with aid of soft cotton cloth, and
clean them with detergent for cleaning utensil, and wipe them off.
3. Do not clean the electric dryer with water current, or clean the bottom seat in the water. Clean
the surface of the dirty bottom seat with wet cloth.
4. Do not use detergent made of grinding material, metal brush or organic solvent.
5. Put the cleaned product in a cool and ventilated environment.
Chapter VII Trouble-shooting
Symptom
Cause
Solution
The product does
not work
1. The power plug is not inserted or it is
inserted loosely.
Insert it properly
2.The power socket is damaged
Change the power socket
3. The power cable is damaged
Send to designated department or professional
maintenance personnel for replacement
The product works
and the light is not
on
The power indicator is damaged
Send to designated department or professional
maintenance personnel for replacement
The product works
and there's no hot air
1.Temperature is set to low, and room
temperature exceeds the set temperature
Set temperature again
2.The fuse is burned
Send to designated department or professional
maintenance personnel for replacement or
scrapping

Page 8of 8
3.The heating wire is burned
Send to designated department or professional
maintenance personnel for replacement or
scrapping
Chapter VIII Packing List
Main
unit
Hopper
Upper
cover
Operating
manual
Warranty
card
1
5
1
1
1
Other manuals for GGJ-320A
1
Table of contents
Other Aicok Kitchen Appliance manuals