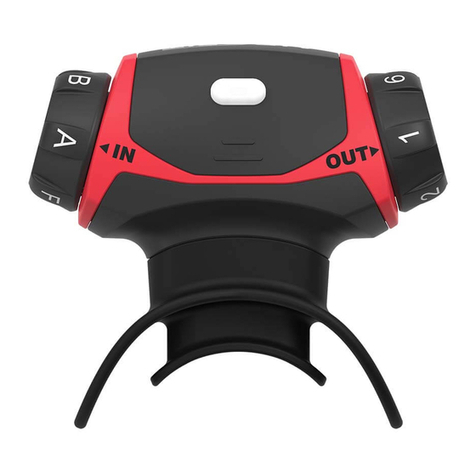
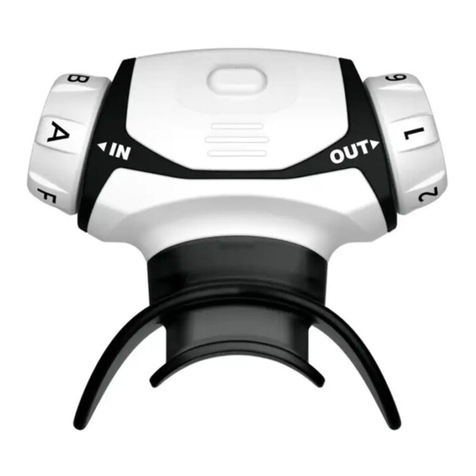
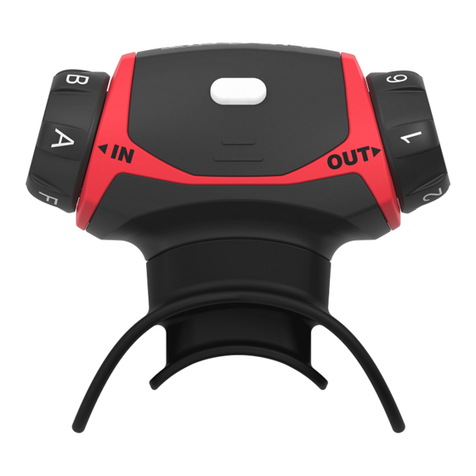
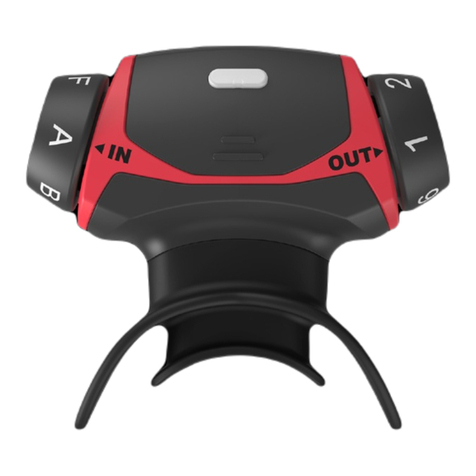
Airofit PRO User manual

QUICK GUIDE
V 4.0

1
CONTENTS
Welcome to Airot
What is Included
The Benets
Product Description
Intended Use and Users
Manufacturer’s Liability
Safety and Precautions
When Not to Use Airot
Handling
Get to Know the Airot PRO Breathing Trainer
•Power Button
•The Mouthpiece
•Resistance Wheels
•Removable E-Unit
•Charging
Care and Maintenance
Getting Started
Technical Specications
Troubleshooting
FAQ
Directives and Approvals
Airot Limited Warranty
02
02
03
04
05
06
06
08
09
10
10
12
12
13
14
16
22
23
24
26
27
|

2
Airot is a training solution designed to help you strengthen and improve
your respiratory system, using the latest technology.
Whether you are competing in demanding sports, or simply want to
improve your general wellbeing, breathing training is benecial for all.
You will be able to train harder, recover faster, and feel better.
The system consists of:
•Airofit PRO Breathing Trainer
•Airofit PRO mobile application
WELCOME TO THE AIROFIT FAMILY
WHAT IS INCLUDED
Your Airot PRO package consists of:
•Airofit PRO Breathing Trainer
•Extra mouthpiece
•CE-approved charging cable
•Airofit PRO Quick Guide
|
|

3
Respiratory Strength
Enhanced respiratory power increases the amount
of oxygen inhaled in a given period, decreasing energy
consumption and respiratory muscle fatigue.
Vital Capacity
Increased accessible lung volume by training
the exibility of the diaphragm means larger amounts
of oxygen in one inhale.
Anaerobic Threshold
Boosted resistance towards lactate ensures prolonged
ability to perform at high intensities for longer periods.
Here are the main areas within which Airot improves your performance
and wellbeing!
THE BENEFITS|

4
Power button
Removable E-unit
Inspiratory Resistance Wheel
Expiratory Resistance Wheel
A
A
B
B
C
C
D
D
F
F
E
E
G
G
PRODUCT DESCRIPTION
Trainer Unit
Removable Mouthpiece (Advanced)
Removable Mouthpiece (Simple)
|

5
INTENDED USE AND USERS
The Airot PRO Breathing Trainer is intended to train the muscles
of the respiratory system. You must familiarize yourself with the user
manual before using the Airot PRO Breathing Trainer. Pay special
attention to warning notices and safety instructions.
Sit down during breathing training as it may cause dizziness.
Remember to look straight ahead while training. Airot should only
be used separately from physical activity. Breathing training during
physical exercise will compromise the oxygenation of the locomotor
muscles.
The intended users are:
•The personal user of the Airofit PRO Breathing Trainer and Airofit
PRO mobile application
•Personnel instructing the user of the Airofit PRO Breathing
Trainer
|

6
MANUFACTURER’S LIABILITY
Airot A/S is only liable for equipment safety, reliability, and performance,
provided that the Airot PRO Breathing Trainer is used in compliance with
these instructions for use.
SAFETY AND PRECAUTIONS
Only use the supplied micro USB cable or another CE certied USB cable,
together with a CE certied USB charger.
(See Technical Specications - Page 21)
Only use the Airot PRO Breathing Trainer together with the Airot PRO
mobile application and the selected sessions and programs. Always set
resistance to the recommended settings.
To prevent the potential transmission of infections, we recommend that
you do not share your Airot PRO Breathing Trainer with other users,
including family members.
Continued on next page |
|
|

7
The Airot PRO Breathing Trainer is not provided sterile – we recommend
that you clean the device before use.
Do not clean the E-Unit with liquids of any kind.
(Follow the cleaning instructions - Page 14 & 15)
Never use scouring pads, abrasive cleaning agents, or aggressive liquids
such as petrol or acetone to clean the appliance. The Airot PRO Breathing
Trainer is not suitable for dishwasher or autoclave use.
Do not use Airot PRO Breathing Trainer simultaneously with other
physical activities (eg. running, cycling, rowing, driving).
Respiratory training can cause dizziness. We recommend that you remain
seated after training, and breathe normally for a minimum of 1-2 minutes
before moving on to other activities.
If you have more than one Airot PRO Breathing Trainer, do not swap the
E-Units. Each E-Unit is calibrated specically to the device, and swapping
them will cause inconsistencies in measurement results.

8
WHEN NOT TO USE AIROFIT
• If you have a history of spontaneous pneumothorax (a collapsed lung
that was not due to traumatic injury e.g. broken rib).
• If you have a collapsed lung due to a traumatic injury that has not
healed fully.
• If you have a burst eardrum that has not healed fully or any other
condition of the eardrum.
•
If you suer from severe exacerbations due to asthma, we
recommend that you consult your doctor before using Airot.
•
If you have any medical conditions with your respiratory system,
heart, or blood pressure, we recommend that you consult your
doctor before using Airot.
•
If you feel any concerning pain during the training sessions, stop
training immediately.
•
If you are under the age of 15, you should only use Airot with
supervision from an adult.
|

9
HANDLING
Airot System Description
The Airot PRO system consists of the Airot PRO Breathing Trainer
and the Airot PRO mobile application. Together with the sensors in the
device, the mobile application will provide you with training information
and your development over time.
Major functionality consists of the Airot PRO Breathing Trainer providing
resistance to your inspiratory and expiratory breathing. The Airot PRO
application provides guidance to respiratory training and monitors your
performance.
Handling Your Breathing Trainer Correctly
You should be relaxed and sitting upright. Hold the device with your hand
on the E-Unit. Make sure that the openings near the resistance wheels are
not covered.
Place the device in your mouth so that your lips cover the outer shield of
the mouthpiece to make a seal. If you are using the advanced mouthpiece,
the bite blocks should be gripped between your teeth.Look straight
forward, as looking down can cause more salivation.
You should not hold the Airot PRO Breathing Trainer with your hands
during training, unless necessary.
|

10
Power Button
To turn ON the Airot PRO Breathing
Trainer, click the button. It will begin to
blink green to indicate that the device
is ON - at this point, it is ready to be
paired with the mobile application.
To turn the device OFF, press and hold
the same button down for 3 seconds.
The Mouthpiece
The mouthpiece is softer than the rest
of the Airot PRO Breathing Trainer,
to ensure complete comfort during
exercise.
To use it, gently bend the sides of the
mouthpiece and put it in your mouth.
AIROFIT PRO BREATHING TRAINER
|

11
Inspiratory Resistance Wheel
The wheel with the letters allows you
to set your Inspiratory Resistance. The
letter F being the highest, and A being
the lowest resistance.
Remember to adjust according to
recommendations in each training
session.
Expiratory Resistance Wheel
The wheel with the numbers allows
you to set your Expiratory Resistance.
The number 6 being the highest, and
1 being the lowest resistance.
Remember to adjust according to
recommendations in each training
session.

12
Removable E-Unit
This part contains all electronics.
To clean or charge your Airot PRO
Breathing Trainer, gently squeeze the
grips and remove the E-Unit from the
rest of the body.
Do not expose the E-Unit to any
liquids.
Trainer Unit
The term ‘Trainer Unit’ is used for your
Airot PRO Breathing Trainer once the
E-Unit and mouthpiece are removed.
AIROFIT PRO BREATHING TRAINER|

13
Charging
You will nd the charging port on the
inside of the E-Unit. Insert your Micro
USB cable to charge. If the button is
blinking green, you have inserted your
cable correctly and your E-Unit
is charging.
Once fully charged, the button will
stop blinking and remain green.

14
CARE AND MAINTENANCE
Please follow the guidelines below to ensure that your Breathing Trainer
remains hygienic and in good working order. Always make sure that your
device is dry before storing it. We advise you to always store your Airot PRO
Breathing Trainer in a suitable, clean, and hygienic way.
Fully charge your device if you are storing it for more than a week without
use to avoid the battery depleting. Remember to charge the Airot PRO
Breathing Trainer fully before resuming usage.
(Youtube: Airot PRO - Care and Maintenance)
Daily Maintenance
As the device will be exposed to saliva during use, it is important to clean it
frequently. We recommend cleaning your device after each training session.
Always remove the E-Unit and wipe it with a dry clean cloth.
We recommend washing the Trainer Unit (Page 13) and the Mouthpiece
(Page 11) in warm water (below 60°C). After washing, shake o and blow
through the device to remove excess water, making sure it’s completely
dry before reassembling. Airot must not be washed in an autoclave or a
dishwasher.
|
Continued on next page |

15
Weekly Maintenance
Once a week, remove both the E-Unit and the Mouthpiece from the Airot
PRO Breathing Trainer to be able to clean it better. Use a drop of dish
soap in water to wash your Trainer Unit thoroughly. Once washed, hold
the Trainer Unit under running water, allowing it to run through. Shake o
excess water, blow through the device, and dry with a clean towel. Let it air
dry and make sure the device is completely dry before reassembling.
Monthly Maintenance
Please remember to charge your Airot PRO Breathing Trainer fully at least
once a month even when not in use, to avoid the battery getting depleted.
Do not clean the E-Unit with liquids of any kind.

16
GETTING STARTED
Start by charging your Airot PRO Breathing Trainer for 8 hours
(Charging - Page 14) When you have installed the Airot PRO mobile
application on your smartphone and your Airot PRO Breathing Trainer is
fully charged, you can start your registration.
Register
Before you can use the Airot PRO
application, you need to create
your Airot account.
Fill in your information
Your stats are important to give
you the best possible feedback on
your respiratory system.
|

17
Next, you must select your training goal. Choose the option that best suits
you. In the next step, you indicate how often do you work out (on average).
The terms
To nalize your registration, you
must accept the terms of service
and privacy policy.
Connect your device
Turn on your device and push
Connect Device Remember to turn
on Bluetooth on your phone.

18
Select “TAKE TEST”.
You might need to turn your
device on and reconnect.
Make sure that you set the
resistance wheels according to
the values shown in the app.
This applies every time you
take a lung test or train.
Select “START” to take your
lung test.
GETTING STARTED
Before you start training, you are required to take a lung test.
This measures your current inspiratory and expiratory strength and vital
lung capacity to use it as the baseline and personalize your training load.
|

19
After taking the lung test, you are presented with your results.
These levels and numbers will be the starting point to measure and give
feedback on your future training sessions.
Here you can see your Vital
Lung Capacity. The colored
line indicates your results
compared to individuals of
similar age, height, weight, etc.
Inhale Strength and Exhale
Strength shows your
maximum inspiratory and
expiratory pressure. They
are measured in centimeters
of water (a standard unit of
pressure).
Again, you can see your results
compared to individuals of
similar age, height, weight, etc.
Other manuals for PRO
2
Table of contents
Other Airofit Fitness Equipment manuals