Aiwa CA-DW235 User manual

8Z-CT9-905-I 1[m ai!!r
990220 BTT-I-FM DIGITAL AUDIO

WARNING
TO REDUCE THE RISK OF FIRE OR
ELECTRIC SHOCK, DO NOT EXPOSE
APPLIANCE TO RAIN OR MOISTURE. THIS
“CAUTION: TO REDUCE THE RISK OF
ELECTRIC SHOCK,
DO NOT REMOVE COVER (OR BACK).
NO USER-SERVICEABLE PARTS INSIDE
REFER SERVICING TO QUALIFIED
SERVICE PERSONNEL.”
Explanation of Graphical Symbols:
AThe lightning flash with arrowhead symbol, within
an equilateral triangle, isintended to alert the user
to the presence of uninsulated “dangerous volt-
age” within the product’s enclosure that may be of
sufficient magnitude to constitute arisk of electric
shock to persons.
AThe exclamation point within an equilateral trian-
gle is intended to alert the user to the presence of
important operating and maintenance (servicing)
instructions in the literature accompanying the
●appliance.
OWNER’S RECORD
For your convenience, record the model number (you will find it at the
bottom of the unit) and serial number (you will find it in the battery
compartment) in the space provided below. Please refer to them when
you contact your AIWA dealer in case of difficulty.
Precautions
Read the Operating Instructions carefully and completely
before operating the unit. Be sure to keep the Operating
Instructions for future reference. All warnings and cautions in
the Operating instructions and on the unit should be strictly
followed, as well as the safety suggestions below.
Installation
1
2
3
4
Water and moisture -Do not use this unit near water,
such as near abathtub, washbowl, kitchen sink, laundry
tub, in awet basement, swimming pool, or the like.
Heat -Do not use this unit near sources of heat, including
heating vents, stoves, or other appliances that generate
heat.
It also should not be placed in temperatures less than 5°C
(41 oF) or greater than 35°C (95°F).
Mounting surface -Place the unit on a flat, even surface.
Ventilation -The unit should be situated with adequate
space around it so that proper heat ventilation is assured.
Allow 10 cm (4 in.) clearance from the rear and the top of
the unit and 5 cm (2 in.) from each side.
-Do not place the unit on a bed, rug, or similar surface
that may block the ventilation openings.
-Do not install the unit in abookcase, cabinet, or airtight
rack where ventilation may be impeded.
2ENGLISH
5
6
7
8
Objects and liquid entry -Take care that objects or
liquids do not get inside the unit through the ventilation
openings.
Carts and stands -When placed or
mounted on a stand or cart, the unit should A-
be moved with care.
Quick sto~s, excessive force, and uneven
Q!f)
&q
surfaces may cause the unit or cart to
overturn or fall. —
Condensation -Moisture may form on the CD pickup
lens when:
-The unit is moved from acold spot to awarm spot
-The heating system has just been turned on
-The unit is used in avery humid room
-The unit is cooled by an air conditioner
When this unit has condensation inside, it may not
function normally. Should this occur, leave the unit for a
few hours, then try to operate again.
Wall or ceiling mounting -The unit should not be
mounted on a-wall. or ceil[ng, unless specified in the
Operating Instructions.
Electric Power
1
2
3
4
5
Power sources -Use on batteries or AC house current,
as specified in the Operating Instructions and marked on
the unit.
Polarization -As asafety feature, some units are
equipped with polarized AC power plugs which can only
be inserted one way into apower outlet. If it is difficult or
impossible to insert the AC power plug into an outlet, turn
the plug over and try again. If it still does not easily insert
into the outlet, please call aqualified service technician to
service or replace the outlet. To avoid defeating the
safety feature of the polarized plug, do not force it into a
power outlet.
AC power cord
-When disconnecting the AC power cord, pull it out by
the AC power plug. Do not pull the cord itself.
-Never handle the AC power plug with wet hands, as this
could result in fire or shock.
-Power cords should be firmly secured to avoid being
bent, pinched, or walked upon. Pay particular attention
to the cord from the unit to the power socket.
-Avoid overloading AC power plugs and extension cords
beyond their capacity, as this could result in fire or
shock.
Extension cord -To help prevent electric shock, do not
use apolarized AC power plug with an extension cord,
receptacle, or other outlet unless the polarized plug can
be completely inserted to prevent exposure of the blades
of the plug.
When not in use -Unplug the AC power cord from the
AC outlet or remove ail th; batteries if the unit will not be
used for several months or more. When the cord is
plugged in, asmall amount of current continues to flow to
the unit, even when the power is turned off.
Maintenance
Clean the unit only as recommended in the Operating
Instructions.
Damage Requiring Service
Have the units serviced by aqualified service technician if:
-The AC power cord or plug has been damaged
-Foreign objects or liquid have got inside the unit
-The unit has been exposed to rain or water
-The unit does not seem to operate normally
-The unit exhibits amarked change in performance
-The unit has been dropped, or the cabinet has been
damaged
DO NOT ATTEMPT TO SERVICE THE UNIT YOURSELF.

Power Supply Connections
OPE/BATl-
The OPE/BATT indicator lights up while electric current flows
to the unit.
Connect the AC cord as illustrated below.
~+@ to an AC outlet
supplied AC cord
CAUTION
Use only the supplied AC cord. Use with other cords may
result in the risk of fire.
Open the lid of the battery compartment on the rear and
insert eiaht R20 (size D) batteries, not sumiied, as illustrated
below. ~hen close the lid.
To switch from AC power supply to battery supply,
disconnect the AC cord from the AC inlet.
When the OPE/BATT indicator becomes dim, the tape speed
slows down, volume decreases, or sound is distorted during
operation, replace the batteries.
Notes on batteries
To avoid damage frolm leakage or explosion, observe the
following:
●Insert the batteries with the Oand Omarks correctly
aligned.
●Do not mix different types of batteries or old batteries with
new ones.
●When the unit is not to be used for along period, remove
the batteries.
●Never recharge the batteries, apply heat to them or take
them apart.
●Remove dead batteries.
If liquid leaks from the batteries, wipe thoroughly to remove.
IMPORTANT
●Make sure that the AC cord is disconnected and batteries
are removed before connecting speakers.
●Do not connect other than the supplied speakers.
Position the speakers.
To couple with the speakers, slide each speaker down
into the guide brackets on the center unit until the height
is level with the unit.
To separate the unit from the speakers, slide the
speakers up and off, while pressing the speaker release
knob.
Re
Iknob I
Connect the speakers.
Connect the right speaker cord to the Rterminals, and
the left speaker to the Lterminals.
Connect the speaker cord with the white broken line to
0 and the other cord to O.
ENGLISH 3

FM
POWER/
O.STANDBY
REPEAT/
MODE/OSC
CD
❑Bbill PLAYI
PAUSE
SKIP/ wSKIPI
SEARCH SEARCH
STOPIMEMORY
1
2
3
Press CD.
The power is turned on and the CD button lights up.
Press PUSH OPEN to open the disc
compartment. Place adisc with the printed
side up and close the disc compartment.
Total number of tracks and total playing time are
displayed.
Press F/n PLAY/PAUSE to start play.
The number of the track being played and elapsed
playing time are displayed.
■STOP/MEMORY –Stops play.
➤/El PLAY/PAUSE –Pauses play. To resume play, press
again.
I++, FFI SKIP/SEARCH –Searches for aparticular point
during playback. Keep Mor Wpressed and then
release it.
–Skips to the beginning of atrack. Press Kor M
repeatedly.
REPEAT/FM MODE/OSC
–Repeats asingle track or all tracks. Select as follows.
C1:Asingle track is played repeatedly.
Select atrack with l++ or M.
G: All tracks are played repeatedly.
To start play when the power is off, press CD. The
power is turned on and play of the loaded disc begins
(Direct Play Function).
If you load adisc while the CD button flashes in step 2,
play starts without pressing ➤II 1.
After listening, press POWER/C!) STANDBY to turn the
power off.
NOTE
●Do not use irregular shape CDs (example: heart-shaped,
octagonal ones).
It may result in malfunctions.
●Do not place more than one disc in the disc
compartment.
●Do not try to open the disc compartment during play.
●Do not touch the lens. Doing so may cause malfunctions,
Up to 30 tracks can be programmed from the disc.
~In stop mode, keep ■STOP/MEMORY pressed
until “M” flashes in the display.
zPress l++ or Mto select atrack, then press
■STOP/MEMORY to store it.
Track number
Programm~d number
3Repeat step 2to program other tracks.
4Press E/n to start play.
To check the program, press Hor Min stop mode.
To clear the program, press ■once in stop mode so that
“M” disappears in the display.
To change the programmed tracks, clear the program and
repeat all the steps again.
4ENGLISH

FM
POWER/
0.STANDBY
REPEAT/
MODE/OSC
1Press RADl(2,
The power is turned on.
The RADIO button lights up and the volume level is
displayed.
pSelect aband with BAND.
3Tune to astation with TUNING.
During FM stereo reception, -is displayed.
After listening, press POWER/O STANDBY to turn the
power off.
For better reception
AM
The antenna is inside the
unit. Position the unit for
the best reception.
REPEAT/FM MODE/OSC
FM
Extend the rod antenna and
orient it for the best reception.
If an FM stereo broadcast contains noise, press the
button so that ~0~ is displayed. +See @shown
below.
Noise is reduced, althouah reception is monaural.
To restore stereo recept”~n, press the button to turn off
m.
If ahigh-pitched :jound is heard during AM recording,
press the button repeatedly until the noise is reduced. Its
position can be checked by “=” being on or off the display
+See @shown below.
If ahigh-pitched :>ound is heard when listening to aradio
broadcast, press the button repeatedly until the noise is
reduced. Its position can be checked by ‘i–” being on or
off the display. +See @shown below.
Example: during FM reception Example: during AM recording
‘El
REC PLAY REW FF STOP/EJECTPAUSE PLAY REW FF 5T0P/EJEcT PAUSE
IEEEI= 1
Use Type I(normal) tapes only.
Press WA STOP/EJECT to open the cassette holder
and insert atape with the exposed side down and the
side to be played facing out.
Deck 1
~(3 ■/A
Push the cassette holder to close.
Press *PLAY while the power is off.
The power is turned on and play of the inserted tape
1begins.
During tape operation, the TAPE button lights up and the
volum-e level is displayed.
WA STOP/EJECT –Stops play. The power will be
automatically turned off.
II PAUSE –Pauses play. To resume play, press again.
4+ REW/-FF –Rewinds/fast forwards. To stop the
winding, press WA STOP/EJECT.
Continuous play
After play on deck 2finishes, play on deck 1will start
without interruption.
During play on deck 2, press II PAUSE then press -
PLAY on deck 1.
II PAUSE on deck 1will be released at the end of play on
deck 2.
NOTE
If the unit picks up noise from other electrical appliances
nearby, like aTV or fluorescent lights, move the unit away.
ENGLISH 5

DUBBING SPEED
II PAUSE
¤/~ sTop/EJEcT
●REC
POWER/(!) STANDBY/TAPE,
RADIO, CD
●Use Type I(normal) tapes only.
●Note that recording is done on only one side of the tape.
●Wind the tape to the point where recording starts.
~Insert atape to be recorded on into deck 1
with the side to be recorded facing out.
Deck 1
@
z Get ready to record from the source.
To record from aCD, press CD and load the disc.
To record from aradio broadcast, press RADIO and
tune to astation.
3Press ●REC on deck 1to start recording.
*PLAY is pressed simultaneously,
When the selected function is CD, CD play and
recording starts simultaneously.
To record only the selected tracks of aCD
1Follow steps 1to 3of PROGRAMMED PLAY on page 4
to program tracks.
2Press ●REC.
To stop recording, press H/A STOP/EJECT on deck 1.
When recording from aCD, play pauses. To stop CD play,
press ■STOP/MEMORY.
To pause recording, press 1IPAUSE. To resume
recording, press again.
To erase recording, press ●REC on deck 1while the
power is off.
After recording, press POWER/~ STANDBY to turn the
power off.
1
2
3
4
5
6
Press TAPE to turn the power off.
Insert atape to be recorded on into deck 1with
the side to be recorded facing out.
Insert atape to be played into deck 2with the
side to be played facing out.
Press 1IPAUSE then press ●REC on deck 1
to enter recording pause mode.
The power is turned on.
-PLAY is pressed simultaneously.
Press DUBBING SPEED to select adubbing
speed.
The HIGH SPEED DUB indicator lights up: Dubs at high
speed.
The HIGH SPEED DUB indicator disappears: Dubs at
normal speed.
Press PPLAY on deck 2.
11 PAUSE on deck 1is released and recording starts.
To stop recording, press WA on deck 1 and deck 2. The
power will be automatically turned off.
NOTE
When recording near atelevision, noise may be recorded.
Move the unit away from the television.
To prevent accidental erasure, break off the plastic tabs on
the cassette tape with ascrewdriver or other pointed tool
after recording.
To record on the tape again, cover the tab openings with
adhesive tape, etc.
6ENGLISH

3-MODE “c:;
QSOUND Ill II II
‘REc----fll:,,,,,’,,,:~
II 1
——
_—
VOLUME
VOLUME
Press VOLUME Aor 7. The volume level is displayed as
anumber from Oto MAX (25).
●The volume level is automatically set to 14 if the power is
turned off when the volume level is set to 15 or more.
To display the vollume level when CD function is
selected
Press VOLUME Aor 7. The volume level is displayed for
4seconds.
3-MODE EQUALIZER
Press one of the 3-MODE EQUALIZER buttons and the
indicator of the selected setting lights up. To cancel, press
the selected setting.
ROCK -Emphasizes the high and low range of music.
POP -Emphasizes voice and midrange of music.
JAZZ -Emphasizes the low range of music.
QSOUND system
This system provides arich, three dimensional sound area
for stereo sources.
You can enjoy more enhanced sound.
Press QSOUND and the QSOUND indicator lights up.
●At higher volumes, turning QSOUND on may cause
sound distortion. In this case, make the volume down.
Connect amicrophone with amini plug to the MIC jack
and play asource to be mixed.
To record the microphone mixing sound, insert atape in
deck 1 and press ●REC.
●During dubbing at high speed, the microphone mixing
sound is not recorded.
MIC VOL –Adjusts the microphone volume. If ahowling
sound is produced, turn the volume down.
●To prevent howling, hold the microphone away from the
speakers. The use of unidirectional type microphones is
also recommended.
To listen with the headphones
Connect headphones with astereo mini plug to the PHONES
jack.
If an erroneous display or malfunction occurs
Make sure that none of the deck operation buttons is
pressed.
Press ■while pressing POWER/(!) STANDBY.
If the unit cannot be reset in the way above, disconnect the
AC cord and remove all the batteries to turn off the display.
Leave the unit for awhile and turn the power back on.
ENGLISH 7

\
!’
REPEAT/
FM MODE/OSC
The unit can be turned off automatically at aspecified time.
NOTE
While CD function is selected, operate the following
procedures in stop mode.
1
2
Press REPEAT/FM MODE/OSC while pressing
■STOP/MEMORY.
If STOP/MEMORY is kept pressed, another operation
may start.
Within 4seconds, press l++ or Mto
specify the time until the power is turned off.
Each time it is pressed, the time changes between 10
and 90 minutes in 10-minute steps.
Specified time While the sleep timer works,
the dot keeps flashing.
To check the time remaining until the power is turned
off
Repeat step 1shown above. The remaining time is
displayed for 4seconds.
To cancel the sleep timer
Display the remaining time and press Wor W
repeatedly until OFF is displayed.
NOTE
If the unit is turned off during tape playback, -on the
deck will not be released. Press WA to release >.
m, w
■STOP/MEMORY
Maintenance
To clean the cabinet
Use asoft cloth lightly moistened with mild detergent
solution. Do not use strong solvents such as alcohol,
benzine or thinner.
To clean the heads
When the tape heads are dirty;
-high frequency sound is not emitted
-the sound is not adequately high
-the sound is off-balance
-the tape cannot be erased
-the tape cannot be recorded on
After every 10 hours of use, clean the tape heads with a
head cleaning cassette.
Use separately sold dry-type or wet-type cleaning
cassette.
Refer to the instructions of the cleaning cassette for
details.
To clean the lens Lens
Use acotton swab slightly
moistened with cleaning fluid.
Wipe gently from the center to
the edge.
8ENGLISH

Specifications
Tunersection
Frequency range, antenna —FM: 87.5 -108.0 MHz Rod antenna,
AM: 530-1,710 kHz Ferrite bar antenna
Decksection
Track format —4tracks, 2channels/ Frequency range —Normal tape:
50-12,000 Hz (EIAJ) /Flecording system —AC bias/ Erasing system
—Magnet erase/ Heads —Deck 1: Recording/playback head (1),
Erasure head (1); Deck 2: Playback head (1)
CDplayersection
Disc —Compact disc/ Scanning method —Non-contact optical scanner
(semiconductor laser) /Fiotation speed –Approx. 500-200 rpm/CLV /
Error correction —Cross interleave, Reed, Solomon code/ Number of
channels —2channels /D/A conversion —1bit DAC
General
Power requirements —DC 12 Vusing eight size D(R20) batteries, AC
120 V, 60 Hz/ Dimensions (W xHxD) —260 x302x 246 mm/ Weight
—4.2 kg (excluding batteries)
Power output —2.5 W+2.5 W(7 ohms, EIAJ) /Power consumption —
18W
Accessory —AC cord (1)
Speaker
Type —120 mm cone type/ Dimensions (W xHxD) —205 x302x 246
mm /Weight —Approx. 1,2 kg x2
Impedance —7ohms/ Allowable max. input –5.0 W
Specifications and external appearance are subject to change without
notice.
L -4
Please check the copyright laws relating to recordings from disc,
radio or external tape for the country In which the machine ISbeing
NOTE
This equipment has been tested and found to comply with the limits for
aClass Bdigital device, pursuant to Part 15 of the FCC Rules. These
limits are designed to provide reasonable protection against harmful
interference in aresidential installation.
This equipment generates, uses, and can radiate radio frequency
energy and, if not installed and used in accordance with the instruc-
tions, may cause harmful interference to radio communications. How-
ever, there is no guarantee that interference will not occur in aparticular
installation. If this equipment does cause harmful interference to radio
or television reception, which can be determined by turning the equip-
ment off and on, the user is encouraged to try to correct the interference
by one or more of the fc)llowing measures:
... Reorient or relocate the receiving antenna.
Increase the separation between the equipment and receiver.
... Connect the equipment into an outlet on a circuit different from that
to which the receiver is connected.
Consult the dealer or an experienced radio/TV technician for help.
CAUTION
Modifications or adjustments to this product, which are not expressly
approved by the manufacturer, may void the user’s right or authority to
operate this product.
ENGLISH 9

ADVERTENCIA
PARA REDUCIR EL RIESGO DE
INCENDIOS OSACUDIDAS ELECTRICAS,
NO EXPONGA ESTE APARATO ALA
LLUVIA NI ALA HUMEDAD.
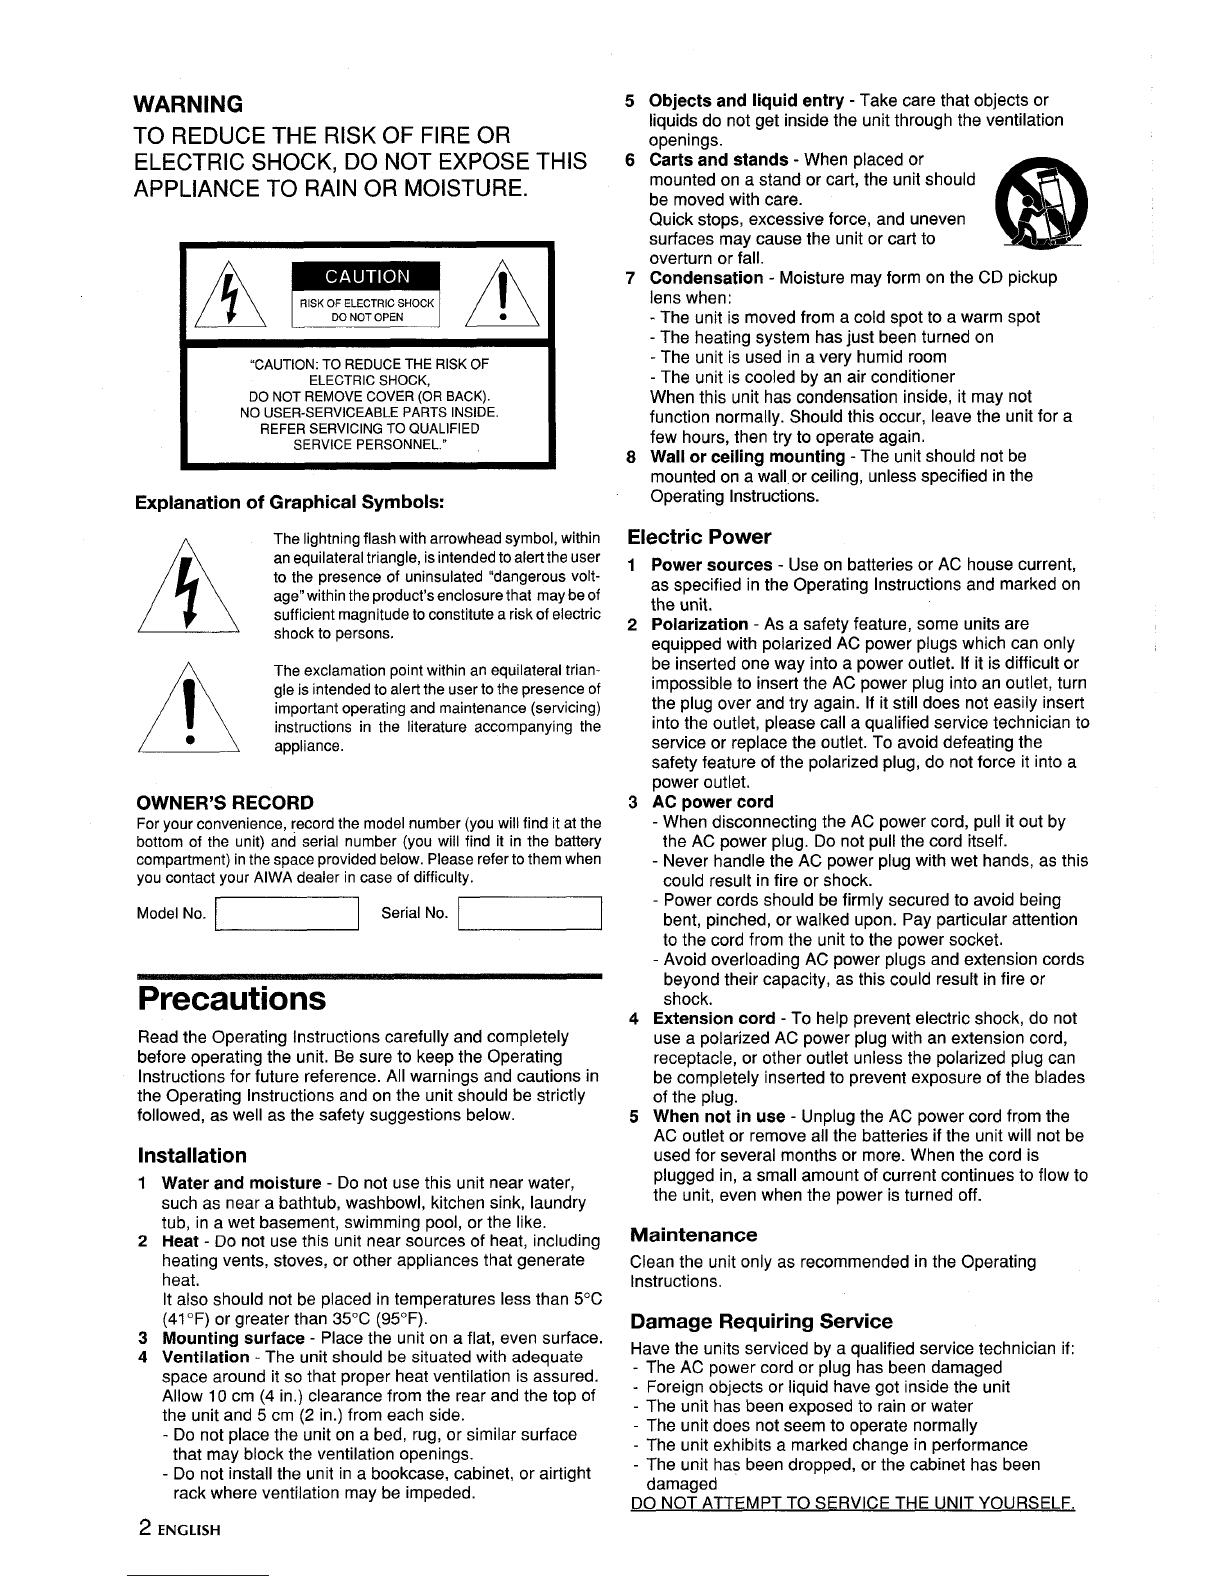
1“CAUTION: TO REDUCE THE RISK OF
ELECTRIC SHOCK,
DO NOT REMOVE COVER (OR BACK).
NO USER-SERVICEABLE PARTS INSIDE
REFER SERVICING TO QUALIFIED
ISERVICE PERSONNEL.” 1
Explication de Ios simbolos graficos:
Elsimbolo delrelampago con Iapuntaenflecha
A
dentro de un triangulo equilat ero, sirve para alertar
al usuariode Iapresencia de’’tension peligrosa”
sin aislar en el interior de la caja del aparato, la
cual podra ser lo suficientem ente fuerte como para
suponer un riesgo de sacudida electrica aperso-
nas.
AEl signo de exclamation dentro del un triangulo
equilatero sirve para alertar al usuario de la
presencia de instrucciones importances de
operation ymanteni miento (servicio) en la
●information que acompaha al aparato.
PARA EL REGISTRO DEL DUENO
Para sus comodidad, anote el numero del modelo (elcual 10encontrara
en la parte de abajo de la unidad) yel numero de serie (el cual 10
encontrara en el compartimiento de la bateria) en el espacio dado a
continuation. Por favor, en caso de dificuldad, Ud. comunique al
repartidor deAlWA, Iasreferencias de numero del modelo ynumero de
serie.
‘odelmodelo~‘odese’e~
Precauciones
Leer detenida ycompletamente Ias instrucciones de
funcionamiento antes de manejar el aparato. Asegurarse de
conservar estas instrucciones de funcionamiento como
referencia en el future. Deben seguirse estrictamente todas Ias
advertencias yprecauciones indicadas en este manual, asi
como Ios consejos siguientes relacionados con la seguridad.
Instalacion
1
2
3
4
Agua yhumedad –No utilizar este aparato cerca del agua,
como cerca de una bahera, Iavabo, pila de la cocina,
Iavadero, en s6tanos htimedos, piscinas oIugares similares.
Calor –No usar este aparato cerca de fuentes de calor,
como rejillas de calefaccion, estufas uotros aparatos que
generan calor.
No debe usarse en sitios en Ios que la temperature es
inferior a5°C (41“F) osuperior a350C (950F).
Superficie de montaje –Colocar el aparato sobre una
superficie plana ynivelada.
Ventilation –Este aparato debe colocarse de manera que
tenga un espacio adecuado asu alrededor para que pueda
disiparse el calor. Dejar un espacio de 10 cm (4 pulg.) desde
la parte posterior ysuperior del aparato y5cm (2 pulg.) en
cada Iado.
-No colocar el aparato sobre una cama, alfombra o
superficie similar que pueda bloquear Ias rejillas de
ventilation.
1() ESPA~OL
5
6
7
8
-No instalar el aparato en una Iibreria, estanteria omueble
donde la ventilation sea deficient.
Entrada de objetos yagua –Tener cuidado de que no
entren objetos extrarlos ni Iiquidos por Ias rejillas de
ventilation.
Carros ymostradores –Cuando el aparato
se coloque sobre un carro omostrador, es
necesario tener cuidado con Ios movimientos.
m
●L
Las paradas bruscas, fuerza excesiva yP
superficies desiguales pueden hater que el 3
aparato se caiga oque el carro vuelque. .**
Condensation –La Iente del Iector de CD puede acumular
humedad cuando:
-El aparato se mueve desde un sitio frio a uno caliente
-Se acaba de encender la calefaccion
-El aparato se usa en una habitation muy htimeda
-El aparato se enfria con un acondicionador de aire
El aparato pudiera no funcionar correctamente cuando se ha
condensado humedad en su interior. Si ocurriera, dejarlo
apagado unas horas eintentar usarlo de nuevo.
Montaje en la pared otecho –El aparato no debe
montarse en una pared ni colgarse dueltecho amenos que
se especifique asi en Ias instrucciones de funcionamiento.
Alimentacion electrica
1
2
3
4
5
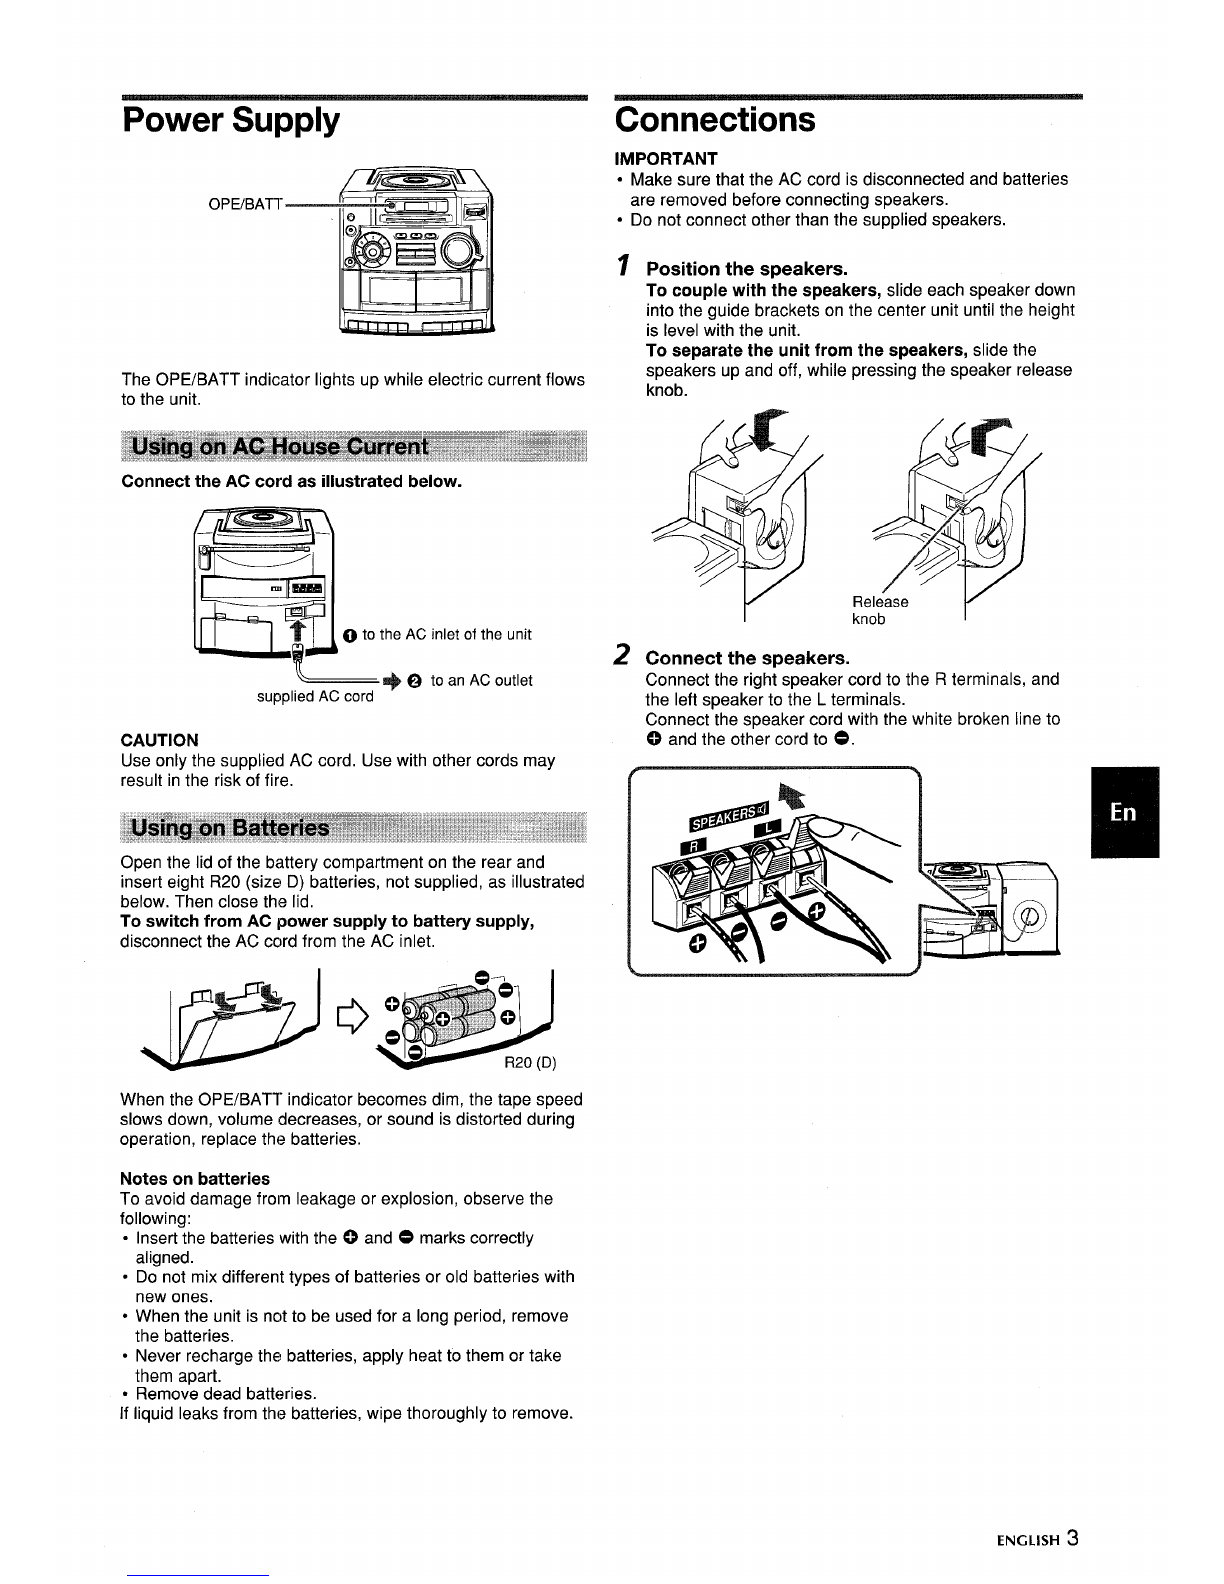
Fuentes de alimentacion –Utilizarlo con pilas ocorriente
alterna de la red, como se especifica en Ias instrucciones de
manejo yse indica en el aparato.
Polarization –Como medida de seguridad, algunos
aparatos estan equipados con enchufes polarizados en el
cable de alimentacion que pueden solamente insertarse en
un sentido tinico dentro del enchufe de la pared. Si fuera
dificil oimposible insertar el enchufe del cable de
alimentacion dentro del tomacorrientes, invierta el sentido de
insertion del enchufe yvuelva aintentar conectarlo. Si sigue
siendo dificil insertarlo en el tomacorrientes, Ie rogamos
Ilame a un tecnico de servicio calificado para que repare o
cambie el tomacorrientes. Para evitar que la medida de
seguridad dei enchufe de alimentacion quede anulada, no
fuerce el enchufe dentro de un tomacorrientes.
Cable de alimentacion
-Cuando se desconecte el cable de alimentacion, sujetarlo
por el enchufe. No tirar del cable.
-No tocar el enchufe del cable con Ias manes mojadas, ya
que puede producirse un incendio o una descarga
electrica.
-Los cables de alimentacion deben colocarse de manera
que no queden doblados, pillados por objetos ni en un sitio
donde puedan pisarse. Prestar una atencion especial al
cable que conecta el aparato yel tomacorrientes.
-Evitar sobrecargar Ios cables de alimentacion yIos cables
de extension por encima de su capacidad porque puede
producirse un incendio o una descarga electrica.
Cable de extension –Para evitar descargas electrical, no
utilice un enchufe polarizado en el cable de alimentacion con
un cable de extension, receptaculo uotro tomacorrientes a
menos que el enchufe polarizado pueda insertarse
completamente con miras aevitar que Ias hojas del enchufe
queden expuestas.
Cuando no se utilice el aparato –Desenchufe el cable de
alimentacion de la toma de corriente osaque todas Ias pilas
cuando el aparato no vaya autilizarse durante algunos
meses. Cuando el cable esta enchufado, sigue entrando una
pequefia cantidad de corriente en el aparato aunque este
apagado.
Mantenimiento
Limpiar el aparato solamente como se recomienda en Ias
instrucciones de funcionamiento.
Servicio yreparation
Llevar el aparato a un tecnico de servicio calificado cuando:
-Se haya dafiado el cable de alimentacion oel enchufe
-Hayan entrado objetos extrahos oKquidos en su interior
-Haya estado expuesto ala Iluvia o agua
-No funcione correctamente
-Su rendimiento se altere de forma notable
-Se haya caido al suelo ose haya dafiado su cuerpo
NO INTENTE REPARAR EL APARATO USTED MISMO.

Alimentacion Conexiones
OPE/BATl-
Ul!l!l=lllg!l
El indicador OPE/BATT se enciende mientras se alimenta
energia electrica al aparato.
Conectar el cable de alimentacion con se ilustra abajo.
Iizll
-T
;0 a Iatomade CAdel aparato
~+@ ~eu~t~~dorrientes
cable de alimentacion facilitado
PRECAUTION
Usar solo el cable de alimentacion facilitado. El uso de otros
cables puede provocar un incendio.
Abrir la tapa del compartimiento de Ias pilas situada en la
parte trasera einsertar echo pilas R20 (tamaho D), no
incluidas, como se ilustra abajo. Luego cerrar la tapa.
Desconectar el cable de alimentacion de la toma de
alimentacion para conmutar entre alimentacion de CA y a
pilas.
\
Cuando el indicador OPE/BATT se debilite, la cinta pierda
velocidad, el volumen disminuya, oel sonido se distorsione
durante la operacidn, reemplace Ias pilas.
Notas sobre Ias pilas
Observar 10siguiente para evitar dafios causados por fugas
oexplosions:
●Insertar Ias pilas alineando correctamente Ias marcas 0y
0.
●No mezclar diferentes tipos de pilas ni pilas usadas con
pilas nuevas.
●Cuando no vaya autilizar la unidad durante un periodo
Iargo, extraiga Ias pilas.
~NrJrecargar, calentar ni desarmar nunca Ias pilas.
●Sacar Ias pilas gastadas.
S1se producen fugas de electrolito en Ias pilas, Iimpiar bien
Ios residues.
IMPORTANTE
●Antes de conectar Ios altavoces, asegurarse de que el
cable de alimentacion esta desconectado yIas pilas
sacadas.
●No conectar unos altavoces diferentes aIos que se
incluyen.
1
2
Instalacion de Ios altavoces.
Para acoplar Ios altavoces, deslizar cada uno de ellos
dentro de Ias guias del aparato principal hasta que su
parte superior quede al ras con la parte superior del
aparato.
Para separar Ios altavoces del aparato, deslicelos
hacia arriba por Ias guias hasta sacarlos al tiempo que
oprime el boton de liberaci6n.
Bot
Iiberacion I
Conexion de Ios altavoces.
Conectar el cable del altavoz derecho en Ios terminals
R, yel cable del altavoz izquierdo en Ios terminals L.
Conectar el cable del altavoz marcado con una Iinea
blanca punteada en el terminal C) yel otro cable en el
terminal O.
r“ %
ESPA~OL 11

POWER/
OSTANDBY
REPEAT/
FM MODE/OSC
1
2
3
Pulsar CD.
Se enciende el aparato yse enciende el boton CD.
Pulsar PUSH OPEN para abrir el
compartimiento del disco. Colocar un disco
con el Iado impreso hacia arriba ycerrar el
compartimiento.
Se indica en la pantalla el numero total de pistas yel
tiempo total de reproduction.
Pulsar E/n PLAY/PAUSE para empezar a
reproducer.
Se indica en la pantalla el numero de la pista que se
esta reproduciendo yel tiempo de reproduction desde
el principio de la pista.
■STOP/MEMORY –Interrumpe la reproduction.
F/n PLAY/PAUSE –Pausa durante la reproduction.
Pulsarlo de nuevo para seguir reproduciendo el disco.
M, MSKIP/SEARCH –Busca un punto particular
durante la reproduction. Mantener pulsado l++ oW
ysoltarlo Iuego.
–Para saltar al principio de una pista, pulsar Mo
Mrepetidamente.
REPEAT/FM MODE/OSC
–Repite una pista otodas Ias pistas. Seleccionar como
sigue.
C1: Se repite la reproduction de una sola pista.
Seleccionar la pista con l++ o~.
C: Se repite la reproduction de todas Ias pistas.
Pulsar CD para empezar areproducer cuando el
aparato esta apagado. El aparato se enciende yse
empieza areproducer el disco cargado (funcion de
reproduction directs).
Cuando se carga un disco mientras parpadea el boton CD
en el paso 2, la reproduction empieza sin pulsar ➤/11.
Despues de la escucha, pulsar POWER/d) STANDBY
para apagar el aparato.
NOTA
.
●
●
●
No usar discos de formas irregulars (ejemplo:
octogonales, en forma de corazon, etc.).
Su uso puede producir errores de funcionamiento.
No colocar mas de un disco compacto dentro del
compartimiento del disco.
No intentar abrir el compartimiento del disco durante la
reproduction.
No tocar la Iente. De hacerlo el aparato puede funcionar
Se puede programar la reproduction de hasta 30 pistas de
un disco.
1En la modalidad de parada, mantener pulsado
■STOP/ME,MORY hasta que “M” parpadee en
la pantalla.
2Pulsar l++ oMpara seleccionar una pista y
pulsar despues ISTOP/MEMORY para
almacenarla en la memoria.
Ntimero de la Dista
Ntimero de prbgramacion
sRepetir el paso 2para programas otras pistas.
aPulsar E/n para empezar la reproduction.
Para comprobar el programa, presionar l++ o~en la
modalidad de parada.
Para borrar el programa, pulsar ■una vez en la
modalidad de parada de modo que “M” desa”parezca de la
pantalla.
Para cambiar Ias pistas programadas, borrar el programa
yrepetir todos Ios pasos de nuevo.
12 ESPA~OL

1
k
By
REPEAT/ ,,, 11 -
FM MODE/OSC I:1!‘!!!!,’,!!:,
——
—
1
2
3
Pulsar RADIO.
Se enciende el aparato.
Se enciende el boton RADIO yse indica el nivel de
volumen.
Seleccionar una banda con BAND.
Sintonizar una emisora con TUNING.
Se indica ~E=[ durante la recepcion de
programas de FM en estereo.
Despues de la escucha, pulsar POWER/0 STANDBY
oara apagar el aparato.
Para mejorar la recepcion $r$%~
AM FM
La antena esta dentrode la Para una recepcion optima,
unidad, oriente la unidad extienda la antena
para obtener una recepcion telescopic yorientela.
optima.
3EPEAT/FM MODE/OSC
Cuando un programa de FM estereo contenga ruidos o
distorsiones, pulsar el boton de manera que se indique
=en la pantaila. +Ver @abajo.
El ruido se reduce yel programa se recibe en modo
monoaural,
Para volver arecibir et programa en estereo, pulsar el
boton de modo que desaparezca m.
Si se escucha un pitido agudo durante la grabacion de
programas de AM, pulsar repetidamente el boton hasta
que se atenue el pitido. Su position puede comprobarse
con la aparicion de “o” en la pantalla. +Ver @abajo.
Si se oye un ~itido acwdo al escuchar la radio, pulsar
repetidamente el bot~n hasta que se reduzca el ruido.
Su position puede comprobarse mediante el encendido
o apagado de “-” en la pantalla. +Ver @abajo.
Ejemplo: durante la Ejemplo: durante la grabacion
recepci6n de FM de programas de AM
—RADIO El
J“’’llll 1’”1
REC PLAY REW FF 5T0p15JEcT PAUSE PLAY REW FF STOPIEJECTPAUSE
●.4+ we
——_ __J ---~z=”
— .—
Utilizar solamente cintas de tipo I(normales).
Pulsar W* STOP/EJECT para abrir el portacasete e
insertar una cinta con el Iado expuesto hacia abajo yet
Iado que se va a reproducer encarado hacia afuera.
Platina 1Platina 2
-(3
Emcwiar el ~ortacasete ~ara cerrarlo,
que se ha insertado.
Durante el uso de la cinta se enciende el boton TAPE yse
indica el nivel de volumen.
WA STOP/EJECT –Interrumpe la reproduction. El
aparato se apaga automaticamente.
II PAUSE –Hate una pausa en la reproduction. Pulsar
de nuevo para seguir reproduciendo.
4+ REW/~ FF –Rebobina yavanza rapidamente la
cinta. Para cancelar la modalidad, pulsar WA STOP/
EJECT.
Reproduction continua
>espues de finalizar la reproduction en la platina 2,
;omenzara la reproduction en la platina 1sin interruption
‘ara reproducer en la platina 1, cuando este
‘eproduciendose en la platina 2, presione II PAUSE y
uego *PLAY en la platina 1.
2uando finalice la reproduction en la platina 2, 11 PAUSE
~e la platina 1quedara Iibre.
dOTA
>uando el aparato capte ruidos de otros aparatos
~lectrodomesticos, como un televisor oIuces
Iuorescentes, alejarlo de ellos. ESPA~OL 13

DUBBING SPEED
II PAUSE
W= STOP/EJECT
●REC
POWER/(!) STANDBY/TAPE,
RADIO, CD
●Utilizar solamente cintas de tipo I(normales).
●Tenga en cuenta que la grabacion solamente se
realizara en una cara.
●Bobine la cinta hasta el punto donde puede grabarse.
1
2
3
Inserte la cinta agrabar en la platina 1con la
cara agrabar mirando hacia afuera.
Platina 1
@
u@wA
Preparar la grabacion desde la fuente de
sonido.
Para grabar desde un CD, pulsar CD ycargar un
disco.
Para grabar un programa de radio, pulsar RADIO y
sintonizar una emisora.
Pulsar ●REC en la platina 1para empezar a
grabar.
-PLAY se activa simultaneamente.
Cuando se ha seleccionado la funci6n CD, la
reproducci6n del CD yla grabaci6n empiezan
simultaneamente.
Grabaci6n de [as pistas seleccionadas dei CD
1Seguir Ios pasos 1 a 3 de REPRODUCCldN
PROGRAMADA, p~gina 12, para programar Ias pistas.
2Pulsar ●REC.
Para dejar de grabar, pulsar WA STOP/EJECT de la
olatina 1.
La reproducci6n hate una pausa al grabar desde el CD.
Pulsar ■STOP/MEMORY para detener la reproducci6n
del CD,
Para hater una pausa durante la grabaci6n, pulsar
II PAUSE. Volver apulsarlo para seguir grabando.
Para borrar una grabaci6n, pulsar ●REC de la platina 1
mientras el aparato est~ apagado,
Despu6s de grabar, pulsar POWERK!) STANDBY para
apagar el aparato.
1
2
3
4
5
6
Pulsar TAPE para apagar el aparato.
Insertar la cinta en la que se va a grabar en la
platina 1con en Iado agrabar encarado hacia
afuera.
Insertar la cinta desde la que se va a grabar en
la platina 2con el Iado que se va a reproducer
encarado hacia afuera.
Pulsar II PAUSE yIuego presione ●REC en la
platina 1para poner la unidad en el modo de
grabacion en pausa.
Se enciende el aparato.
0PLAY se activa simultaneamente.
Pulsar DUBBING SPEED para seleccionar la
velocidad de copiado.
Con el indicador HIGH SPEED DUB encendido:
Duplication aalta velocidad.
Con el indicador HIGH SPEED DUB apagado:
Duplication avelocidad normal.
Pulsar >PLAY en la platina 2.
Se desactiva II PAUSE de la platina 1yse empieza a
grabar,
Para dejar de grabar, pulsar WA de la platina 1yplatina
2. El aparato se apagara autom4ticamente.
NOTA
Cuando grabe cerca de un televisor, la grabaci6n podr~
contener ruidos. Retire la unidad del televisor,
Para evitar el borrado accidental de la cinta, romper Ias
pestafias de pldstico de la cinta con un destornillador uotro
articuio puntiagudo deepubs de grabar.
Para volver agrabar en una cinta, cubrir Ios orificios de Ias
pestafias con cinta adhesiva, etc.
Lado A
e
“Q”(Q *
\*Pestafia del
Iado A
14 ESPAfiOL

\
3-MODE
MIC VOL
MIC
EQUALIZER
PHONES
QSOUND
●REC
—L
L
.
—VOLUME
VOLUMEN
Pulsar VOLUME A07. El nivel de volumen se indica en
la pantalla en forma numerics desde Ohasta MAX (25).
:●Cuando se apaga el aparato el nivel del volumen se
ajusta automaticamente en 14 si se ajusto en 150 mas.
Presentation del nivel de volumen al seleccionar la
funcion CD
Pulsar VOLUME AoY. Se indica et nivel de volumen
durante 4segundos.
ECUALIZADOR DE 3MODOS
Pulsar uno de Ios botones de ecualizador 3-MODE
EQUALIZER yse encendera el indicador del ajuste
seleccionado. Pulsar el ajuste seleccionado para
cancelarlo.
ROCK -Acentua Ios tonos altos ybajos de la musics.
POP -Acenttia Ios vocales yIos tonos medios.
JAZZ -Acentua Ios tonos bajos.
Sistema QSOUND
Este sistema ofrece una rica area de sonido tridimensional
para fuentes estereofonicas.
Se disfrutara de un sonido mas marcado.
Pulsar el boton QSOUND de modo que se encienda el
indicador QSOUND.
●QSOUND puede distorsionar ei sonido a un volumen
alto. Reducir el volumen cuando ocurra esto.
Conecte un microfono con miniclavija ala toma MIC y
reproduzca la musics amezclar.
Para grabar el sonido mezclado con el microfono, inserte
una cinta en la platina 1ypresione ●REC.
●Durante el copiado aalta velocidad, no podra grabarse el
sonido de mezcla con microfono.
MIC VOL –Ajusta el volumen del microfono. Si se produce
un sonido de aullido, baje el volumen.
●Para evitar Ios aullidos, aleje el microfono de Ios
altavoces. Tambien se recomienda usar un microfono de
tipo unidirectional.
Escucha con auriculares
Conectar unos auriculares con miniclavija estereofdnica en
la toma PHONES.
Cuando se produzcan errores de indicaci6n o
funcionamiento
Asegurarse de que no hay oprimido ningtin boton de la
platina,
Pulsar ■yPOWER/(!) STANDBY simultaneamente.
Si el aparato no se repusiera de la manera indicada,
desconectar el cable de alimentacion ysacar todas Ias pilas
de modo que se apague la pantalla. Dejarlo en este estado
durante un rato yvolver aconectar la energfa e16ctrica.
ESPA~OL 15

REPEATI
FM MODE/OSC
3aparato puede apagarse automaticamente a una hors
iesignada.
QOTA
Seguir Ios pasos siguientes en la modalidad de parada
nientras esta seleccionada la funcion CD.
Pulsar REPEAT/FM MODE/OSC al tiempo que
se pulsa ■STOP/MEMORY.
Sise mantiene pulsado STOP/MEMORY,
comenzar otra operation. pudiera
Antes de que pasen 4segundos, pulsar Wo
~para especificar el tiempo hasta la
desconexion del aparato.
Cada vez que se pulsa, el tiempo cambia entre 10 y90
minutes en pasos de 10 minutes.
Hera espec~ficada Cuando el temporizador de
desconexion esta activado,
parpadea el punto.
Somprobacion del tiempo restante hasta la
desconexion
<epetir el paso 1anterior. El tiempo restante se indica
~urante un espacio de 4segbndos.
Bancelaci6n del temporizador de desconexion
ndicar el pantalla el tiempo restante ypulsar
‘epetidamente WoWhasta que se indique OFF.
NOTA
-de la platina no se desactiva cuando el aparato se
apaga durante la reproduction de una cinta. Pulsar W=
>ara desactivar -.
l++, w
■STOP/MEMORY
*
Mantenimiento
Limpieza del cuerpo del aparato
Usar un parlo suave Iigeramente humedecido con una
solution de detergence suave. No utilizar solventes
fuertes como alcohol, bencina odiluyente.
Limpieza de Ias cabezas
Cuando Ias cabezas estan sucias,
-no se reproduce sonidos de altas frecuencias
-el sonido no es adecuadamente alto
-el sonido se desequilibra
-no se pueden borrar cintas
-no se pueden grabar cintas
Limpiar Ias cabezas de la cinta con una casete
Iimpiadora cada 10 horas de utilization.
Utilizar casetes Iimpiadoras de tipo seco ohumedo de
venta en comercios.
Consultar Ias instrucciones de la casete Iimpiadora para
mas detalles.
Limpieza de la Iente Lente
Utilizar un bastoncillo de
algodon Iigeramente
humedecido con fluido
Iimpiador. Frotar suavemente
desde el centro hacia el horde.
16 ESPA~OL

Especificaciones
Seccion del sintonizador
Gama de frecuencias, antena –FM: 87,5 -108.0 MHz, antena de varilla,
AM: 530-1,710 kHz, antena de barra de ferrita
Seccion de la platina
Formato de pistas – 4 pistas, 2canales /Gama de frecuencias –Cinta
normal: 50-12,000 Hz (EIAJ) /Sistema de grabacion –Polarization de
CA/ Sistema de borrado –Borrado magnetico /Cabezas —Platina 1:1
de grabacion/reproduction, 1 de borrado; Platina 2:1 de reproduction
Seccion del Iector de CD
Disco –Disco compacto /Metodo de Iectura –Lector optico sin contacto
(laser de semiconductor)/ Velocidad de rotation –Aprox, 500-200
rpm/CLV /Correction de error —Interpolation cruzada, Reed, Codigo
Solomon /Numero de canales —2canales /Conversion D/A —1bit
DAC
General
Alimentacion – 12 VCC usando echo pilas de tamario D(R20), 120 V,
60 Hz /Dimensioned (an xal xur) —260 x302 x246 mm /Peso —4.2
kg (sin pilas) ‘,,
Potencia —2.5 W+2,5 W[7 ohmios, EIAJ) /Consumo de enerafa —18
w
Accesorio – 1 cable de alimentacion
Altavoces
Tipo —Tipo conico de 120 mm/ Dimensioned (an xal xpr) —205x
302 x246 mm /Peso —1.2 kg x2aprox.
Impedancia —7ohms /Capacidad maxima permitida —5.0 W
Las especificaciones yel aspecto externo estan sujetos acambio sin
previo aviso.
E~
Rogamos compruebe Ias Ieyes sobre “copyright” relacionadas con la
grabaclon de discos, programas de radio ocmtas externas wgentes
en el pais en el que se va autilizar este aparato.
ESPA~OL 17

ATTENTION
POUR REDUIRE LES RISQUES D’INCENDIE
OU D’ELECTROCUTION, NE PAS EXPOSER
CET APPAREIL ALA PLUIE OU A
L’HUMIDITE.
1A= Al
“CAUTION: TO REDUCE THE RISK OF
ELECTRIC SHOCK,
DO NOT REMOVE COVER (OR BACK).
NO USER-SERVICEABLE PARTS INSIDE
REFER SERVICING TO QUALIFIED
SERVICE PERSONNEL.”
Explication des symboles graphiques:
Le symbole representant un eclair au bout en
A
pointedefleche place aI’interieur d’un triangle
equilateral est destine amettre en garde I’usager
contre la presence dune “tension dangereuse” non
isolee clans Ie boltier de I’appareil, tension
suffisante pour constituer un risque d’electrocution
pour Ies humains.
A
Le point d’exclamation place aI’interieur dun tri-
angle equilateral est destine asignaler aI’usager
la presence d’instructions importances d’operation
etd’entretien (service) clans Ies manuelsfournis
●avec I’appareil.
RESERVE AU PROPRIETAIRE
Noter clans I’espace reserve acet effet ci-dessous Ie numero de modele
(indique au dos de I’appareil) et Ie numero de serie (indique clans Ie
compartment apiles). Toujours mentioner ces numeros clans toutes
Ies relations avec Ies revendeurs AIWA en cas de probleme.
‘OdemOde’e~NOdese’e~
Precautions
Lire attentivement tout ce mode d’emploi avant de faire
fonctionner I’appareil. Bien conserver ce mode d’emploi afin de
pouvoir s’y reporter ulterieurement. Observer scrupuleusement
tous Ies avertissements et Ies precautions du mode d’emploi et
de I’appareil, ainsi que Ies conseils de s6curite ci-dessous.
Installation
1
2
3
4
Eau et humidite -Ne pas utiliser I’appareil aproximite d’eau,
par exemple prbs d’une baignoire, d’un Iavabo, d’un evier de
cuisine, d’une cuve ~Iessive, clans une cave humide, une
piscine, etc.
Chaleur -Ne pas utiliser I’appareil aproximit6 de sources de
chaleur, par exemple une bouche de chauffage, un appareil
de chauffage ou tout autre appareil degageant de la chaleur.
Par aiileurs, ne pas Ie soumettre ades temperatures
inf&ieures ~50C ou sup6rieures A35”C.
Surface de montage -Placer I’appareil sur une surface
plane et de niveau.
Ventilation -L’appareil devra 6tre place avec suffisamment
d’espace Iibre tout autour de fagon”~ assurer une bonne
dissipation de la chaleur. Laisser environ 10 cm derribre et
au-dessus de I’appareil, et 5cm de chaque c6t6.
-Ne pas mettre I’appareil sur un lit, un tapis ou toute surface
similaire qui risquerait de boucher Ies 6vents de ventilation.
-Ne pas mettre I’appareil clans une bibliothbque, une
armoire ou une t%agdre ferm6e oh la ventilation tisque
d’&re inadequate.
18 FRANQAIS
5
6
7
8
Penetration d’objets et de Iiquides -Veiller a ce qu’aucun
objet ni aucun Iiquide ne penetre aI’interieur de I’appareil par
Ies events de ventilation.
Chariots et socles -Si I’appareil est place sur
un socle ou un chariot, Ie deplacer avec
precaution.
Des arr&s brusques, une force excessive et
@
●k
des surfaces irregulieres pourraient provoquer ‘
Ie renversement ou la chute de I’appareil ou du &.
chariot.
Condensation -De I’humidite risque de se former sur la
Ientille du capteur CD si :
-I’appareil est amene d’un endroit froid a un endroit chaud
-Ie chauffage vient juste d’?4re allume
-I’appareil est utilise clans une piece tres humide
-I’appareil est refroidi par un climatiseur.
S’il ya de la condensation aI’interieur de I’appareil, il risque
de ne pas fonctionner normalement. Dans ce cas, attendre
quelques heures avant de Ie reutiliser.
Montaae au mur ou au dafond -L’acmareilne devra oas
~tre m~nte sur un mur o~ un plafond, sauf specification’
contraire clans Ie mode d’emploi.
Alimentation electrique
1
2
3
4
5
Sources d’alimentation -Alimenter I’appareil sur piles ou
sur courant secteur, comme specifie clansIe mode d’emploi
et indique sur I’appareil.
Polarisation -Ades fins de securite, certains appareils sent
equipes d’une fiche secteur polarisee qui ne peut rentrer
clans la prise secteur que clans un seul sens. S’il est difficile
ou impossible d’inserer la fiche clansla prise, tourner la fiche
clansI’autre sens et recommence. SI la fiche ne rentre
toujours pas facilement, contacter un technician qualifie pour
faire reparer ou remplacer la prise. Pour ne pas faire echec a
la fonction de securite de la fiche polarisee, ne pas I’inserer
de force clans la prise.
Cordon d’alimentation secteur
-Pour debrancher Ie cordon d’alimentation secteur, Ie tirer
en Ie tenant par la fiche. Ne pas tirer sur Ie cordon
proprement alit.
-Ne jamais manipuler Ie cordon d’alimentation secteur avec
des mains mouillees, car cela pourrait provoquer un feu ou
une decharge electrique.
-Les cordons d’aiimentation doivent 6tre solidement fixes
pour eviter qu’ils ne soient plies, pinces, ou qu’on ne
marche dessus. Faire particulierement attention au cordon
qui relie I’appareil ala prise secteur.
-Eviter de surcharge Ies cordons d’alimentation secteur et
Ies cordons de rallonge au-dela de Ieur capacite nominale,
car cela pourrait provoquer un feu ou une decharge
electrique.
Cordon de rallonge -Pour eviter tout risque de choc
electrique, ne pas utiliser une fiche secteur polarisee avec un
cordon de rallonge ou toute autre prise si la fiche polaris6e
ne rentre pas completement clans la fiche, pour eviter
d’exposer Ies lames de la fiche.
En cas de non utilisation -Si l’armareil doit rester inutilise
pendant plusieurs mois, debrancher Ie cordon secteur de la
prise secteur ou retirer toutes Ies piles. Quand Ie cordon est
branche, I’appareil continue de consommer une petite
quantite de courant, m~me s’il est hors tension.
Entretien
Nettoyer I’appareil comme indiqur5 clans Ie mode d’emploi,
Dommages necessitant des reparations
Faire r6parer I’appareil par un personnel qualifir5 si :
-Le cordon d’alimentation secteur ou la fiche sent
endommag6s
-Des corps etrangers ou un Iiquide ont p6n6tr6 ~I’inh%ieur de
I’appareil
-L’appareil a&e expos6 ala pluie ou ~I’eau
-L’appareil semble ne pas fonctionner normalement
-L’appareil accuse un changement notable de ses
performances
-L’appareil est tomb6, ou Ie coffret est endommag6.

Alimentation Raccordements
OPE/BAT’T
L’indicateur OPE/BATT s’allume Iorsque Ie courant
electrique circule clans I’appareil.
Raccorder Ie cordon secteur comme indique ci-dessous.
q
—.
.mFa
GI
t0vers la prise AC de I’appareil
~+ ~ vers la prise secteur
Cordon secteur fourni
ATTENTION
Utiliser exclusivement Ie cordon secteur fourni. L’utilisation
d’autres cordons risque de provoquer un feu.
Ouvrir Ie couvercle du Iogement des piles au dos de
I’appareil et inserer huit piles R20 (taille D), non fournies,
comme indique ci-dessous. Puis, refermer Ie couvercle.
Pour passer de I’alimentation sur secteur a
I’alimentation sur piles, d&rancher Ie cordon secteur de la
prise secteur.
Lorsque I’indicateur OPE/BATT devient sombre, que la
vitesse du ruban magnetique ralentit, que Ie volume diminue
ou que Ie son est deform@ pendant Ie fonctionnement,
remplacer Ies piles.
Remarques sur Ies piles
Pour eviter tout risque de fuite ou d’explosion, observer Ies
points suivants :
●Inserer Ies piles en respectant Ies polarites 0et O.
●Ne pas melanger des piles de type different ni des piles
neuves avec des piles ayant deja servi.
●Si I’appareil doit rester Iongtemps inutilise, sortir Ies piles.
●Ne jamais recharger, chauffer ni demonter Ies piles.
●Retirer Ies piles mortes.
Si I’electrolyte des piles fuit, bien essuyer pour nettoyer.
IMPORTANT
●Bien s’assurer que Ie cordon secteur est debranche et Ies
piles retirees avant de raccorder Ies enceintes.
●Ne pas raccorder d’autres enceintes que celles qui sent
fournies.
Installer Ies enceintes.
Pour coupler Ies enceintes aI’appareil, glisser chaque
enceinte vers Ie bas clans Ies etriers de guidage de
I’appareil central jusqu’a ce qu’elles arrivent au m~me
niveau que I’appareil.
Pour detacher Ies enceintes de I’appareil, glisser Ies
enceintes vers Ie haut jusqu’a Ies sortir, tout en
appuyant sur Ie bouton de degagement des enceintes.
Idegagement I
Raccorder Ies enceintes.
Raccorder Ie cordon de I’anceinte droite aux bornes R,
et celui de I’enceinte gauche aux bornes L.
Raccorder Ie cordon d’enceinte avec la Iigne blanche
discontinue aOet I’autre cordon aO.
FRANqAIS 19

POWER/
6STANDBY
REPEAT/
FM MODE/OSC
1
2
3
■
Appuyer sur CD.
L’appareil se met sous tension et la touche CD
s’allume.
Appuyer sur PUSH OPEN pour ouvrir Ie tiroir
du disque. Mettre un disque avec la face
imprimee orientee vers Ie haut et refermer Ie
tiroir du disque.
OPEN
Le nombre total de plages et la duree de lecture totale
s’affichent.
Appuyer sur E/n PLAY/PAUSE pour
demarrer la lecture.
Le numero de la plage en tours de lecture et Ie temps
de lecture ecoule s’affichent.
STOP/MEMORY –Arr&e la lecture.
Wl IPLAY/PAUSE –Interrompt la lecture. Pour reprendre
la lecture, appuyer anouveau.
W,M SKIP/SEARCH –Pour rechercher un passage
particulier au tours de la lecture. Appuyer sur Kou
Mpuis la rel~cher Ie moment venu.
–Saute au debut d’une plage. Appuyer de fa~on
repetee sur l++ ou M.
REPEAT/FM MODE/OSC
–Repete une seule plage ou toutes Ies plages. R6gler
comme suit:
=1: Une seule piage est Iue de fa~on repetee.
Selectionner la plage avec Kou ~.
=: Toutes Ies plages sent Iues de fagon repetee.
Pour demarrer la lecture Iorsque I’appareil est hors
tension, appuyer sur CD. L’appareil se met sous tension et
la lecture du disque charge demarre (fonction de lecture
directe).
Si I’on charge un disque pendant que la touche CD clignote
au point 2, la lecture demarre saris qu’il soit necessaire
d’appuyer sur ●111.
Lorsque I’ecoute est terminee, appuyer sur POWER/0
STANDBY pour mettre I’appareil hors tension.
REMARQUE
●Ne pas utiliser de disques de forme irreguli&e (par
exemple en forme de coeur, octogonale, etc.).
Cela risque de provoquer une anomalie.
●Ne pas mettre plus d’un disque compact clans Ie tiroir.
●Ne pas ouvrir Ie tiroir du disque pendant la lecture.
●Ne pas toucher la Ientille. Cela risque de provoquer une
anomalie.
II est possible de programmer un maximum de 30 plages du
disque.
En mode d’arr&, continuer aappuyer sur
■STOP/MEMORY jusqu’a ce que “M” clignote
sur I’affichage.
Appuyer sur Kou Mpour selectionner une
plage, puis appuyer sur SSTOP/MEMORY
pour la memoriser.
Numero de plage
Numero p;ogramme
Recommence I’operation 2pour programmer
Ies autres plages.
Appuyer sur ➤/11 pour demarrer la lecture.
Pour verifier Ie programme, appuyer sur Mou Men
mode d’arr&.
Pour effacer Ie programme, appuyer une fois sur ■en
mode d’arr& de fagon que “M” disparaisse de I’afficheur.
Pour modifier Ies plages programmers, effacer Ie
programme et recommence depuis Ie debut.
20 FRANqAIS
Other manuals for CA-DW235
2
Table of contents
Languages:
Other Aiwa Speakers System manuals