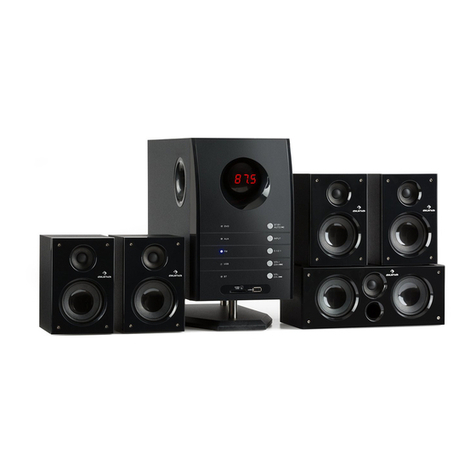
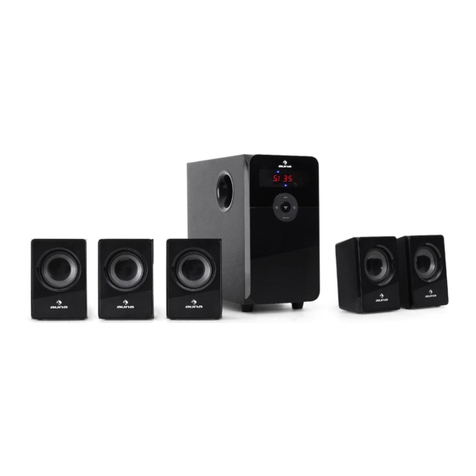
auna X-Gaming User manual

www.auna-multimedia.com
X-Gaming
5.1 Lautsprechersystem
5.1 Speaker System
Sistema de altavoces 5.1
Système d’enceintes 5.1
Sistema di altoparlanti 5.1
10033070


3
DE
English 11
Español 19
Français 27
Italiano 35
Sehr geehrter Kunde,
wir gratulieren Ihnen zum Erwerb Ihres Gerätes.
Lesen Sie die folgenden Hinweise sorgfältig durch
und befolgen Sie diese, um möglichen Schäden
vorzubeugen. Für Schäden, die durch Missachtung der
Hinweise und unsachgemäßen Gebrauch entstehen,
übernehmen wir keine Haftung. Scannen Sie den
folgenden QR-Code, um Zugri auf die aktuellste
Bedienungsanleitung und weitere Informationen rund
um das Produkt zu erhalten:
INHALTSVERZEICHNIS
Sicherheitshinweise 4
Bedienfeld und Tastenfunktionen 5
Fernbedienung 6
Anschlussdiagramme 7
Positionierung im Raum 9
BT-Funktion 10
Hinweise zur Entsorgung 10
Technische Daten 10
KONFORMITÄTSERKLÄRUNG
Hersteller:
Chal-Tec GmbH, Wallstraße 16, 10179 Berlin,
Deutschland.
Dieses Produkt entspricht den folgenden
Europäischen Richtlinien:
2011/65/EU (RoHS)
2014/53/EU (RED)
Die vollständige Konformitätserklärung des
Herstellers nden Sie unter folgendem Link:
https://use.berlin/10033070

4
DE
SICHERHEITSHINWEISE
Allgemeine Hinweise
• Blitzschlag - Wenn Sie das Gerät länger nicht benutzen oder es
gewittert, ziehen Sie den Stecker aus der Steckdose der trennen Sie das
Gerät vom Antennenanschluss. Dadurch werden Schäden am Produkt
durch Blitzschlag und Überspannung vermieden.
• Überlastung - Überlasten Sie keine Steckdosen, Verlängerungskabel
oder integrierten Steckdosen, da dies zu einem Brand oder Stromschlag
führen kann.
• Fremdkörper und Flüssigkeitseintritt - Schieben Sie niemals
Gegenstände jeglicher Art durch Önungen in das Gerät, da sie
gefährliche Spannungspunkte berühren oder Teile kurzschließen
können, die zu einem Brand oder einem elektrischen Schlag führen
könnten. Verschütten Sie niemals Flüssigkeiten jeglicher Art auf dem
Gerät.
• Reparatur und Wartung - Versuchen Sie nicht, dieses Produkt selbst zu
warten, da Sie sich durch das Önen oder Entfernen von Abdeckungen
gefährlichen Spannungen oder anderen Gefahren aussetzen.
Überlassen Sie alle Wartungsarbeiten qualiziertem Servicepersonal.
• Schäden, die einen Service erfordern - Ziehen Sie den Netzstecker aus
der Steckdose und wenden Sie sich an einen qualizierten Fachbetrieb
wenn eine der folgenden Situationen eintritt:
a) Wenn das Netzkabel oder der Stecker beschädigt ist.
b) Wenn Flüssigkeit verschüttet wurde oder Gegenstände auf das
Produkt gefallen sind.
c) Wenn das Produkt Regen oder Wasser ausgesetzt war.
d) Wenn das Produkt heruntergefallen oder beschädigt ist.
e) Wenn das Produkt eine deutliche verringerte Leistung aufweist.
• Ersatzteile - Wenn Ersatzteile benötigt werden, stellen Sie sicher, dass
der Fachbetrieb, der die Teile ersetzt, nur Ersatzteile verwendet, die
vom Hersteller zugelassen sind oder dieselben Eigenschaften wie das
Originalteil haben. Unbefugter Austausch kann zu Feuer, Stromschlag
oder anderen Gefahren führen.
• Wärme - Stellen Sie das Gerät nicht in der Nähe von Wärmequellen
wie Heizkörpern, Heizregistern, Öfen oder anderen Produkten
(einschließlich Verstärkern) aufgestellt.
5
DE
BEDIENFELD UND TASTENFUNKTIONEN
VOLUME Drehen Sie am Lautstärkeregler (1), um die Lautstärke
anzupassen.
ST.BY/INPUT
Standby: Drücken Sie im Modus AUX / USB / SD / FM 3
Sekunden lang auf die Taste, um in den Standby-Modus
zu wechseln. Input: Drücken Sie die Taste, um den Modus
auszuwählen
5.2/2.1 Umschalten zwischen 5.1 und 2.1
AUTO Play/Pause im USB/SD-Modus. Im FM-Modus Taste 3
Sekunden lang gedrückt halten, um die Sendersuche zu starten
/ CH- Vorheriger Titel im USB/SD-Modus. Vorheriger Sender im
FM-Modus
/ CH+ Nächster Titel im USB/SD-Modus. Nächster Sender im FM-
Modus
SD/MMC Card SD/MMC Steckplatz
U DISK USB-Anschluss
Hinweis: Der Speicherplatz der verwendete SD-Karte muss mind. 512 MB groß sein.

6
DE
FERNBEDIENUNG
Power-Taste: Gerät ein- und
ausschalten
SD SD-Modus
5.2/2.1 Umschalten zwischen 5.1 und 2.1
USB USB-Modus
FM Radiomodus
AUX AUX-Modus
DVD DVD-Modus
BT BT-Modus
SAVE Radiosender speichern
TUNE +/- Vorheriger/Nächster Sender
Titel abspielen/pausieren
AUTO Automatischen Sendersuchlauf
Vorheriger Titel (USB/SD)
CH- Vorheriger Sender
Nächster Titel (USB/SD)
CH+ Nächster Sender
SLEEP Sleeptimer einstellen
FL +/- Sound vorne links einstellen
FR +/- Sound vorne rechts einstellen
SW +/- Subwoofer einstellen
CEN +/- Centerlautsprecher einstellen
VOL +/- Master-Lautstärke
SL +/- Surround links einstellen
SR +/- Surround rechts einstellen
REPEAT Wiederholen
RESET Zurücksetzen
EQ -/+ Equalizer anpassen
DISP +/- Helligkeit des Displays anpassen

7
DE
ANSCHLUSSDIAGRAMME
Lautsprecheranschlüsse
Schließen Sie Frontlautsprecher, den Centerlautsprecher und die Surround-
Lautsprecher an die 5.1-Lautsprecherausgänge an:
• Das Front-Lautsprecherkabel an den FR-Anschluss
• Das Kabel des Centerlautsprechers an den CEN-Anschluss
• Die Surround-Lautsprecherkabel an die SR-Anschlüsse
Hinweis: Bringen Sie keine magnetischen Gegenstände in die Nähe der
Lautsprecher.

8
DE
Anschluss an andere Geräte
Die Buchsen und Stecker des Anschlusskabels sind farblich gekennzeichnet.
Die roten Buchsen und Stecker sind für den linken Audio-Kanal.
• Stecken Sie die Stecker vollständig in die Buchsen, da es sonst zu
Brummtönen oder anderen Störgeräuschen kommen kann.
• Schließen Sie zuerst die Lautsprecher und alle anderen externen Geräte
an und schließen Sie erst zum Schluss das Netzkabel an.

9
DE
POSITIONIERUNG IM RAUM
(a) Subwoofer: Stellen Sie den Subwoofer irgendwo auf dem Boden auf. Es
gibt keine Richtungsvorgabe für den Bass-Eekt.
(b) Vordere Lautsprecher
(c) Surround-Lautsprecher: Stellen Sie die Surround-Lautsprecher seitlich
direkt neben oder etwas hinter den Hörbereich. Richten Sie sie
horizontal aus, etwa 1 Meter über der Ohrhöhe.
(d) Centerlautsprecher: Position Sie ihn in der Mitte der beiden
Frontlautsprecher, auf oder unter dem TV-Gerät (falls Sie ein TV-Gerät
anschließen).

10
DE
BT-FUNKTION
1 Aktivieren Sie BT auf ihrem Smart-Gerät.
2 Suchen Sie nach dem Gerätenamen „Auna“.
3 Verbinden Sie sich mit den Lautsprechern.
4 Falls Ihr Gerät BT 2.0 oder darunter verwendet, kann es sein, dass Sie
als Passwort „0000“ eingeben müssen.
HINWEISE ZUR ENTSORGUNG
Bendet sich die linke Abbildung (durchgestrichene
Mülltonne auf Rädern) auf dem Produkt, gilt die
Europäische Richtlinie 2012/19/EU. Diese Produkte
dürfen nicht mit dem normalen Hausmüll entsorgt
werden. Informieren Sie sich über die örtlichen
Regelungen zur getrennten Sammlung elektrischer
und elektronischer Gerätschaften. Richten Sie sich nach
den örtlichen Regelungen und entsorgen Sie Altgeräte
nicht über den Hausmüll. Durch die regelkonforme
Entsorgung der Altgeräte werden Umwelt und
die Gesundheit ihrer Mitmenschen vor möglichen
negativen Konsequenzen geschützt. Materialrecycling
hilft, den Verbrauch von Rohstoen zu verringern.
Das Produkt enthält Batterien, die der Europäischen
Richtlinie 2006/66/EG unterliegen und nicht mit dem
normalen Hausmüll entsorgt werden dürfen. Bitte
informieren Sie sich über die örtlichen Bestimmungen
zu gesonderten Entsorgung von Batterien. Durch
regelkonforme Entsorgung schützen Sie die Umwelt
und die Gesundheit ihrer Mitmenschen vor negativen
Konsequenzen.
TECHNISCHE DATEN
Artikelnummer 10033070
Frequenzbereich 40Hz-20kHz
Signal-Rausch-Verhältnis ≥75 dB
Separation ≥50 dB
Abmessungen 8“ + 3“ x 5
Stromversorgung 220-240 V ~ 50/60 Hz

11
EN
Dear Customer,
Congratulations on purchasing this equipment.
Please read this manual carefully and take care of the
following hints to avoid damages. Any failure caused
by ignoring the items and cautions mentioned in the
instruction manual is not covered by our warranty and
any liability. Scan the QR code to get access to the
latest user mannual and other information about the
product:
CONTENT
Safety Instructions 12
Control Panel and Key Functions 13
Remote Control 14
System Connection Diagram 15
Positioning the Speakers 17
BT Function 18
Hints on Disposal 18
Technical Data 18
DECLARATION OF CONFORMITY
Producer:
Chal-Tec GmbH, Wallstraße 16, 10179 Berlin, Germany.
This product is conform to the following European
Directives:
2011/65/EU (RoHS)
2014/53/EU (RED)
The complete declaration of conformity of the
manufacturer can be found at the following link:
https://use.berlin/10033070

12
EN
SAFETY INSTRUCTIONS
General information
• Lightning - If you are not going to use the device for a long time or
if there is a storm, disconnect the plug from the electrical outlet and
disconnect the device from the antenna connector. This will avoid
damage to the product that may be caused by lightning or overvoltage.
• Overload - Do not overload power outlets, extension cords, or built-in
power outlets, as this may result in a re or electric shock.
• Foreign objects and liquid - Never push objects of any kind through
openings in the device as they may touch dangerous voltage points or
short out parts, which could result in a re or electric shock. Never spill
liquids of any kind on the device.
• Repairs and maintenance - Do not attempt to service this product
yourself, as opening or removing covers will expose you to dangerous
voltages or other hazards. Leave all maintenance to qualied service
personnel.
• Damage requiring service - Disconnect the power plug from the outlet
and consult a qualied specialist if any of the following conditions
occur:
a) If the power cord or plug is damaged.
b) If liquid has been spilled or objects have fallen onto the product.
c) If the product has been exposed to rain or water.
d) If the product has been dropped or damaged.
e) If the product has a markedly reduced performance.
• Replacement parts - When replacement parts are required, make
sure that the service professional who replaces the parts only uses
replacement parts that have been approved by the manufacturer or
that have the same characteristics as the original part. Unauthorized
replacement may result in re, electric shock or other hazards.
• Heat - Do not place the unit near heat sources such as radiators,
heaters, stoves or other products (including ampliers).

13
EN
CONTROL PANEL AND KEY FUNCTIONS
VOLUME Turn the volume control (1) to adjust the volume.
ST.BY/INPUT
Standby: In AUX / USB / SD / FM mode, press the button for 3
seconds to switch to standby mode. Input: Press the button to
select the mode
5.2/2.1 Switching between 5.1 and 2.1
AUTO Play/Pause in USB/SD mode. In FM mode, press and hold for 3
seconds to start the station search
/ CH- Reduce volume. Previous track in USB/SD mode. Previous
station in FM mode
/ CH+ Increase volume. Next title in USB/SD mode. Next station in
FM mode
SD/MMC Card SD/MMC slot
U DISK USB port
Note: The storage space of the used SD card must be at least 512 MB.

14
EN
REMOTE CONTROL
Power button: Switch the device
on and o
SD SD mode
5.2/2.1 Switching between 5.1 and 2.1
USB USB mode
FM radio mode
AUX AUX mode
DVD DVD mode
BT BT mode
SAVE Storing Radio Stations
TUNE +/- Previous/Next station
Play/Pause track
AUTO Automatic station search
Previous track (USB/SD)
CH- Previous channel
Next Title (USB/SD)
CH+ Next channel
SLEEP Setting the sleep timer
FL +/- Adjusting the sound front left
FR +/- Adjusting the sound front right
SW +/- Adjusting the subwoofer
CEN +/- Setting the center speaker
VOL +/- Master volume
SL +/- Left surround setting
SR +/- Right Surround setting
REPEAT Replay
RESET Reset
EQ -/+ Adjust equalizer
DISP +/- Adjusting the display brightness

15
EN
SYSTEM CONNECTION DIAGRAM
Speaker Terminals
Connect front speakers, a center speaker, surround speakers to 5.1 speaker
output terminals:
• The front speaker cords to the FRONT SPEAKERS terminals
• The center speaker cords to the CENTER SPEAKERS terminals
• The surround speaker cords to the SURROUND SPEAKERS terminals
Note: Do not leave objects generating magnetism near the speakers.

16
EN
Connecting Equipment
Jacks and plugs of the connecting cord are color-coded. Red jacks and plugs
are for the left channel of audio signals
• Insert the plugs fully into the jacks.Loose connections may produce a
humming sound or other noise interference.
• Connect the speakers and all other external equipment, and nally
connect the AC power cord.

17
EN
POSITIONING THE SPEAKERS
(a) Sub-woofer: Place the sub-woofer anywhere on the oor. There is no
directional requirement for the Bass eect.
(b) Front Speakers
(c) Surround Speakers: Place the surround speakers directly to the side or a
slightly behind the listening area. Align them horizontally,about 1 meter
above ear height.
(d) Center Speaker: Position in the center of the two front speakers or
Position on or below the TV set (if connecting a TV set to the unit).

18
EN
BT FUNCTION
1 Activate BT on your smart device.
2 Search for the device name „Auna“.
3 Connect Suie to the speakers.
4 If your device uses BT 2.0 or below, you may need to enter „0000“ as
the password.
HINTS ON DISPOSAL
According to the European waste regulation 2012/19/EU
this symbol on the product or on its packaging indicates
that this product may not be treated as household waste.
Instead it should be taken to the appropriate collection
point for the recycling of electrical and electronic
equipment. By ensuring this product is disposed of
correctly, you will help prevent potential negative
consequences for the environment and human health,
which could otherwise be caused by inappropriate waste
handling of this product. For more detailled information
about recycling of this product, please contact your local
council or your household waste disposal service.
Your product contains batteries covered by the
European Directive. 2006/66/EC, which cannot be
dis-posed of with normal household waste. Please
check local rules on separate collection of batteries. The
correct disposal of batteries helps prevent potentially
negative conse-quences on the environment and
human health.
TECHNICAL DATA
Item number 10033070
Frequency range 40Hz-20kHz
S/N Ratio ≥75 dB
Separation ≥50 dB
Dimensions 8“ + 3“ x 5
Power supply 220-240 V ~ 50/60 Hz

19
ES
Estimado cliente:
Le felicitamos por la adquisición de este producto.
Lea atentamente el siguiente manual y siga
cuidadosamente las instrucciones de uso con el n de
evitar posibles daños. La empresa no se responsabiliza
de los daños ocasionados por un uso indebido del
producto o por haber desatendido las indicaciones de
seguridad. Escanee el código QR para obtener acceso
al manual de usuario más reciente y otra información
sobre el producto:
ÍNDICE DE CONTENIDOS
Indicaciones de seguridad 20
Panel de control y funciones de los botones 21
Mando a distancia 22
Diagrama de conexiones 23
Colocación en la estancia 25
Función bt 26
Retirada del aparato 26
Datos técnicos 26
DECLARACIÓN DE CONFORMIDAD
Fabricante:
Chal-Tec GmbH, Wallstraße 16, 10179 Berlín
(Alemania).
Este producto cumple con las siguientes directivas
europeas:
2011/65/UE (refundición RoHS)
2014/53/UE (RED)
Puede descargar la declaración de conformidad
completa del fabricante en el siguiente enlace:
https://use.berlin/10033070

20
ES
INDICACIONES DE SEGURIDAD
Indicaciones generales
• Relámpago - Si no va a utilizar el aparato durante un periodo largo
de tiempo o si hay una tormenta eléctrica, desenchufe el aparato de la
toma de corriente y desconecte el conector de antena. De este modo,
protegerá el aparato de los daños que pueden ocasionar relámpagos y
la sobretensión.
• Sobrecarga - No sobrecargue las tomas de corriente, cables
alargadores o tomas de corriente integradas para evitar el riesgo de un
incendio o de descarga eléctrica.
• Objetos extraños y entrada de líquido - No introduzca objetos de
ningún tipo en las ranuras del aparato, ya que podría tocar elementos
con voltajes peligrosos o piezas salientes que podrían causar un
incendio o una descarga eléctrica. No derrame líquido de ningún tipo
sobre el aparato.
• Reparación y mantenimiento - No intente reparar el aparato usted
mismo, ya que si abre o retira las cubiertas, podría provocar una tensión
peligrosa u otro riesgo. Contacte con un servicio técnico para su
reparación.
• Daños que requieren una reparación - Desconecte el enchufe de
la toma de corriente y póngase en contacto con un servicio técnico
cualicado si:
a) El cable de alimentación o el enchufe está dañado.
b) Se ha derramado líquido o se ha caído un objeto en el interior del
aparato.
c) El producto ha estado expuesto a la lluvia o agua.
d) Se ha dejado caer el producto o está dañado.
e) El rendimiento del producto ha disminuido considerablemente.
• Piezas de repuesto - Si necesita piezas de repuesto, asegúrese de
que el técnico que cambiará las piezas utiliza solamente las piezas
de recambio originales del fabricante o piezas con las mismas
características que las piezas originales. Las piezas no autorizadas
pueden provocar incendios, descargas eléctricas y otros riesgos.
• Calor - No instale el aparato cerca de las fuentes de calor como
radiadores, calentadores, hornos u otros aparatos similares (incluidos
amplicadores).
Table of contents
Languages:
Other auna Speakers System manuals

auna
auna Areal 652 User manual

auna
auna Areal Bar 950 User manual

auna
auna UltraSonic Pulse V6-40 User manual

auna
auna Areal Bar 541 User manual

auna
auna 10032833 User manual

auna
auna Stealth Bar 70 User manual

auna
auna Stealth Base Connect User manual

auna
auna Areal 525 DG User manual

auna
auna TB 700-BT User manual

auna
auna Areal Bar 650 User manual

auna
auna Areal Elegance User manual

auna
auna HF583 User manual

auna
auna Areal 652 User manual

auna
auna Clubmaster Tube User manual

auna
auna 10033254 User manual

auna
auna FS23 User manual

auna
auna Areal Bar 700 User manual

auna
auna Areal Bar 150 User manual

auna
auna PSS35 User manual

auna
auna Streetstar 12 User manual