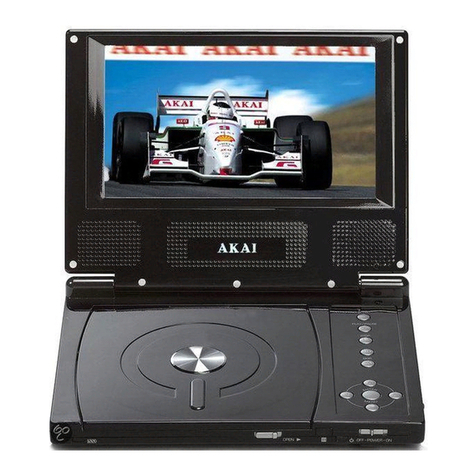
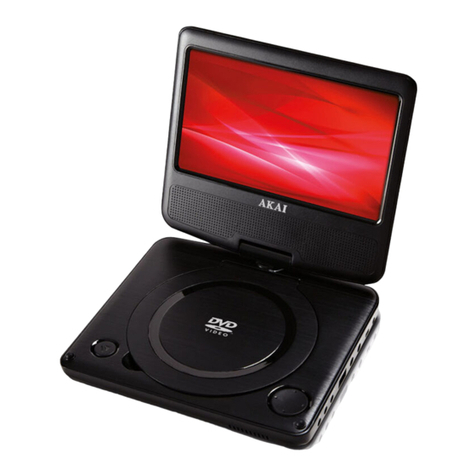
Akai HC-PDV9018 User manual

9” Portable DVD Player
HC-PDV9018
Instruction Manual
AFTER SALES SUPPORT
NZ: 0800 836 761
N13275

2
Important Safety Instructions 3
Important Notes 6
Parts List 7
Buttons and Functions 9
Getting Started 11
Basic DVD Playback 14
Advanced Operations 15
Setup Options 17
Troubleshooting Guide 20
Technical specications 22
Contents

3
Read this manual thoroughly before rst use and keep it in a safe place for future
reference, along with the warranty card, purchase receipt and carton. The safety
precautions enclosed herein reduce the risk of re, electric shock and injury when
correctly adhered to. Follow all instructions and take notice of all warnings.
Important warnings and cautions!
DANGER! CAUTION!
This symbol alerts you to dangerous voltage inside. To prevent
electric shock, do not open the unit’s casing.
IMPORTANT!
This symbol alerts you to important warnings and instructions on the
unit or in this manual.
To reduce the risk of re or electric shock:
Do not attempt to open the equipment. Both visible and
invisible laser radiation will beam out when opened. Avoid
direct exposure. Do not stare into the beam.
Do not repair the unit yourself, and do not replace the plug.
Only have the equipment serviced by qualied personnel.
In case of damage or when service is required, contact our
after sales support line for advice.
This product uses a laser component. Adjustments, use of controls, or performance
of procedures other than those specied in this manual may result in hazardous
radiation exposure.
Always align the power plug properly and insert it fully into the wall outlet.
These symbols indicate that this product utilises a Class 1 laser to
read discs. This DVD Player is equipped with safety switches to avoid
exposure when the disc door is open and the safety interlocks are
defeated. Invisible laser radiation is present when the DVD Player’s lid
is open and the system’s interlock has failed or has been defeated. It
is very important that you avoid direct exposure to the laser beam at
all times. Do not attempt to defeat or bypass the safety switches.
CLASS 1
LASER
PRODUCT
Important Safety Instructions

4
Electrical safety and cord handling
• Voltage: Before connecting the AC adaptor to your power supply, make sure your
outlet voltage and circuit frequency correspond to the voltage stated on the
product rating label.
• Adaptor: Only use this equipment with the AC adaptor supplied, and do not
overload the power outlet.
• Adaptor power cord: Do not let the adaptor cord hang over the edge of a table,
or touch any hot surface. Do not allow anything to rest on or roll over the power
cord.
• CAUTION: To reduce the risk of re or electric shock, do not expose this product
or the AC power adaptor to rain or moisture; do not use it anywhere near water
or where water splashes or drips. Do not touch the power adaptor plug with wet
hands.
• Liquid: If liquid is spilled onto the player, unplug it and have it checked by
qualied personnel before operating it again.
• Disconnect: Remove the disc and unplug the power adaptor from the power
outlet after use to avoid possible damage during electrical storms, or when the
equipment will not be used for some time. Always grasp the plug, not the cord,
when disconnecting.
• RCD: The installation of a residual current device (safety switch) is recommended
to provide additional safety protection when using electrical appliances.
It is advisable that a safety switch with a rated residual operating current
not exceeding 30mA be installed in the electrical circuit which supplies the
appliance. See your electrician for professional advice.
Usage conditions and restrictions
• Damage: If the player, adaptor or power cord is damaged, unplug the equipment
and have it serviced by appropriately qualied personnel. Contact our after sales
support line for advice.
• Usage restrictions: This equipment is not intended for use by persons (including
children) with reduced physical, sensory or mental capabilities, or lack of
experience and knowledge, unless they have been given supervision or
instruction concerning use of the equipment by a person responsible for their
safety.
• Children: Supervise young children to ensure they do not play with the equipment.
Close supervision is always necessary when electronic equipment is used by or near
children.
Important Safety Instructions (Cont.)

5
• Do NOT operate the player in the following conditions:
• Close to a heat source, or in a place subject to direct sunlight. The maximum
working temperature of this machine is 45ºC.
• In a place subject to excessive dust or mechanical shocks.
• Close to strong magnetic elds.
• On unbalanced, unstable surfaces.
• In the car: If the player is left in a car parked in the sun, put the player in the boot
or where it will not be subjected to direct sunshine and heat.
• Ventilation: Leave at least 2.5cm clearance around the unit for proper ventilation
Do not place the player on a thick carpet, on a bed, or any place where
ventilation holes are obstructed. Do not cover the ventilation holes, and do not
insert anything into the ventilation openings.
• Leave the top of the unit clear. Do not place heavy objects on top. Do not place
objects lled with water, such as vases, on top of the unit. Do not place any
naked ame sources, such as lit candles, incense sticks, or cigarettes on top of
the unit.
• When playing a disc:
• Keep your ngers clear of the disc when it is spinning.
• Do not attempt to play a cracked or deformed disc, even if attempts have been
made to repair it.
• Do not tilt, shake or move the unit while it is playing. It may damage the disc.
• Do not put any discs or any objects in the disc holder other than those disc
types intended for use with this device.
• Do not touch the spindle immediately after prolonged play, as it may have
become hot. Be careful when loading/removing a disc.
• Cleaning: Always unplug the power adaptor from the outlet and remove the
battery before cleaning. Clean the cabinet with a soft, damp cloth. Do not use
any type of abrasive pad, scouring powder, detergent or solvent such as alcohol
or benzene.
• Repair: This unit does not contain any parts you can repair yourself. Do not
open it or attempt to repair it. Opening or removing covers may expose you to
dangerous voltage or other hazards.
• Liability: Follow the instructions in this manual when adjusting this equipment.
Only adjust those controls that are covered in this instruction manual, as
improper use can result in electric shock and/or material damage. We accept no
liability for any damage resulting from misuse of the product or noncompliance
with the instructions.
Important Safety Instructions (Cont.)

6
Condensation
• The unit may suer from condensation in the following situations:
• When you take it directly from a cold to a warm place, and vice versa.
• When you use the unit in a room where you just turned on a heater, or where
cold air from an air conditioner is directed onto the unit.
• When you use the unit in a hot and humid area just after having moved it
from an air conditioned room.
• When the room is steamy or damp.
• If there is condensation, wipe the moisture away with a cloth.
Disturbances
• When you place the unit near a TV, radio or VCR, the playback picture quality may
deteriorate and the sound may be distorted. To avoid these problems, place the
unit away from these appliances.
Disc protection
• Do not touch the playback side of the disc.
• Do not attach tape or paper to the disc. To clean o dust, slightly moisten a soft
cloth, wiping in a straight motion from the centre out. Finish cleaning with a dry
cloth.
• Do not use any type of solvent, commercially available benzene or antistatic
spray designed for vinyl LPs, as these may damage the discs.
• Do not store discs in a place subject to or near heat sources.
• Do not store discs in a place subject to moisture and dust, such as a bathroom or
near a humidier.
• Store discs vertically in a case. Stacking discs or placing objects on discs outside
their case may cause warping.
Region codes
This DVD Player is able to play Region 4 coded discs.
Important Notes

7
1 OPEN
2 VOL -
3 VOL +
4 SOURCE
5 TFT (Screen) ON/OFF
6 SET UP
7 MENU
8 PREV
9 DIRECTION Buttons
10 FWD
11 OK
12 NEXT
13 REW
14 PLAY/PAUSE
15 STOP
16 INDICATOR Light and SENSOR
for Remote Control
17 DC IN
18 POWER ON/OFF
19 AV OUT
20 EARPHONE Socket
21 SD/MMC Card Slot
22 USB Port
Parts List

8
HC-PDV9018
See pages 9 to 10 for a description of the buttons and functions of the remote
control.
Parts List (Cont.)

9
POWER Turn on/o the power source of this machine.
MUTE Press to turn o the sound output temporarily. Press it again to
restore the sound output.
SUBTITLE When viewing a subtitle-encoded disc, press to display and select
the subtitle language.
SOURCE Press to enter USB/CARD/DVD mode, then press the [UP] and
[DOWN] arrow buttons to choose the information source, then
press [ENTER] to conrm your selection.
ZOOM When viewing DVD, VCD, MPEG4 and other video discs, press to
zoom in on the video picture and enlarge it to twice, three times
or four times the original size. Press the arrow keys to move to the
amplied picture.
REPEAT Press to switch to repeat mode. (Note: this button is valid only
when the PBC function is turned o ).
DISPLAY Press to display or hide playback information of the currently
playing video disc.
ANGLE When viewing a multi-angle encoded DVD, press to view dierent
angles of a particular scene.
SETUP Press once to enter the main system setup menu. Press it again to
quit the menu.
PLAY/ PAUSE Press to enter playback mode, or restore normal playback when in
FF, FR, or slow play.
Press to suspend current playback.
Press it again, or press [ ] to restore normal playback
MENU Press to display the DVD menu. Then use the arrow buttons for
selection and OK/ENTER for conrmation.
STOP Press once to suspend current playback, and press [ ] to
continue playback.
Press twice in succession to stop current playback.
ARROW
Buttons
Use the [UP], [DOWN], [LEFT] and [RIGHT] arrow buttons to move
to a selected target, then press [OK/ENTER] to conrm.
Some of the functions explained below and on the following page can only be
accessed with the remote control, some only with the buttons on the player, and
some either with the remote control or directly from the player.
Buttons and Functions

10
ENTER Press to enter the selected setup options, or to conrm your
selection of a particular option.
TITLE Press to return to the title menu of the DVD.
AUDIO Press to switch the dialogue language provided on a DVD or the
sound channel provided on a VCD.
PROGRAM Press to program favourite songs when playing a VCD or DVD.
After opening it, input the programmed track number, then press
[START]. Note: the repeat function does not work for programmed
tracks.
NUMBER
Buttons
Press to input corresponding numbers or select corresponding
chapters or songs.
VOLUME +/- Press VOLUME + to increase volume and VOLUME – to decrease
volume.
SLOW Press repeatedly to move forward or backward in the video at
dierent slow motion speeds: 1/2, 1/4, 1/8, 1/16.
GOTO Press it and use the directional and numeric buttons to select a
particular title, chapter, song, title time, chapter time, or song time
for playback.
In TV mode, press to search channels automatically.
A-B When playing a video disc, press this button to record the starting
point (A) of the segment you want to repeat, press it again to
record the end point (B) of the segment repetition. The player will
then constantly loop the content between points A and B. Press
this button for a third time to cancel the previously set segment
repetition and restore normal playback.
Note: the points A and B must be in the same title or song.
REW Press repeatedly to fast reverse playback at the following speeds:
2x, 4x, 8x, 16x, 32x. In TV mode, press to carry out manual ne
adjustments to the previous frequency.
FWD Press repeatedly to fast forward playback at the following speeds:
2x, 4x, 8x, 16x, 32x. In TV mode, press to carry out manual ne
adjustments to the next frequency.
PREV Press to jump to the previous chapter or song.
In TV mode, press to jump to the previous channel.
NEXT Press to jump to the next chapter or song.
In TV mode, press to jump to the next channel.
Buttons and Functions (Cont.)
11
Using the remote control
Most instructions are based on remote control operation, unless otherwise noted.
When they have the same function, you can use either the buttons on the remote
control or those on the main unit. However, some functions are only available from
the remote control.
The remote requires two AAA size batteries that are located in the battery
compartment at the back of the remote control. To replace the batteries:
• Squeeze the latch at the back of the battery compartment to open and remove
the cover.
• Take out the old batteries and replace them with fresh batteries of the same type
and size, following the polarity markings (+ / -) inside the compartment.
• Replace the cover.
Note: If the remote control will not be used for a long time, take out the batteries
and store the remote control in a cool and dry place, out of direct sunlight.
• When using the remote control, make sure to aim it at the remote control sensor
at the front of the unit (near the indicator light).
Precautions when using batteries
• Do not use old and new batteries together.
• Do not use dierent types of battery (for example, Manganese and Alkaline
batteries) together.
• Note that there are chargeable and non-chargeable batteries. Do not attempt
to charge non-chargeable batteries.
• Remove the batteries from the remote control unit if you do not intend to use
the unit for a long time.
• When disposing of used batteries, follow any guidelines for recycling and
disposal of batteries that apply in your local area.
Rotating the screen
Put the player on a level surface and open up the monitor vertically. While holding
the lower side of the player:
• To rotate the monitor for viewing from the right side, turn it slowly. It can be
turned up to 90degrees.
• To rotate the monitor for viewing from the left or opposite side, turn it slowly, but
do not force it beyond 180 degrees.
• Adjust the angle of the monitor backwards or forwards for comfortable viewing.
The monitor can also be laid at.
NOTE: Do not store the player with the screen side up. Otherwise, the screen will
get dusty or get damaged by an unexpected shock.
Getting Started

12
Powering the DVD player
• The DVD player is powered by a rechargeable, ultra-thin and lightweight lithium
polymer battery, which can be charged at any time without aect on its memory
capacity — you do not have to wait until the battery power has run out to
recharge.
• To charge the battery, rst make sure the power switch at the side of the
player is in the OFF position. Then connect the DC IN plug of the AC/DC power
adaptor to the DC IN socket (next to the power switch) and the other end to an
appropriate electrical outlet.
• WARNING: Only use the supplied AC/DC adaptor for charging the DVD player.
Charging with a dierent adaptor may cause damage or explosion.
• During recharging, the indicator light at the front of the unit will glow red,
indicating that the battery is being charged. When the battery is fully charged,
the light will turn green.
It takes about 6 hours to fully charge the battery. With a full charge, the
player can be used continuously for about 2 hours without recharging.
• Once fully charged, you can disconnect the device from the charger (AC/DC
power adaptor), or leave the charger connected to run the DVD player on mains
electricity and save battery power.
NOTE: During playback, it is normal for the appliance to produce heat, so avoid
using for an excessively long time. The normal working temperature range
for the equipment is 0°C - 45°C.
• In a car, you can also recharge the battery or run the player via the supplied car
charger connected to the car’s cigarette lighter.
Using the DVD player with your TV
This DVD player can also be connected to a TV for viewing movies on a larger
screen. To do so:
• Connect the supplied AV cable to the AV OUT socket at the right side of the DVD
player, then connect the other end of the cable to the AV IN sockets on your TV.
• Make sure to set your TV to the video input channel (most likely via the MODE
button on your TV remote, but check your TV instruction manual for detailed
information). Once you have selected the correct channel, your TV will show the
opening DVD screen.
Getting Started (Cont.)

13
Turning the player on/o
Once the player is fully charged, or connected to an electrical outlet via the AC/DC
power adaptor, slide the POWER switch (on the right side of the player) to the ON
position to turn the player on. The indicator light at the front of the unit will glow
green. Slide the power switch to the OFF position to turn it o.
Loading a disc
• Open the player.
• Press the OPEN button on the bottom left corner of the main unit to open the
disc cover. Any protective sheet beneath the disc cover must be removed before
using the player for the rst time.
• Place a disc with the playback side down (label side up) and push gently on the
centre of the disc to x it to the spindle. The player will be unable to recognise or
correctly play the disc if it is not properly xed to the spindle.
• Close the disc cover. The player will begin to play the disc automatically.
• To remove the disc, press the OPEN button and remove the disc by lifting from
beneath while gently pressing down on its centre.
Adjusting the volume
Use the VOL- and VOL+ buttons on the main unit (or on the remote control) to
adjust the volume of the speaker and headphones.
Using headphones
To listen to the audio using headphones, plug them into the EARPHONE socket
on the right side of the player. The speakers will automatically disable the sound
output when headphones are connected.
• CAUTION: To prevent causing permanent hearing damage, keep the volume at
a moderate level when using headphones. Before connecting, turn down the
volume and then readjust it when playback starts.
• Turn o the player before connecting/disconnecting the headphone cable as
movements from moving the plug may cause disc damage.
Adjusting settings
Before rst use you may want to adjust some of the settings or functions according to
your TV settings or personal preferences. These are explained on pages 17 to 19.For a
quick guide to basic DVD playback functions, just read the following page. Advanced
operations are described on pages 15 to 16.
Getting Started (Cont.)

14
Basic DVD playback
1. Set up the DVD player according to the instructions on the previous pages. Make
sure that:
• The player battery is fully charged, or the player is properly connected to a
power point (via the AC/DC adaptor) or to the car cigarette lighter (via the car
charger).
• The remote control contains batteries.
• The screen is in an appropriate viewing position (unless connected to a TV).
• The player is properly connected to your TV (if required).
• Earphones/headphones are properly connected (if required).
• The player is switched on.
• A disc has been properly loaded and the disc compartment is closed.
NOTE: If a disc has been loaded upside down or is badly scratched or dirty, it will
not play. If this happens, clean the disc or change it.
2. Once a disc has loaded, the DVD player will start playing the disc automatically or,
depending on the disc, it will start reading the disc’s contents list, which may take
10-20 seconds.
3. If the menu is presented, use these buttons to highlight your selection
and press OK/ENTER to conrm.
Pause / stop / resume
• To pause playback, press the PLAY/PAUSE button. To resume playback, press
the PLAY/PAUSE button again.
• To stop playback temporarily, press the STOP button once. Playback will be
stopped temporarily and when you press the PLAY/PAUSE button, playback
will resume where you stopped it.
• To stop playback completely, press the STOP button twice. Playback will be
stopped completely and when you press the PLAY/PAUSE button, playback will
start again at the beginning.
NOTE: A screen saver displaying a bouncing DVD logo will be activated if the player
is stopped or paused and no button is pressed for a while.
Basic DVD Playback

15
Playing a video disc in MP3/MPEG4 format
To play a disc in MP3 or MPEG4 format, follow step 1 of the basic DVD playback
instructions on the opposite page. The player will display the contents menu of the
video disc on the screen.
1. Press [UP] or [DOWN] to select a document or le.
2. Press [ENTER] or [OK] to enter the selected le and display the content of the
le. Then press [ENTER] or [OK] to play the selected le.
3. Press [LEFT] to return to the previous level menu when the video disc stops.
Playing content from a USB drive or SD/MMC card
To play content from a USB device or memory card, follow step 1 of the basic DVD
playback on page 14, but instead of inserting a disc, insert a USB device into the
USB port (and/or a memory card into the card slot) at the side of the player.
• Press [SOURCE] and after a brief waiting time, the les on your storage medium
will be displayed on the screen and “USB” (or “SD”) will appear on the bottom
of the screen, indicating the medium that is currently selected. Press [SOURCE]
again to switch between“USB” and “SD”.
• Use the [UP] / [DOWN] / [LEFT] / [RIGHT] buttons to select a folder and/or le
for playback. Then press [OK/ENTER] to conrm your selection.
NOTE: If no memory storage device is loaded but you have selected this source,
“EMPTY” will be displayed on the screen.
Advanced Operations

16
Playing a picture CD
To play a picture disc, follow step 1 of the basic DVD playback on page 14. The
player will start playing the disc automatically.
• Press [ ] to display the contents menu of this video disc.
• Press [UP] or [DOWN] to select a picture, then press [ENTER/OK] or [ ] to play
the video disc from the selected picture in full screen.
• Press [GOTO] and then use the number keys to select a picture. The player will
play the video disc from the selected picture.
• Press [ ] to suspend current playback. Press it again, or press [ ] to restore
normal playback.
• Press [ ] to start or restore playback of the currently playing video disc.
• Press [REPEAT] repeatedly to cycle through the repeat options.
• Press [ ] / [ ] during playback to jump to the previous or next picture.
• Press [RIGHT] during playback to rotate a picture clockwise. Press [LEFT] to
rotate a picture counterclockwise.
• Press [ZOOM] repeatedly during playback to zoom in or out in a picture, or to
restore the original size once you have zoomed in or out. When a picture is
amplied, press the arrow keys to move it.
Advanced Operations (Cont.)
17
Menu operation
1. Press [SETUP] on the DVD player, or on the remote control, to display the
system setup menu, where you can congure the operation of the player. The
icons on top of the display represent the dierent setup menus, from left to
right: General Setup, Audio Setup, Video Setup and Preferences.
2. Use the [LEFT] and [RIGHT] arrow keys to select the targeted setup page.
3. Use the [UP] and [DOWN] keys to select the setup items you want to adjust,
then press [ENTER] or [OK] or [RIGHT] for access. Press the [UP] and [DOWN]
arrow keys to choose options, and press [ENTER] or [OK] to conrm.
4. Use the arrow keys to keep on selecting other setup items for adjustment.
5. Press [LEFT] to return to the previous level menu.
6. Press [SETUP] again to quit the system setup menu.
General setup menu
In this menu you can set up the TV display format, angle mark, display language,
captions, screen saver, HDCD, and last memory.
TV display
• Normal/PS: When this machine is connected to an ordinary TV, a wide screen
picture will display on the entire TV screen, but parts on the left and right of the
picture are cut o.
• Normal/LB: When this machine is connected to an ordinary TV, a wide screen
picture will display on the entire TV screen, but with black strips above and
beneath the picture.
• Wide screen: When this machine is connected to a wide screen TV, you can
select this option. The wide screen image will be displayed across the full
screen, stretched horizontally.
Angle mark
The angle mark can be turned ON or OFF.
• When the Angle mark is turned ON, the screen will display the angle mark
when a multi-angle DVD is played. This is only applicable when playing video
discs recorded with multiple angles.
OSD language display
The OSD language is set to English.
Setup Options

18
Captions
Captions can be turned ON or OFF.
• When the captions are turned ON, the screen will display subtitles (if the video
disc being played has subtitles) and [HIDE SUBTITLE] will be displayed during
playback.
Screen saver
The screen saver can be turned ON or OFF.
• When the screen saver is turned ON, the screen will display a screen saver (a
bouncing DVD logo) after several minutes without activity. This is intended to
protect the screen. Press any key to resume activity.
HDCD
The High Denition Compatible Digital format can be set to OFF, 1x or 2x.
Last memory
• This can be turned ON or OFF. When it is turned ON, the player will remember
the last playback point on a disc before it was turned o or stopped. When the
disc is started again, it will start playing from this memory point.
Audio setup menu
Speaker setup
• Left/Right sound channel: Mixes the audio frequency into L/R sound channels to
output it from the left or right speakers.
• Stereo: Mixes the audio frequency into stereo to output it from the left and
right speakers.
Dynamic range
When watching a low-volume video disc with a big dynamic range at night, you can
turn up the dynamic balance value to reduce the loss of sound details.
Video setup menu
In this menu you can set up the screen quality of this unit.
Panel quality
• Sharpness can be set to High, Medium or Low.
• Brightness, Contrast, Hue and Saturation can be adjusted using the [LEFT]
and [RIGHT] arrow buttons. Press [ENTER] to conrm.
Setup Options (Cont.)
19
Preferences menu
Items in this setup menu can only be adjusted when there is no video disc in the
compartment, or when the video disc inside the compartment has been stopped.
Press [STOP] twice to stop the disc.
TV type
The TV type can be set to PAL or NTSC, depending on the connected TV system.
• PAL: Is used in Australia, Europe, China and other countries.
• NTSC: Is used in the USA, Canada and other countries.
NOTE: If the wrong TV system is selected, the picture quality will be very poor.
Audio, subtitle and disc menu language
Choose from a selection of languages for sound, subtitles, and the disc menu.
NOTE: If the video disc does not contain the selected language, the default setting
of the video disc will work.
Parental control
This option is used to set up parental control levels so you can control which discs
can be played. The player will not play discs with a rating above the one you set,
unless you input the correct password. To change this setting, you must rst input
the master password: 8888.
NOTE: The function is valid only for video discs with a rating.
Password
• Password mode: This can be set to ON or OFF. But to change the password
mode, you must rst input the correct password, and the default password is
8888.
• Password: Select this setting to reset a new password.
NOTE: The master password 8888 is still valid, even if the password is reset.
Defaults
Restore factory defaults, excluding parental control and password settings.
Setup Options (Cont.)
20
Problem Possible cause Possible solution
The power light
does not come
on.
The power adaptor
is not securely
connected.
Make sure the power cable from the
AC/DC adaptor is rmly inserted into
the socket on the right side of the
player.
Make sure the power cord from the
wall outlet is connected securely to the
power adaptor and wall outlet.
The power outlet is
switched o or not
working.
Make sure that the outlet is switched
on, and check that the outlet is working
by plugging in a dierent appliance.
The battery needs
recharging.
Run the player with the power adaptor
plugged into a wall outlet to recharge
the battery.
There is no
picture on the
external TV
display.
The wrong source has
been selected, or there
is a loose connection.
Make sure that the proper source is
selected on the external display. Also
make sure that the AV cable is properly
connected.
No sound.
Volume is set to
minimum.
Press the VOL+ button to increase the
volume level.
Headphones are
plugged in.
Unplug the headphones to enable
sound from the speaker.
Audio is muted. Press the MUTE button to restore the
sound.
In FF/FR playback state. Press the PLAY/PAUSE button to restore
normal playback and sound.
Display is too
dark or too
bright.
Brightness is too low or
too high.
In the Setup Options, go to the Video
Setup Page and adjust the contrast
and/or brightness to the desired
setting.
If you encounter any problems with your DVD player, check in the table below
for possible causes and solutions to common problems. If none of the solutions
provided helps you solve the problem, contact our customer helpline for advice.
Troubleshooting Guide
Table of contents
Other Akai Portable DVD Player manuals

Akai
Akai ACVDS735 User manual

Akai
Akai ACVDS715UX User manual

Akai
Akai AKDVD10 User manual

Akai
Akai A51007 User manual

Akai
Akai APD909 User manual

Akai
Akai ACVDS702 User manual

Akai
Akai PDVD172 User manual

Akai
Akai ACVDS736T User manual

Akai
Akai ACVDS955 User manual

Akai
Akai Walt Disney's Donald Duck ACVDS9DD User manual