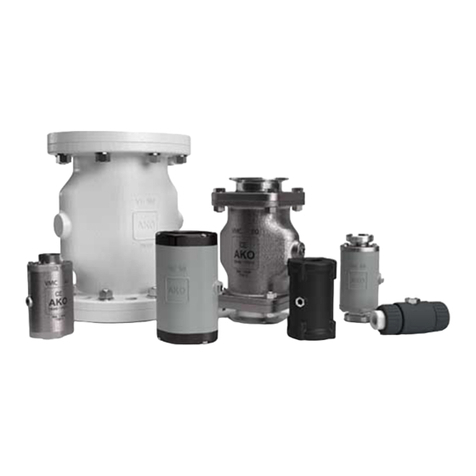
AKO V Series User manual

Operating Manual
for Air operated Pinch Valves
Series V - VF - VM - VMC - VMCE - VMF - VMP
VT
Ex-Series VX - VFX - VMX - VMCX - VMCEX -
VMFX - VMPX - VTX
(Translation)

Contents
1. SAFETY INSTRUCTIONS .................................................................. 3
Special conditions and safety instructions for use in potentially explosive areas ............................. 3
2. USAGE .................................................................................. 5
2.1 Service life............................................................................. 5
2.2 Intended use ........................................................................... 5
2.3 Improper use ........................................................................... 6
2.4 Function............................................................................... 6
3. TECHNICAL DESCRIPTION ................................................................ 6
3.1 Control................................................................................ 6
3.2 Technical data . . . . . . . . . . . . . . . . . . . . . . . . . . . . . . . . . . . . . . . . . . . . . . . . . . . . . . . . . . . . . . . . . . . . . . . . . . 6
3.3 Operating data.......................................................................... 6
4. ASSEMBLY .............................................................................. 7
4.1 Preparation ............................................................................ 7
4.2 Mechanical connections .................................................................. 7
4.3 Connection for the control pressure line ...................................................... 7
5. COMMISSIONING......................................................................... 8
5.1 Requirements .......................................................................... 8
5.2 Normal operation........................................................................ 8
6. MAINTENANCE AND REPAIR............................................................... 8
6.1 Generalspecications .................................................................... 8
6.2 Inspection ............................................................................. 8
6.3 Maintenance intervals . . . . . . . . . . . . . . . . . . . . . . . . . . . . . . . . . . . . . . . . . . . . . . . . . . . . . . . . . . . . . . . . . . . . 8
6.4 Repair work ............................................................................ 8
7. MALFUNCTIONS ......................................................................... 8
8. STORAGE ............................................................................... 8
9. DISPOSAL ............................................................................... 9
10. ADDITIONAL DOCUMENTATION ............................................................ 9
11. MAINTENANCE / REPAIR INSTRUCTIONS .................................................. 10
11.1 Generalprinciplesforttingthepinchvalves ................................................. 10
11.2 General principles for the maintenance/repair of the pinch valves ................................. 11
11.3 Air operated Pinch Valve series VF, DN 40-80 ................................................ 12
11.4 Air operated Pinch Valve series VF, DN100-300 ............................................... 13
11.5 Air operated Pinch Valve series VMC, DN10-50, type F, FA, G, M, N, R, RA, T, TA .......................14
11.6 Air operated pinch valves series VMC, DN65-80, Type F, FA .................................... 15
11.7 Air operated pinch valves series VMC, DN65-80, Type G, M, N, R, RA, T, TA, FT ..................... 16
11.8 Air operated pinch valves series VMC, DN100, Type F, FA ...................................... 17
11.9 Air operated pinch valves series VMC, DN 100, Type G, M, R, RA, T, A ............................ 18
11.10 Air operated pinch valves series VMC, DN125-150, Type F, FA, R, RA, T, TA ........................ 19
11.11 Air operated pinch valves series VMP, DN10-50 .............................................. 20
11.12 Air operated pinch valves series VM+VMF, DN10-50 ......................................... 21
11.13 Air operated pinch valves series VT, DN100 .................................................. 22
12. APPENDIX .............................................................................. 23
12.1. Possible malfunctions ................................................................... 23
12.2 EC Declaration of Incorporation ........................................................... 24
AKO Armaturen & Separationstechnik GmbH
D-65468Trebur-Astheim▪Adam-Opel-Str.5▪Telefon/Phone:+49(0)6147-9159-0▪Fax:+49(0)6147-9159-59
E-Mail:[email protected]▪Internet:www.ako-armaturen.de / www.pinch-valve.com 2/24

WARNING! Risk of contamination
If the sleeve is destroyed due to temperatures above its
maximumapplicationlimits(alsoduetore),thepump-
ingmediummaypossiblybecomecontaminated(release
ofpoisonousgases). In addition,theairoperated pinch
valve will then be inoperable.
Avoid any possible consequential damage to the whole
plant through the corresponding on-site safety meas-
ures derived from the risk assessment for the whole
plant. This risk assessment must be created and docu-
mented on-site by the operator.
Ensure that the contaminated pumping medium is not
circulated and is disposed of in accordance with local
and national regulations.
Replace the destroyed air operated pinch valve.
In the case of dangerous, explosive or toxic transport-
ed media, a corresponding protective measure must be
provided to prevent the media escaping into the atmos-
phere.
Note:
If the sleeve breaks, the transported medium can be
pushed into the control pressure line or control compo-
nents (e.g. solenoid valve, proportional valve, etc.) and
cause damage.
It is possible that the transported medium may escape
into the atmosphere via the control components.
Note
If the air operated pinch valve freezes up due to con-
densation and/or low temperatures, it will be inoperable.
Avoid any possible consequential damage to the whole
plant through the corresponding on-site safety measures
derived from the risk assessment for the whole plant.
This risk assessment must be created and documented
on site by the operator.
If necessary, heat up the air operated pinch valve.
Note
Condensation may form in the control medium area
between the surrounding area, control medium and
operating medium if there are large temperature
differences. This can get into the control pressure line
and must be drained/disposed of in a controlled manner.
The operator must depressurise the pinch valves in case of
aretoensurethatdamagedpinchvalvescannotexplode.
Themaximumpressureandtemperaturespecicationson
the type plate must be observed and strictly adhered to. A
pressure regulating valve/pressure limiter is to be installed
in the control pressure line and set to the control pressure
to be calculated.
This operating and assembly manual ensures safe
installation and safe commissioning of the air operated
AKO pinch valves, hereinafter called pinch valves.
Please rstly read and follow these safety instructions
and observe the operating and assembly manual.
1. Safety Instructions
The installation, maintenance and commissioning must
onlybeperformedbyqualiedpersonnelorbypersonnel
assigned by the operator. The operating and assembly
manual with the safety instructions must be to hand at all
times for operating and maintenance personnel.
WARNING: Danger of crushing
Severe crushing may occur when closing the pinch valve.
Do not put your hands or other body parts in the opening.
Performmeasuresthatpreventtheinsertionofngers
or hands into the interior space of the pinch valves.
Install appropriate warnings if required.
Note
Thepinchvalveconguration(materialsfortheindividual
parts e.g. sleeve) must be suitable for the operating
medium.
Note
The documentation is subject to constant changes due
to updates.
The current version is valid and you can nd it at
www.pinch-valve.com.
Onlyusethepinchvalvewhenitistted(e.g.inapipe).
Use dry, oil-free and ltered compressed air as a control
medium to avoid corrosion and damage to the pinch valve
and sleeve.
Isolate the control pressure and relieve the pinch valve of
any pressure immediately in case of failure of or damage
to the pinch valve. The control pressure connection must
remain under pressure. Remove the pinch valve only when
it is not under pressure.
Contact protection must be provided and marked by the
operator if necessary at high temperatures. Any warning
signs,suchas"Hotsurface",mustbeafxedtothepinch
valve.
AKO Armaturen & Separationstechnik GmbH
D-65468Trebur-Astheim▪Adam-Opel-Str.5▪Telefon/Phone:+49(0)6147-9159-0▪Fax:+49(0)6147-9159-59
E-Mail:[email protected]▪Internet:www.ako-armaturen.de / www.pinch-valve.com 3/24

Sleeve type Mxxx.xxLF
Connectionoptiontype 50(stainlesssteel),
(material): 31(aluminiumwith
steel),35(aluminium
withstainlesssteel)
Bodytype(material) 30(aluminium)
Designation
I M2 II 2GD IIC TX
Key:
Hexagonalsymbol(showsthespecicdesignation
fortheexplosionprotection)
I EquipmentgroupI(productsformining)
M2 EquipmentgroupM2(thepinchvalveissuitablefor
Exzones1/21and2/22)
II EquipmentgroupII(productsnotusedinmining)
2 Equipmentgroup2(thepinchvalveissuitablefor
Exzones1/21and2/22)
GD HazardtypeGD(thepinchvalveissuitableforuse
inatmosphereswithgas(vapour/mist)anddust)
IIC Maximum permitted explosion class for internal and
external atmospheres
TX Temperature class TX (the temperature class is
denedbytheuserthemselves)
If components from other manufacturers such as pressure
manometers or other equipment parts/accessories are
used, they must have their own conformity assessments
in accordance with ATEX 2014/34/EU or 94/9/EC from
the manufacturers.
The information provided by the manufacturers in relation
to the designation X must be observed.
If necessary, VDE0165 must be followed and observed
during the electrical installation.
Pinch valves with aluminium bodies in their basic versions
are only approved for pumping speeds of less than 1 m/s.
In the case of pumping speeds of between 1 and 15 m/s,
only anges made out of low-sparking metals such as
bronze or brass that have been approved and delivered
by the manufacturer may be used.
In the case of pumping speeds of over 15 m/s, only
anges made out of electrostatically conductive plastic
bushings that have been approved and delivered by the
manufacturer may be used.
Theinternaluidsmustnotimpairthepropertiesofthe
sleeve and ange bushings such as their electrostatic
conductivity or resistance.
All electrical equipment tted, such as solenoid valves,
pressures switches and air vents, must be suitable for
operationinareasatriskofexplosion(Ex)andhavetheir
ownmanufacturer'scerticateorconformityassessment
Optimum control pressure (example calculation)
Operatingpressure(pumpingpressure) 3.0bar
+Differentialpressure(seetypeplate) 2.5bar
= Optimum control pressure to be set 5.5 bar
Note
Inthecase of periodic inspections(e.g.inthesenseof
theGermanHealthandSafetyatWorkRegulations(Be-
trSichV)),thehousingmustbelledwithwaterbecause
the housing and not the sleeve is the pressure-bearing
component. The test pressure of 1.43 x the max. control
pressure(DGRL)andthe test period of up to DN150 =
60 seconds then 120 seconds (EN12266) must not be
exceeded.
Special conditions and safety instructions for
use in potentially explosive areas
The installation, maintenance and commissioning must
be monitored and inspected by a person qualied in
explosion protection.
The designation stated on the Ex type plate is authoritative
for the use of the pinch valve.
Fig. 1 Example
Ex pinch valve
Fig. 2 Example
ATEX pinch valve
Ex pinch valves
For Ex zones 0;1;2 and 20;21;22, the following pinch
valvesaresuitablebutarenotsubjecttoATEX:
Series VX, VMX, VMCX,
VMCEX, VMPX
Sleeve type Mxxx.xxLF
Connectionoptiontype 10(steel),
(material) 50(stainlesssteel),
73(POM)
Bodytype(material) 10(steel),
50(stainlesssteel),
73(POM)
ATEXpinchvalves:
For Ex zones 1;2 and 21;22, the following pinch valves
aresuitableandcomplywithATEX:
Series VFX, VMX, VMCX,
VMFX, VTX
AKO Armaturen & Separationstechnik GmbH
D-65468Trebur-Astheim▪Adam-Opel-Str.5▪Telefon/Phone:+49(0)6147-9159-0▪Fax:+49(0)6147-9159-59
E-Mail:[email protected]▪Internet:www.ako-armaturen.de / www.pinch-valve.com 4/24

toothlockwashers(e.g.DIN6797A)intheplant.Unstable
gases must not be used as a pumping medium.
Theexternalorinternalatmospherehasbeenclassied
by the operator as being in explosion group IIC. The
suitability of the pinch valve for an external potentially
explosive atmosphere must thus be taken into account.
The operator must ensure using corresponding signs that
noamesandhotgasesariseintheexplosionprotection
zones of the plant. This includes a ban on smoking and
nakedames.
Subsequent changes to the pinch valve require renewed
explosion protection testing according to the servicing/
repair instructions (work instruction)AA50_pV_xx_xxxx-
xx-xx.
2. Usage
The pinch valves were evaluated in accordance with the
requirements of the Pressure Equipment Directive (PED)
2014/68/EU,theMachine Directive(MD)2006/42/EGand
the ATEX Directive 2014/34/EU.
Corresponding declarations of conformity and manufacturer's
certicatesmustbereadandtheircontentobserved(see also
section 10).
2.1 Service life
Under ideal conditions, the service life of the pinch valves is
limitedto30years(VMPseries10years).
The service life or the number of load changes
(pressurisation)maybereducedduetoanumberoffactors.
These factors include environmental and operational
inuences such as the ambient/pumping medium
temperature, wear, solar radiation, switching cycles,
vibrations during operation, tension caused by assembly,
external loads, contaminated control air, corrosion or
damage caused during operation or assembly.
In order to maintain the service life, the operator must check
thepinchvalvesfordamage(e.g.cracks,corrosion,etc.)at
self-dened service intervals/maintenance measures. We
recommend pressurising the body every 10 years (VMP
series 5 years) with water and 1.5 times the maximum
controlpressureandcheckingforleaks(TestEN1266P10).
A damaged or leaking pinch valve has reached the end of
its service life and continuing to operate the valve is not
permitted.
2.2 Intended use
The pinch valve is used to isolate or interrupt the material
ow of uids with sold and liquid components or dusts in
pipes and hoses.
for use in areas at risk of explosion (Ex). Accessories
without approval for Ex zones may not be installed in an
Ex atmosphere.
Use only materials as a control medium that cannot lead
to a risk of explosion. The operator must ensure that
any air operated/plastic hoses used are electrostatically
conductive(<10^6Ohm).
The pinch valves must be adequately connected to a
conductive, earthed pipe. The pinch valve should be
integratedintothepotentialequalisation(atleasta4mm²
copperstrandforunprotectedinstallation).Axingscrew
with marking is located on the pinch valve for connecting
the earthing.
Thepotentialequalisation(earthing)betweenthepipeand
pinch valve must be checked with a suitable measuring
deviceafteritisttedinthepipe.
The layer thickness of any coating/possible protective
coating must not be greater than 200 µm. If a coating
has been applied, it must be regularly checked and, if
necessary, touched up. The subsequent coating is also
not permitted to exceed a layer thickness of 200 µm.
Knocking the valve free with a striking tool is not permitted.
Dust and oil deposits must be promptly removed so that
no hazardous deposits and hybrids or mixtures of oils,
grease and dust can lead to glowing ignition.
The temperature of the pumping medium may increase
through friction when operating in the pumping area.
The operator must ensure that the temperature of
the owing medium inside the valve is not higher than
80% of the ashpoint or the ignition temperature of the
pumping medium or the gases and dust that can form
Ex atmospheres. Otherwise the maximum temperature of
the pinch valve applies.
It must be impossible for corrosion particles (e.g. rust)
in the pumping medium to come into contact with the
aluminium of the pinch valve. If necessary, the operator
should prevent valves with an aluminium body from coming
into contact with rusty iron using suitable measures e.g. A
protectivecasing.Connectiontypes(e.g.Flanges)made
outofpurealuminium(30)mustnotbeused.
The occurrence of ignition sources as a result of ionising
radiation, X-rays, cathodic corrosion protection, stray
currents, adiabatic compression, frames and hot gases,
electromagnetic waves, lightning, sparks due to friction
and impact must be safely prevented by the operator.
As the sleeve is a wear part, the control medium may
get into the pumping area due to a leak. If the pumping
medium is a liquid fuel and mixes with air, this may create
a potentially explosive atmosphere in the pumping area.
Conversely, the pumping medium may penetrate into
the control pressure medium and create a potentially
explosive atmosphere there.
Pinchvalveswithaprotectivecoating(e.g.paint)madeof
non-conductivematerialmustbettedwithcontactdiscs/
AKO Armaturen & Separationstechnik GmbH
D-65468Trebur-Astheim▪Adam-Opel-Str.5▪Telefon/Phone:+49(0)6147-9159-0▪Fax:+49(0)6147-9159-59
E-Mail:[email protected]▪Internet:www.ako-armaturen.de / www.pinch-valve.com 5/24

(A)Operatingpressure(pumpingpressure)
(B)+Differentialpressure(seetypeplate)
(C)=Optimumcontrolpressuretobeset
3. Technical description
3.1 Control
Thepinchvalveshouldbeactuatedbyacontrolvalve(e.g.
3/2-waysolenoidvalve)tteddirectlytothecontrolpressure
connection. Any control pressure line between the control
valve and pinch valve should be as short as possible. We
recommendthefollowingcross-sections:
• DN10-DN25 = 4 mm nominal size
• DN32-DN150 = 6 mm nominal size
• DN200 = 9 mm nominal size
• DN250-DN300 = 13 mm nominal size
We recommend installing a quick exhaust valve directly on
the control connection so that the sleeve can be opened
quicker (control medium: compressed air). A pressure
switch to monitor the control pressure or display the OPEN/
CLOSEDpositioncanalsobetted.Defectsinthesleeve
can be detected in good time and replaced in a targeted
manner in most cases using this pressure switch. Pressure
compensation with the product ow must be provided on
the control medium side if the pinch valve is operated in a
vacuum process below 100 mbar.
Please refer to the "Pinch valve control examples" technical
information sheet at www.pinch-valve.com for control
recommendations.
3.2 Technical data
Control medium
Installation position
Flow direction
Medium
Compressed air, neutral gases, water
Any (also see section 4.3)
Any
Gaseous, liquid, solids
3.3 Operating data
Operatingpressure(A)
Controlpressure(C)
Differentialpressure(B)
Temperature range
Can be read off the type plate
Seecalculationexample:safety
instructions and type plate
Can be read off the type plate
Please contact AKO immediately if the type plate is missing.
WARNING! Risk of injury
Incorrect operating conditions could result in injury to
persons, as well as damage to the system and the pinch
valve.
Pinch valves and accessories must be considered
individually for their respective use in areas at risk of
explosion (Ex) and suitable for use there. Therefore,
they cannot be supplied by AKO as an assembled unit.
Accessories are not put together as an assembly as
denedbytheATEXDirective 3.7.5.Theoperatormust
determine the suitability of accessories supplied for use
inareasatriskofexplosion(Ex).
2.3 Improper use
• Non-compliance with the operating and assembly manual
including the safety instructions.
• Operating the pinch valve for a purpose other than its
intended use.
• Unauthorised or untrained personnel operating the pinch
valve.
• Use of the pinch valve as an equipment part with a
safetyfunctionorasanendttingwithoutcorresponding
reinforcement.
• Installing non-original spare parts.
• Violating the applicable standards and laws.
AKO does not accept liability for damage resulting from
failure to observe the specications, safety instructions
and warnings in the operating and assembly manual or the
modicationofthepinchvalve.
2.4 Function
A exible elastomer hose (sleeve) is compressed by
increasing the pressure in the pinch valve body. This creates
alip-shapedclosingpattern(Fig.II).Powdersandgrainsup
to a certain size are enclosed by the elastic sleeve. This
ensures the pinch valve tightness. The sleeve is opened
again when the control pressure is removed and by the
restoring force of the sleeve.
Fig. I
Fig. II
AKO Armaturen & Separationstechnik GmbH
D-65468Trebur-Astheim▪Adam-Opel-Str.5▪Telefon/Phone:+49(0)6147-9159-0▪Fax:+49(0)6147-9159-59
E-Mail:[email protected]▪Internet:www.ako-armaturen.de / www.pinch-valve.com 6/24

Appropriate supports are to be provided depending on
the weight of the pinch valve and when several pinch
valvesarettedsequentially.
The assembly must not cause any leakages in the
pipeline system.
Vibrations in the plant can cause the destruction of the
pinch valve or the connections. There must be at least
twice the face-to-face length of the pinch valve between
an elbow and the pinch valve as a shorter pipe length will
leadtoprematurewearonthesleeveandangebecause
of the turbulence generated.
Appropriate supports are to be provided depending on
the respective weight of the pinch valve and when several
pinchvalvesarettedsequentially.
Internal thread connection according to DIN EN ISO 228
(G) or ANSI/ASME B1.20.1 (NPT)
Use a suitable sealant for the threaded connection seal,
such as a PTFE sealing strip.
• PinchvalvesseriesVMP/VMC:Installbyhandorwitha
strap spanner.
• Pinch valves series VM/VMF: Secure the connection
thread on the pinch valve against rotation with a suitable
open-end wrench to prevent the sleeve turning when it is
being installed.
Flange connection according to DIN EN 1092-1 PN
10/16 or ANSI B 16.5/150 lbs
Use suitable, standard ange seals to seal the ange
connections.Anadditionalangesealisnotneededwhen
pinch valves have a ange sleeve. Make sure that the
ange surfaces are clean and undamaged. Use ange
screws in accordance with the relevant standards, You can
calculate the length of the screws based on the thickness of
theangeusingthedatasheetforthepinchvalve.Tighten
the screws evenly and crossways, initially 50% and then
80%. Re-tighten the screws once or several times during
commissioning if necessary to ensure the sealing effect.
Other connections (e.g. threaded spigot, weld-on ends,
tri-clamp connection, tankers ange)
Connect all other connections in accordance with their
intended purpose and according to general engineering
practice.
4.3 Connection for the control pressure line
Connect the pinch valve to the control pressure line. Adjust
the dened control pressure on the pressure regulating
valve/pressure limiter.
Compressed air as a control medium
The control pressure line is to be installed in the
pipe in such a way that any condensation can run
out of the pinch valve. A water separator should
always be provided upstream of the pinch valve.
Water as a control medium
control valves must be suitable for water and have a
sufcientlylargecross-section.Thisinuencestheclosing
/ opening time of the pinch valve and therefore also the
service life of the sleeve.
Note
Maximum operating conditions (temperature/pressure/
environmental inuences) must not be exceeded or
exceeding these operating data must be prevented in the
plant.
Supplementary technical data for the individual pinch valves
can be found in the respective data sheet.
4. Assembly
4.1 Preparation
Afunctiontestmustalwaysbeperformedbeforettingthe
pinch valve.
All pneumatic hoses/lines in the pneumatic control system
must be electrostatically conductive (<10^6Ohm) (not
includedinthedelivery)andintegratedintothepotential
equalisation.
If the pinch valve is installed into a plant with cathodic
corrosion protection by the operator, there must be
no mutual interference. If necessary, insulation pieces
shouldbettedoutsidetheExzone.
4.2 Mechanical connections
WARNING! Risk of injury
The use of unsuitable lifting devices or load handling
equipment could possibly result in severe postural de-
formity when handling air operated pinch valves from DN
150.
Use suitable lifting devices and load handling equip-
ment.
Regularly instruct and train assembly personnel in ac-
cordance with accident prevention regulations.
WARNING! Noise emission
Unusual noises can indicate faulty connection of the air
operated pinch valve to the pipe/hose or the compressed
air supply or a faulty sleeve.
If necessary, repeat the assembly in accordance with
the instructions.
Carry out regular maintenance as a precautionary
measure.
Connect the factory pre-assembled pinch valve to the
plant connections.
Avoid tension and impacts from external forces and
moments.
It must be ensured when tting the air operated pinch
valve that no damage is caused to the pipe (structural
analysis).
The air operated pinch valve must be securely connected
to the pipe so that it can neither fall down by itself nor
bend, break or cause other parts of the pipeline to fall
down.
AKO Armaturen & Separationstechnik GmbH
D-65468Trebur-Astheim▪Adam-Opel-Str.5▪Telefon/Phone:+49(0)6147-9159-0▪Fax:+49(0)6147-9159-59
E-Mail:[email protected]▪Internet:www.ako-armaturen.de / www.pinch-valve.com 7/24

refer to the respective safety data sheet for specications,
safety instructions and warnings related to the pumping
medium.
6.2 Inspection
The service life of the sleeve is dependent on the control
pressure, quality of the sleeve, operating temperatures,
pumping medium, nominal size, load change duration/
frequency, control and its components.
• Check the proper function of the pinch valve every 3 months.
Depending on the operating conditions, a functional check
at different/shorter intervals may be required.
• Determine the inspection intervals depending on the
operating conditions and the frequency of the operation.
• Check the sleeve at regular intervals for wear and damage.
• Check that the optimal control pressure is set correctly
and that the connections and joints on the pinch valve are
ttedcorrectlyandsealed.
6.3 Maintenance intervals
The operator is responsible for the creation of a maintenance
planthatincludesthemaintenanceintervals(seeinformation
ontheservicelifeofthesleevesinsection6.2).
• Create a maintenance plan based on the information
gathered in the inspections.
6.4 Repair work
WARNING! Hearing damage
In the event of faulty assembly when replacing the sleeve,
the sleeve can slip out. If the sleeve slips out of the valve,
airwillsuddenlybedischarged(loudbang).
Work carefully.
Checkthecorrectttingofthesleevebeforecomplet-
ing the functional test.
Wear hearing protection.
Damaged sleeves, connections and joints as well as
protection and safety settings must be repaired immediately
or replaced with original spare parts.
The pinch valve must not be used until the proper function
of the plant has been fully restored.
The potential equalisation for all system parts must be
fully restored after the maintenance work.
7. Malfunctions
A list with possible malfunctions, causes and their solution
can be found in the appendix.
8. Storage
Store the pinch valve and replacement sleeves at room
temperature in a dry and dust-free environment, protected
from UV radiation. A storage time of 2 years should not be
5. Commissioning
5.1 Requirements
Only put the pinch valve into operation when the following
measureshavebeentaken:
• Pinch valve must be securely attached with the designated
connections.
• A pressure regulating valve/pressure limiter must be
installed and adjusted in the control pressure line.
• Any safety devices required must be in place and fully
functional.
• The operator must demonstrate that the pumping medium
is compatible with the pinch valve materials.
Note
Before commissioning, the entire pinch valve must be
checked for seal tightness with connecting parts.
In case of explosive or toxic pumped media, conduct the
control air into a separate, closed exhaust air system to
prevent a possible escape into the atmosphere in case of
a sleeve defect.
5.2 Normal operation
Use the pinch valve exclusively for its designated purpose.
Follow the safety instructions.
Safetyandprotectivedevicesorwarningsignsttedtothe
pinch valve must not be removed. The pinch valve has no
control pressure in an open position. It closes only when the
optimum control pressure is applied.
The pinch valve must be relieved of any pressure
immediately and taken out of operation immediately in case
of damage.
Check the pinch valve sleeve if the level drops below or
exceeds the permissible operating/control pressure or the
permissible operating temperature.
6. Maintenance and Repair
6.1 General specications
Carry out maintenance and repair work only when the
control pressure has been released. The system must be
shut off and depressurised. The control pressure line must
be disconnected from the pinch valve. The power supply
to the attachments (e.g. on the pressure switch) must be
disconnected.
It is important to ensure that there is not any potentially
explosive atmosphere.
Precautions must be taken (e.g. personal protective
equipment) if dangerous substances may escape whilst
carrying out maintenance work on the pinch valve. Please
AKO Armaturen & Separationstechnik GmbH
D-65468Trebur-Astheim▪Adam-Opel-Str.5▪Telefon/Phone:+49(0)6147-9159-0▪Fax:+49(0)6147-9159-59
E-Mail:[email protected]▪Internet:www.ako-armaturen.de / www.pinch-valve.com 8/24

exceeded because the technical properties will increasingly
deteriorate as the storage time lengthens due to the ageing
processoftheelastomers(e.g.sleeves).
Longer storage time -> shorter service life
9. Disposal
Pinch valves can be recycled. The environmental guidelines
in force at the operator's location are applicable for the
disposal.
10.Additional Documentation
The following documents are available on the internet at
http://www.pinch-valve.com/downloads/air-operated-pinch-
valves.html or on request.
• Quickinstructions(BAK_pV_...)
• Datasheets(DB_pV_...)
• Technicalinformationsheets(TI_pV_...)
• Codicationlists(KL_pV_...)
• Declarationsofconformity(KE_pV_...)
• Declarationsofincorporation(EE_pV_...)
• Certicates(HB_pV_...)
Therequireddocumentcanbeidentiedbasedonthepart
number(seeorder,deliverynote,invoiceortypeplate).It
iscoded.Example:
VMC100.03x.50F.50LA
Series Connection option (type)
Adetailedbreakdowncanbefoundinthecodicationlists
(KL_pV_...).
AKO Armaturen & Separationstechnik GmbH
D-65468Trebur-Astheim▪Adam-Opel-Str.5▪Telefon/Phone:+49(0)6147-9159-0▪Fax:+49(0)6147-9159-59
E-Mail:[email protected]▪Internet:www.ako-armaturen.de / www.pinch-valve.com 9/24

AKO Armaturen & Separationstechnik GmbH
D-65468Trebur-Astheim▪Adam-Opel-Str.5▪Telefon/Phone:+49(0)6147-9159-0▪Fax:+49(0)6147-9159-59
E-Mail:[email protected]▪Internet:www.ako-armaturen.de / www.pinch-valve.com 10/24
11.1 General principles for tting the pinch valves
Structure shown for series
VF+VT, DN40 to 300
1 Control air connection 4 Sleeve*
2 Body 5 Screws*
3 Flange*
1 Control air connection 4 Sleeve*
2 Body 5 Screws*
3 Socket end cover/
ange*
* Wear parts
Structure shown for series
VMC,DN65to100(F,FA,G,M,N,R,RA,T,TA,FT),+VMCE+VT
5
4
3
2
1
5
4
3
2
1
11.Maintenance / Repair Instructions
1 Control air connection 4 Sleeve*
2 Body 5 Screws*
3 Socket end cover/
ange*
Structure shown for series
VMC,DN10to50(F,FA,G,M,N,R,RA,T,TA)
5
4
3
2
1

AKO Armaturen & Separationstechnik GmbH
D-65468Trebur-Astheim▪Adam-Opel-Str.5▪Telefon/Phone:+49(0)6147-9159-0▪Fax:+49(0)6147-9159-59
E-Mail:[email protected]▪Internet:www.ako-armaturen.de / www.pinch-valve.com 11/24
Structure shown for series
VM+VMF, DN10 to 50
1 Control air connection 4 Sleeve*
2 Body 5 Coupling nut
3 Socket end*
1 Control air connection 4 Sleeve*
2 Body 5 Mounting discs
3 Socket end cover/
ange*
6 Screws*
Structure shown for series
VMCDN125ro150(F,FA,G,M,N,R,RA,T,TA)
* Wear parts
5
4
3
2
1
5
4
3
2
6
1
11.2 General principles for the maintenance/
repair of the pinch valves
• Use only AKO assembly paste and no adhesive, grease
or oil!
• Do not use any sharp or pointed objects during assembly
to avoid damage to the sleeve/valve!
• Assembly aids or kits can be ordered.
1 Control air connection 5 Pressure zone ring
2 Body 6 O-ring body*
3 Socket end cover/
ange*
7 Screws*
4 Sleeve*
Structure shown for series
VMP, DN10 to 50
5
4
3
2
6
7
1

AKO Armaturen & Separationstechnik GmbH
D-65468Trebur-Astheim▪Adam-Opel-Str.5▪Telefon/Phone:+49(0)6147-9159-0▪Fax:+49(0)6147-9159-59
E-Mail:[email protected]▪Internet:www.ako-armaturen.de / www.pinch-valve.com 12/24
Place the pinch valve facing
upwards and hold it tightly
on the body. Loosen the nuts
crossways with a spanner
(SW19). Then turn the pinch
valve and also loosen all screws
crossways.
11.3 Air operated Pinch Valve series VF,
DN 40-80
Push or pull the sleeve out of
the body. Use a pipe wrench if
necessary.
This is made easier by using
AKO assembly paste (MP200/
MPL200) as lubrication
between the sleeve and body.
Clean all individual parts afterwards and check the parts
for damage as well as for ageing and porosity. Replace
damaged parts.
Apply AKO assembly paste
(MP200/MPL200) to the inside
of both ends of the sleeve and
totheconesoftheanges.
Push the ange opposite the
xing screw into the sleeve
and tighten the second screw,
washer and nut by the length of
a nut.
Turn the valve unit 180° and
position it again.
Repeat the process for the
secondange.
Now tighten the screws
alternately and crossways on
both sides to max. 30 Nm until
theangesrestonthebody.
Check the function of the pinch
valve by closing the pinch valve
with minimal control pressure.
Make sure that it closes
correctly to form a lip shape.
Insert the sleeve into the body
until it protrudes evenly at both
ends.
Use a little AKO assembly paste
(MP200/MPL200) between the
sleeve and body in case of
stiffness.
http://www.pinch-valve.com/videos.html
Dismantling
Assembly aid: AKO assembly paste MP200 or MPL200
for the food sector
Assembly
Push one ange diagonally
into the sleeve and x it in
a mounting screw hole with
a screw, washer and nut. Turn
the nut approximately the
length of a nut.
If necessary, lubricate the
screws with suitable grease
before screwing them in.
Lift both anges off the valve
unit. Use a slot screwdriver to
do this if necessary.

AKO Armaturen & Separationstechnik GmbH
D-65468Trebur-Astheim▪Adam-Opel-Str.5▪Telefon/Phone:+49(0)6147-9159-0▪Fax:+49(0)6147-9159-59
E-Mail:[email protected]▪Internet:www.ako-armaturen.de / www.pinch-valve.com 13/24
11.4 Air operated Pinch Valve series VF,
DN100-300
Place the pinch valve facing
upwards and hold it tightly on
the body. Loosen the screws
crossways with a spanner
(SW19).
Then turn the pinch valve and
also loosen all screws cross-
ways.
Now lift both anges off the
valve unit. Use a slot screwdriv-
er to do this if necessary.
Clean all individual parts afterwards and check the parts for
damage as well as for ageing and porosity. Replace dam-
aged parts.
Push or pull the sleeve out of
the body. Use a pipe wrench
or another suitable tool if nec-
essary.
Placeoneangeonthesleeve,
place the screws for pre-assem-
bly into the holes and tighten
the nuts with washers by hand
until there is no play between
theangeconeandsleeve.
Turn the valve unit 180° and
repeat the process with the
second ange. Tighten the
screws until there is slight
pressure on the sleeve.
Slide the assembly pipe into the
valve. Apply approx. 2 bar of air
to the body via the control air
connection (varies depending
onthenominalsize).
Release the control air from the body. Remove the
assembly pipe. Place the mounting screws into the
remainingmountingholesoneachangesideandtighten
them. Replace the screws for pre-assembly with mounting
screwsoneachangeandtightenthemaswell.
Now tighten the screws alternately and crossways on both
sidestomax.30Nmuntiltheangesrestrmlyonthebody.
Check the function of the pinch valve.
Pushthesleeveovertheange
cone using a ring spanner
(SW19).
Make sure that the sleeve is
protruding evenly (approx. 5-7
mm)onbothsides.
Insert the assembly board into
the valve so that the narrow
side of the board is facing
the air connection. Hold the
assembly board rmly. Apply
the minimal control pressure
to the body. Make sure that it
closes correctly to form a lip
shape.
Lubricate the following parts
with AKO assembly paste
(MP200/MPL200):
• Inside and outside of the
sleeve on both ends
• Conesofbothanges
• Inner neck of the body on
both sides
Slide or push the sleeve into the
body until it protrudes evenly at
both ends.
http://www.pinch-valve.com/videos.html
Dismantling
Assembly aids: Assembly kit incl. assembly paste MP200
or MPL200 for the food sector, AKO assembly pipe, AKO
assembly board, screws for pre-assembly
If necessary, lubricate the screws with suitable grease
before screwing them in.
Assembly
Tighten the screws for pre-assembly on both sides with
aspanner(SW19).
Repeat the process two or three times to give the sleeve
the optimum closing direction.
Use AKO assembly paste
(MP200/MLP200)aslubrication
between the body and sleeve.

AKO Armaturen & Separationstechnik GmbH
D-65468Trebur-Astheim▪Adam-Opel-Str.5▪Telefon/Phone:+49(0)6147-9159-0▪Fax:+49(0)6147-9159-59
E-Mail:[email protected]▪Internet:www.ako-armaturen.de / www.pinch-valve.com 14/24
Dismantling
Place the pinch valve facing
upwards and hold it tightly on
the body. Loosen the screws
crossways with a ratchet or
spanner(T30TorxbitorSW10
Allenkey).
Then turn the pinch valve and
also loosen all screws cross-
ways.
11.5 Air operated Pinch Valve series VMC, DN10-
50, type F, FA, G, M, N, R, RA, T, TA
Lift both the socket end cover
and ange off the valve unit.
Use a slot screwdriver to do this
if necessary.
Push or pull the sleeve out of
the body. Use a pipe wrench if
necessary.
This is made easier by using
AKO assembly paste (MP200/
MPL200) as lubrication be-
tween the sleeve and body.
Clean all individual parts afterwards and check the parts for
damage as well as for ageing and porosity. Replace dam-
aged parts.
Assembly
Slide the sleeve into the
body until the bottom edge is
sitting ush and the sleeve is
protruding upwards by approx.
3-7 mm.
Use a little AKO assembly paste
(MP200/MPL200) between the
sleeve and body in case of stiff-
ness.
Apply AKO assembly paste
(MP200/MPL200) to the inside
of both ends of the sleeve and
to the cone of the socket end
cover/ange.
Position the valve unit with one
hand and hold it rmly. Insert
the socket end cover/ange
diagonally into the sleeve with
your other hand and push in the
socketendcover/ange.
Align the socket end cover/
ange with the screw holes
ushwiththeholesinthebody.
Insert the screws into the desig-
nated holes.
With type M, insert the screws
intothesocketendcover/ange
beforettingit.
Push and hold the socket end
cover/ange and tighten the
screws crossways with a ratch-
et or spanner until the socket
end cover/ange are sitting
on the body. Check all screws
have an adequate tightening
torque(max.6Nm).
Turn the valve unit 180° and
position it again.
Repeat the process for the
second socket end cover/
ange.
Check the function of the pinch
valve by closing the pinch valve
with minimal control pressure.
Make sure that it closes
correctly to form a lip shape.
http://www.pinch-valve.com/videos.html
Assembly aid: AKO assembly paste MP200 or MPL200
for the food sector
If necessary, lubricate the screws with suitable grease
before screwing them in.

AKO Armaturen & Separationstechnik GmbH
D-65468Trebur-Astheim▪Adam-Opel-Str.5▪Telefon/Phone:+49(0)6147-9159-0▪Fax:+49(0)6147-9159-59
E-Mail:[email protected]▪Internet:www.ako-armaturen.de / www.pinch-valve.com 15/24
Place the pinch valve facing up-
wards and hold it tightly on the
body. Loosen the screws cross-
wayswithaspanner(SW16).
Then turn the pinch valve and
also loosen all screws cross-
ways.
11.6 Air operated pinch valves series VMC,
DN65-80, Type F, FA
Lift both anges off the valve
unit. Use a slot screwdriver to
do this if necessary.
Push or pull the sleeve out of
the body. Use a pipe wrench if
necessary.
This is made easier by using
AKO assembly paste (MP200/
MPL200) as lubrication be-
tween the sleeve and body.
Clean all individual parts afterwards and check the parts for
damage as well as for ageing and porosity. Replace dam-
aged parts.
Apply AKO assembly paste
(MP200/MPL200) to the inside
of both ends of the sleeve and
totheangecone.
Place the ange onto a stable
surface with the sealing surface
facing downwards and the cone
facing upwards. Take the body
with the inserted sleeve and
position the 5-6 mm protruding
sleeve end diagonally on the
angecone.Pushthebodywith
thesleevermlyoverthecone.
If necessary, lubricate the screws with suitable grease
before screwing them in.
Align the body with the through
holes with the threaded ange
holes.
Push and hold the body, insert
the screws and tighten them
crossways with a spanner until
the screws are sitting in the
threadedangeholes.
Turn the valve unit 180° and
position it again.
Repeat the process with the
secondange.
Check all screws have an
adequate tightening torque
(max.20Nm).
http://www.pinch-valve.com/videos/vmc-65-80-f.
html
Dismantling
Assembly aids: AKO assembly paste MP200 or MPL200
for the food sector, if necessary 4 no. M10x30 ISO 4017
screws for pre-assembly
Assembly
Slide the sleeve into the body
until the bottom edge is sitting
ush and the sleeve is pro-
truding upwards by approx.
5-6 mm.
Use a little AKO assembly paste
(MP200/MPL200) between the
sleeve and body in case of stiff-
ness.
Check the function of the pinch
valve by closing the pinch valve
with minimal control pressure.
Make sure that it closes correct-
ly to form a lip shape.

AKO Armaturen & Separationstechnik GmbH
D-65468Trebur-Astheim▪Adam-Opel-Str.5▪Telefon/Phone:+49(0)6147-9159-0▪Fax:+49(0)6147-9159-59
E-Mail:[email protected]▪Internet:www.ako-armaturen.de / www.pinch-valve.com 16/24
Dismantling
Place the pinch valve facing
upwards and hold it tightly on the
body. Loosen the screws and
nuts crossways with a spanner
(SW16 + FT=hexagon socket
wrench8).
Then turn the pinch valve and
also loosen all screws cross-
ways.
11.7 Air operated pinch valves series VMC,
DN65-80, Type G, M, N, R, RA, T, TA, FT
Lift both covers off the valve
unit. Use a slot screwdriver to
do this if necessary.
Push or pull the sleeve out of
the body. Use a pipe wrench if
necessary.
This is made easier by using
AKO assembly paste (MP200/
MPL200) as lubrication
between the sleeve and body.
Clean all individual parts afterwards and check the parts
for damage as well as for ageing and porosity. Replace
damaged parts.
Check the function of the pinch valve by closing the pinch
valve with minimal control pressure. Make sure that it
closes correctly to form a lip shape.
Apply AKO assembly paste
(MP200/MPL200) to the inside
of both ends of the sleeve and
to the cover cone.
Place the valve unit so that the
protruding sleeve end is at the
top. Push one cover diagonal-
ly into the sleeve and x it in
a screw hole with a screw for
pre-assembly, washer and nut.
Turn the nut approximately the
length of a nut.
Align the cover with the screw
holesushwiththeholesinthe
body and push the cover into
the sleeve. Insert the screws
with washer and nut into the
designated holes.
Push and hold the cover and
tighten the screws and nuts
crossways with a spanner
(SW16 + FT=hexagon socket
wrench8)untilthecoverissit-
ting on the body.
Turn the valve unit 180°.
Repeat the process for the
second cover.
Check all screws have an
adequate tightening torque
(max.20Nm).
http://www.pinch-valve.com/videos/vmc-65-80.
html
Assembly aids: AKO assembly paste MP200 or MPL200
for the food sector, if necessary 4 no. M10x45 ISO 4017
screwsforpre-assembly(FT=DIN912)
Assembly
Slide the sleeve into the body
until the bottom edge is sitting
ush and the sleeve is pro-
truding upwards by approx.
5-6 mm.
Use a little AKO assembly paste
(MP200/MPL200) between the
sleeve and body in case of stiff-
ness.
If necessary, lubricate the screws with suitable grease
before screwing them in.

AKO Armaturen & Separationstechnik GmbH
D-65468Trebur-Astheim▪Adam-Opel-Str.5▪Telefon/Phone:+49(0)6147-9159-0▪Fax:+49(0)6147-9159-59
E-Mail:[email protected]▪Internet:www.ako-armaturen.de / www.pinch-valve.com 17/24
Dismantling
Place the pinch valve facing
upwards and hold it tightly on
the body. Loosen the screws
crossways with a spanner
(SW19).
Then turn the pinch valve and
also loosen all screws cross-
ways.
11.8 Air operated pinch valves series VMC,
DN100, Type F, FA
Use your thumb to push the
old sleeve out of the body. Use
AKO assembly paste (MP200/
MLP200) as lubrication be-
tween the body and sleeve.
Lift both anges off the valve
unit. Use a slot screwdriver to
do this if necessary.
Clean all individual parts afterwards and check the parts for
damage as well as for ageing and porosity. Replace dam-
aged parts.
Remove the old sleeve with a
pipe wrench or another suitable
tool.
Place the ange onto a stable
surface with the sealing surface
facing downwards and the cone
facing upwards. Take the body
with the inserted sleeve and
position the evenly protruding
sleeve end diagonally on the
angecone.Pushthebodywith
thesleevermlyoverthecone.
Insert the second screw for
pre-assembly diagonally and
tighten it slightly.
Turn the valve unit 180° and re-
peat the described process for
thesecondange.
Insert the assembly pipe into
the centre of the valve. Apply
approx. 2 bar of air to the body
via the control air connection.
Make sure that the sleeve
is protruding evenly on both
sides. Tighten the screws for
pre-assembly with a spanner.
Release the control air from
the body. Remove the assem-
bly pipe. Place two mounting
screwsperangesideintothe
other two holes and tighten
them. Replace the screws for
pre-assembly with mounting
screwsoneachange.
If there is a triangular closing
pattern, correct this using an
assembly board. Position the
assembly board with the nar-
row side in alignment with the
control air connection and hold
it tightly.
Assembly
Lubricate the following parts
with AKO assembly paste
(MP200/MPL200):
• Inside and outside of the
sleeve on both ends
• Conesofbothanges
• Inner neck of the body on
both sides
http://www.pinch-valve.com/videos/vmc-100-
ange.html
Assembly aids: Assembly kit incl. assembly paste MP200
or MPL200 for the food sector, AKO assembly pipe, AKO
assembly board, screws for pre-assembly
Now tighten the screws alternately and crossways on both
sides to max. 30 Nm until the anges rest on the body.
Check the function of the pinch valve by closing the pinch
valve with minimal control pressure. Make sure that it
closes correctly to form a lip shape.
If necessary, lubricate the screws with suitable grease be-
fore screwing them in.
Slide or push the sleeve into
the body and centre the sleeve
until it protrudes evenly at both
ends.

AKO Armaturen & Separationstechnik GmbH
D-65468Trebur-Astheim▪Adam-Opel-Str.5▪Telefon/Phone:+49(0)6147-9159-0▪Fax:+49(0)6147-9159-59
E-Mail:[email protected]▪Internet:www.ako-armaturen.de / www.pinch-valve.com 18/24
Dismantling
Place the pinch valve facing
upwards and hold it tightly on
the body. Loosen the screws
and nuts crossways with a
spanner(hexagonSW19).
Then turn the pinch valve and
also loosen all screws cross-
ways.
11.9 Air operated pinch valves series VMC, DN
100, Type G, M, R, RA, T, A
Use your thumb to push the
old sleeve out of the body. Use
AKO assembly paste (MP200/
MLP200) as lubrication be-
tween the body and sleeve.
Clean all individual parts afterwards and check the parts
for damage as well as for ageing and porosity. Replace
damaged parts.
Remove the old sleeve with a
pipe wrench or another suitable
tool.
Slide or push the sleeve into
the body and centre the sleeve
until it protrudes evenly at both
ends.
Place the valve unit onto a sta-
ble surface. Push one cover di-
agonallyintothesleeveandx
it in a screw hole with a screw
for pre-assembly, washer and
nut. Turn the nut approximately
the length of a nut.
Insert the second screw for
pre-assembly diagonally and
tighten it slightly.
Turn the valve unit 180° and
repeat the process with the
second cover.
Insert the assembly pipe into
the centre of the valve. Apply
approx. 2 bar of air to the body
via the control air connection.
Tighten the mounting screws of
both socket end covers.
Release the control air from the body. Remove the assem-
bly pipe. Insert two mounting screws per cover and tighten
them.
Replace the screws for pre-assembly on both covers with
mounting screws and tighten them.
If there is a triangular closing
pattern, correct this using
an assembly board. Position
the assembly board with the
narrow side in alignment with
the control air connection and
hold it tightly.
Assembly
Lubricate the following parts
with AKO assembly paste
(MP200/MPL200):
• Inside and outside of the
sleeve on both ends
• Cones of both covers
• Inner neck of the body on
both sides
http://www.pinch-valve.com/videos/vmc-100.html
Assembly aids: Assembly kit incl. assembly paste MP200
or MPL200 for the food sector, AKO assembly pipe, AKO
assembly board, screws for pre-assembly
Lift both covers off the valve
unit. Use a slot screwdriver to
do this if necessary.
If necessary, lubricate the screws with suitable grease
before screwing them in.
Check the function of the pinch
valve by closing the pinch valve
with minimal control pressure.
Make sure that it closes
correctly to form a lip shape.
Now tighten the screws alternately and crossways on both
sides to max. 30 Nm until the covers rest on the body.
Make sure that the sleeve
is protruding evenly on both
sides. Tighten the screws for
pre-assembly with a spanner.

AKO Armaturen & Separationstechnik GmbH
D-65468Trebur-Astheim▪Adam-Opel-Str.5▪Telefon/Phone:+49(0)6147-9159-0▪Fax:+49(0)6147-9159-59
E-Mail:[email protected]▪Internet:www.ako-armaturen.de / www.pinch-valve.com 19/24
11.10 Air operated pinch valves series VMC,
DN125-150, Type F, FA, R, RA, T, TA
Dismantling
Place the pinch valve facing
upwards and hold it tightly on
the body. Loosen the screws
crossways with a spanner
(SW19).
Then turn the pinch valve
and also loosen all screws
crossways.
Nowliftbothanges/socketend
covers off the valve unit. Use
a slot screwdriver to do this if
necessary.
Clean all individual parts afterwards and check the parts
for damage as well as for ageing and porosity. Replace
damaged parts.
Remove the old sleeve with
a pipe wrench or another suit-
able tool.
Use your thumb to push the
old sleeve out of the body. Use
AKO assembly paste (MP200/
MLP200) as lubrication be-
tween the body and sleeve
Push one ange/socket end
cover diagonally into the sleeve
andxitinascrewholewitha
screw for pre-assembly, mount-
ingdisc(areatothebody)and
nut. Turn the nut approximately
the length of a nut.
Slide the assembly pipe into the
valve. Apply approx. 2 bar of air
to the body via the control air
connection (varies depending
onthenominalsize).
Align the groove in the ange/
socket end cover with the
screw on the body. Push the
ange/socketendcoverintothe
sleeve. Insert the second screw
for pre-assembly diagonally
and tighten it approximately the
length of a nut.
Release the control air from the body. Remove the as-
sembly pipe. Place the mounting screws into the re-
maining mounting holes on each ange side/socket
end cover side and tighten them. Replace the screws
for pre-assembly with mounting screws on each
ange/socket end cover and tighten them as well.
Now tighten the screws alternately and crossways on both
sidestomax.30Nmuntiltheangesrestrmlyonthebody.
Check the function of the pinch valve.
Make sure that the sleeve is protruding evenly (approx.
5-8mm)onbothsides.
Insert the assembly board into
the valve so that the narrow
side of the board is facing the
air connection. Hold the as-
sembly board rmly.Apply the
minimal control pressure to the
body. Make sure that it closes
correctly to form a lip shape.
Assembly
Lubricate the following parts
with AKO assembly paste
(MP200/MPL200):
• Inner neck of the body
• Inside and outside of the
sleeve on both ends
• Cones of both anges/
socket end covers
Slide or push the sleeve into the
body until it protrudes evenly at
both ends.
Assembly aids: Assembly kit incl. assembly paste MP200
or MPL200 for the food sector, AKO assembly pipe, AKO
assembly board, screws for pre-assembly
If necessary, lubricate the screws with suitable grease
before screwing them in.
Tighten the screws for pre-as-
sembly on both sides with a
spanner(SW19).
Repeat the process two or three times to give the sleeve
the optimum closing direction.
Insert two further mounting screws twisted at 90°, as
described above. Turn the valve unit 180° and repeat the
processwiththesecondange/socketendcover.

AKO Armaturen & Separationstechnik GmbH
D-65468Trebur-Astheim▪Adam-Opel-Str.5▪Telefon/Phone:+49(0)6147-9159-0▪Fax:+49(0)6147-9159-59
E-Mail:[email protected]▪Internet:www.ako-armaturen.de / www.pinch-valve.com 20/24
Dismantling
Place the pinch valve facing
upwards and hold it tightly on
the body. Loosen the screws
crossways with a ratchet (T30
Torxbit).
Then turn the pinch valve and
also loosen all screws cross-
ways.
11.11 Air operated pinch valves series VMP,
DN10-50
Lift both socket end covers off
the valve unit. Use a slot screw-
driver to do this if necessary.
Push or pull the sleeve through
the pressure zone rings out of
the body.
This is made easier by using
AKO assembly paste (MP200/
MPL200) as lubrication be-
tween the sleeve and pressure
zone ring.
Clean all individual parts afterwards and check the parts
for damage as well as for ageing and porosity. Replace
damaged parts.
Replace the body following two assemblies to ensure the
thread strength.
Assembly
Pull the sealing ring over the
pressure zone ring and push it
into the designated groove.
Repeat the process for the sec-
ond pressure zone ring.
Apply a thin layer of AKO as-
semblypaste(MP200/MPL200)
to the outside of one end of the
sleeve.
Slide the coated end of the
sleeve through the rst pres-
sure zone ring into the body
until the sleeve through the
second pressure zone ring is
ush with the bottom edge of
the body.
Apply enough AKO assembly
paste(MP200/MPL200)toboth
ends of the sleeve and to the
cone of the socket end cover.
Position the valve unit with one
hand and hold it rmly. Insert
the socket end cover diagonally
into the sleeve with your other
hand and push in the socket
end cover.
Align the socket end cover
withthe screwholesushwith
the holes in the body. Insert
the screws into the designated
holes.
Push and hold the socket end
cover and tighten the screws
crossways with a ratchet until
the socket end cover is sitting
on the body. Check all screws
have an adequate tightening
torque(max.4Nm).
Turn the valve unit 180° and po-
sition it again.
Repeat the process for the sec-
ond socket end cover.
Slide both pressure zone rings
including the sealing ring into
the body.
http://www.pinch-valve.com/videos.html
Assembly aid: AKO assembly paste MP200 or MPL200
for the food sector
Check the function of the pinch valve by closing the pinch
valve with minimal control pressure. Make sure that it clos-
es correctly to form a lip shape.
Other manuals for V Series
1
This manual suits for next models
16
Table of contents
Other AKO Control Unit manuals
Popular Control Unit manuals by other brands

Hopeland
Hopeland CL7206A5 user manual

T&S
T&S B-0475 Installation and maintenance instructions

Mitsubishi Electric
Mitsubishi Electric FX-USB-AW user manual

GEM
GEM 563 Installation, Operating and Maintenance Instructions for the Installer and the User

DURAG
DURAG D-ISC 100 2 Series operating manual

iNels
iNels RFSAI-161B manual