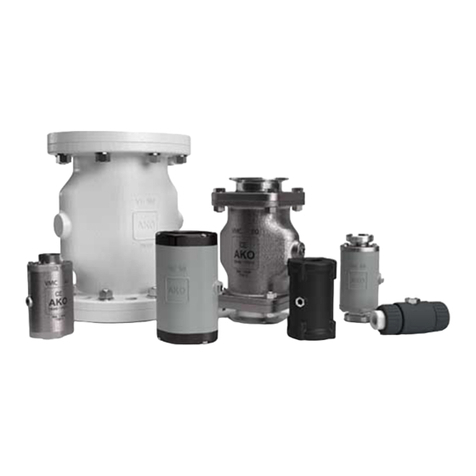
AKO VZ series User manual

Technical details subject to change without notice
AKO Armaturen & Separationstechnik GmbH
D-65468 Trebur-Astheim ▪ Adam-Opel-Str. 5 ▪ Telefon: +49 (0) 61 47-9159-0 ▪ Fax: +49 (0) 61 47-9159-59
E-Mail: [email protected] ▪ Internet: www.pinch-valve.com
Operating instructions
BA_mV_VZ_EN_2015-07-09
Important Information:
Please ensure you read these operating instructions
before each installation.
Faulty installation or incorrect commissioning can
lead to damage in the plant or equipment and to
personal injuries. The rm AKO does not give any
guarantee for damage resulting from improper handling
or due to the use of third party parts. Our VZ valves
are designed as dened by the Pressure Devices
Directive (EC Directive RL97/23/EC) for Group II uids.
Valves for use with Group I uids can be produced on
request. AKO does not accept any responsibility for
the resistance of the valve materials.
Storage:
Please store pinch valves dry, protected of sunlight,
wetness and any agressive enviromental.
Structure:
AKO’s VZ pinch valve essentially comprises three
principal components:
valve housing •
(two-part - upper and lower casing halves)
sleeve •
(elastomer hose in contact with the medium)
actuation (handwheel or electric drive)•
The valve is designed so that all the moving compo-
nents (apart from the actuation) are located inside the
pinch valve.
The lower case half incorporates a bore with a vent
plug. The medium being delivered would escape here
or at the actuator should the sleeve begin to leak as a
result of a fault. This bore can optionally be tted with
a leak monitor which requires that the pinch valve is
mounted such that the bore is located at the lowest
point.
The AKO pinch valve is, thanks to its innovative tech-
nology, an extremely low maintenance and hence
low-cost valve.
The functional principle of a mechanical Pinch
Valve:
Operating the actuator causes a mechanical system
to drive two pinch bars which compress a exible elas-
tomer hose (sleeve) and thus close the pinch valve.
This creates a lip-shaped closing pattern. When the
actuator is run in the opposite direction, the sleeve
opens to create a free passage. This process is
supported by opening tabs which connect the
sleeve with the pinch bars. The opening and closing
motions of the sleeve reduce the build-up of medium
sediment on the sleeve wall. Solids (up to a certain
size) in the medium are enclosed by the sleeve as it
closes - thereby ensuring the tightness of the closed
valve. However, the sleeve will no longer close tight if
there is a large volume of coarse solids.
Technical operating data:
DN 80 = max. 6,0 bar operating pressure
The AKO pinch valve is supplied with a ange
connection complying with DIN PN10/16 and/or ANSI
150.
Further technical data may be found in the data
sheet.
Selection of the materials for the individual valve
parts:
The selection of the correct materials depends on
a number of factors, such as: medium properties
(pressure, temperature etc.), ambient criteria
(temperature, weather etc.) and customer/application
specications. We would be pleased to advise you in
the selection of the correct sleeve.
The sleeve is the only component that comes into
contact with the medium being delivered and simulta-
neously acts as the ange gasket.
Please ensure adequate UV protection when storing
sleeves. UV radiation leads to premature aging of the
sleeve and all types of plastic parts.
Controlling:
The following actuators are possible:
Handwheel (the valve is opened or closed by means •
of physical rotating force at the handwheel)
Electric rotary drive (the valve is opened or closed •
by means of an actuating or regulating drive)
Where actuating components manufactured by third
parties are used, their regulations and instructions
must be observed.
1
Operating Instructions for AKO
Manual Pinch Valves of VZ series

Technical details subject to change without notice
AKO Armaturen & Separationstechnik GmbH
D-65468 Trebur-Astheim ▪ Adam-Opel-Str. 5 ▪ Telefon: +49 (0) 61 47-9159-0 ▪ Fax: +49 (0) 61 47-9159-59
E-Mail: [email protected] ▪ Internet: www.pinch-valve.com
Operating instructions
BA_mV_VZ_EN_2015-07-09
Safety Insturctions:
Before any sleeve change, valve cleaning or inter-•
vention in the pinch valve it must be established
with certainty that the actuator cannot start the
pinch valve moving (e.g. isolate electrical supply or
remove the fuse).
When controlling the pinch valve it is imperative that •
you ensure that no bodies or tools or other parts can
get intothe pinch valve.
The respective safety data sheets must be observed •
before each contact with the media / products.
The pinch valve must not be touched while media •
with high temperatures are being transported.
(risk of burns!!!)
The pinch valve may only ever be dismantled if the •
plant has been switched off and depressurised.
Suitable pressure limiters and / or safety valves •
must be installed to prevent the max. permissible
operating/control pressure (PS) from being
exceeded.
”Unstable gases” may • not be used as an operating
medium.
Please note that, depending on the medium used •
and in which environments the valve is installed,
static charges can result.
When designing the valve materials with respect to •
resistance against the operating media, the control
components (control air pipe, magnetic valve, etc.)
must also be taken into consideration, as the
operating medium can get into the control pipe if the
sleeve is defective.
If the ange connection between the pipe and the •
valve is not properly made, there can be leaks which
could result in injury to persons.
If handled and used properly, and AKO original parts
are used, we give the actual valid guarantee regu-
lated by law for all valves. Parts subject to wear are
not covered by the guarantee.
For further questions, please contact us.
Note: Modications to the valve of any kind will void
the guarantee and warranty obligations.
Installation (assembly in the plant):
Inspect the pinch valve for external damage. •
Always test with a function test before tting the •
pinch valve.
No ange gasket is required between the pipe and •
the pinch valve as the sleeve is formed such that
also it acts as the seal. Make sure that the sealing
faces of the sleeve are smooth and have not suf-
fered cuts or other damage, as otherwise the seal-
ing effect will be impaired.
The valve’s installation dimensions, such as the •
length etc. may be found in the appropriate techni-
cal data sheet.
The internal diameter of the pinch valve and the in-•
ternal diameter of the pipe must be identical to pre-
clude deposition and turbulence.
The medium to be delivered may ow in either di-•
rection.
The pipe anges should have grooves on the seal-•
ing face to improve the sealing performance (mini-
mum average roughness Rz =160µm). Here, too,
the sealing surface must be clean and undamaged.
Tip: If it is intended that the pinch valve is to be •
freely positioned in the pipe, or must be positioned
at a specic point, slip-on anges must be select-
ed as the counterange as the arrangement of the
connecting drillings in the pinch valve cannot be
changed.
There must be at least twice the face-to-face length •
of a pinch valve (of the relevant nominal diameter)
between an elbow and the pinch valve as pipe
length, as a shorter length will lead to premature
wear on the sleeve because of the turbulence gen-
erated.
The pipe must be supported/suspended on either •
side so that it can bear the weight of the valve and
delivered medium and that the pipe anges are par-
allel with one another.
Heavy actuators (rotary drives etc.) must be addi-•
tionally supported/suspended or blocked up accord-
ingly so that no stresses can build up in the valve.
Caution: The limit switches will have to be read-
justed if a rotary drive is tted on the pinch valve
and if this is twisted or removed (refer to manu-
facturer’s specications).
The pinch valve is now tted between the •
pipe anges in the pipeline and aligned.
Stresses and the introduction of external forces and
torques must absolutely be avoided when the valve
is tted in the pipe. Similarly, signicant vibrations
in the plant can lead to damage to the valve or the
connectors.
No sharp objects/tools may be used in the installa-•
tion as these can cause damage to the valve.
Use the connecting bolts (number and size) listed in •
the table. The bolts must be suitable for the counter-
ange and be of the correct length. This means that
2 to 3 thread pitches will still be visible after the nut
once the bolted connection has been tightened.
The bolts must be tightened evenly (rst 50%, then •
100%) and crosswise (or in a star pattern) to the
specied torque (see table).
2

Technical details subject to change without notice
AKO Armaturen & Separationstechnik GmbH
D-65468 Trebur-Astheim ▪ Adam-Opel-Str. 5 ▪ Telefon: +49 (0) 61 47-9159-0 ▪ Fax: +49 (0) 61 47-9159-59
E-Mail: [email protected] ▪ Internet: www.pinch-valve.com
Operating instructions
BA_mV_VZ_EN_2015-07-09
Now the pinch valve must be opened and closed •
several times. Retighten the connecting bolts to the
specied torque.
The valve can now be pressurized on the medium •
side. It may be necessary to retighten the ange
bolts several times during operation to ensure that
the sealing effect is established. Should there
nevertheless still be leaks at the ange connection,
it may be necessary to increase the torque on the
connecting bolts in 5Nm increments. A maximum
however of 150% of the specied value.
Excessive tightening torque or uneven tightening of •
the connecting bolts can damage the sleeve.
Maintenance / changing the sleeve:
Maintenance:
AKO pinch valves do not need any particular main-
tenance. The sleeves are subject to wear depending
on the medium delivered. The sleeve can be replaced
simply and quickly on site. On request, we can also
change the sleeve in our works.
The internal mechanism should be inspected at half-
yearly intervals, cleaned and regreased. Particular at-
tention should be paid to the moving parts such as the
compression bearings, drive spindle, guide rods, drive
square etc. The sleeve must not come into contact
with lubricant as the sleeve material can be impaired
if not compatible. The maintenance intervals must be
abbreviated if the valve is switched frequently, or if the
valve is permanently regulated.
Where actuating components manufactured by third
parties are used, their regulations and instructions
must be observed.
Changing the sleeve:
Removal:
The plant must be shut down for the full duration of •
the sleeve change procedure. An adequate means
of shutting off the ow of product must be provided.
Ensure that the pipe and the pinch valve are •
depressurized.
Undo all power supply cables, where present.•
Undo ange connecting bolts and take the valve out of •
the plant.
Caution: Residual amounts of the delivered
medium may escape from the valve.
(Take corresponding safety measures).
Set the valve to the OPEN position.•
Now remove the bolts connecting the two halves of •
the casing.
The two halves of the casing can now be taken •
apart.
Clamp the unit removed, consisting of the closing •
mechanism and the sleeve by the upper crossbar
in a vice with protective jaws so that the sleeve is
facing upwards.
Now the bolts clamping the opening tabs on the •
sleeve must be undone sufciently that the opening
tabs can be withdrawn.
The sleeve can now be pushed out to the side.•
Assembly:
The valve is reassembled in the reverse order to •
removal.
Bolt tightening torques: •
Bolts clamping the opening tabs = M5 -> 5 Nm
Casing half connecting bolts = M10->45 Nm
On completion of assembly and following a function•
test the valve will be ready for tting again.
Please take note of the instructions for installation •
(tting in the plant).
Caution: The limit switches will have to be checked
for correct setting or readjusted if a rotary drive is
tted on the pinch valve (refer to manufacturer’s
specications).
Note:
Modications to the valve of any kind will void the
guarantee and warranty obligations.
3
Flange connecting bolts and tightening torques
(bolts lightly greased)
DN 80
Bolts (no.) 4
Thread (metric) M16
Tightening torque (Nm) 40
Table of contents
Other AKO Control Unit manuals
Popular Control Unit manuals by other brands

ETAS
ETAS ES4720.1 manual

Genebre
Genebre 2448 Installation, operation & maintenance manual

ABB
ABB Triguard SC300E user manual

Moxa Technologies
Moxa Technologies MiiNePort W1 Series user manual

Kallista
Kallista P23083-CR installation instructions

Spirax Sarco
Spirax Sarco WAV1 Installation and maintenance instructions