8
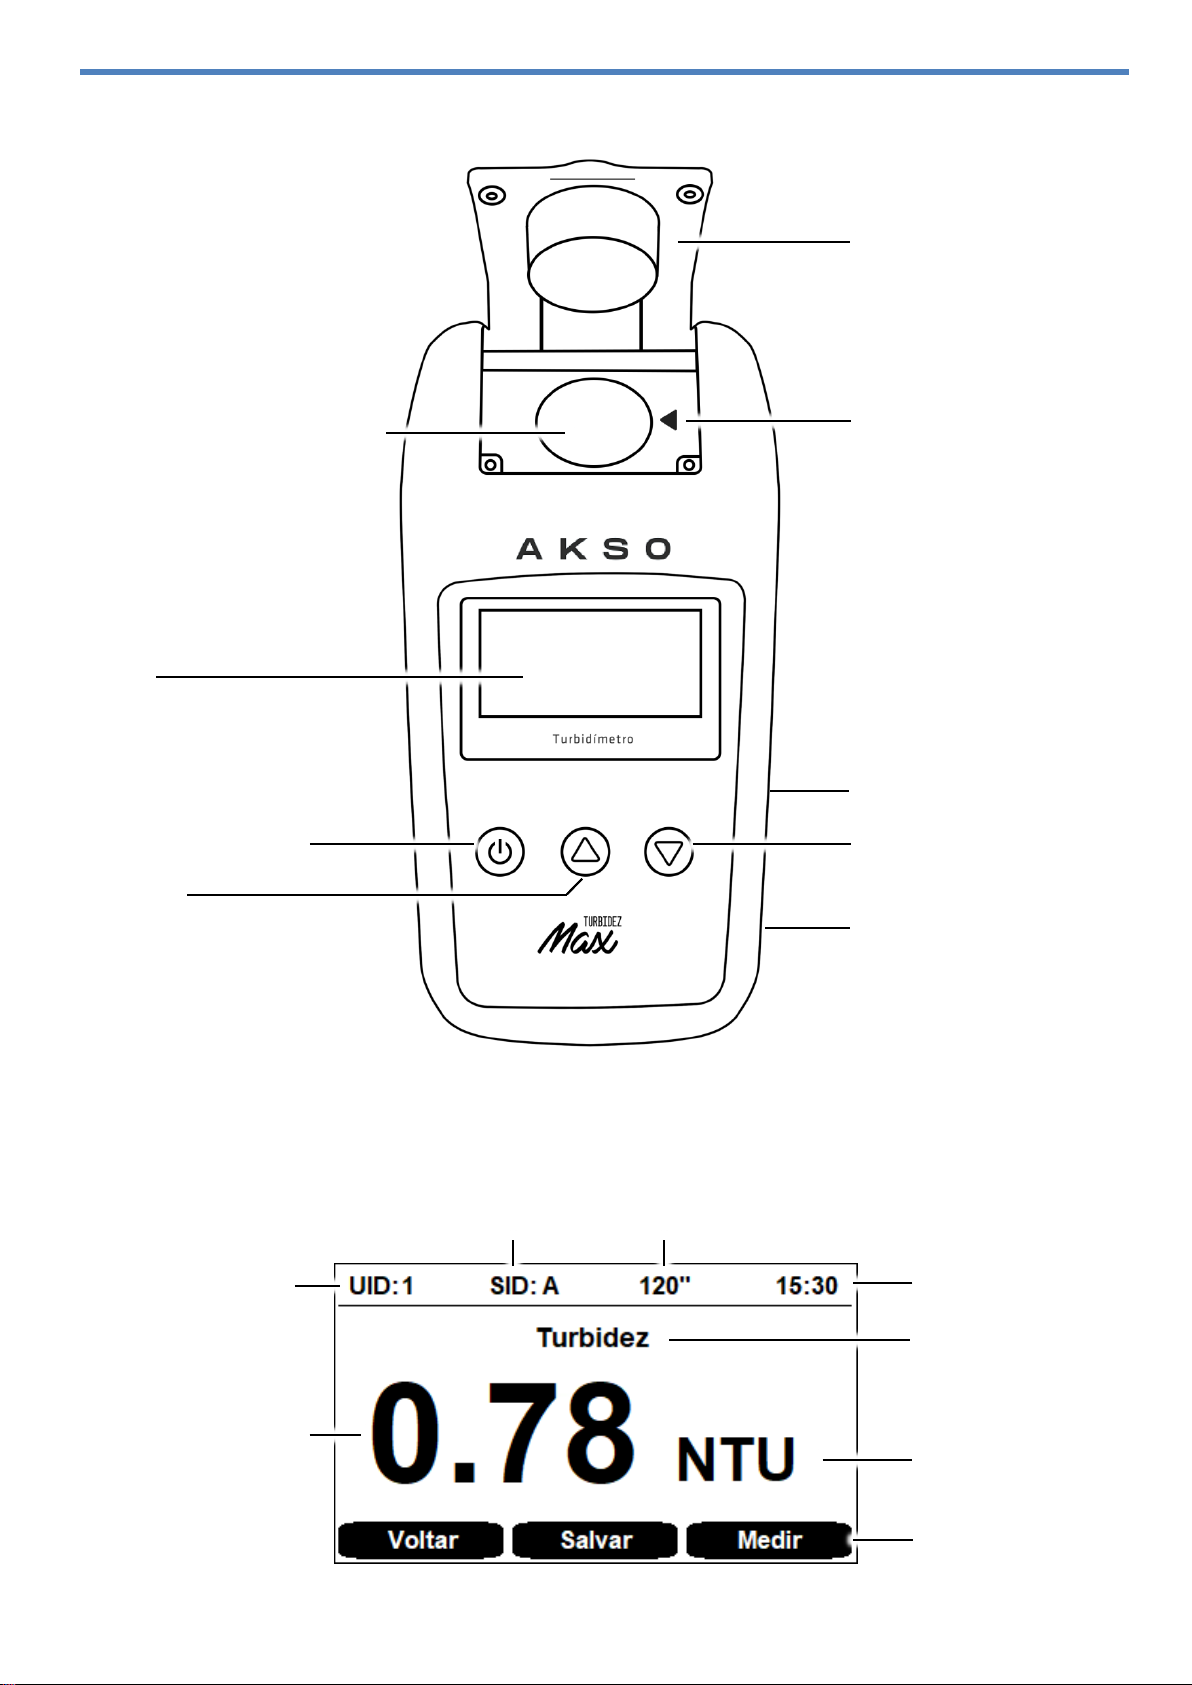
4. INSTRUÇÕES DE OPERAÇÃO PT
AJUSTE
O Turbidez Max pode ser ajustado em 7 pontos, respeitando a seguinte sequência:
0NTU 5NTU 20NTU 100NTU 200NTU 500NTU 800NTU
IMPORTANTE!
O ajuste deve ser efetuado apenas quando houver evidências de desvios
significativos que estejam acima da exatidão do instrumento.
Padrões de ajuste:
Para realizar o ajuste de turbidez, serão necessários padrões estáveis com valores
confiáveis, a fim de garantir a melhor exatidão nas leituras.
A realização de ajustes com padrões não confiáveis são de total responsabilidade
do usuário.
Para efetuar o ajuste de medição:
1) Ligue o instrumento, pressionado brevemente o botão On-Off;
2) Com o auxilio dos botões ▲ /▼,navegue até a opção configs e pressione
brevemente o botão Entrar;
3) Com o auxílio dos botões ▲ /▼,navegue até a opção Ajuste e pressione
brevemente o botão Entrar;
4) Navegue até a opção Turbidez e pressione o botão Entrar;
5) Com o auxílio dos botões ▲ /▼,selecione a opção Ajustar e pressione o botão
Entrar.Aparecerá na tela a mensagem Ponto de ajuste 0.00NTU;
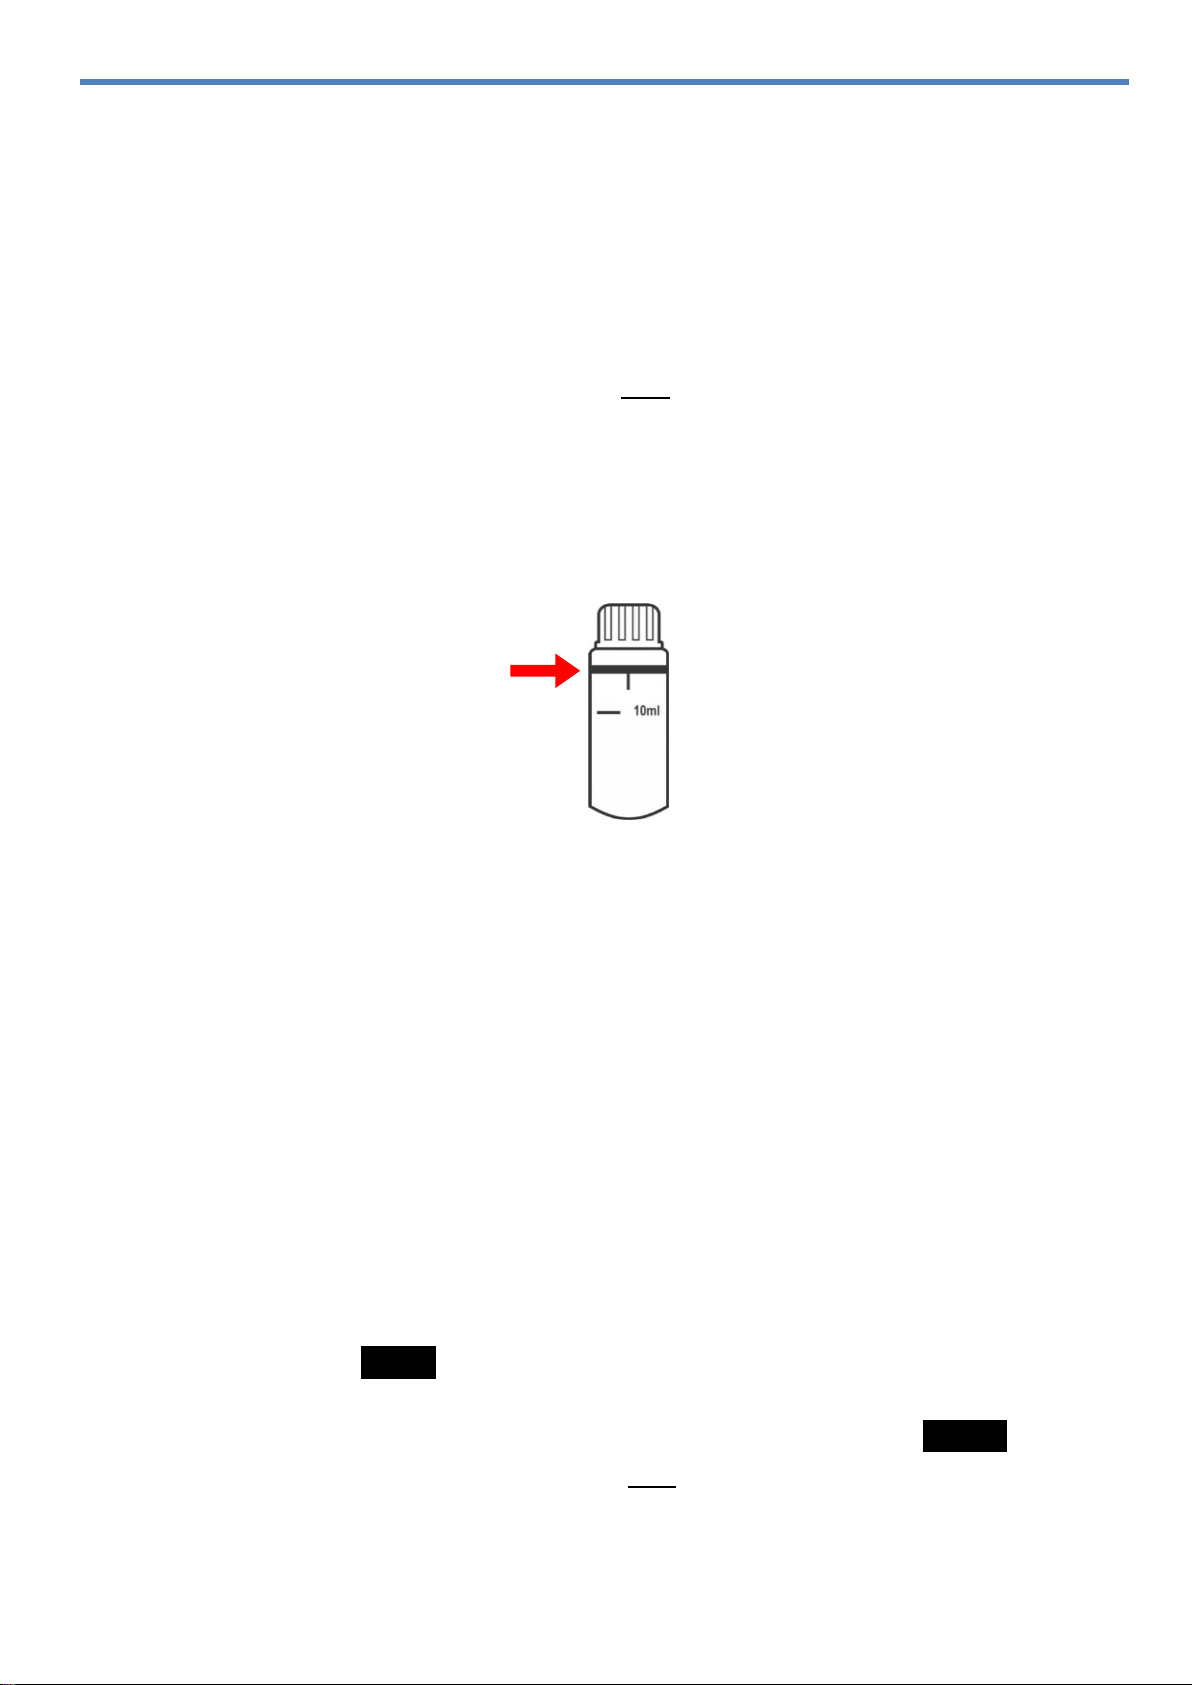
6) Separe a cubeta de solução padrão (0NTU);
7) Agite suavemente a solução padrão para homogeneizá-la;
8) Manuseando a cubeta pela tampa, seque-a e limpe-a de qualquer umidade,
sujeira ou gordura, utilizando a flanela que acompanha o instrumento;
9) Segurando a cubeta pela tampa, com cuidado, insira-a no compartimento de
medição, alinhando a indicação do corpo da cubeta com a seta para
alinhamento do instrumento;
10) Com cuidado, feche a tampa de medição do Turbidez Max;
11) Para iniciar a leitura e ajuste, pressione o botão Medir. O instrumento iniciará o
procedimento de análise do padrão inserido;
12) Após a análise do padrão 0.00NTU, aparecerá Ponto de ajuste 5.00NTU;
13) Siga os passos 7 a 11, utilizando a cubeta de solução padrão 5NTU;
14) Para ajustar nos demais pontos, repita os passos 7 a 11, utilizando a cubeta de
solução padrão correspondente ao valor indicado no visor do instrumento;
15) Ao final do ajuste, aparecerá na tela a mensagem Ajuste finalizado;
NOTA: Para restaurar os valores de ajuste de fábrica, acesse Ajuste e
selecione a opção Padrão fabrica.