ALBIN PUMP ALH Series User manual

since 1928
ALBIN ALH
INSTRUCTION MANUAL

SAFETY AND CONTROL MEASURES TO RESPECT IMPERATIVELY
1. Mechanical risk:
Ensure that all protections (cover, sight glass, ventilator hood, coupling protection) are in place before
operating the pump.
Disconnect the electricity supply before any mechanical intervention, except during a hose replacement.
Hose replacement must be done with the pump cover closed.
While replacing a hose, wear protective gloves and clothes and keep hands away from the brackets, suction
anddischargeanges.
During the pump maintenance, check that the lifting points are correctly used.
Theframeofthepumpmustbermlyfastenedtotheground.
2. Electrical risk:
Ensure that the electrical installation is conforming to the standards required in the country of use especially
regarding earth and thermal protection.
3. Operational risk:
Check the compatibility of the products to be pumped with:
•Theperistalticpumpprinciple.
•Thehosematerial.
•Thelubricant.
•Theinsertsmaterial.
•Theshoematerial.
Albin pump cannot guaranty the hose lifetime or the product loss due to a hose burst. It is the operator’s
responsibility to prevent pumped liquid loss with additional hose rupture detectors and or automatic shut down
valves. Check §2.4 conditions of guarantee for further information.
Ensure that the pump is compatible with the required process.
Ensure that the pressure applied on the suction side is compatible with the pump.
The rupture of the hose and its consequences must be taken in account:
•Thepumpcasingcanbelledwiththepumpedproduct.
•Ifthesuctionlineisonload,thisonecanemptyintothepumpcasingandleakoutofthepump.
•Ifthedischargelineisunderpressure,thepumpedproductmaybeforcedbackintothepumpcasingandleak
out of the pump.
A leakage detector as well as automatic shut down valves are recommended in order to prevent such consequences.
While draining the pump following a hose rupture, take note of the risk of pollution caused by the lubricant and by
the pumped product.
The pump, being volumetric, may suffer dangerously high pressure by even partial blockage of the discharge line.
Ensure that all protections have been made regarding this aspect.
Before each use, check the direction of rotation of the pump.
While placing the pump under vacuum, mount window screws using an airtight glue to avoid air leakage.

1 SECURITY AND GUARANTEES.
1.1 Safety measures 3
2 HOW TO USE THIS MAINTENANCE MANUAL.
2.1 Use of the pump 3
2.2 Responsibility 5
2.3 Training and instructions 5
2.4 Conditions of guarantee 5
3 DESCRIPTION.
3.1 Productidentication 6
3.2 Operationprinciple 6
3.3 Pump construction 7
3.4 Pump hose 10
3.5 Pump gearbox 10
3.6 ElectricalMotor 10
3.7 Available Options 10
4 INSTALLATION.
4.1 Unpacking and control 11
4.2 Conditions of installation 11
4.3 Setup 11
4.4 Piping 11
4.5 Pump lifting 12
5 PUMP START UP.
5.1 Preparations 12
5.2 Pump startup 12
6 MAINTENANCE.
6.1 Emptyingandllingoflubricant 12
6.2 Hosecleaning 14
6.3 Hosereplacement 14
6.3.1 Removingofthehose 14
6.3.2 Cleaningofthepumpcasing 16
6.3.3 Reassemblyofthehose 16
6.4 Replacementofspareparts 18
6.5 Shoeshimming 20
6.6 ALHSseriescomplementaryinformation 24
6.7 Maintenanceandperiodicalcontrols 24
7 STORAGE.
7.1 Pump storage 24
7.2 Hose storage 24
8 TROUBLESHOOTING. 25
9 CHARACTERISTICS AND TECHNICAL SPECIFICATIONS.
9.1 Performances curves 27
9.2 Overall dimensions 31
9.3 Nomenclature 36
9.4 Spare parts list 43
9.5 Lubricationtable 44
9.6 Shimingtable 44
9.7 Generated noise and temperature 45
10 COMPLEMENTARY INSTRUCTIONS FOR ATEX CERTIFIED MATERIAL. 46
11 STATEMENT OF CE COMPLIANCE. 51
12 SECURITY FORM. 52

2. HOW TO USE THIS MAINTENANCE MANUAL
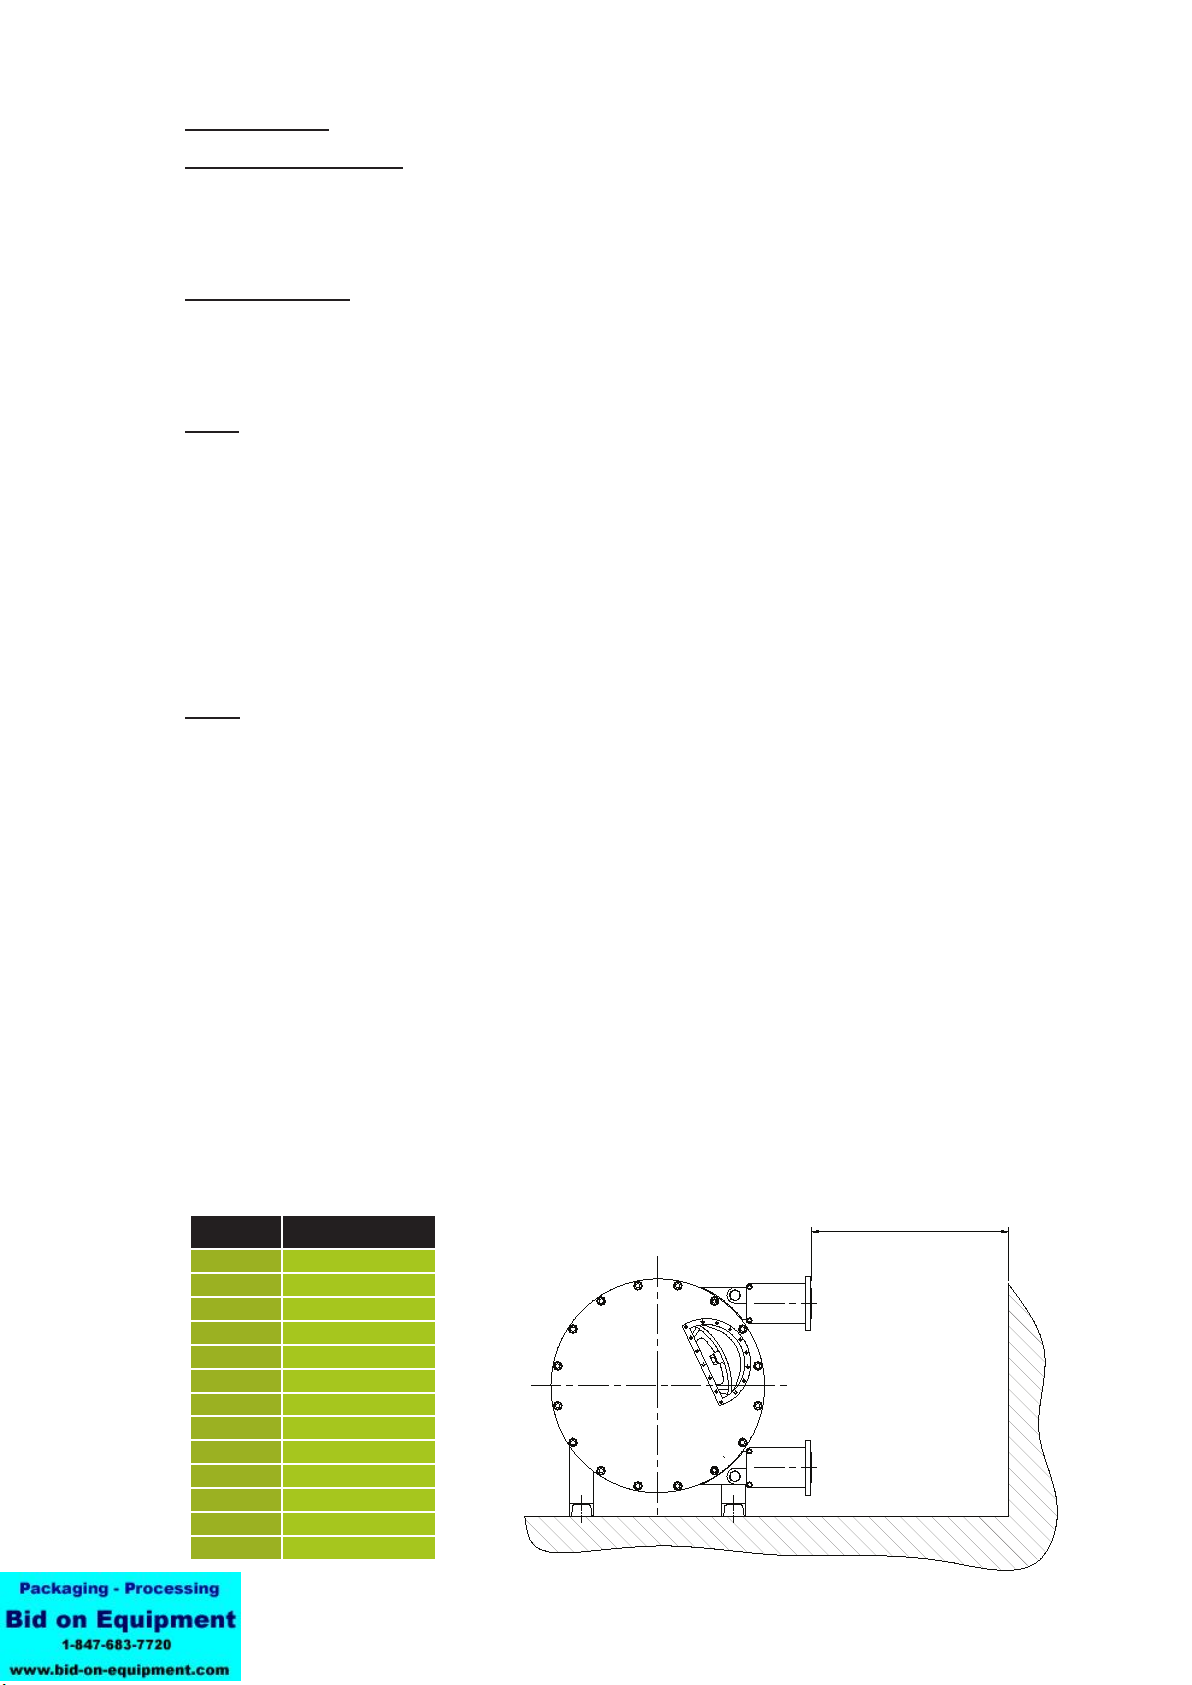
ThismanualisspecictoAlbinpumpALHandALHSserieshosepumps.Itallowstheuserstoinstall,tostartandtocarryoutmainte-
nanceonthesepumps.Allpersons,ttersandusersmustreadthismaintenancemanualinitsentirety.
TheALHseriesareprovidedwithagearmotorandtheALHSseriesarebareshaftpumps.Alldimensions,spareparts,materialsand
caracteristicsarethesameforthetwoseriesunlessspecied.
Documents concerning the gearbox, the electrical motors as well as all other options (pulsation dampener, hose rupture detector etc)
areprovidedinannex.Refertointhesedocumentstoknowthespecicdetailsofeveryapparatus.
YourlocalAlbindistributorisatyourdisposalfortheinformationthatyouwouldnotndinthismanual.Forshortreply,pleaseindicate
the following informations:
- Type of pump
- Pump serial number
- Reference of order
You can also visit our website albinpump.com for further information.
2.1 USE OF THE PUMP
Thepumpwasdenedforaspecicapplication.Anyotherusewhichdoesnotcomplywithenvisageduseisnotguaranteed.
Albin pump cannot be held responsible for damage or possible wounds produced during the use of the pump. The pump was designed
in accordance with EU norms and applicable directives. Use the pump only for applications represented above. If you want to change
yourapplication,rstcontactyourAlbinpumpdistributor.
2.2 RESPONSIBILITY
Albin pump SAS will be under no circumstances responsible for damage or wounds caused by non respect of security directives and
maintenance instructions contained in this manual, or by negligence during the installation, use, service or repair of Albin hose pumps.
Moreover,additionaldirectivesofsecuritycanbenecessaryaccordingtoworkingconditionsoraccordingprocess.ContactyourAlbin
pump distributor if you notice a potential danger during the use of the pump.
2.3 TRAINING OF THE USER AND INSTRUCTIONS
Everypersonwhoinstalls,usesorperformsanyoperationsofmaintenanceonthepumpmustbequaliedandmusthavepreviously
read this technical manual. Any temporary personnel must be supervised by skilled users.
Theorderofexecutionofoperationsdenedinthismanualmustbeabsolutelyrespected.Storethismanualnexttothepumpsothatit
can be consulted at any time.
2.4 CONDITIONS OF GUARANTEE
Albin pump S.A.S offers a guarantee of 2 years on the pump’s parts. Albin pump S.A.S promises to repair or to replace for free all dam-
aged parts except if their deterioration came from a poor use of the pump. This concerns all parts except for the hose, the clamps, the
sleeves, seals, bushings and bearings as well as the pump shoes.
Albin pump SAS will not be able to accept a request of guarantee under no circumstances if the used parts are not of Albin pump origin.
Any damaged parts covered by guarantee must be returned to the Albin pump factory or to the local Albin pump distributor. The returned
partsmustbeaccompaniedwiththedulylledandsignedsecurityform.Acopyofthisformisattheendofthismanual.Itmustbe
appended in a visible way outside the packing. The potentially dangerous parts for health must be cleaned before returning them to the
producer. It must be pointed out on the security form how parts were cleaned and those that have been decontaminated.
Albin pump SAS is under no circumstances urged to respect guarantees given in its name by a third, whatever it is, representatives of
AlbinpumpSAS,subsidiariesandrepresentativesincludingunlessaspecicagreementiswrittenbyamanagerofAlbinpumpSAS.

3 DESCRIPTION
3.1 Identication of the pump
AlbinPumpsareidentiablebythepumpplatelocatedontheupperbracket.Thisoneincludesthetypeandserialnumberofthe
pump. This serial number leads to all information concerning building materials, nature of the hose, characteristics of the gearbox
and characteristics of the motor. The gearbox as well as the motor include their own descriptive plate on which you can
read the reduction ratio, power and electrical voltage etc.
3.2 Operation principle
PHASE 3
As soon as, at the discharge side, the shoe is detached from
the hose, the other shoe diametrically opposite is already in
compression thus avoiding an internal product leakage. The
product is then successively sucked and pushed due to the
wheel rotation.
PHASE 2
The pumped liquid has now entered the hose. The second
shoe will compress the hose and push the liquid towards
the pump outlet.
PHASE 1
The pump hose is compressed successively by two pressing
shoesassembledonarotatingwheel.Therstshoe,by
pressing the walls of the hose, will create a vacuum and at-
tract the pumped liquid into the hose.

3.3 PUMP CONSTRUCTION
3.3.1 PUMPS ALH05 to ALH20
PART NO DESIGNATION ALH05-10-15-20
1 CASING CAST IRON
2 COVER LEXAN
3WHEEL CAST IRON
6 SLEEVE EPDM
7CLAMPONCASING STAINLESSSTEEL
8 CLAMPSLEEVE/HOSE BICHROMATEDSTEEL
9CLAMPONHOSE BICHROMATEDSTEEL
10 SEALCOVER NITRILE
12 INSERT STAINLESSSTEEL
14 LUBRICANT GLYCERINBLEND
16 HOSE NR/NBR/EPDM
18 BRACKET ELECTROPLATEDSTEEL
19 HUB STEEL
21 FRAME ELECTROPLATEDSTEEL
71 COVERFLANGE ELECTROPLATEDSTEEL
2118
8
9
12
7
6
14
1610
21
19
3
71

3.3.1 PUMPS ALH25 to ALH65
PART NO DESIGNATION ALH25-32-40 ALHX40-50-65
1 CASING CAST IRON CAST IRON
2 COVER ELECTROPLATEDSTEEL STEEL
3WHEEL CAST IRON CAST IRON
4SHIM GALVANIZEDSTEEL GALVANIZEDSTEEL
5 SHOE ALUMINIUM ALUMINIUM (ALHX40) / CAST IRON (ALH50-65)
6 SLEEVE EPDM EPDM
7CLAMPONCASING STAINLESSSTEEL STAINLESSSTEEL
8 CLAMPSLEEVE/HOSE STAINLESSSTEEL STAINLESSSTEEL
9CLAMPONHOSE STAINLESSSTEEL BICHROMATESTEEL
10 SEALCOVER NITRILE NITRILE
12 INSERT STAINLESSSTEEL STAINLESSSTEEL
14 LUBRICANT GLYCERINBLEND GLYCERINBLEND
15 SIGHTGLASSSEAL LEXAN LEXAN
16 HOSE NR/NBR/EPDM NR/NBR/EPDM
18 BRACKET ELECTROPLATEDSTEEL ELECTROPLATEDSTEEL
19 HUB STEEL STEEL
21 FRAME STEEL STEEL
46 SIGHTGLASSSEAL NITRILE NITRILE
47 INLET/OUTLETFLANGE STAINLESSSTEEL STAINLESSSTEEL
18 47
15
7
8
12
9
6
14
16
21
10
4
20
19
1
2
3
5

3.3.1 PUMPS ALHX80 to ALH125
PART NO DESIGNATION ALHX80-ALH80 ALH100-ALH125
1 CASING CAST IRON CAST IRON
2 COVER STEEL STEEL
3WHEEL CAST IRON CAST IRON
4SHIM GALVANIZEDSTEEL GALVANIZEDSTEEL
5 SHOE CAST IRON CAST IRON
6 SLEEVE EPDM EPDM
7CLAMPONCASING STAINLESSSTEEL STAINLESSSTEEL
8 CLAMPSLEEVE/HOSE STAINLESSSTEEL STAINLESSSTEEL
9CLAMPONHOSE BICHROMATESTEEL BICHROMATESTEEL
10 SEALCOVER NITRILE NITRILE
12 INSERT STAINLESSSTEEL STAINLESSSTEEL
14 LUBRICANT GLYCERINBLEND GLYCERINBLEND
15 SIGHTGLASS LEXAN LEXAN
16 HOSE NR/NBR/EPDM NR/NBR/EPDM
18 BRACKET ELECTROPLATEDSTEEL ELECTROPLATEDSTEEL
19 HUB STEEL
20 BOLTONPLATE CAST IRON
21 FRAME STEEL STEEL
46 SIGHTGLASSSEAL NITRILE NITRILE
47 INLET/OUTLETFLANGE STAINLESSSTEEL STAINLESSSTEEL
18 47
15
7
8
12
9
6
14
16
21
10
4
20
19
1
2
3
5

3.4 HOSE
TheAlbinhosesaremanufacturedaccordingtoverystrictspecicationstoacquirethebestperformancesofthepumpand
toassureanoptimumhoselife.Theyareavailableinthreematerials:NaturalRubber(NR),perbunan(NBR),EPDM,NBR
food and Hypalon. The material of the hose must be compatible with the pumped liquid. Consult an Albin pump distributor to
denethebesthoseforyourprocessorconsultthechemicalresistancetableonourwebsitealbinpump.com.
HOSE DIMENSIONS (dimensions in mm)
3.5 GEARBOX
OurstandardgearboxesarecoaxialgearboxesforpumpsALH05,ALHX40andALH125andplanetaryforpumps
ALH50toALH100.
They have been sized according to the important radial loads of the pump. Consult the gearbox maintenance manual
provided with the pump to know the quantity of lubricant requested as well as the periodicity of oil change.
3.6 ELECTRICAL MOTORS
Thestandardmotorsprovidedonourpumpsaresquirrel-cagemotorsandhavea220/400&400/660V50Hztri-phase
voltage.
Ifthepumphastoworkinapotentiallyexplosiveenvironment,pleaserefertothecomplementaryinformationonATEX
compliances and contact your Albin pump distributor.
3.7 AVAILABLE OPTIONS
Albin pump offers several options for their pumps:
- Hose rupture detector.
- Revolution-counter.
- Pulsation dampener.
- Air vacuum assistance (for highly viscous liquids).
Please contact your Albin pump distributor for any information about these different options.
PUMP Ø INSIDE THICKNESS LENGTH
ALH10 10 11 570
ALH15 15 11 830
ALH20 20 9 830
ALH25 25 14,5 1090
ALH32 32 15,5 1300
ALH40 38 13,5 1300
ALHX40 40 13,5 1500
ALH50 51 15 1820
ALH65 60 13,5 1850
ALHX65 65 17,5 2335
ALHX80 80 17,5 2400
ALH80 80 21,5 2910
ALH100 100 22 3410
ALH125 125 21,25 4000

4 INSTALLATION
4.1 UNPACKING AND CONTROL
During the reception of the pump, please follow the indications pointed out on the packing. Undertake a visual control to be
sure that no damage happened during the transport. If this is the case, please contact your Albin pump distributor as soon
as possible.
4.2 CONDITIONS OF USE
ALHpumpscanworkinatmosphereswherethetemperatureissituatedbetween-20°Cand+45°C.Pumpsaredelivered
painted with a 150µ polyurethane paint which allows them to resist to certain aggressive ambiences. They are designed for
indoor and outdoor setups.
4.3 SETUP
Before installing the pump, check the following points:
-Thepumpisdeliveredwithaframeprovidedwithfouranchoringholes.Itmustbexedonasolidbasewithaslope
whichdoesnotexceed5mmfor1mandmustbermlyfastenedtothisone.
- Require enough space around the pump to carry out maintenance. If such was not possible, consider the
moving of the pump to a space provided for this purpose.
-Makesurethattheroomisadequatelyventilatedtoreleivetheheatgeneratedbythepump.Leaveaspace
behind the motor ventilatior hood so as not to obstruct air intake.
4.4 PIPING
Suction line piping:
- The internal diameter of the piping must be superior to that of the pump hose (see §3.4.).
- It must be the shortest and most direct possible to avoid suction loss.
- Install a valve on the suction line especially if the pump is on load.
-Limitthepresenceofbendsandmakesurethattheyareaslargeaspossible.
-Makesurethatpipingcansupporttheservicepressureofthepump.
Discharge line piping:
- The internal diameter of piping must be superior to that of the pump hose (see §3.4.).
- It must be the shortest and most direct possible to avoid discharge pressure loss.
-Limitthepresenceofbendsandmakesurethattheyareaslargeaspossible.
- Provide a space for a pulsation dampener (see picture below).
- If there is a valve on the discharge line, install a pressure valve or a over pressure protection gauge to
avoid any possible damage to the pump and to the installation.
-ItisrecommendedtoinstallaDillatoex®pipetoabsorbvibrationscreatedbythepumppulsations.
During the pump ground study, provide enough space for the hose change as well as the possible installation
ofapulsationdampener.Distance(L)istherequiredlengthforhoseremoval.
PUMP DISTANCE(L)
ALH10 400
ALH15 500
ALH20 500
ALH25 800
ALH32 1000
ALH40 1000
ALHX40 1200
ALH50 1400
ALH65 1400
ALHX80 1600
ALH80 2000
ALH100 2800
ALH125 3000
L

PUMP ALH05-10 ALH15 ALH20 ALH25 ALH32 ALH40
WEIGHT KG 25 35 35 80 130 145
PUMP ALHX40 ALH50 ALH65 ALHX80 ALH80 ALH100 ALH125
WEIGHT KG 210 315 335 650 930 1250 1750
REF 15 and 46
REF 23
4.5 LIFTING THE PUMP
Pumpsareprovidedwithtwoliftringsttedontheupperpartoftheframe.Whileliftingthepump,
respect the following points:
-Liftthecompletehosepumpusingtheliftingringsplusadditionalsupportonthegearboxandthe
motor using suitably rated straps or slings.
- Never exceed the upper limits of lift and control the motorized pump weights in the table below.
- The motorized pump, given its centre of gravity, will tend to overbalance on the pump head side.
Makesurethatthepersonsareatasecuritydistanceofthepumptoavoidanyriskofwound.
- Never raise the pump otherwise than by the pump’s lifting rings.
-Neverraisethepumpbyit’soricesnorbyit’sbrackets.
5 PUMP STARTUP
5.1 PREPARATIONS
a. Connect the electrical motor in accordance with the local rules and regulations. Perform this work
byqualiedpersonnel.
b. Makesurethatthelubricantlevelarrivesatthelevelofthesightglass.Addlubricantifrequiredby
thebreatherorbythesightglass(see§6.1.).
c. Makesuretheshimmingofthepumpisaccordingtothepumpprocess(see§6.5shoeshimming).
d. Check the direction of rotation of the pump. It is recommended to install a rotation inverter on the
motor for the hose change.
5.2 STARTUP
a. Install piping at the inlet and outlet of the pump.
b. Makesurethatvalvesattheinletandoutletareopened.
c. Start the pump by checking its direction of rotation by the sight glass.
6 MAINTENANCE
6.1 EMPTYING AND FILLING OF THE LUBRICANT.
Referto§6.6toknowtheperiodicityoflubricantchange
1. Stop the pump.
2.PlaceatrayunderneaththedrainplugREF23.
3. If necessary, install a tap and a drain circuit instead
ofthedrainplugREF23.
4.Makesurethatthistraycancontainthequantityof
lubricant during the drainage process (see lubricant
volume table §9.5).
5.UnscrewtheplugREF23andundertakeemptying.
6.PositionandtightentheplugREF23byapplying
Teon®bandorwaterproofpasteorclosethedraintap.
NOTE: If the pump is mounted with the inlet/outlet
positioned upwards, lubricant drainage is obtained by
unscrewing some cover screws in the lower part.

7. RemovethesightglassREF15aswellasits
sealREF46andllthecasingwiththeAlbin
lubricant (see lubricant table §9.5.). You can
alsollthecasingbythebreathercapREF52
situated at the back of the pump casing.
The level of necessary lubricant is at the level
of the sight glass or underneath the shaft line
(see photograph).
FOR MODELS ALH05-10-15-20:
UnscrewhigherplugREF23ofthepump.
Placeafunnelinsidetheplugholeandll
the casing with the Albin lubricant
(see lubricant table §9.5.).
The necessary volume of lubricant is just
underneath the shaft line.
MAX LEVEL
REF 23
8. CheckthestateofthesealREF46andreassemble
thesightglassREF15ortightenthebreathercap
REF52.

6.2 HOSE CLEANING
The hose cleaning can be done without removing the hose. It can be done with water or with a cleaning liquid (check
compatibility with hose material). With numerous products, it is necessary to clean the hose after every pumping in order
to avoid the hardening of the product inside this one.
CAUTION!Makesurethatthecleaningliquidtemperatureisadaptedtothehosematerial.
6.3 HOSE REPLACEMENT
CAUTION! Before any hose change, check the following points:
a. This service has to be performed by skilled personnel that is acquainted with this manual.
b. Inlet and outlet valves have to be closed to minimize product loss.
c. Always carry clothes and necessary protection according to the pumped product.
d. Respect all security and enviromental rules necessary for the manipulation of the pumped product.
6.3.1 HOSE REMOVAL
1. Disconnect and remove the suction and discharge piping.
2.Drainthelubricantasexplainedin§6.1.
3.Atthesuctionend,loosenclampsREF8and9(photograph1).
ExtracttheinsertREF12andremovetheangeREF47(photograph2).
REF 8
REF 9
REF 47
REF 12
REF 8 REF 9
REF 24
REF 12REF 18
FOR MODELS ALH05-10-15-20
RemovecirclipsREF24anddismantlebracketREF18.
ExtractinsertREF12.
PHOTO 1
PHOTO 2

4. -Atthedischargeend,loosenclampsREF8and9.
-ExtracttheinsertREF12andremovetheangeREF47aswell
asthebracketsREF18(photograph4).
-RemoveclampsREF8and9(photograph5).
5. Jog run the motor to deliver the hose from the pump
casing at the outlet side.
WARNING! The hose can come out of the pump casing very fast
and cause harm. Check that nobody is in front of the pump´s
oriceswhileremovingthehose.
REF 8 REF 9
REF 24
REF 12
REF 18
FOR MODELS ALH05-10-15-20:
-Atthepumpoutlet,loosenclampsREF8andREF9.
RemovecirclipsREF24anddismantlebracketREF18.
ExtractinsertREF12.RemoveclampsREF8andREF9.
REF 47
REF 12
PHOTO 4
PHOTO 5
PHOTO 6

6.3.2 PUMP CASING CLEANING
This operation is necessary when a hose has burst and when the product has contaminated the inside of the pump casing.
1. Unscrew cover bolts by leaving two screws partly fastened to the casing. Slightly withdraw the cover from the casing and
xashackleinoneofthecover’shighestfasteningholes.(PumpsALH80,100and125areequippedwithaliftingring).
Install a lift equipment in this shackle and slightly raise the cover. Unfasten the remaining screws and withdraw the cover.
2. CheckthestateofthecoversealREF10andreplaceifnecessary.
3. CheckthestateofwearofthepressingshoesREF5andreplacethemifnecessary(see§6.4Replacementofspareparts).
CAUTION! A wear of shoes can cause problems to the pump and provoke abnormal hose lifetime.
4. Inthecaseofahoseburst,itispossiblethattheshaftsealREF26aswellasthesealringREF27havebeennotably
damagedwhenpumpinganabrasiveliquid.Relateto§6.4ifareplacementofthesepartsisnecessary.
5. Wash the casing with clear water and withdraw any residues.
6. Drythepumpcasingentirely.
7. Replace the cover seal in its groove.
8. Reassemblethepumpcover.
6.3.3 REASSEMBLY OF THE HOSE
WARNING! You should never assemble a new hose
without a mounted cover.
1. Pre-assembletheangeREF47attheinletport
with two bolts (photograph 1).
FORMODELSALH05-10-15-20
-TemporarilymountthebracketREF18
at the inlet port.
2. Clean the new Albin hose carefully.
Slightly coat it with Albin lubricant.
SlightlylubricatetheinsideofthesleeveREF6
REF 47
PHOTO 1

3. Insert the hose by the outlet port (photograph 2).
4. Reverse the direction of rotation of the motor.
5. While pushing on the hose, jog run the motor and check the
direction of rotation.
6. Theshoesmountedonthewheelaregoingto“swallow”thehose
and push it out of the inlet port. Always by giving jolts, bring the
hoseagainsttheangeREF47(photograph3).
7. AssembletheclampsREF8and9ontheinletside.Mounttheinsert
REF12intothehose.TightenclampsREF8and9.
Ifyoumeetdifcultiesinintroducinginsertsintothepumphose,
coat them slightly with Albin lubricant. Never use another lubricant.
8. AssemblethebracketsREF18andpre-assembleangeREF47onthe
outlet side with two temporary bolts.
9. Reverse the direction of rotation of the motor.
10. Jogrunthemotortobringthehoseagainstthedischargeange.
11. Undertake operation 7 at discharge side.
12. FillthepumpwiththenecessaryquantityofAlbinlubricant
(see§6.1.and§9.5.).
13. Takeawaythetemporaryangeboltsandxthepipingonbothsuction
and discharge sides.
14. Open the valves at the suction and discharge sides.
15. Check the direction of rotation of the pump.
Check for any possible lubricant leakage by the inserts, sleeves or
cover.
PHOTO 2
FORMODELSALH05-10-15-20
DismantlethebracketREF18.MountclampREF8and9
onthehose.MounttheinsertREF12intothehose.Fix
bracketREF18andblocktheinsertwithcirclipsREF24.
TightentheclampREF8and9.
FORMODELSALH05-10-15-20
AssemblethebracketREF18attheoutletside.
PHOTO 3

6.4 REPLACEMENT OF SPARE PARTS
6.4.1 REPLACEMENT OF PUMP SHOES (except ALH05 to ALH20)
1. Jog run the motor and position one of the shoes in front of the sight glass.
2. Cut the power supply.
3. Drainthelubricant(see§6.1).
4. RemovethepumpcoverREF2aswellasthecoversealREF10.
5. Disassemble the shoe which is not in contact with
the hose and put aside the shims if any. Check that
thepinREF30isstillonthewheel(ALH25toALHX80).
6. Mountanewshoeonthewheel(donottoforget
thewasherREF29).Slidetheshimsbetweenthe
shoe and the wheel before tightening.
CAUTION: Be careful of the position of the shoe with
thecentringpenREF30(ALH25toALHX80).
7. Tighten the shoe onto the wheel.
8. Reassemblethecoverwith3temporaryboltsdisposed
atabout120°betweeneachother.
9. Jogrunthemotor180°tobringthesecondshoeinfront
of the sight glass.
10. Remove the cover once again and undertake operations 5 - 7.
11. Reposition the cover and tighten all cover screws.

6.4.2 REPLACEMENT OF THE SEAL RING REF27 AND THE SHAFT SEAL REF26
Albin hose pumps are equipped with a leakage channel that allows to see the wear of the seal ring or the shaft seal. This channel is at
thebackofthepumpcasingunderneaththegearboxange.Italsoprotectsthegearboxsealsbyleavingthelubricantorthe
product to pass freely at the back of the pump casing.
PUMPS ALH05 to ALH65 (refer to the nomenclature §9.3. for the landmarks of parts).
1. Isolate the pump from the power supply.
2. Emptythelubricantandcleanoutthepump(see§6.1).
3. Removethepumphose(see§6.3.1).
4. DisassemblethepumpcoverandwithdrawthecoversealREF10.
5. DisassemblethewheelbyunscrewingtheexpansiblehubREF19.
6. Withdrawthewheelofthepumpshaftwithasuitableliftingequipment.
7. Support the gear motor with a suitable lifting equipment.
8. UnscrewthenutsREF41andwithdrawthegearboxfromthepumpcasing.
9. ExtractthedamagedsealringREF27.
10. SliponthespacerringREF73ifnecessaryandgluetotheshaft.Position
thenewsealringREF27againstthespacerringorthegearboxshaft’s
shoulder.Fillthethekeygroovewithsiliconemastictoensurecorrectsealing.
11. WithdrawtheshaftsealREP26withadriftpunch.
12. ReplaceanewshaftsealREF26withanappropriatetool(woodenorplasticcylinder).
Check the mounting position of the seal (opened side turned to the cover).
REF 41
REF 72
LEAKAGE CHANNEL
REF 27

13. Mountthegearmotoronthecasingbeingcarefulnottodamagetheshaftseal.
TightenthenutsREF41withtheirwashersREF72.
14. Mountthewheelonthepumpshaftbypositioningitreferringtothetableandthedrawingsbelow.
ForPumpsALH100andALH125thewheelisautomaticallypositionedbythespacerringandsealring.Therefore,no
ajustment is necessary.
PUMP ALH
05 - 10
ALH
15 - 20
ALH
25
ALH
32
ALH
40
ALH
X40
ALH
50 - 65
ALH
X80
ALH
80
Distance cas-
ing/shoe(L) 4 mm 2,75 mm 5,5 mm 6mm 2,5 mm 5 mm 3 mm 6,5mm 8mm
Tolerance
+or- 0,5 mm 0,5 mm 0,5 mm 0,5 mm 0,5 mm 0,5 mm 0,5 mm 0,5 mm 0,5 mm
REF 19
L L

15. Crosstightentheexpansiblehubwithadynamometricspannertothetorquesthatgureinthetablebelow.
Check the wheel position once again.
16. MountthecoversealREF10initsgrooveandmountthecover.
17. Mountthepumphoseasstatedin§6.3.3.
PUMPS ALHX80 to ALH125 (refer to the nomenclature for the landmarks of parts §9.3.)
1. Undertakethesameoperations1to10asforpumpsALH05toALH65.
2. DisassemblethesealangeREF25andwithdrawtheshaftsealwithascrewdriverorasimilartool.
3. TakethenewshaftsealREF26betweenthethumbandtheindexandbytighteningyourngers,forman“8“gure.
The seal can now be inserted into its groove by respecting the mounting position (see drawing).
4. Mountthegearmotoronthepumpcasing(seeoperation13).
5. ReplacetheOringREF67ifnecessaryandreassemblethesealange.
6. ForpumpsALHX80andALH80, undertake operations 14 to 17 of previous chapter.
ForpumpsALH100andALH125, undertake operation 14 of previous chapter. Then block the wheel with
thewasherREF60andthescrewREF59andnishwithoperations16and17ofpreviouschapter.
PUMP TYPE TORQUE Nm
ALH05-10-15-20 12
ALH25-32-40 13
ALHX40 27
ALH50-65 35
ALHX80 110
ALH80(shaftØ90) 110
ALH80(shaftØ100) 190
67
26
25
This manual suits for next models
27
Table of contents
Other ALBIN PUMP Water Pump manuals
Popular Water Pump manuals by other brands

IWAKI PUMPS
IWAKI PUMPS EWN-W instruction manual

Mopec
Mopec FP025 user manual

Jebao
Jebao PU-11W owner's manual

Walrus
Walrus TPHK Series installation manual

Bestway
Bestway AlwayzAire 69037 owner's manual

GORMAN-RUPP PUMPS
GORMAN-RUPP PUMPS PA Series Installation, operation and maintenance instructions manual

TRIB
TRIB airCap PG owner's manual

Aquasub engineering
Aquasub engineering TEXMO ASM SP Series Installation & Spare Parts Manual

Landustrie
Landustrie DCP22 Operation & maintenance manual

Aquagarden
Aquagarden Barracuda instruction manual

Fast Flow
Fast Flow FF-3D-TM-TCP Operation and maintenance manual

EINHELL Bavaria
EINHELL Bavaria BAK 12 operating instructions