Albrecht DR 306 User manual
I
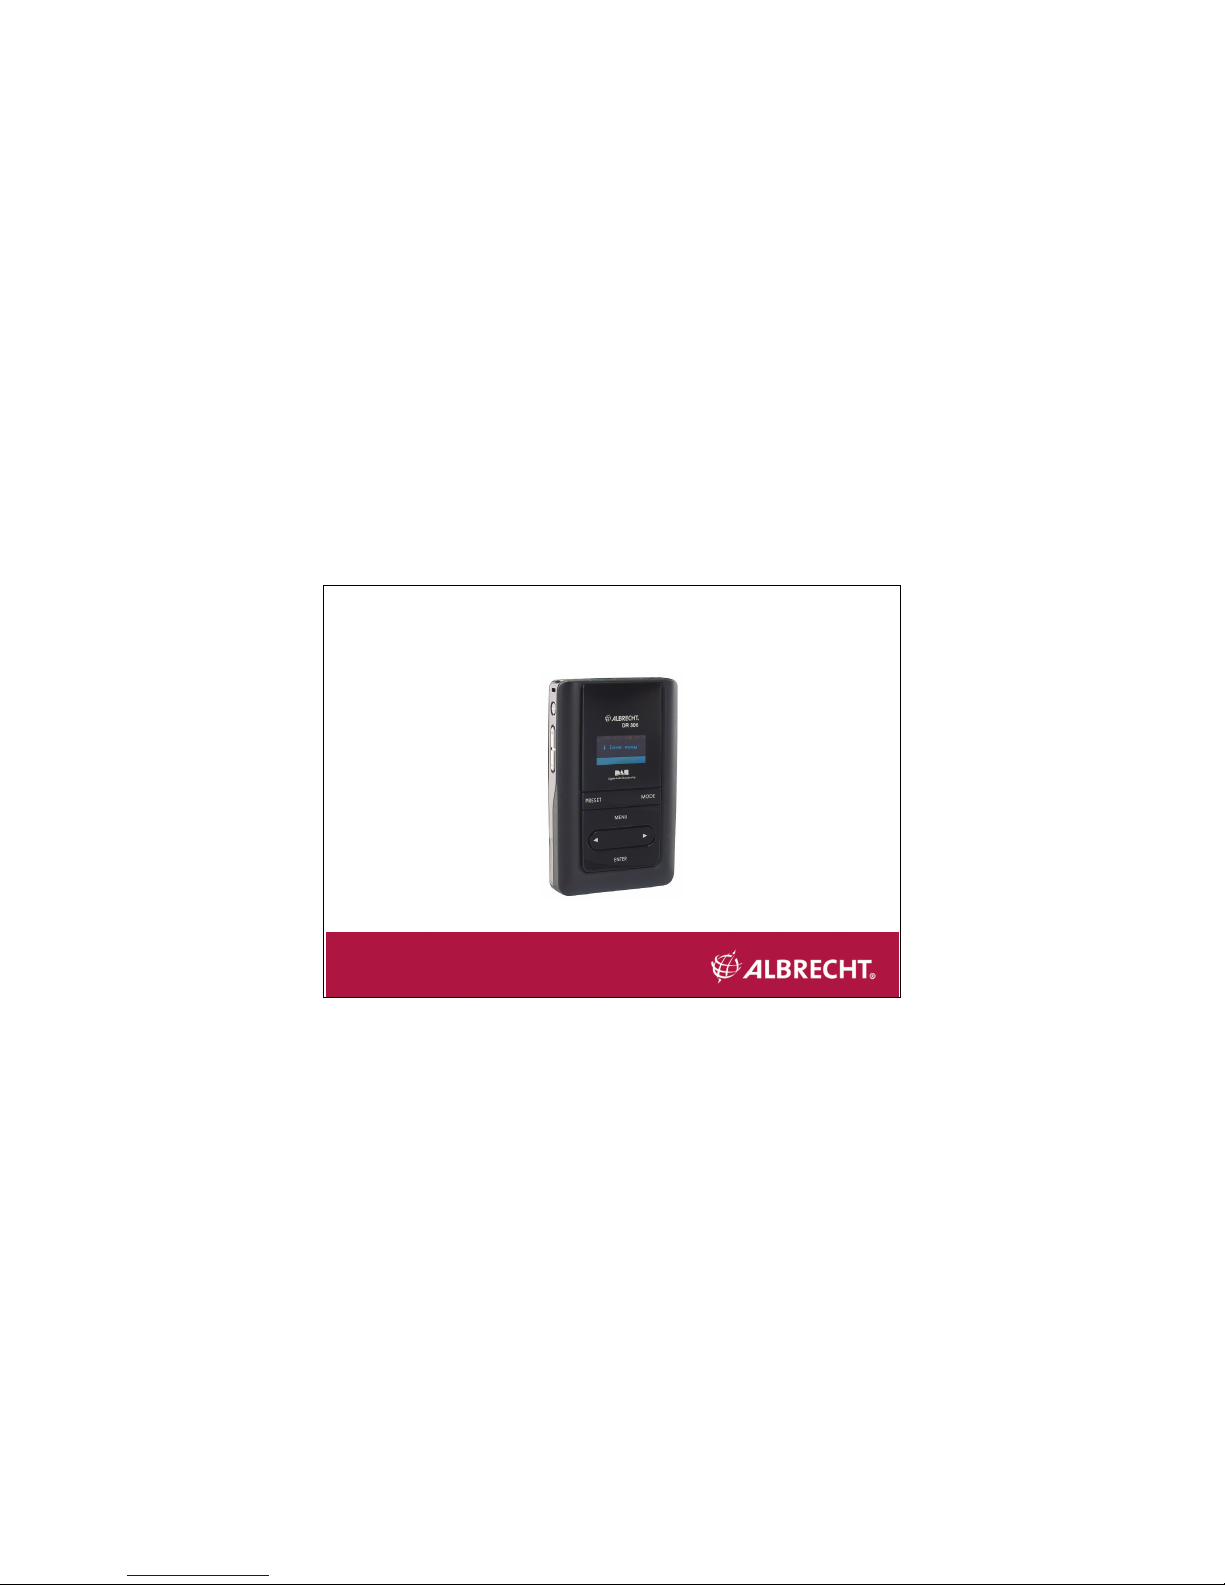
DAB / FM Radio & MP3 Player DR 306
USER MANUAL

II
Safety Instructions
1. Always connect the device with the originally provided power supply.
Please do not use other similar objects. Meanwhile, the original power
supply can only be used for this product. Please do not apply it to other
electronic products.
2. Please do not expose the device to environments with the following
conditions: rapid change of temperature, high temperature (e.g., direct
sunlight), extremely low temperature, high voltage, electro-static
interference, dust, and moisture; please also keep the device away from
being splashed with water or dipped in any kind of liquid.
3. Please keep the device away from electronic items that can cause
electromagnetic interference, e.g., television sets, personal computers,
motors, motorized vehicles, scanners, video disc players, fax machines,
hair dryers, and so on.
4. Keep the device away from strong impact or dropping.
5. Please do not clean the device with corrosive or volatile liquids. Only
clean with a soft cloth or paper tissue if necessary.

III
6. Please do not use pens or sharp objects to press the enclosure of the
device or the display panel to avoid damage or scratching.
7. If the device is out of order, please send it back to the retail store for
service by authorized personnel. Please do not disassemble the device
by yourself. Any disassembly of the device by unauthorized personnel
will void the warranty.
8. The European regulations for use of FM transmitters (EN 301 357-2) are
brandnew and not all countries allow already the use of this transmitter.
At April 2007, when issuing this user manual, only Germany and
Switzerland accepted the free use of the transmitter. We will publish
updated country lists on our website http://service.alan-germany.de
Please respect the national requirements and use the transmitter only
where allowed.

IV
Safety Instructions.................................................................II
Features ..................................................................................1
Package Contents..................................................................1
Product Diagram ....................................................................2
Function Keys ...................................................................3
Getting Started .......................................................................4
Power On Firstly or Reset ................................................7
Notes.................................................................................9
DAB Mode...............................................................................10
Receive DAB programs ....................................................11
Handheld DAB Radio User Manual
A
lbrecht DR 306

V
Change DAB channel .......................................................11
Store channel Preset ........................................................12
Vol+ and Vol- related functions ........................................13
DAB Setting ......................................................................14
DAB channel information and Clock.................................18
FM Transmitter .................................................................19
FM Mode..................................................................................21
MP3 Mode ...............................................................................29
Listen to MP3 music .........................................................30
Function List ..........................................................................36
Specifications.........................................................................40

1
Features
This product has a portable design with a compact, lightweight, and
sleek appearance. It integrates digital audio broadcasting (DAB), FM radio
and MP3/ WMA playback functions into a single device and provides the
services of receiving digital audio broadcasting and FM radio.
Package Contents
1.
Main device 2.
Stereo earphones 3.
USB cable
4.
Adapter plug 5.
User manual
2
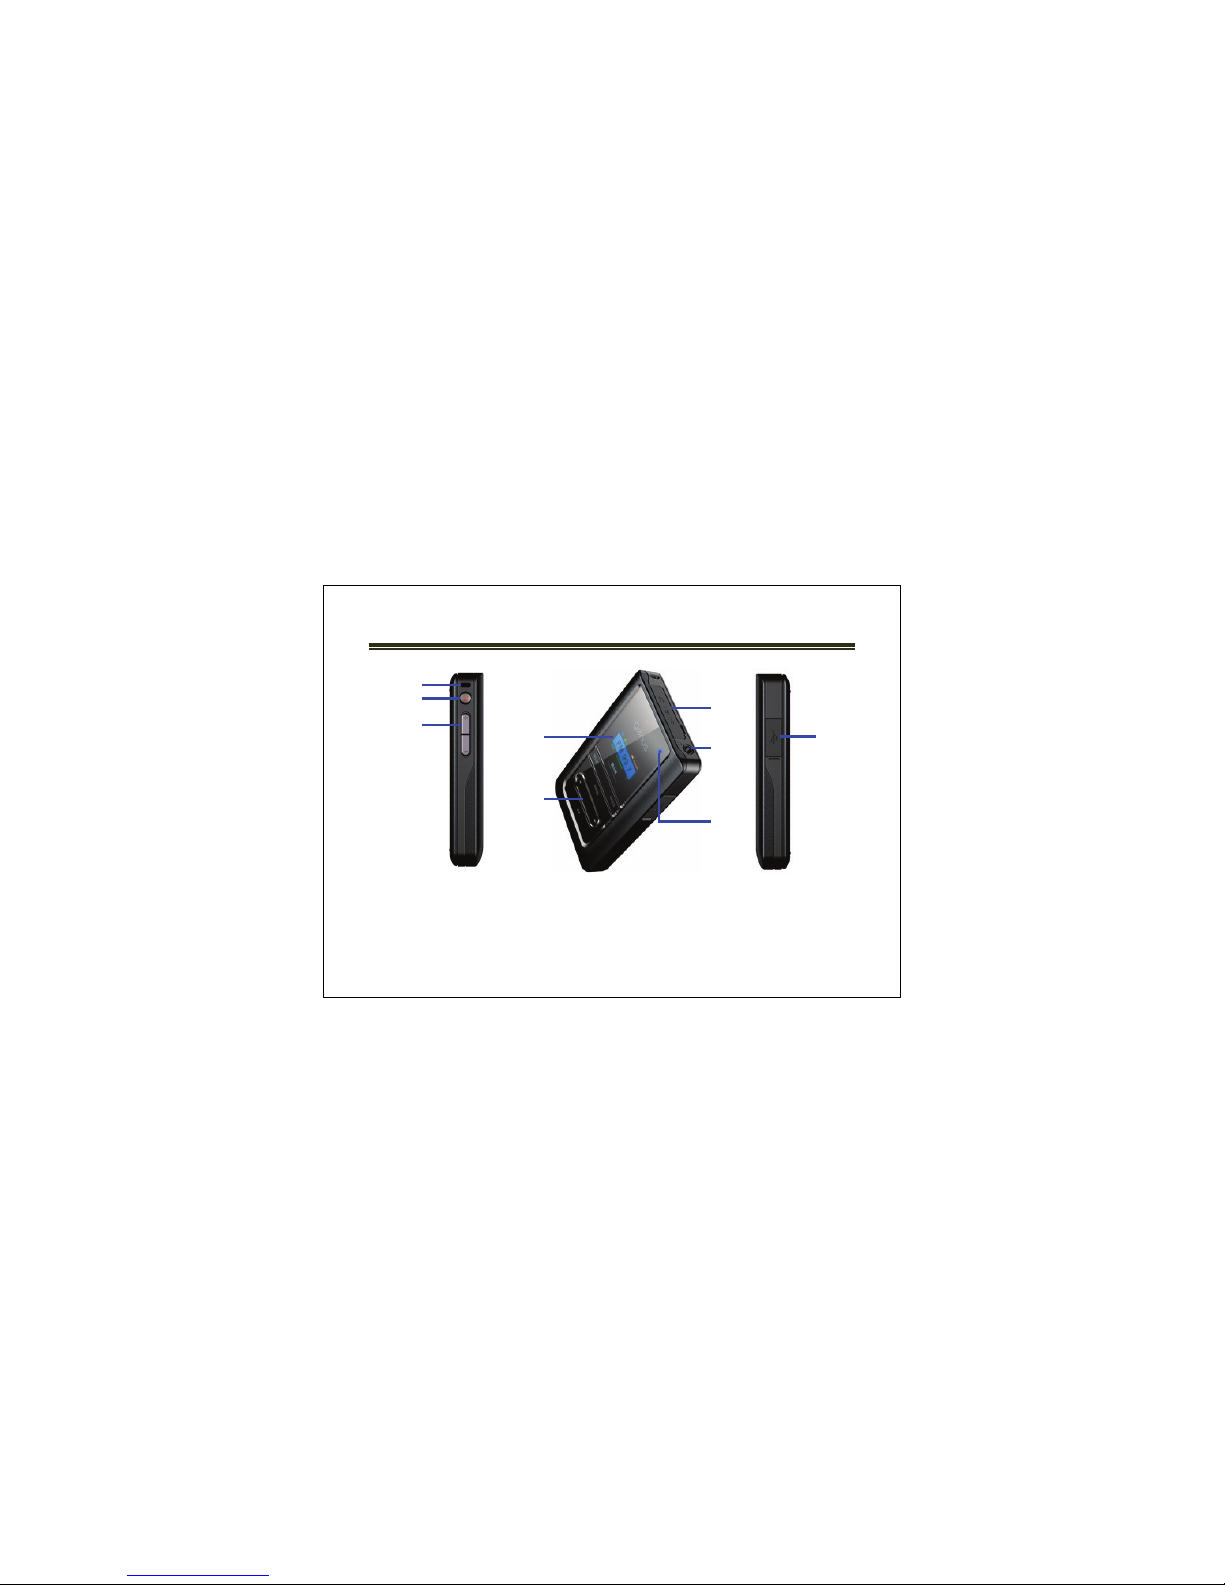
Product Diagram
nNeck strap hook oPower / Lock pVolume up / down
qOLED display rFunction keys sSD/MMC card slot
tHeadphone jack uCharge indicator vUSB port/
Power supply jack
o
p
n
s
r
u
t
v
q

3
Function Keys
Function Panel Keys Function
1. PRESET Store preset channels; repeat
type setting for MP3
playback; sound effect setting
for MP3 playback
2. MODE Select modes (DAB/ FM/
MP3)
3. MENU Mode / Menu / Esc / Stop
4. YZChange channels; select
songs
5. ENTER Enter / Play / Pause
Note: The following sections will use the terminologies: “Hold” and “Press”.
“Hold” means a keystroke which lasts more than 2 seconds then release;
“Press” means a keystroke which lasts less than 2 seconds.
4
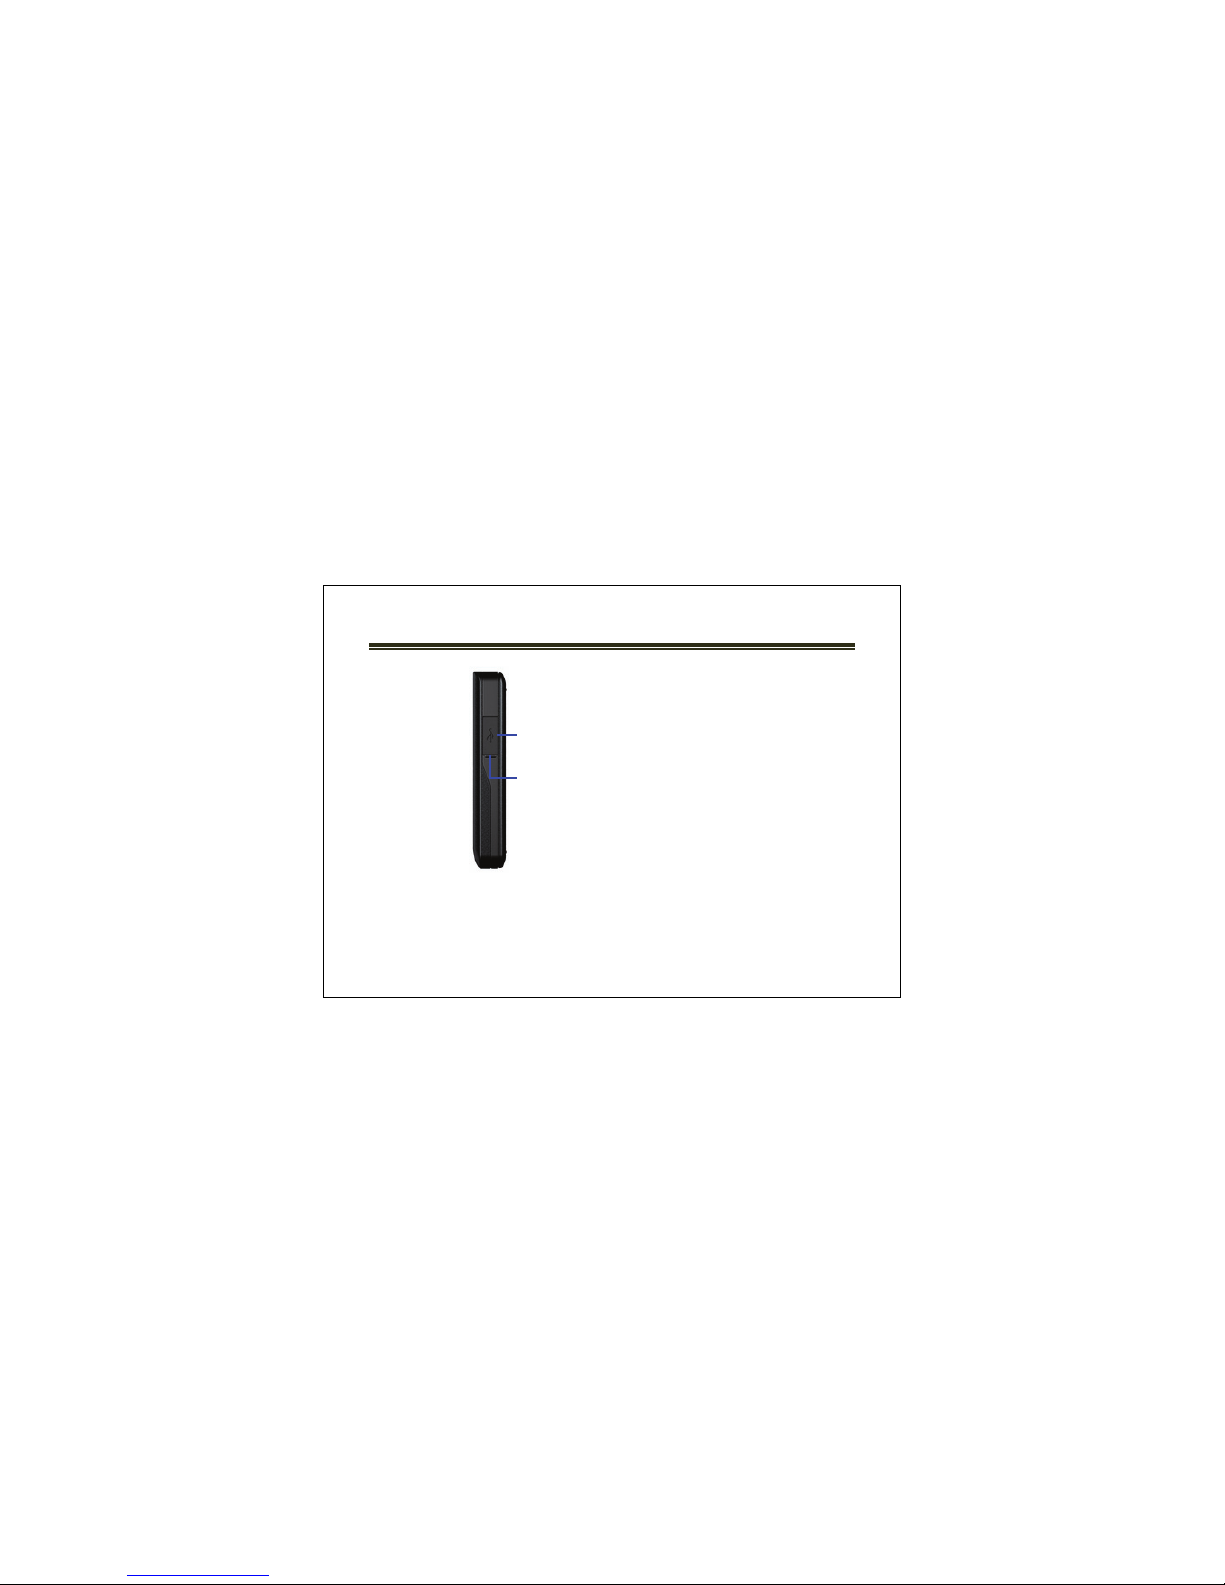
Getting Started
nOpen the cover
oPower supply socket and USB
port for PC connection and
charging from PC via USB
1. Charge: plug the power supply into the electrical outlet in your house,
and then plug the smaller end of the power supply into the power supply
jack on the device, the built-in battery will be automatically charged.
o
n
5
2. When the device is unpacked for the first time, please charge the battery
for at least 8 hours. Only after the green light of the charge indicator is on,
the device can be operated normally. Afterwards, charge the battery until
the green light of the charge indicator is on.
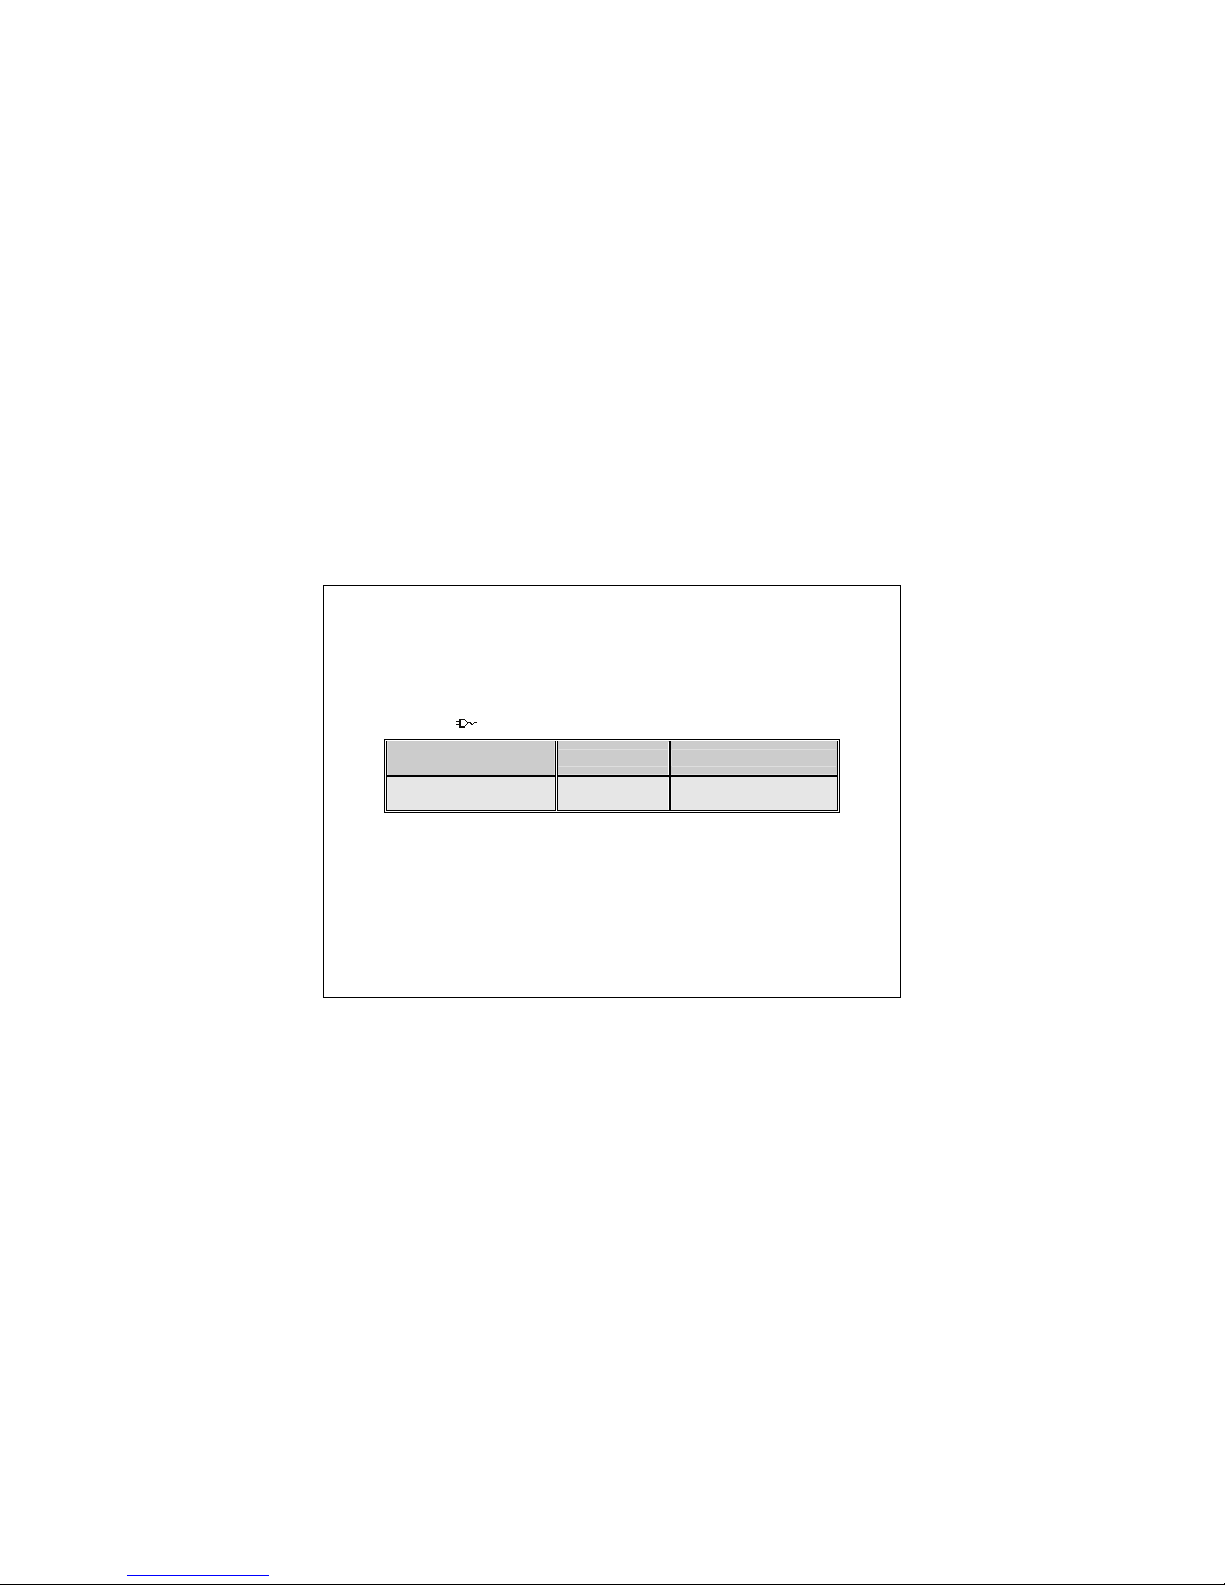
3. The charge indicator on the front cover shows the status of charging.
Meantime icon displays.
Slow charging under low
battery condition Charging Charge Completed
Both Red and Green
lights are on
Red light is on Red light is off and Green
light is on
4. Power on the device: Hold Power key, the display will be turned on while
the charge indicator is off. Press Power key, the device will be locked.
Equally, press Power key again to unlock the device.
5. During the first time usage or when there is no preset channel, the
system will automatically scan available channels and store the channel
information.
Table of contents


