Aldor Automotive DAI1MASU User manual

DAI1MASU-ENG-DE-NL.doc / Rev. 0 / blz. 1
ASSEMBLY MANUAL
Roofspoiler DAIHATSU MATERIA
Manufacturer : Aldor Automotive
Type : DAI1MASU
Material : PU
Parts list :
Description
Qty
Roofspoiler
1
Black pointed thread-piece
2
Hexagonal screw M5x12 + wide ring
2 + 2
Tube PU-glue
1
Required tools:
- Tape
- M5 tap
- Sandpaper
- Degreaser
- Drilling machine & drills Ø 2.5 and 8 mm
- Primer
- Hexagonal wrench M5
These assembly instructions should be read thoroughly prior to mounting the spoiler!
IMPORTANT ASSEMBLY AND GLUEING INSTRUCTIONS
1. The glueing of the spoiler must be done at a temperature of at least 20 °C. The temperature of spoiler and car must be as equal as
possible. At low temperatures it is advised to heat up the mounting surfaces using an air heater (prevent overheating!).
2. No warranty acceptance at incompetent mounting and not following the assembly instructions.
3. It is advised to let an official Daihatsu dealer carry out the mounting.
4. In case the spoiler must be painted the enclosed painting instructions must be followed.
5. Ensure that the keeping date of the enclosed PU-glue is not exceeded. When so, please order new PU-glue.
6. In case of painting, ensure that the imprinted identification of the spoiler remains visible.
MOUNTING
1. Check the fit of the spoiler on the car.
2. Roughly mask the areas corresponding with the inserts in the spoiler on the trunk lid with tape.
3. At the inner side of the trunklid remove the 2 plastic caps (LH and RH).
4. In case the inserts are polluted by paint, clear the thread by means of an M5tap.
5. Screw the black thread-pieces in the inserts of the spoiler, so that the pointing ends are sticking out 2 to 3 mm.
6. Place the spoiler well centred on the trunk lid. Apply light pressure to both sides, thus enabling the black
thread-pieces to mark the drilling points on the trunk lid.
7. Remove the spoiler from the trunk lid and remove the black thread-pieces out of the spoiler.
8. Drill the mounting holes. Pre-drill with 2.5 mm and then drill out with an 8 mm drill.
9. Deburr the holes. Remove the tape and clean the trunk lid with degreaser.
10. Apply primer to the holes and allow to dry.
11. Use coarse sandpaper to remove the paint from the mounting surfaces of the spoiler, so that the basic material
becomes visible.
12. Clean the mounting surfaces of the spoiler and trunk lid with degreaser and apply the enclosed spoiler glue.
13. Place the spoiler well centred on the trunk lid and fix it with the enclosed hexagonal screws + rings. Prevent the
screws from falling into the trunk lid!
14. Re-install the 2 plastic caps.
IMPORTANT INSTRUCTIONS AFTER MOUNTING
Allow the glue to dry for at least 12h. Do not drive the car during this period.
During the first 24h after the mounting no mechanical loading must be applied to the spoiler.
Do not wash during 48h.
No warranty acceptance of any damage due to the use of a car wash.
Van Hilststraat 4
5145 RL Waalwijk
The Netherlands
tel: +31-416-344 778
fax: +31-416-344 984
www.aldorautomotive.com

DAI1MASU-ENG-DE-NL.doc / Rev. 0 / blz. 2
PAINTING INSTRUCTIONS >PUR<
An optical improvement of both spoiler and car is realised when the spoiler will be painted after its fitting is checked on the car.
For the painting of the spoiler we recommend the painting instructions from your professional paint supplier.
It must be stipulated that PUR-parts are foamed parts and therefore can have pores. These pores must be removed by means of pore-
filler and primer.
The primer coating in which the part is supplied is only a first surface treatment. Further steps like filling, grinding and cleaning must be
done by the customer prior to painting the part.
For the painting please follow these instructions:
1. Place the parts in the same position as they will be mounted on the car. Prevent bending or tightening at painting and drying, because
this can cause problems at mounting due to deformation of the part.
2. Preliminary treatment:
2a. Clean the part using a plastic cleaner, like Spies-Hecker Nr. 85-81 or a similar product.
2b. Grind with grain 800, let dry.
2c. Clean and make dust free.
2d. Fill pores.
2e. Check part and repair eventual flaws.
3a. For uni-colours follow the next steps:
- mix 2K acryl paint with 2K harderner and 2K thinner according to the instructions of your paint supplier.
- apply 2 - 3 layers.
3b. For metallic -colours follow the next steps:
- apply 2 - 3 layers of basecoat.
- mix 2K clear coat with 2K harderner and 2K thinner according to the instructions of your paint supplier.
- apply 2 - 3 layers of clear coat.
4. ensure that the imprinted identification of the spoiler remains visible.
Attention: Never dry at temperatures exceeding 30 °C!
At painting and drying prevent bending or tightening of the parts!

DAI1MASU-ENG-DE-NL.doc / Rev. 0 / blz. 3
MONTAGEHANDLEIDING
Dakspoiler DAIHATSU MATERIA
Fabrikant : Aldor Automotive
Type : DAI1MASU
Materiaal : PU
Onderdelenlijst :
Onderdeel
Aantal
Spoiler
1
Zwart markeerdraadeindje
2
Inbusboutje M5x12 + brede sluitring
2 + 2
Tube spoilerlijm
1
Benodigd gereedschap:
-Tape
-M5-tap
-Schuurpapier
-Ontvetter
-Boormachine & boren Ø 2.5 mm en 8 mm
-Primer
-Inbussleutel M5
Lees voor de montage van de spoiler eerst deze handleiding aandachtig door!
BELANGRIJKE MONTAGE- EN LIJMVOORSCHRIFTEN VOORAF
7. Het vastlijmen van de spoiler dient bij een temperatuur van minstens 20 °C te gebeuren. Spoiler en auto dienen een zo gelijk mogelijke
temperatuur te hebben. Bij lagere temperaturen is het aan te bevelen de lijmvlakken te verwarmen met een föhn (oppassen voor
oververhitting!).
8. Geen garantie-aansprakelijkheid bij onvakkundige montage en het niet volgen van de montagehandleiding.
9. Het is aan te raden de montage door een Daihatsu dealer te laten uitvoeren.
10. In het geval van het zelf spuiten van de spoiler dienen absoluut de bijgevoegde spuitinstructies voor PUR-delen te worden gevolgd.
11. Let erop, dat de houdbaarheidsdatum van de spoilerlijm niet is overschreden. Zo ja, dan nieuwe spoilerlijm bestellen.
12. Let erop, dat het typeplaatje leesbaar blijft (i.g.v. spuiten).
MONTAGE
15. Controleer de pasvorm van de spoiler op de achterklep van de auto.
16. Plak de oplegvlakken van de spoiler op de achterklep af met plakband.
17. Verwijder aan de binnenzijde van de achterklep de 2 plastic afdekdopjes (geheel links en rechts).
18. Eventuele verfresten in de inserts verwijderen met een M5-tap.
19. Schroef nu de meegeleverde zwarte draadeindjes in de inserts van de spoiler, zodat de punten 2 à 3 mm
uitsteken.
20. Plaats de spoiler zo goed mogelijk gecentreerd op de achterklep. Met lichte druk op de spoiler kunnen nu de
zwarte draadeindjes de boorpunten markeren in het plakband op de achterklep.
21. Verwijder de spoiler weer van de achterklep en verwijder de zwarte draadeindjes uit de spoiler.
22. Boor de gaatjes voor de bevestigingspunten. Eerst voorboren met 2.5 mm. Uitboren met 8 mm.
23. Ontbraam de boorgaatjes. Verwijder de tape en ontvet de achterklep.
24. Breng vervolgens primer aan op de boorgaatjes en laat deze uitharden.
25. Verwijder met grof schuurpapier de laklaag op de montagevlakken van de spoiler, zodat het basismateriaal
zichtbaar is.
26. Ontvet de montagevlakken van de spoiler en breng de bijgeleverde kit aan.
27. Plaats de spoiler zo goed mogelijk gecentreerd op de achterklep en bevestig deze met de bijgeleverde
inbusboutjes + ringen. Voorkom dat de boutjes in de klep vallen!
28. Hermonteer de 2 plastic afdekdopjes.
BELANGRIJKE VOORSCHRIFTEN ACHTERAF
Laat de kit minimaal 12 uur uitharden. Gedurende deze periode niet met de auto rijden.
Gedurende 24 uur de spoiler niet mechanisch belasten.
Gedurende 48 uur niet wassen.
Schades die ontstaan door gebruik van een autowasserette vallen buiten de garantie-aansprakelijkheid.

DAI1MASU-ENG-DE-NL.doc / Rev. 0 / blz. 4
MONTAGEANLEITUNG
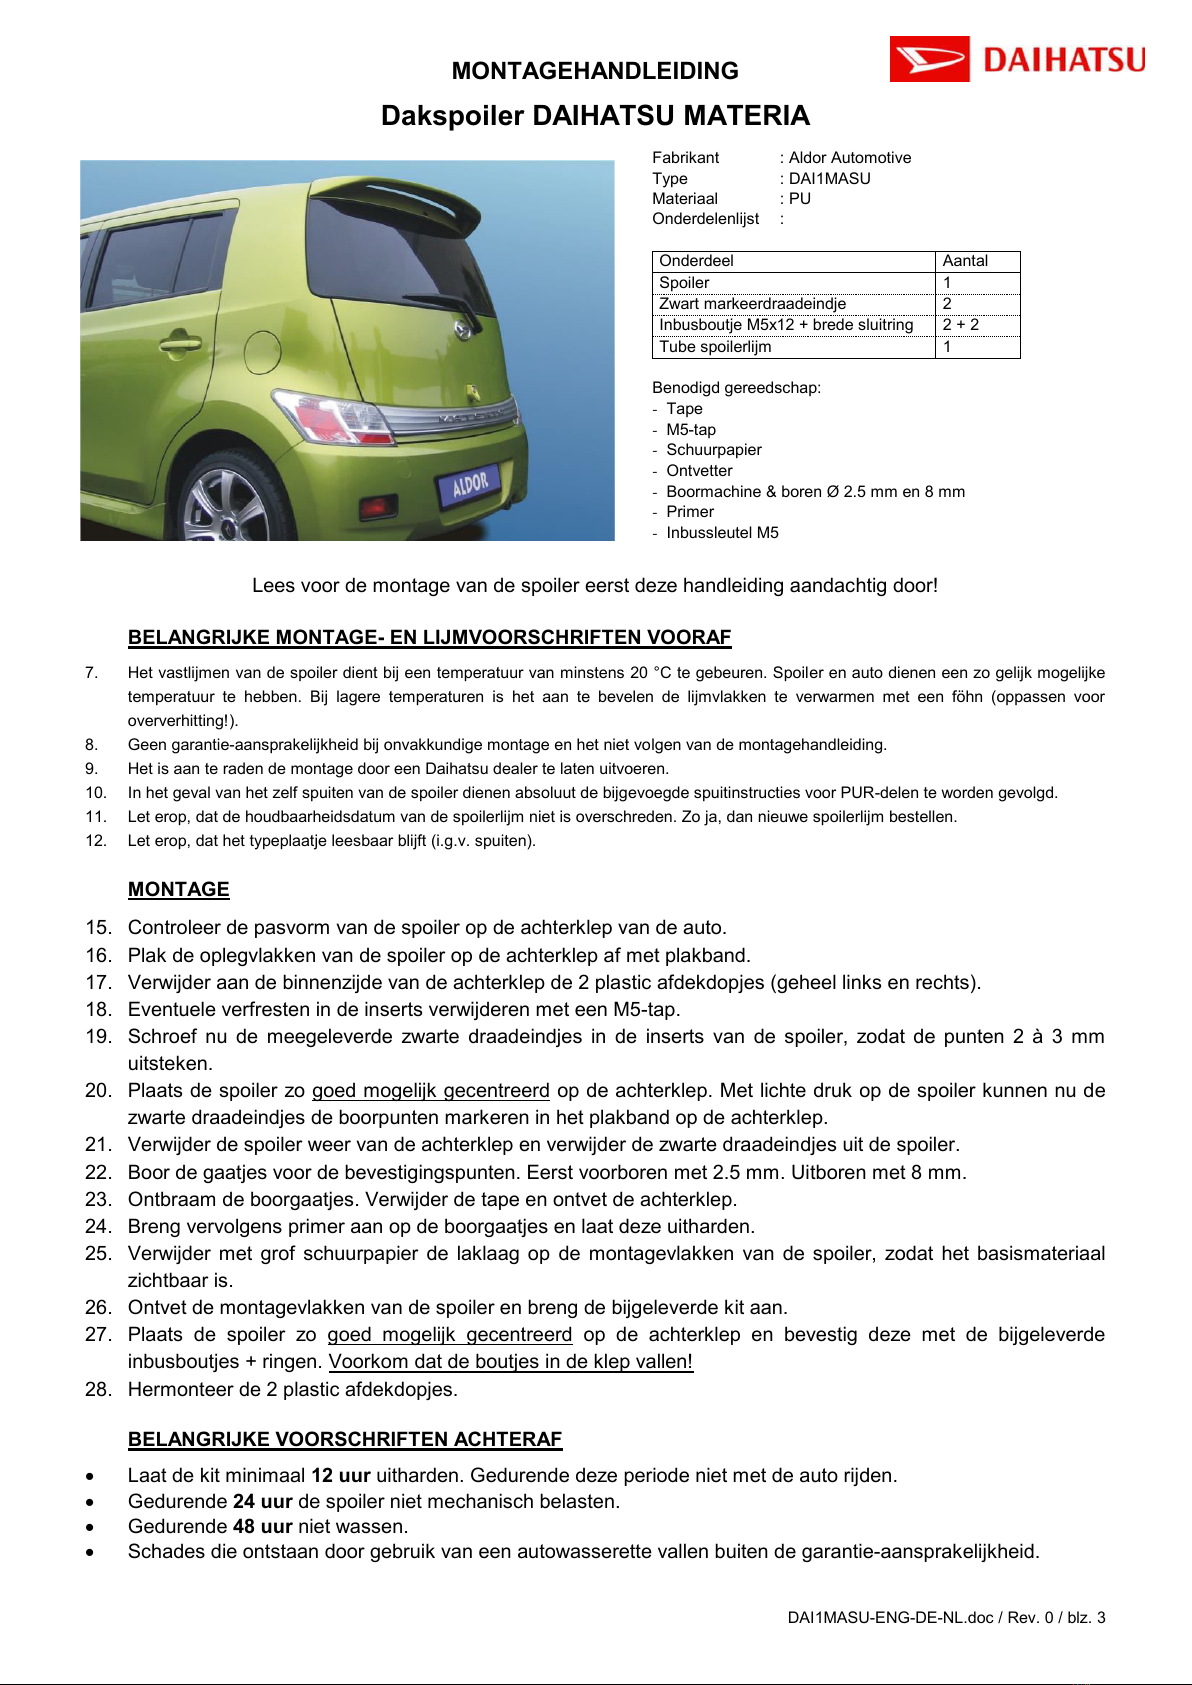
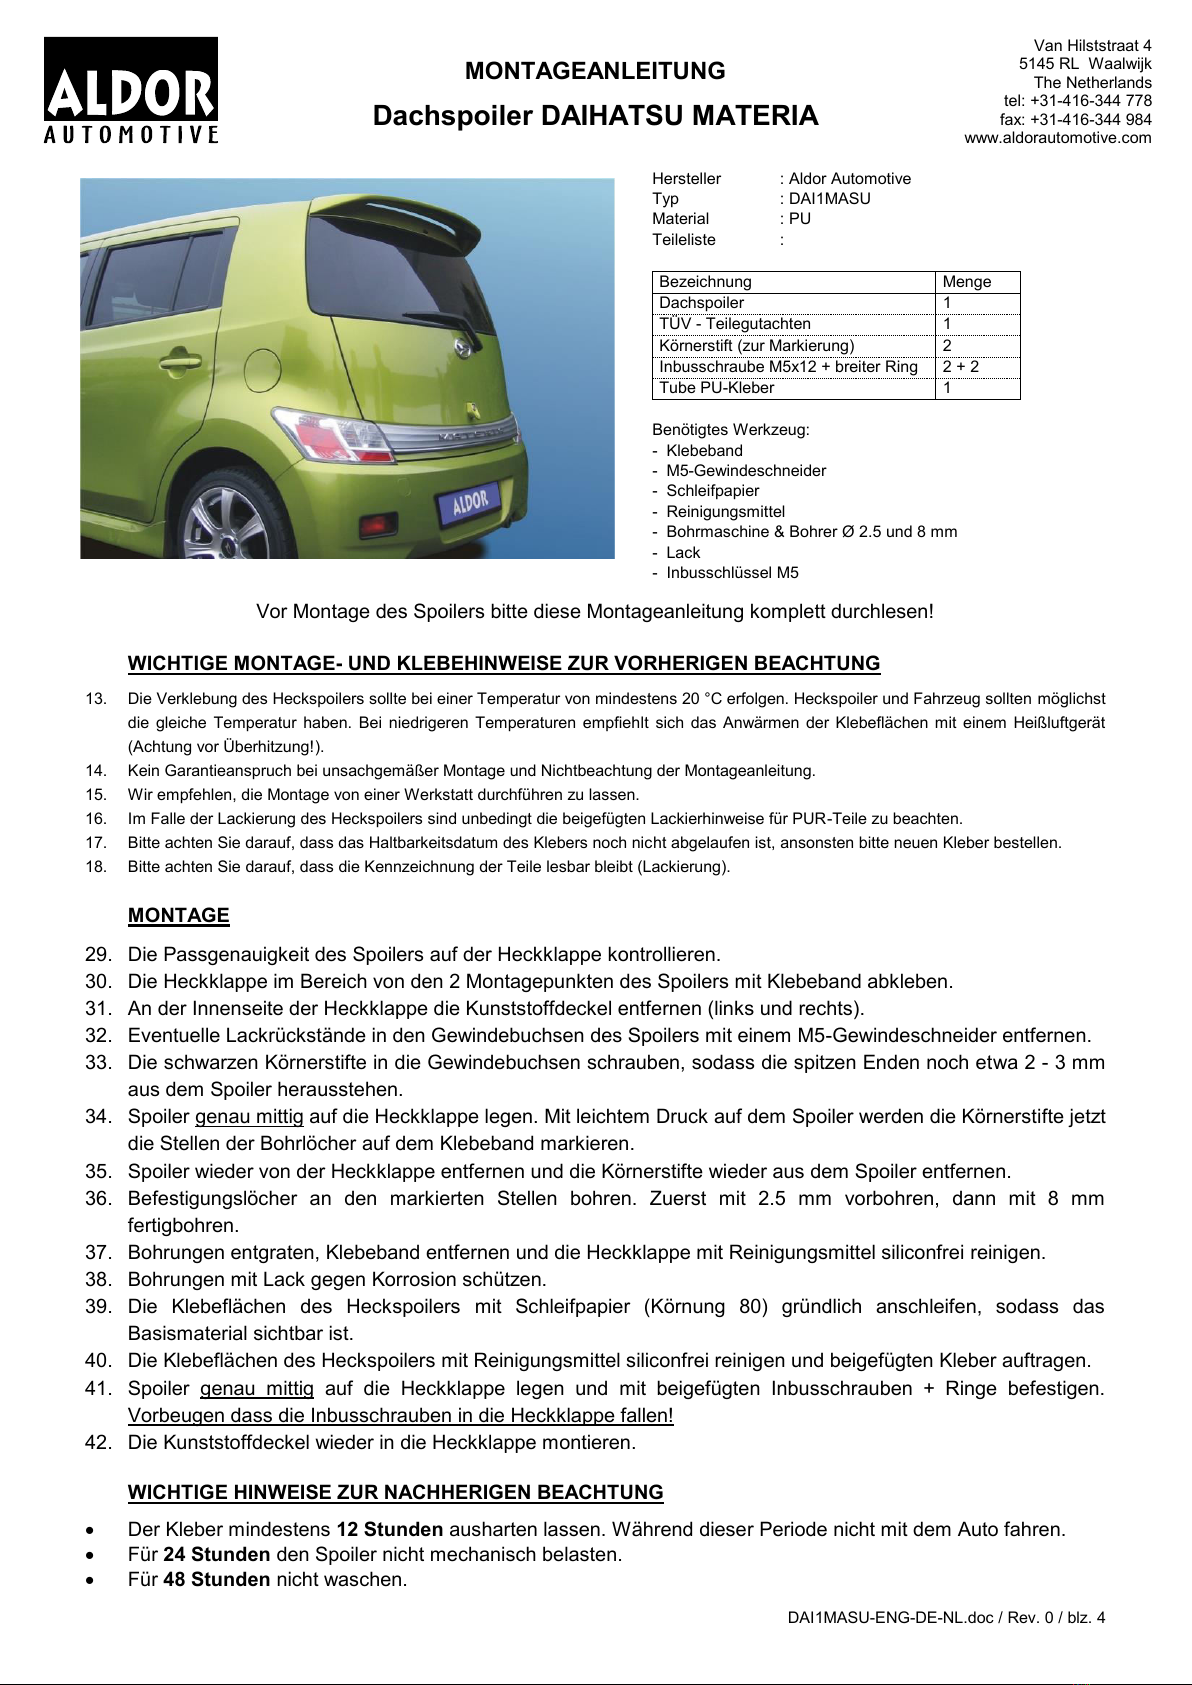
Dachspoiler DAIHATSU MATERIA
Hersteller : Aldor Automotive
Typ : DAI1MASU
Material : PU
Teileliste :
Bezeichnung
Menge
Dachspoiler
1
TÜV - Teilegutachten
1
Körnerstift (zur Markierung)
2
Inbusschraube M5x12 + breiter Ring
2 + 2
Tube PU-Kleber
1
Benötigtes Werkzeug:
- Klebeband
- M5-Gewindeschneider
- Schleifpapier
- Reinigungsmittel
- Bohrmaschine & Bohrer Ø 2.5 und 8 mm
- Lack
- Inbusschlüssel M5
Vor Montage des Spoilers bitte diese Montageanleitung komplett durchlesen!
WICHTIGE MONTAGE- UND KLEBEHINWEISE ZUR VORHERIGEN BEACHTUNG
13. Die Verklebung des Heckspoilers sollte bei einer Temperatur von mindestens 20 °C erfolgen. Heckspoiler und Fahrzeug sollten möglichst
die gleiche Temperatur haben. Bei niedrigeren Temperaturen empfiehlt sich das Anwärmen der Klebeflächen mit einem Heißluftgerät
(Achtung vor Überhitzung!).
14. Kein Garantieanspruch bei unsachgemäßer Montage und Nichtbeachtung der Montageanleitung.
15. Wir empfehlen, die Montage von einer Werkstatt durchführen zu lassen.
16. Im Falle der Lackierung des Heckspoilers sind unbedingt die beigefügten Lackierhinweise für PUR-Teile zu beachten.
17. Bitte achten Sie darauf, dass das Haltbarkeitsdatum des Klebers noch nicht abgelaufen ist, ansonsten bitte neuen Kleber bestellen.
18. Bitte achten Sie darauf, dass die Kennzeichnung der Teile lesbar bleibt (Lackierung).
MONTAGE
29. Die Passgenauigkeit des Spoilers auf der Heckklappe kontrollieren.
30. Die Heckklappe im Bereich von den 2 Montagepunkten des Spoilers mit Klebeband abkleben.
31. An der Innenseite der Heckklappe die Kunststoffdeckel entfernen (links und rechts).
32. Eventuelle Lackrückstände in den Gewindebuchsen des Spoilers mit einem M5-Gewindeschneider entfernen.
33. Die schwarzen Körnerstifte in die Gewindebuchsen schrauben, sodass die spitzen Enden noch etwa 2 - 3 mm
aus dem Spoiler herausstehen.
34. Spoiler genau mittig auf die Heckklappe legen. Mit leichtem Druck auf dem Spoiler werden die Körnerstifte jetzt
die Stellen der Bohrlöcher auf dem Klebeband markieren.
35. Spoiler wieder von der Heckklappe entfernen und die Körnerstifte wieder aus dem Spoiler entfernen.
36. Befestigungslöcher an den markierten Stellen bohren. Zuerst mit 2.5 mm vorbohren, dann mit 8 mm
fertigbohren.
37. Bohrungen entgraten, Klebeband entfernen und die Heckklappe mit Reinigungsmittel siliconfrei reinigen.
38. Bohrungen mit Lack gegen Korrosion schützen.
39. Die Klebeflächen des Heckspoilers mit Schleifpapier (Körnung 80) gründlich anschleifen, sodass das
Basismaterial sichtbar ist.
40. Die Klebeflächen des Heckspoilers mit Reinigungsmittel siliconfrei reinigen und beigefügten Kleber auftragen.
41. Spoiler genau mittig auf die Heckklappe legen und mit beigefügten Inbusschrauben + Ringe befestigen.
Vorbeugen dass die Inbusschrauben in die Heckklappe fallen!
42. Die Kunststoffdeckel wieder in die Heckklappe montieren.
WICHTIGE HINWEISE ZUR NACHHERIGEN BEACHTUNG
Der Kleber mindestens 12 Stunden ausharten lassen. Während dieser Periode nicht mit dem Auto fahren.
Für 24 Stunden den Spoiler nicht mechanisch belasten.
Für 48 Stunden nicht waschen.
Van Hilststraat 4
5145 RL Waalwijk
The Netherlands
tel: +31-416-344 778
fax: +31-416-344 984
www.aldorautomotive.com
Table of contents
Languages:
Other Aldor Automotive Automobile Accessories manuals