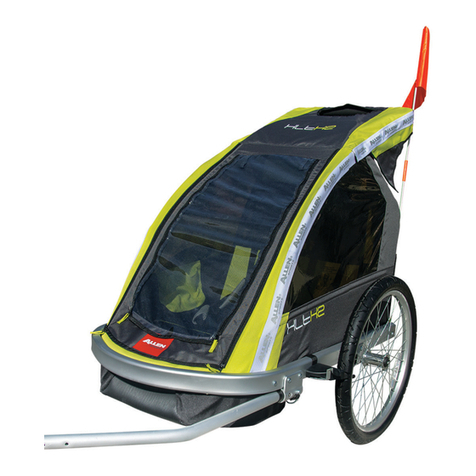
Allen Sports SST1 User manual

INSTRUCTIONAL
OWNER’S MANUALp1
MODEL SST1 JOGGER/BIKE TRAILER
Owner’s Manual should be kept for future reference
WARNING
WARNING
WARNING
WARNING
1. Completely read and understand Owner’s Manual before assembling or operating this product.
2. This product should be assembled by an adult
SAFETY TOWING TIPS
IMPORTANT SAFETY INFORMATION
WARNING #1:
• Failuretofollowthesewarningsandassemblyinstructionscouldresultinseriousinjuryordeath!
• Immediatelydiscardallplasticbagsandplasticwrappingmaterials!
• Maximumweightcapacityforthistrailerisone(1)childat50pounds,maxpayload!
• Neverusethistrailer/strollerifitbecomesdamaged!
• Toavoidseriousinjury,childrenshouldalwaysweartheseatbeltandtheshoulderstraps!
• Donotinstallacarseatoranyotherseatingdevicenotapprovedbythemanufacturerinsidethetrailer!
• AreectorthatcomplieswithCPSCregulationsmustbevisibleontherearoftrailer.
• Neverleavechildrenunattendedinoraroundthisproduct!
• Neverallowchildrentoassemble,fold,ordisassemblethisunit!
• Accessoriesorparcelsplacedintrailer/strollermaycauseittobecomeunstable!
• Notforusewithchildrenunder12monthsold!Childrenmustbeabletosupporttheirownheads!
• Beforeriding,checkthatallpartsareassembledaccordingtothemanufacturerinstructions!
Also,ensurethatthetrailerdoesnotinterferewithbraking,pedaling,orsteeringofthebicycle!
• Donotallowanyofthechild’sbody,clothing,shoelaces,ortoystocomeintocontactwithmovingparts!
• Makenomodicationstothetrailer!
• Tiresshouldbeinatedto25-35PSIformaximumcomfort!Checktirepressurebeforeeachuse!
• Useafootpumporhandpumptoinatetires!Pressurizedairhosescancauseoverination!
• Periodicallyre-checkallfastenerstomakesuretheyaretight!
• Cleantraileronlywithsoapandwater.Donotusesolvents!
TOWING TIPS:
• Makesureyourbikebrakesworkproperly!Brakingdistanceisincreasedwhenpullingatrailer!
• Thistraileriswide!Allowextraclearancenearcurbs,signs,parkedcars,andotherobstacles!
• Abicyclewithtrailerattachedrequiresawideturningradius!Donotturnsharply!
• Childrenmustwearanapprovedsafetyhelmetwhenusingthisproductintrailermode!
• Neverremoveprotectivecanopywhenpullingchildreninthetrailer!
• Alwaysusethesafetyagwhenpullingthistrailer!
• Donotrideovercurbs!Avoidbumpsandholes!Alwayssignalyourturns!
• Useextracautionwhenturningonunevenpavement,andgoingdownhill!
• Notforuseathighspeeds!Donotexceed10MPH!
• NEVERusethistraileratnight!
• Installarearviewmirroronyourbiketocheckonchildrenintrailer!
• Dresschildrenappropriatelytopreventthemfromgettingchilledoroverheatedwhileriding!
Protectagainstwind-chillincoldtemperatures,andprovideadequateventilationandhydrationduring
warmertemperatures.

INSTRUCTIONAL
OWNER’S MANUALp2
FULLY ASSEMBLED JOGGER
QUANTITY DESCRIPTION
1 Framew/Canopy,Sling
Seatwith5pointsafety
harness,towbar,tow
bar coupler and rear
wheel bracket attached
2 16”Rearwheels
1 Safetyflag
1 Joggerfrontfork
1 12”QuickReleasefrontwheel
1 Joggerhandlebarwithwriststrap
PARTS LIST

INSTRUCTIONAL
OWNER’S MANUALp3
TRAILER ASSEMBLY & OPERATING INSTRUCTIONS
STEP 1:
NOTE(S):
STEP2:
STEP3:
WARNING!: IMMEDIATELYDISCARDALLPLASTICBAGSANDWHEELWRAPPINGMATERIALS!
WARNING!: Thespring-releasepinsmustbeengagedforsafeoperationofthetrailer.FailuretoAssemble
properlymayresultininjury.Ifthespring-releasepinsdonotengageproperly,DONOTUSE.
Callthecustomerservicenumberasindicatedintheliteraturefor!
Removethetrailerfromtheboxandcheckcontentsagainstthe
partslist.
1.Laythetraileronthegroundwiththeblackfabricsidedown.
2.DonotremovethewhitefoamfromthewheelaxlesuntilSTEP4
OPEN FRAME
Removetrailerandallcomponentsfromcarton.Unfoldtrailerbypullingtheframeandremoveallcomponentsfrom
inside(Fig.2).
A. Liftbothsidepanelsintoanuprightposition(Fig2a).
B. InsertQRSnapPinsthroughholeinframeandclosethesnappinsotheloopofthepinisoverthepinshaft(Fig2b).
RELEASETHETOWBAR
1.Turnthetraileronitssidesothehitcharmisalongthetopedge[Fig.3].
2.Findthequick-releasepinthatholdsthetowbarinplaceinthetowbarbracket[Fig.3a]
3.Opentheloopofthequick-releasepinandremovethepin.
4.RotatethehitcharmforwarduntilitisseatedintheU-channel[Fig.3b].Re-installpininfront
holesintheU-channelandclosethesnappinsotheloopofthepinlockisoverthepinshaft.
FIGURE2.
FIGURE3. FIGURE3A. FIGURE3B.
FIGURE2A. FIGURE2B.
FIGURE1.

INSTRUCTIONAL
OWNER’S MANUALp4
WHEELINSTALLATION
ATTACHINGTHEFOURSEASONCOVER
WARNING! Removethefoamfromthewheelaxlesanddiscardimmediately.Donotremovewashers.
WARNING!: Checkwheelsperiodicallyduringandbeforeeachusetobesurethattheyhavenot
becomeloose.FailuretodosocouldresultinSERIOUSINJURYtoyouortrailer’soccupants.
WARNING!: Neverusethetrailerwithoutthefourseasoncover.Thefrontwindoworbugscreenmustbe
attachedtoprotectchildrenfromyingobjects.
STEP 1:
STEP2:
STEP2:
STEP3:
STEP3:
STEP4:
STEP4:
STEP5:
STEP 1:
Liftthetrailerbacksotherightsideisup,andlocatetherightwheel.
Installthewheelaxlebyslidingtheaxlecompletelythroughthebracket
intheframeasshown.
WraptheVelcrobackedxingstrapsandsecurethecoveraroundtheframe.
Positionthefour-seasoncoveroverthetrailerwhereroll-upwindowisfacingtowardsthefrontsideofthetrailer.(Fig.12).
InserttheQuickReleasePin(tetheredtothetrailerframenearthewheelbracket)
throughtheholeintheaxleandlockthecliptosecurethepin.
SecuretheVelcromaterialatthebottomfrontofthecovertothematchingVelcromaterialon
thelowerfrontfabricpanel.
Repeatfortheleftwheel.Whencomplete,giveeachofthewheelsatugtobesure
thattheyaresecure.
NOTE: Wheelsmustbeproperlyinstalledwithquickreleasepinsclosedand
snappedshut.IfQRpinsarenotcorrectlyattached,wheelsmayfalloff.
DonotuseifQRpinsaremissing,oriftheclosureisdamagedormissing.
Connecttheslidereleasebucklesafxedtotherearcornersofthecovertothematchingbucklessewn
therearsideofthetrailercabin(Fig13).
ConnecttheelasticcordsontherearcovertotheD-Ringswhicharelocatedonthebottomcabincorners
NOTE: Thefour-seasoncoverisdesignedtokeeppassengersandcargodryandwarmininclement
weather.Italsoprotectsthepassengersfromyingdebris.Thefour-seasoncovercanbe
rolleduptoallowforaddedventilationinhotweather.Velcroclosureskeepthefour-season
coverinplacewhenrolledup.
FIGURE12. FIGURE13.

INSTRUCTIONAL
OWNER’S MANUALp5
SAFETY FLAG INSTALLATION
STEP 1: Assembletheagandinserttheendintothesmallsleeveonthesideofthe
trailerskin.ReattachtheVelcrotosecurethecover.
NOTE: Flagshouldberemovedbeforeattemptingtofoldtrailer
WARNING!: Thisagismeantforuseonlywiththetrailer.Thisagisnotatoy.Donotletyourchildplay
withthisagatanytime.Failuretocomplywiththiswarningcouldresultinseriousinjury
ofyourchild.
WARNING!: Yourtrailerisdesignedtoattachtomostfull-sizedbicycles.Thetrailer’shitchmustbe
attachedtotherearaxleofthebike.Donotusetrailerifthehitchcannotbesecurely
attachedtorearaxle.Itisrecommendedthatthebicycle(s)towhichthetrailerwillbe
attachedundergoasafetycheckbyaqualiedbicyclemechanicbeforeattachingtrailer.
Thistrailershouldneverbeusedwithelectricbicycles,oranymotorcycleoranymotorizedvehicle
ATTACHINGTRAILERTOBICYCLE
STEP2:
STEP3:
STEP4:
STEP 1:
Positionhitchoverleftrearaxleofbicycleframe(Fig16).
LoosenLEFTsiderearaxletoallowthetrailer’shitchtoattachtoframe(Fig15).
Tightenaxlenutsecurely,testingtoseethathitchisunabletopullloose.
LoopSafetyStraparoundframeandsecuretoD-ringonhitcharm(Fig17).
WARNING!: Safetystrapmustattachtothebikeframewhenusingthisproductintrailermode.
FIGURE15. FIGURE16. FIGURE17.
Table of contents
Other Allen Sports Bicycle manuals
