ALORAIR Ironmen 50L Setup guide

Ironmen 50L
E-mail: sales@alorair.com
Add: North Carolina USA
Installation and Operations Manual
ALORAIR
ALO R AI R
Registrate by scanning

-1-
The machine through a vapor compression refrigeration principle , which can efficiently
remove airborne moisture . Especially for the home , office and other space dehumidification
range to prevent items from moisture , mildew , dry clothes can protect senior musical
instruments, high-end furniture and other unaffected humid environment , to create a good
living environment .
※INTRODUCTION※
※ ※Features/Specifications
Low Sound Levels <50dBA
Super Cop,2.8L/Kwh
The temperature control defrosting , more thorough, and more quick
Large Water trank
Humity can be fixed within 1%
Human handspike design
Water Full protection
R410A Refrigerant
Self-Checking Function
Automatic humidistat control,Display Tube TEM
Timing Memory starting
Big Shock-proof Wheels
Purification
Note: This dehumidification capacity is at room temperature 30 ℃, relative humidity of
80% income test conditions
Customer Service:
For additional questions concerning the operation of your dehumidifier,
Identification:
Model Number Ironmen 50L
Serial Number__________________________ Date of Purchase__________________________
For future reference, write down the model, serial number, and date of purchase so you
can identify your unit when seeking assistance. NOTE: data label on back of unit includes
serial number.
DEHUMIDIFIERS
Contact your installing contractor
Email: sales@alorair.com
please:
WARNING
1Unplug when cleaning or storing this dehumidifier .
2. Do not immerse the machine in water or near water .
3. Do not place the machine near a heating device or flammable dangerous place.
4. Do not put your fingers or other objects into the outlet or plug the outlet .
5. Do not sit on this machine table .
6. Follow the requirements of the tank to drain .
7. Before moving the machine , use the manual drain key discharged within
consuming water.
8. Do not use this machine in a sealed environment to avoid fire.
9. Make sure the condensate drain down the installation so that you can continue to
be excluded .
10. If the power cord is damaged, you buy the same specifications of the power line
to be replaced.
.
When using this machine , please note the following safety warnings :
DEHUMIDIFIERS
-2-
Installation:
WARNING! 120 Volts AC may cause serious injury from electric shock.
1. Disconnect electrical power before servicing 2. Only plug unit into grounded electrical outlet
3. Do not use extension cord 4. Do not use plug adapter
Power Supply: 115V, 60 Hz AC Only 1 Phase
Outlet Requirement: 3-Prong, GFI
Circuit Protector: 15 Amp Time Delay Fuse or Circuit Breaker

DEHUMIDIFIERS
-3-
※ Unit Overview ※
※ Front View
Handle
Wheel
※ Rear View
Control panel
Front cover
Power line
Hose and
Cord Rack
Outlet
LOGO
Rear cover
Tripod
Plates
Bolt
DEHUMIDIFIERS
Humidity Setting:Adjust the humidity setpoint
※Operating instructions※
※Control Panel Operation
OK
M
P
Menu
up button Down Button LCD Monitor
On/Off
Select/OK Purificaction
1. ON/Off Button
Press this button, and the machine will start running. Press this key again and the machine
will stop running. NOTE: When unit is turned off, the fan will run for 1 minute prior to
shutting off.
2. Purificaction Button P
Press air purification function is activated , the compressor does not work after entering
the mode , the fan work , timing, temperature scale , and set the humidity effective
3. Menu Button M
Pressing the Menu (M) button, gives you the options to select between two different
control modes as well as adjust the temperature measurement units. Continue pressing the M
button until you get to your desired selection. Press the Select (OK) key to confirm that
selection and move to a submenu.
After you’ve completed your task select“R”thenpress the select (OK) button to
moveback to Previous Menu, or wait for 10 S for automatically returning to main screen.
Four selections are available:
-4-
ALORAIR

DEHUMIDIFIERS
6. LCD monitor
When the unit is running, the LCD monitor will go dark if no buttons are pushed. Push any
button once to light monitor.
7. LCD display function
(1)Show Power On when the machine has already connected but not started.
Po w e r on
n
Unit O
(2)Show UnitOn when the machine in working status(This display will disappear in 2
seconds and then the next screen will appear.)
Use to confirm a selection.
4. Select/OK Button OK
These buttons are used for adjusting humidity or timer settings.
5. UP Botton Down Botton
Timer setting:Timing for the start/Timing Shutdown/Cycle Timing
Temperature Scale Switch:Degrees Celsius or Fahrenheit selection
Return:Return to display the main page
NOTE: See Section 8 for more detailed programming instructions.
(3)The LCD interface shows two lines of data. The first line displays the room
temperature and humidity. On the second line, Job T(working time) and Humidity Setpoint are
displayed on an alternating basis.
Inlet 32℃7 6 %
The contents of the second line alternateevery 10 sec.
-5-
DEHUMIDIFIERS
or
Job. T 0 0 0 5
Humi.s e t 50%
(5)Show Defrosting when the machine is in defrosting mode.Defrosting is the display
priority.
Once the pump reservoir is drained, the contents second linein turn show job hours and total hours
alternating every 10 seconds for approximately 1 minute while the fan completes its final cycle. At this
point.
Job. T 0 0 0 5
0 8 9L fe
i.0H
or
Inlet 32℃7 6 %
Dig
ft
en
ro s
(6) .Second line of display will rotate through several screens depending on setup
f f
UnitO
(4)When you press the Power Offbutton, two lines of data will be displayed. The top
line will read “Unit Off”. The bottom line will read “DRAINING” for approximately 14
seconds while the pump is emptied.
f f
Unit O
Draining
Second screen display options:
Job. T 0 0 0 5
0 8 9
Lfe
i.0
H
or
Time On 0 0 0 5
Time remaining to Auto opening
-6-

DEHUMIDIFIERS
-7-
Time O 0 0 0 5
f f
O 000 000
I1 1
Time remaining to Auto Closing
Time remaining tocirculate status
(7) Air purifiers work status
1) Display : Power On ( powered on ) The second line shows : Purify ( purification ) . After
power Press )
P
P
o w e r on
urify
2)
disappears after displaying the main interface )
The machine work is displayed : Purify On ( removal start ) , ( 2 seconds after the display
3) The main screen displays : the first line , Inlet 20 ℃ 60% ( inlet air temperature (in
default ℃), into the wind and humidity ) , the second line , purifying ( purification ) .
Pon
urify
Inlet 32℃7 6 %
Second screen display options:
or
Purifyn g
i
Or set humidity
HumiSet35%
.
Job. T 0 0 0 4
Turn off the machine after the show : purif off ( purification closed )
Pof f
urify
DEHUMIDIFIERS
Job. T 0 0 0 0
Lfe
i.H
Second screen display options:
or
or 0 000
Humid Timer
TempU R
Humid
R
Set t ing
35%
( 1 ) The Humidity Setting (Humid)
a. Press the Menu (M) button.The screen shows:
b. Press the M button until “Humid” is flashing. Press “OK” to select this option.The
screen shows:
8. Operation and Display
Note: As long as the machine is plugged into power, the settings can be changed. The unit does not
have to be operating to change setup.
d. Press the menu key until the humidity level (bottom left of display) is flashing (it will
either say “Co” for continuous or a number for a specific percentage).
e. Use the Up or Down buttons to set the machine to your desired level.Press the OK
Buttonwhen finished.The cursor automatically moves toR which will be flashing.Press OK to
confirm or wait 10 seconds and you will automatically return to main screen.
( 2 ) Timer Settings (Timer)
This selection allows you to set a timer for the unit to turn on or turn off. You can also set up cycle
timing, which allows you to set up and repeating cycle of specific on and off durations.
a. Press the menu key several times unit the Timer button is flashing. Press OK button to
confirm this option.
Humid Timer
TempU R
-8-

DEHUMIDIFIERS
f f
noo
T T ..
T R
/
.I0
b.Press the Menu key unit TempU flashes. Press OK to select.
c. The screen shows:T.on,T.off,T.I/0,R
“
“T.off” – Unit will stop when timer expires
“T.I/O” – Unit will cycle “on” and “off” based on the set time. If unit is off, the
cycling will start with unit “off”. If unit is on, the cycling will start with the unit “on.”
d. Press the menu key, move into cursor to function you prefe.
T.on” – Unit will start when timer expires
Timer On
OR
f f
00 00
1) Start Time (T.on Selection)
a.Press to confirm key.The screen runs as follow, the first 00 positions (flashes) at the same
time.
b.Press Up and Down key, the first position number from 00-24 variety, choose an hour
numberc. Press to confirm key to make selection the number.
d.After, the next number position automatically flashes(minute position). Once the
correct time is displayed, press to OK key to make selection the number.
e.The OFF button will now flash. Press OK one more time, the OFF will switch to ON and
the timer is now set.
a. Press the M button until the T.off button is flashing. Press OK to confirm.
b. Set timer as above.
2) Shut Off Time (T.offSelection). Unit will run for designated time and then turn off.
3) Cycling Timer (T.I/O Selection)
The third selection, T.I/O, lets you set up the machine to cycle on and off during a specific
time frame. For example, you could set the unit to run 8 hours a day and remain off the other
16 hours. Note: You are selecting on and off periods of time, not set clock times.
-9-
DEHUMIDIFIERS
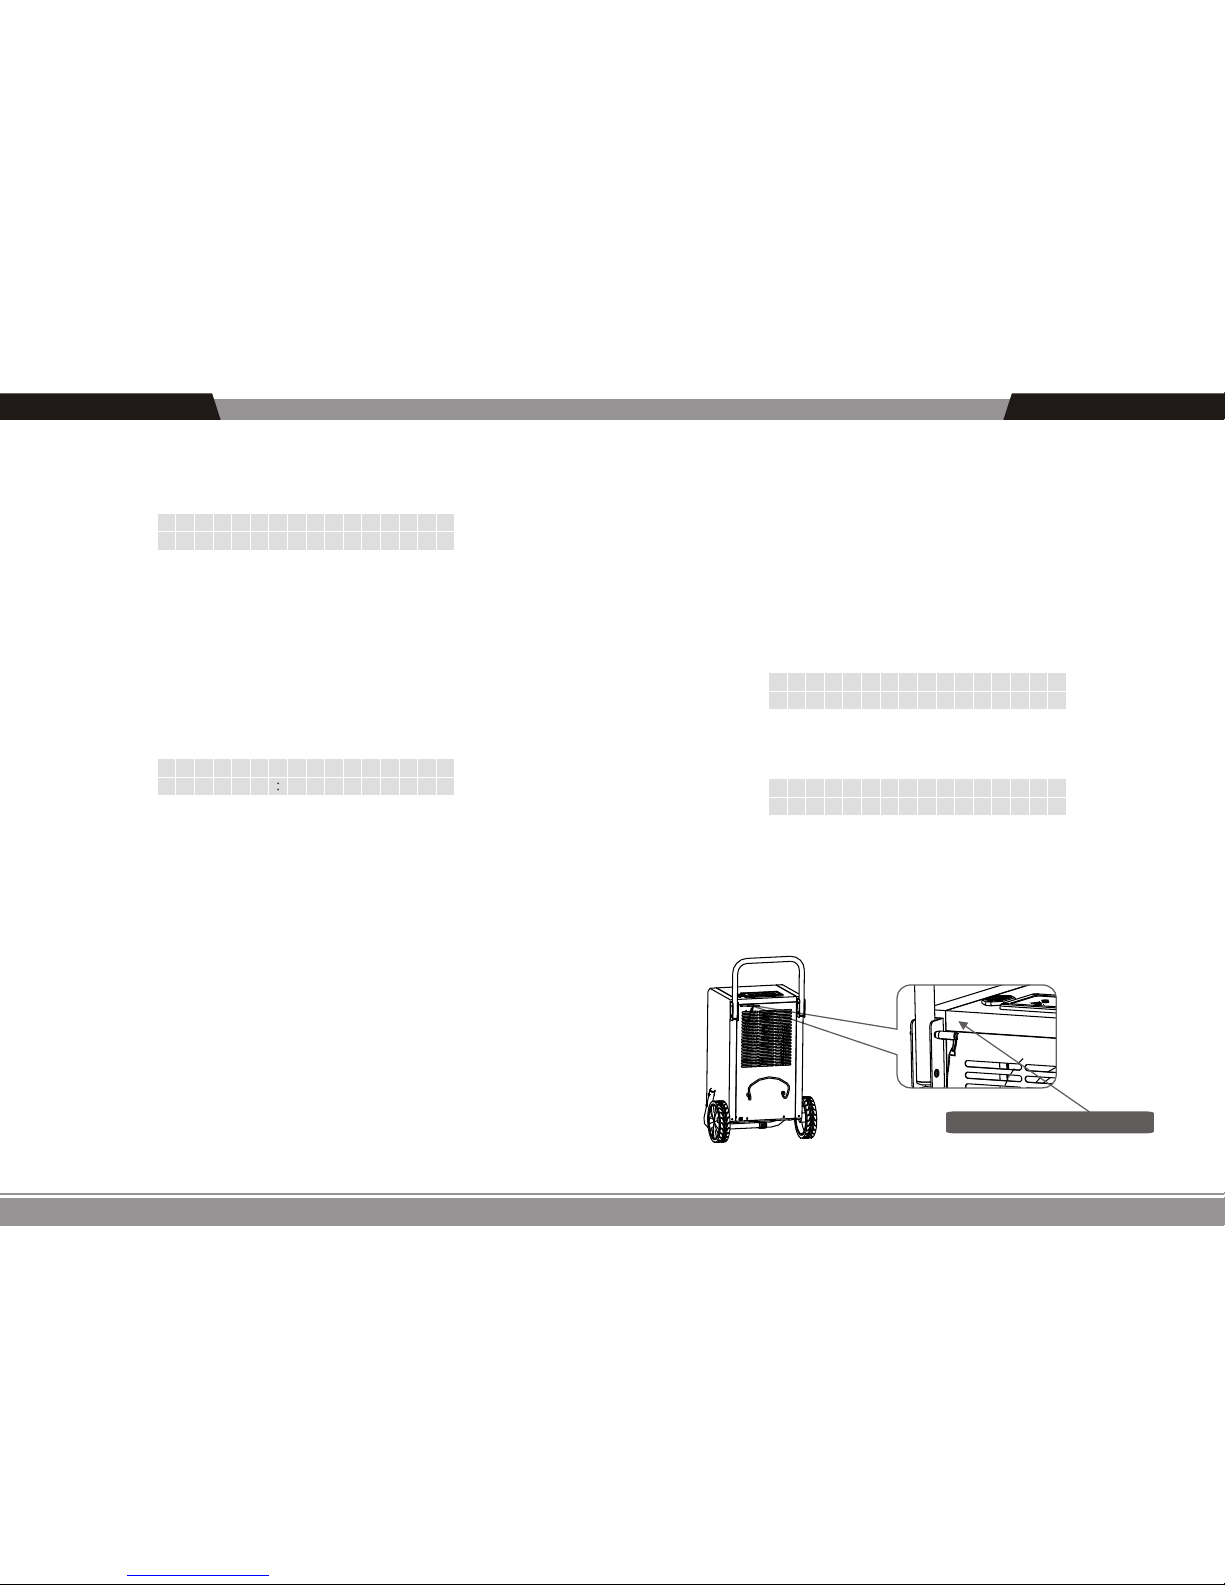
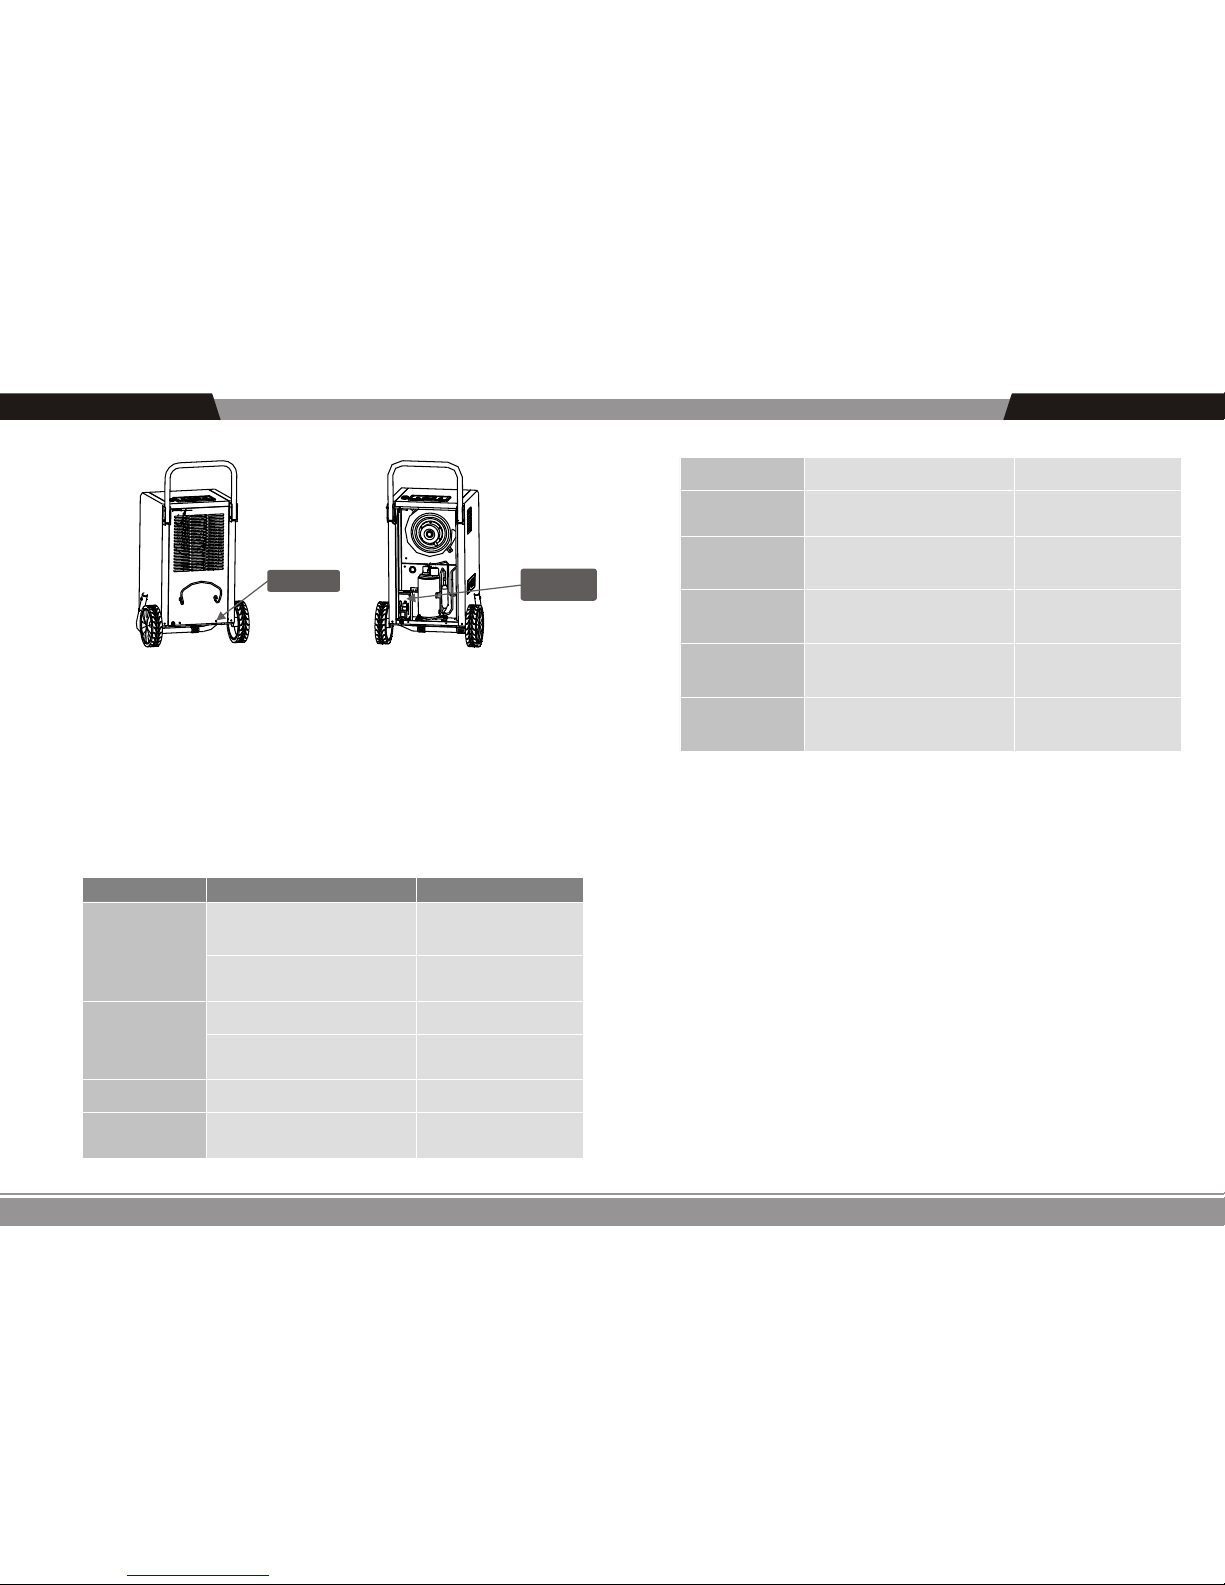
9.Handlebar Mounting
Handle rotates 180 °, after aligning with locating pin holes will be fixed.
The locating pin is inserted and fixed
a. Press the M button until the T.I/O selection is flashing. Press OK button to select.
b. Use the up and down arrows to adjust the hours and minute of the first cycle.
c. Use the M button to move from 1st line of display to second and adjust second time
period with up and down buttons.
d. Press the OK button to confirm the time. (Flashing OFF will turn to ON).
( 3 ) Temperature scale set
This selection allows you to switch the machine from displaying temperature in degrees
Celsius to degrees Fahrenheit.
a. Press the menu key.The screen shows:Humid,Timer,Tempu, R.
Humid T i mer
TempU R
d. Press the menu key to move the cursor to the ℃ on/offor ℉ off/on(flashes).
e. Press to confirm key. The on/off status of C and F will exchange.
TempU
R
Set t in
n
g
O O ff
oF
℃
b.Press the Menu key unit TempU flashes. Press OK to select.
c. The screen shows:Celsius degree℃ on/off and Fahrenheit degree the ℉ off/on.
-10-

DEHUMIDIFIERS
-11-
※Preparing the Unit for Use※
( 1 ) The position will be placed in the following figure the machine can take advantage of
machine performance.
( 2 ) In order to avoid the repeated water tank caring,It is in strongly recommendation that
to extend the draining to ground if this unit would in long term running.if the outlet pipe get
wrapped or deflated,it would resulte bad water follow and even cause dead machine.
1. The tank cover open Vias
( 3 ) Insert the power cord to matched socket safely and reliably
≥≥≥≥
≥≥
≥≥
2
through the Vias on
Base and connect
it to the water pipe
which been fixed on
water collector
Put External pipe
DEHUMIDIFIERS
※Maintenance and Repair※
-12-
a. out of the filter
1. Exterior Cleaning
Use a soft, slightly damp cloth to wipe the plastic body.
2. Filter cleaning
1) Open the air intake frame 2) Out of the filter
b. Clean the filter
Using a vacuum cleaner to gently
absorb dust filter surface , if the filter is
very dirty, with a brush to brush off surface
dirt.
※Maintenance
Warning-Always Unplug Unit Prior To Performing Any Maitenance!
1.Electronic Control Maintenance
The fixing screws on the rear panel of the machine is removed
ALORAIR
ALORA IR
ALORAI R

DEHUMIDIFIERS
The screws Electrical
control box
※ Storing Your Dehumidifier ※
If the unit will be stored for an extended period of time:
1. Turn unit off and allow to dry.
2. Manually drain pump reservoir.
3. Wrap and secure the power cord .
4. Clean the filter mesh.
5. Store in clean,dry environment.
※ Troubleshooting ※
Solution
Trouble cause
Filter mesh jammed Clean the filter
Machine Won’t Work/
Display is Blank
Clean the filter
Display Blank. Power outage
or poor connection
Room temperature whether in
5℃~35 this inner?℃
Check Power Supply
Check both ends of power
cord for good connection
Cannot start the
dehumidifier
Filter mesh is clogged
Air inlet or outlet jammed Clear the blockage from
air inlet or air outlet
No Airflow
Unit is not level Place unit on flat surface
in vertical orientation
Place unit on flat surface
in vertical orientation
Loud/Unusual Noise
-13-
Trouble code:E1
Loud/Unusual Noise
Humidity Sensor or
communication error
Check sensor cable is properly
connected.Replace the Senser
The water tank float tank
drained or re-install the
float switch normal conntact
Water Full Protection
Trouble code E4:
Trouble code L0:
Trouble code HI:
Trouble code HI:E1.L0.
Filter mesh jammed Clean the filter
Unit sensing room temperature
below 33°F
Unit sensing room temperature
above 100°F
Increase room temperature
Check Sensor
Check Sensor Cable
Decrease room temperature
Check Sensor
Check Sensor Cable
Shows E1, L0,HI at the same time
indicated a bad connection, cable
or sensor
Check Cable connection
Replace Cable
Replace Sensor
DEHUMIDIFIERS
-14-

DEHUMIDIFIERS
-15-
※ Warranty※
Seller warrants the equipment to be free from defects in workmanship and
materials for a period of 12 months after shipment (60 months/5 years on compressor,
evaporator and condenser). This warranty is limited, however, to the repair or
replacement of defective equipment. If it is necessar y to return unit for ser vice,
customer is solely responsible for proper packaging, transportation costs. Customer
must initiate warranty process by contacting factory. Do not send any component or
product back to factory without Return Material Authorization.
This limited warranty does not apply to any part or component that is damaged in
transit or when handling, has been subject to misuse, corrosion, chemicals, acts of
God has not been installed, operated or ser viced according to the Seller's instructions,
or has been operated beyond the factor y-rated capacity or has been altered in any
way. Routine maintenance is not covered by this warranty.
Seller's liability is limited to replacement of defective parts or components and
does not include any cost of labor (including, but not limited to, labor to remove
and/or reinstall any defective part), refrigerant or piping. Customer may elect to have
unit fixed locally in which case required replacement parts will be sent to customer at
customer's expense.
ALORAIR shall not be responsible for loss of use of any product, loss of time
inconvenience, or damage to other equipment, or any other indirect or consequential
damage with respect to property whether as a result of breach of warranty, neglect, or
otherwise.
THE WARRANTIES AND LIABILITIES SET FORTH ARE IN LIEU OF ALL
OTHERWARRANTIES EXPRESSED OR IMPLIED, IN LAW OR IN FACT, INCLUDING
IMPLIED WARRANTIES OF MERCHANTABILITY AND FITNESS FOR PARTICULAR
PURPOSE.
ALORAIR's total liability, regardless of nature of claim shall not exceed original
purchase price of the product. If a product or component is replaced while under
warranty, the applicable warranty period shall not be extended beyond the original
warranty time period.
The foregoing shall constitute the total liability of seller in the case of defective
performanceof all or any of the equipment or ser vices provided to Buyer. Buyer agrees
to accept and hereby accepts the foregoing as the sole and exclusive remedy for any
breach or alleged breach of warranty by Seller.
Table of contents
Other ALORAIR Other manuals
Popular Other manuals by other brands

KAT VR
KAT VR KAT Walk mini owner's manual

Selec
Selec 900CPR-1 operating instructions

Flowmaster
Flowmaster FORCE II 817526 Installation instructions manual

Universal Electronics
Universal Electronics NAVIGATOR manual

Cobalt Aquatics
Cobalt Aquatics C-Ray 200 user manual

Husqvarna
Husqvarna DS250 Series Operator's manual