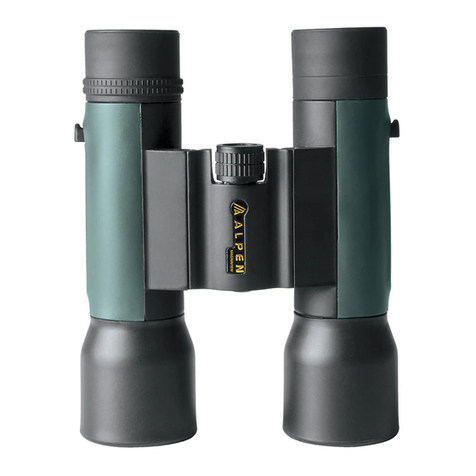
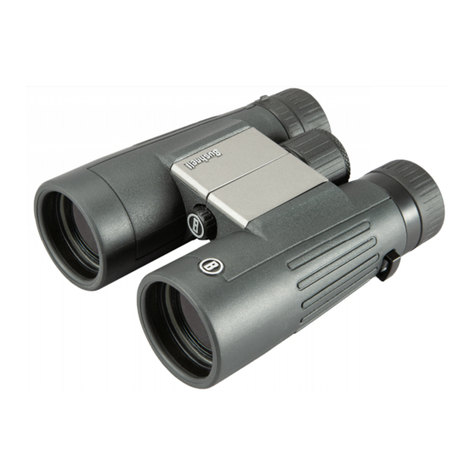
Alpen Optics 10 42 Series User manual

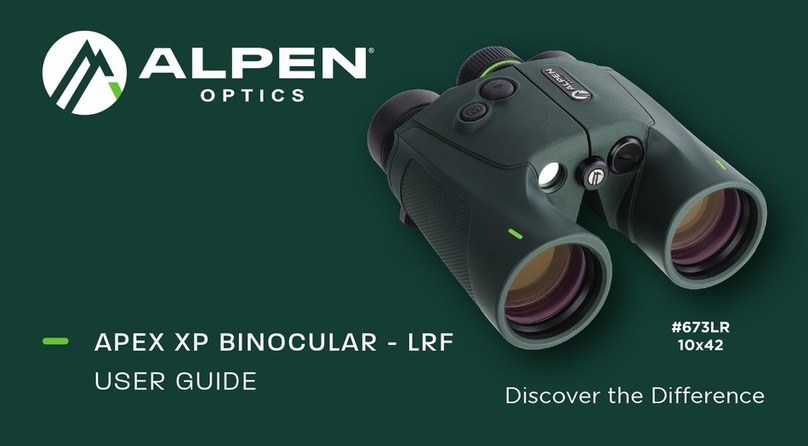
Discover the Dierence
10x42
APEX XP BINOCULAR - LRF
DE Bedienungsanleitung
US/GB Instruction manual
FR Manuel d‘instruction
ES Manual de instrucciones
NL Gebruiksaanwijzing
IT Manuale d‘istruzioni

2www.alpenoptics.de

3
www.alpenoptics.de
DE Bedienungsanleitung...................................14
US/GB Instruction manual ........................................ 4
FR Manuel d‘instruction ...................................24
ES Manual de instrucciones.............................34
NL Gebruiksaanwijzing.....................................54
IT Manuale d‘istruzioni....................................44
DOWNLOAD AREA
www.alpenoptics.de/download

4www.alpenoptics.de
PARTS OVERVIEW
Parts
Mode button
Distance measuring button
Right visual knob
Focus knob
Left visual knob
Strap Attachment
Objective Lens
Tripod Adapter Socket
Laser Rangefinder Modules
Battery Compartment

5
www.alpenoptics.de
DE
US/GB
FR
ES
NL
IT
RISK of physical injury!
Never look through this device directly at or near
the sun. There is a risk of BLINDING YOURSELF!
Children should only use this device under super-
vision. Keep packaging materials (plastic bags,
rubber bands, etc.) away from children.
There is a risk of SUFFOCATION.
Fire/Burning RISK!
Never subject the device - especially the lenses - to
direct sunlight. Light ray concentration can cause
fires and/or burns.
Caution
1. Use of controls or adjustments or performance of
procedures other than those specified herein may
reuslt in hazardous radiation exposure.
2. The use of optical instruments with this product
will increase eye hazard.
3. Powered by CR2 batteries.
RISK of material damage!
Never take the device apart. Please consult your dealer
if there are any defects. The dealer will contact our ser-
vice centre and send the device in for repair if needed.
Do not subject the device to temperatures excee-
ding 60°C!
Warranty & Service
The regular guarantee period is 5 years and begins
on the day of purchase. Batteries and rechargeable
batteries have a 1-year guarantee.
You can consult the full guarantee terms as well as
information on extending the guarantee period and
details of our services at
https://www.alpenoptics.de/downloads/warranty-
terms-alpen-optics.pdf
GENERAL SAFETY INFORMATIONS!

6www.alpenoptics.de
Rolled Eyecup
Eyecup Adjustment
Your ALPEN binocular is fitted with eyecups which
can be rolled or twisted up or down (depending on
your model) to optimize the view for your eyes and
to exclude extraneous light. If you are not wearing
eyeglasses or sunglasses, keep the eyecups fully
extended („up“ position). If you are wearing glas-
ses, roll down the eyecups or twist them to the
down position. This will bring your eyes closer to
the binocular’s eyepiece (ocular) lens to ensure you
can see the entire image (full field of view with no
“cuto” or “tunnel vision”)
.
IPD (Interpupillary Distance) Adjustment
The distance or spacing between the center of the
pupils, called “interpupillary distance” (IPD) varies
from person to person. To adjust the binocular to
match your eyes, follow these simple steps:
1. Hold your binocular in the normal viewing
position. Grasp each barrel firmly.
2. Move the barrels closer together or further apart
until you see a single circular field (don’t worry
about focus yet).
3. Always re-set your binocular to this position
before using it.
Twisted Eyecup Rolled Eyecup

7
www.alpenoptics.de
DE
US/GB
FR
ES
NL
IT
Diopter Adjustment and Focusing
1. Adjust eyecups interpupillary distance as descri-
bed in the previous sections.
2. Set the diopter adjustment ring to zero and view
a distant object.
3. Keep both eyes open at all times.
4. Using a lens cover or your hand, cover the objec-
tive (front) lens of the same side of the binocular
that has the diopter adjustment ring. This is usu-
ally the right side.
5.
Using the center focus wheel, focus on a distant
object with fine detail (e.g., brick wall, tree bran-
ches, etc.) until it appears as sharp as possible.
6. Uncover the objective lens on the diopter side,
cover the other objective lens, the left side, then
view the same object.
7. Using the diopter adjustment ring, move the di-
opter adjustment marker to the “+” or “-” till you
reach focus.
Caution should be used as over turning or forcing
the diopter ring can cause damage or cause the
eyepiece to break away from the chassis.
8. Your binocular should now be adjusted for your
eyesight. Focusing for any distance can now be
done simply by turning the center focus wheel.
Make a note of your diopter setting for future
reference.
Diopter
Adjustment Marker
Diopter
Adjustment
Ring

8www.alpenoptics.de
Description of binocular refractive correction
1. Turn the left and right visual knobs
counterclockwise until they stop. First press the
distance measuring button and look through the
eyepiece with your right eye, pointing only at the
display, turning the right visual knob clockwise
until the display is fully in focus.
2. Look at the object through the right eyepiece
with your right eye, then focus on it and adjust the
focusing knob until the object comes into focus.
3. Close your right eye (or cover your right eye)
and look at the same object only with your left
eye, turning the left visual knob clockwise until
the object is in focus. Your personal refractive
correction is adjusted.
Single measurement
The sighting mark appears when the dis-
tance measuring button is pressed for the
first time. After the second release of the
button, the display will show the adjust-
ment range.
Scanning measurement
The scanning measurement is
used to continuously measure
the distance of the moving
target. If you hold on the distan-
ce measuring button for more
than 3 seconds, it will automa-
tically switch to scan style. And
the measurement will continue
always until the button is relea-
sed.
Scan
(LOS Mode)
Scan
(HCD Mode)
9
www.alpenoptics.de
DE
US/GB
FR
ES
NL
IT
Mode transition
Press the distance measuring button and release
the mode button after pressing for more than 3
seconds, it will appear the main menu. When the
mode button is pressed again, the next menu
option will appear. Press the distance measuring
button to select the program.
1. Brightness conversion
2. M and Y conversion
3. HCD and LOS mode conversion.
HCD: In the HCD Mode you get the following
information displayed. The horizontal distance to the
object and the angle you hold the device to the target.
LOS: The LOS mode show you the horizontal and
straight distance to the target.

10 www.alpenoptics.de
Angle measurement
The Angle of your measurement position to any
target can be displayed in the upper area of the
display.
Neckstrap Attachment
To securely attach your binocular to the
binocular strap:
1. Thread the end of the strap from the bottom up
through the strap attachment loop.
2. Hold the buckle and thread the end of the strap
inside the buckle.
3. Adjust the overall length and pull the strap
webbing tight so it is secure within the buckle.
Waterproof / Fogproof Models
ALPEN binoculars are designed and built utilizing
the latest waterproof and fogproof technology (this
will be noted on the product packaging). Waterproof
models are O-ring sealed for complete moisture
protection. Fogproof protection is achieved from dry
nitrogen purging that removes all internal moisture.
Tripod Mounting
(tripod and tripod adapter not included)
To attach the binocular to a tripod or monopod,
unscrew (counter-clockwise) the cap which covers
the threaded socket at the far end of the center
hinge, and set it aside in a safe place. Use a compa-
tible binocular tripod adapter accessory to attach
your binocular to any standard tripod in a hori-
zontal position to provide a stable image during
prolonged viewing.

11
www.alpenoptics.de
DE
US/GB
FR
ES
NL
IT
Care and Cleaning
Your binocular will provide years of trouble-free
service if it receives the normal care you would
give any fine optical instrument.
• Do not expose non-waterproof models to heavy
rain or other excessive moisture.
• I
f your binocular has roll-down, flexible eyecups, store
it with the eyecups up. This avoids excessive moisture.
• Avoid sharp impacts. Use the included neckstrap
to avoid accidentally dropping the binoculars to
prevent mis-alignment of the optics.
• When not using them, store your binoculars in the
provided case in a cool, dry place.
•
Avoid storing the binoculars in hot places, such as
the passenger compartment of a vehicle on a hot
day. The high temperature could adversely aect the
lubricants and sealants. Never leave the binocular
where direct sunlight can enter either the objective
or the eyepiece lens. Damage may result from the
concentration (burning glass eect) of the sun’s rays.
• All moving parts of the binocular are permanently
lubricated. Do not try to lubricate them.
To Clean Your Binoculars Lenses
1. Blow away any dust or debris on the lens (or use
a soft lens brush).
2. To remove fingerprints or other smears, clean
with a soft cotton cloth rubbing in a circular
motion. A “microfiber”cleaning cloth (available
from camera or computer retailers) is ideal for
the routine cleaning of your optics.
3.
For a more thorough cleaning, photographic lens
tissue and photographic-type lens cleaning fluid
or isopropyl alcohol may be used. Always apply
the fluid to the cleaning cloth –
never directly on the lens.

12 www.alpenoptics.de
Disposal
Dispose the packaging materials properly,
according to their type, such as paper or
cardboard. Contact your local waste-disposal
service or environmental authority for information
on the proper disposal.
Do not dispose of electronic devices in the
household garbage! As per Directive 2002/96/
EC of the European Parliament on waste electri-
cal and electronic equipment and its adaptation
into German law, used electronic devices must be
collected separately and recycled in an environmen-
tally friendly manner.
In accordance with the regulations concerning
batteries and rechargeable batteries, dispo-
sing of them in the normal household waste is
explicitly forbidden.
Please make sure to dispose of your used batteries
as required by law — at a local collection point or in
the retail market. Disposal in domestic waste viola-
tes the Battery Directive.
Batteries that contain toxins are marked with a sign
and a chemical symbol.
Cd¹ Hg² Pb³
1battery contains cadmium
2battery contains mercury
3battery contains lead
UKCA DECLARATION OF CONFORMITY
Alpen Optics GmbH has issued a „Declaration
of Conformity“ in accordance with applicable
guidelines and corresponding standards. The
full text of the UKCA declaration of conformity is
available at the following internet address:
http://www.alpenoptics.de/download

13
www.alpenoptics.de
DE
US/GB
FR
ES
NL
IT
NOTES

14 www.alpenoptics.de
TEILEÜBERSICHT
Teile
Modus-Taste
Entfernungsmesstaste
Rechter Okularring
(Display-Fokus-Einstellung)
Fokusrad
Linker Okularring
(Dioptrieneinstellung)
Trageriemen-Öse
Objektivlinse
Stativanschlussgewinde
Laser-Entfernungsmesser-Module
Batteriefach

15
www.alpenoptics.de
DE
US/GB
FR
ES
NL
IT
GEFAHR von Körperschäden!
Schauen Sie mit diesem Gerät niemals direkt in die
Sonne oder in die Nähe der Sonne. Es besteht ER-
BLINDUNGSGEFAHR!
Kinder sollten das Gerät nur unter Aufsicht benut-
zen. Verpackungsmaterial (Plastiktüten, Gummibän-
der etc.) von Kindern fernhalten!
Es besteht ERSTICKUNGSGEFAHR!
BRANDGEFAHR!
Setzen Sie das Gerät – insbesondere die Linsen –
keiner direkten Sonneneinstrahlung aus! Durch die
Lichtbündelung können Brände und/oder Verbren-
nungen verursacht werden.
Vorsicht
1. Die Verwendung von Bedienelementen oder
Anpassungen oder Vorgehensweisen, die nicht in
dieser Anleitung beschrieben sind, können zu einer
gefährlichen Strahlenbelastung führen.
2. Die Verwendung von optischen Instrumenten mit
diesem Produkt erhöht die Gefahr für die Augen.
3. Stromversorgung durch CR2-Batterien.
GEFAHR von Sachschäden!
Bauen Sie das Gerät nicht auseinander! Wenden Sie
sich im Falle eines Defekts bitte an Ihren Fachhänd-
ler! Der Händler wird sich mit unserem Service-Center
in Verbindung setzen und das Gerät bei Bedarf zur
Reparatur einschicken.
Setzen Sie das Gerät keinen
Temperaturen über 60 °C aus!
Garantie & Service
Die Garantiezeit für dieses Gerät beträgt 5 Jahre
und beginnt am Tag des Kaufs. Auf Batterien und
Akkus wird eine Garantie von 1 Jahr gewährt.
Die vollständigen Garantiebedingungen sowie Infor-
mationen zu Garantiezeitverlängerung und Service-
leistungen können Sie unter
https://www.alpenoptics.de/downloads/warranty-
terms-alpen-optics.pdf einsehen.
ALLGEMEINE SICHERHEITSHINWEISE

16 www.alpenoptics.de
Rolled Eyecup
Einstellung der Augenmuscheln
Ihr ALPEN Fernglas ist mit Augenmuscheln aus-
gestattet, die je nach Modell umgestülpt oder aus-
und eingedreht werden können, um Ihre Sicht zu
optimieren und Streulicht abzuhalten. Wenn Sie
keine Brille oder Sonnenbrille tragen, lassen Sie die
Augenmuscheln ausgeklappt bzw. drehen Sie sie
heraus. Wenn Sie eine Brille tragen, stülpen Sie die
Augenmuscheln nach außen um bzw. lassen Sie sie
eingedreht. Dadurch kommen Ihre Augen näher
an die Okularlinse des Fernglases, sodass Sie das
gesamte Bild sehen können (volles Sehfeld ohne
„Abschneiden“ oder „Tunnelblick“)
.
Einstellen des Augenabstands
Der Abstand zwischen den Mittelpunkten der
Pupillen, die sogenannte Interpupillardistanz (IPD),
unterscheidet sich von Mensch zu Mensch. Führen
Sie die folgenden einfachen Schritte aus, um das
Fernglas an Ihre Augen anzupassen:
1. Halten Sie Ihr Fernglas in der üblichen
Beobachtungsposition. Fassen Sie den
Fernglaskörper an jeder Seite fest an.
2. Bewegen Sie die Fernglasseiten um die Mittel-
achse näher zusammen oder weiter auseinander,
bis Sie ein einziges kreisförmiges Bild sehen
(Achten Sie noch nicht auf die Fokussierung).
3. Stellen Sie Ihr Fernglas vor jeder Verwendung
immer wieder auf diese Position ein.
Herausgedrehte
Augenmuschel
Umgestülpte
Augenmuschel

17
www.alpenoptics.de
DE
US/GB
FR
ES
NL
IT
Dioptrieneinstellung und Fokussierung
1. Stellen Sie den Augenabstand wie im vorherigen
Abschnitt beschrieben ein.
2. Stellen Sie den Dioptrieneinstellring auf Null und
betrachten Sie ein entferntes Objekt.
3. Halten Sie durchgehend beide Augen oen.
4. Bedecken Sie das Objektiv (Frontlinse) auf der
Seite des Fernglases, auf der sich der Dioptrien-
einstellring befindet, mit einem Objektivschutz
oder Ihrer Hand. Bei dem APEX XP LRF handelt
es sich um die linke Seite.
5.
Fokussieren Sie mit dem Fokusrad ein entferntes
Objekt mit feinen Details (z. B. eine Mauer, Baum-
zweige usw.), bis es so scharf wie möglich er-
scheint.
6. Decken Sie die Objektivlinse auf der Seite mit
dem Dioptrieneinstellring wieder auf und bede-
cken Sie die andere Objektivlinse auf der rechten
Seite. Betrachten Sie dann dasselbe Objekt.
7. Drehen Sie die Dioptrieneinstellmarkierung auf
dem Dioptrieneinstellring Richtung „+“ oder „-“
bis das Bild scharf ist.
Seien Sie vorsichtig, denn zu starkes Drehen des
Dioptrieneinstellrings kann Schäden verursachen oder
dazu führen, dass sich das Okular vom Gehäuse löst.
8. Ihr Fernglas sollte nun auf Ihre Sehstärke
eingestellt sein. Um auf eine beliebige Entfernung
zu fokussieren, drehen Sie jetzt einfach am
Fokusrad. Merken Sie sich Ihre Dioptrieneinstellung
für die zukünftige Verwendung.
Dioptrieneinstellmar-
kierung
Dioptrien-
einstellring

18 www.alpenoptics.de
Dioptrien- und Displayeinstellung des Fernglases
1. Drehen Sie den linken und rechten Okularring
gegen den Uhrzeigersinn bis zum Anschlag.
Drücken Sie zunächst die Entfernungsmesstaste
und schauen Sie mit dem rechten Auge durch
das Okular nur auf das Display. Drehen Sie den
rechten Okularring im Uhrzeigersinn, bis das
Display vollständig scharf gestellt ist.
2. Schauen Sie mit dem rechten Auge durch das
rechte Okular auf ein Objekt und drehen Sie am
Fokusrad, bis das Objekt scharf gestellt ist.
3. Schließen Sie Ihr rechtes Auge (oder decken
Sie Ihr rechtes Auge ab) und betrachten
Sie dasselbe Objekt nur mit Ihrem linken
Auge. Drehen Sie den linken Okularring im
Uhrzeigersinn, bis das Objekt scharf ist. Ihre
persönlichen Dioptrien- und Displayeinstellungen
sind nun vorgenommen.
Einzelmessung
Die Visiermarke erscheint, wenn die Entfer-
nungsmesstaste zum ersten Mal gedrückt
wird. Nach dem zweiten Tastendruck zeigt
das Display die Entfernung an.
Scan-Modus
Der Scan-Modus dient der kontinuierlichen Mes-
sung der Entfernung eines be-
wegten Ziels. Wenn Sie die
Entfernungsmesstaste länger
als 3 Sekunden gedrückt halten,
schaltet das Gerät automatisch
in den Scan-Modus. Die Messung
wird so lange fortgesetzt, bis Sie
die Taste wieder loslassen.
Scan
(LOS-Modus)
Scan
(HCD-Modus)

19
www.alpenoptics.de
DE
US/GB
FR
ES
NL
IT
Modus-Wechsel
Drücken Sie die Entfernungsmesstaste. Halten Sie
dann die Modus-Taste ungefähr 3 Sekunden ge-
drückt. Sobald Sie die Modus-Taste wieder los-
lassen, erscheint das Hauptmenü. Wenn Sie die
Modus-Taste erneut drücken, wird die nächste Me-
nüoption angezeigt. Drücken Sie die Entfernungs-
messtaste, um den Modus auszuwählen.
1. Helligkeitseinstellung
2. M- und Y-Einstellung
3. HCD- und LOS-Modus-Auswahl.
Der HCD-Modus (Horizontal Component Distance)
zeigt eine winkelkompensierte Entfernungsmessung
an. Der LOS-Modus (Line of Sight) zeigt die
Entfernung auf einer geraden Linie an.

20 www.alpenoptics.de
Winkelmessung
Der Winkel Ihrer Messposition zu einem beliebigen
Ziel kann im oberen Bereich des Displays angezeigt
werden.
Befestigung des Trageriemens
Zur sicheren Befestigung des Fernglases am Trage-
riemen:
1. Fädeln Sie das Ende des Trageriemens von
unten nach oben durch die Öse am Fernglas.
2. Halten Sie die Schnalle fest und fädeln Sie das
Ende des Trageriemens in die Schnalle ein.
3. Stellen Sie die Gesamtlänge ein und ziehen Sie
den Trageriemen fest, sodass er sicher in der
Schnalle sitzt.
Wasserdichte / Beschlagfreie Modelle
Bei der Entwicklung und Herstellung von wasser-
dichten und beschlagfreien ALPEN Ferngläsern
kommen die neusten Technologien zum Einsatz. Die
wasserdichten Modelle sind mit O-Ringen abge-
dichtet und bieten somit vollständigen Schutz vor
Feuchtigkeit. Der Schutz vor Beschlagen wird durch
eine trockene Stickstofüllung erreicht, die sämt-
liche Feuchtigkeit im Inneren entfernt.
Anschluss eines Stativs
(Stativ und Stativadapter nicht enthalten)
Um das Fernglas an einem Stativ oder Einbein-
stativ zu befestigen, schrauben Sie (gegen den
Uhrzeigersinn) die Kappe ab, die das Anschlussge-
winde am Ende der Mittelachse abdeckt, und legen
Sie sie an einen sicheren Ort. Für ein stabiles Bild
bei längeren Beobachtungen verwenden Sie einen
kompatiblen Stativadapter, um Ihr Fernglas hori-
zontal an einem Standardstativ zu befestigen.
Table of contents
Languages:
Other Alpen Optics Binoculars manuals

Alpen Optics
Alpen Optics TETON 8X42 User manual

Alpen Optics
Alpen Optics Magnaview 10X52 Wide Angle Manual

Alpen Optics
Alpen Optics APEX XP LRF 673LR User manual

Alpen Optics
Alpen Optics Rainier 10x32 Manual

Alpen Optics
Alpen Optics 8 56 Series User manual

Alpen Optics
Alpen Optics APEX STEADY 14X42 HD User manual
Popular Binoculars manuals by other brands

Nikon
Nikon Action 7x35 CF Product guide

Meopta
Meopta MeoStar B1 Plus 8x32 quick start guide

Leica
Leica TRINOVID BCA Series instructions

Opticron
Opticron M-3 8x30 BIF.GA User instructions and warranty

Vectronix
Vectronix USMC VECTOR 21 Operating & operator maintenance instructions

Leica
Leica geovid HD-B instructions