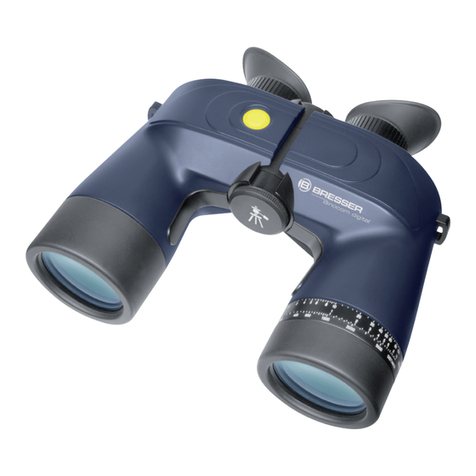
Alpen Optics APEX XP LRF 673LR User manual

Discover the Difference
#673LR
10x42
APEX XP BINOCULAR - LRF
USER GUIDE

2www.alpenoptics.com
PARTS OVERVIEW
Parts
Mode Button
Distance Measuring Button
Right Visual Knob
Focus Knob
Left Visual Knob
Strap Attachment
Objective Lens
Tripod Adapter Socket
Laser Rangender Modules
Battery Compartment

3
www.alpenoptics.com
RISK of physical injury!
Never look through this device directly at or near
the sun. There is a risk of BLINDING YOURSELF!
Children should only use this device under supervi-
sion. Keep packaging materials (plastic bags, rubber
bands, etc.) away from children.
There is a risk of SUFFOCATION.
Fire/Burning RISK!
Never subject the device - especially the lenses - to
direct sunlight. Light ray concentration can cause
res and/or burns.
Caution
1. Use of controls or adjustments or performance of
procedures other than those specied herein may
result in hazardous radiation exposure.
2. The use of optical instruments with this product
will increase eye hazard.
3. Powered by CR2 batteries.
RISK of material damage!
Never take the device apart. Please consult your dealer
if there are any defects. The dealer will contact our ser-
vice center and send the device in for repair if needed.
Do not subject the device to temperatures exceed-
ing 60°C!
Warranty & Service
ALPEN Warranty, without an end date, begins on
the day of purchase. To benet from an extended
voluntary guarantee period as stated on the gift
box, registration on our website is required. You can
consult the full warranty terms as well as informa-
tion on extending the warranty period and details of
our services at:
bresserusa.com/pages/warranty
GENERAL SAFETY INFORMATIONS!

4www.alpenoptics.com
Rolled Eyecup
Eyecup Adjustment
Your ALPEN binocular is tted with eyecups which
can be rolled or twisted up or down (depending
on your model) to optimize the view for your
eyes and to exclude extraneous light. If you are
not wearing eyeglasses or sunglasses, keep the
eyecups fully extended („up“ position). If you are
wearing glasses, roll down the eyecups or twist
them to the down position. This will bring your
eyes closer to the binocular’s eyepiece (ocular)
lens to ensure you can see the entire image (full
eld of view with no “cutoff” or “tunnel vision”)
.
IPD (Interpupillary Distance) Adjustment
The distance or spacing between the center of the
pupils, called “interpupillary distance” (IPD) varies
from person to person. To adjust the binocular to
match your eyes, follow these simple steps:
1. Hold your binocular in the normal viewing
position. Grasp each barrel rmly.
2. Move the barrels closer together or further
apart until you see a single circular eld (don’t
worry about focus yet).
3. Always re-set your binocular to this position
before using it.
Twisted Eyecup Rolled Eyecup

5
www.alpenoptics.com
Diopter Adjustment and Focusing
1. Adjust eyecups interpupillary distance as de-
scribed in the previous sections.
2. Set the diopter adjustment ring to zero and view
a distant object.
3. Keep both eyes open at all times.
4. Using a lens cover or your hand, cover the objec-
tive (front) lens of the same side of the binocu-
lar that has the diopter adjustment ring. This is
usually the right side.
5.
Using the center focus wheel, focus on a dis-
tant object with ne detail (e.g., brick wall, tree
branches, etc.) until it appears as sharp as possi-
ble.
6. Uncover the objective lens on the diopter side,
cover the other objective lens, the left side, then
view the same object.
7. Using the diopter adjustment ring, move the di-
opter adjustment marker to the “+” or “-” till you
reach focus.
Caution should be used as over turning or forcing
the diopter ring can cause damage or cause the
eyepiece to break away from the chassis.
8. Your binocular should now be adjusted for your
eyesight. Focusing for any distance can now be
done simply by turning the center focus wheel.
Make a note of your diopter setting for future
reference.
Diopter
Adjustment Marker
Diopter
Adjustment
Ring

6www.alpenoptics.com
Description of Binocular Refractive Correction
1. Turn the left and right visual knobs counter-
clockwise until they stop. First press the dis-
tance measuring button and look through the
eyepiece with your right eye, pointing only at
the display, turning the right visual knob clock-
wise until the display is fully in focus.
2. Look at the object through the right eyepiece
with your right eye, then focus on it and adjust
the focusing knob until the object comes into
focus.
3. Close your right eye (or cover your right eye)
and look at the same object only with your left
eye, turning the left visual knob clockwise until
the object is in focus. Your personal refractive
correction is adjusted.
Single Measurement
The sighting mark appears when the
distance measuring button is pressed for
the rst time. After the second release
of the button, the display will show the
adjustment range.
Scanning Measurement
The scanning measurement is
used to continuously measure
the distance of the moving
target. If you hold on the
distance measuring button for
more than 3 seconds, it will
automatically switch to scan
style. And the measurement
will continue always until the
button is released.
Scan
(LOS Mode)
Scan
(HCD Mode)

7
www.alpenoptics.com
Mode Transition
Press the distance measuring button and release
the mode button after pressing for more than 3
seconds, it will appear the main menu. When the
mode button is pressed again, the next menu
option will appear. Press the distance measuring
button to select the program.
1. Brightness conversion
2. M and Y conversion
3. HCD and LOS mode conversion.
HCD: In the HCD Mode you get the following informa-
tion displayed. The horizontal distance to the object
and the angle you hold the device to the target.
LOS: The LOS mode show you the horizontal and
straight distance to the target.

8www.alpenoptics.com
Angle Measurement
The Angle of your measurement posi-
tion to any target can be displayed in
the upper area of the display.
Neckstrap Attachment
To securely attach your binocular to the binoc-
ular strap:
1. Thread the end of the strap from the bottom
up through the strap attachment loop.
2. Hold the buckle and thread the end of the strap
inside the buckle.
3. Adjust the overall length and pull the strap
webbing tight so it is secure within the buckle.
Waterproof / Fogproof Models
ALPEN binoculars are designed and built utilizing
the latest waterproof and fogproof technology (this
will be noted on the product packaging). Water-
proof models are O-ring sealed for complete mois-
ture protection. Fogproof protection is achieved
from dry nitrogen purging that removes all internal
moisture.
Tripod Mounting
(tripod and tripod adapter not included)
To attach the binocular to a tripod or monopod,
unscrew (counter-clockwise) the cap which covers
the threaded socket at the far end of the cen-
ter hinge, and set it aside in a safe place. Use a
compatible binocular tripod adapter accessory
to attach your binocular to any standard tripod
in a horizontal position to provide a stable image
during prolonged viewing.
Care and Cleaning
Your binocular will provide years of trouble-free
service if it receives the normal care you would
give any ne optical instrument.

9
www.alpenoptics.com
• Do not expose non-waterproof models to heavy
rain or other excessive moisture.
• I
f your binocular has roll-down, exible eyecups, store
it with the eyecups up. This avoids excessive moisture.
• Avoid sharp impacts. Use the included neckstrap
to avoid accidentally dropping the binoculars to
prevent mis-alignment of the optics.
• When not using them, store your binoculars in
the provided case in a cool, dry place.
•
Avoid storing the binoculars in hot places, such as
the passenger compartment of a vehicle on a hot
day. The high temperature could adversely affect the
lubricants and sealants. Never leave the binocular
where direct sunlight can enter either the objective
or the eyepiece lens. Damage may result from the
concentration (burning glass effect) of the sun’s
rays.
• All moving parts of the binocular are permanent-
ly lubricated. Do not try to lubricate them.
To Clean Your Binoculars Lenses
1. Blow away any dust or debris on the lens (or
use a soft lens brush).
2. To remove ngerprints or other smears, clean
with a soft cotton cloth rubbing in a circular
motion. A “microber”cleaning cloth (available
from camera or computer retailers) is ideal for
the routine cleaning of your optics.
3.
For a more thorough cleaning, photographic lens
tissue and photographic-type lens cleaning uid
or isopropyl alcohol may be used. Always apply
the uid to the cleaning cloth – never directly on
the lens.
10 www.alpenoptics.com
Disposal
Keep packaging materials, like plastic bags and
rubber bands, away from children as they pose
a risk of suffocation. Dispose of packaging
materials as legally required. Consult the local
authority on the matter if necessary and recycle
materials when possible.
• The WEEE symbol if present indicates that
this item contains electrical or electronic
components which must be collected and
disposed of separately.
• Never dispose of electrical or electronic waste in
general municipal waste. Collect and dispose of such
waste separately.
• Make use of the return and collection systems avail-
able to you, or your local recycling program. Contact
your local authority or place of purchase to nd out
what schemes are available.
• Electrical and electronic equipment contains haz-
ardous substances which, when disposed of incor-
rectly, may leak into the ground. This can contribute
to soil and water pollution which is hazardous to
human health, and endanger wildlife.
• It is essential that consumers look to re-use or recy-
cle electrical or electronic waste to avoid it going to
landll sites or incineration without treatment.

11
www.alpenoptics.com
NOTES

Alpen Optics
1010 S. 48th Street
Springdale, AR 72762
Phone: 866.252.3811
www.alpenoptics.com
Table of contents
Other Alpen Optics Binoculars manuals

Alpen Optics
Alpen Optics 8 56 Series User manual

Alpen Optics
Alpen Optics 10 42 Series User manual

Alpen Optics
Alpen Optics TETON 8X42 User manual

Alpen Optics
Alpen Optics APEX STEADY 14X42 HD User manual

Alpen Optics
Alpen Optics Magnaview 10X52 Wide Angle Manual

Alpen Optics
Alpen Optics Rainier 10x32 Manual
Popular Binoculars manuals by other brands

Orion
Orion 5271 manual

FujiFilm
FujiFilm MARINER 7X50 WP-XL instruction manual

Bresser
Bresser Night Vision 3.5x42 Digital instruction manual

National Geographic
National Geographic FERNGLASS BINOCULARS ROOF operating instructions

Levenhuk
Levenhuk Nelson 8x30 user manual

Celestron
Celestron Outland X instruction manual