manuals.online logo
Brands
  1. Home
  2. •
  3. Brands
  4. •
  5. Alpine
  6. •
  7. Lawn And Garden Equipment
  8. •
  9. Alpine BVF278 Guide

Alpine BVF278 Guide

BVF278
Colorful Orbital Wind Spinner
Garden Stake
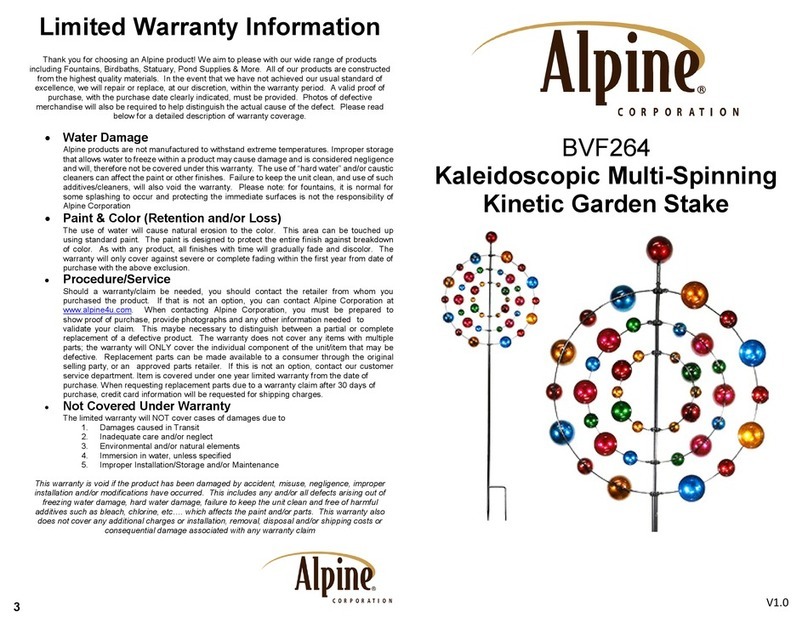
Limited Warranty Information
Thank you for choosing an Alpine product! We aim to please with our wide range of products
including Fountains, Birdbaths, Statuary, Pond Supplies & More. All of our products are constructed
from the highest quality materials. In the event that we have not achieved our usual standard of
excellence, we will repair or replace, at our discretion, within the warranty period. A valid proof of
purchase, with the purchase date clearly indicated, must be provided. Photos of defective
merchandise will also be required to help distinguish the actual cause of the defect. Please read
below for a detailed description of warranty coverage.
•Water Damage
Alpine products are not manufactured to withstand extreme temperatures. Improper storage
that allows water to freeze within a product may cause damage and is considered negligence
and will, therefore not be covered under this warranty. The use of “hard water” and/or caustic
cleaners can affect the paint or other finishes. Failure to keep the unit clean, and use of such
additives/cleaners, will also void the warranty. Please note: for fountains, it is normal for
some splashing to occur and protecting the immediate surfaces is not the responsibility of
Alpine Corporation
•Paint & Color (Retention and/or Loss)
The use of water will cause natural erosion to the color. This area can be touched up
using standard paint. The paint is designed to protect the entire finish against breakdown
of color. As with any product, all finishes with time will gradually fade and discolor. The
warranty will only cover against severe or complete fading within the first year from date of
purchase with the above exclusion.
•Procedure/Service
Should a warranty/claim be needed, you should contact the retailer from whom you
purchased the product. If that is not an option, you can contact Alpine Corporation at
www.alpine4u.com. When contacting Alpine Corporation, you must be prepared to
show proof of purchase, provide photographs and any other information needed to
validate your claim. This maybe necessary to distinguish between a partial or complete
replacement of a defective product. The warranty does not cover any items with multiple
parts; the warranty will ONLY cover the individual component of the unit/item that may be
defective. Replacement parts can be made available to a consumer through the original
selling party, or an approved parts retailer. If this is not an option, contact our customer
service department. Item is covered under one year limited warranty from the date of
purchase. When requesting replacement parts due to a warranty claim after 30 days of
purchase, credit card information will be requested for shipping charges.
•Not Covered Under Warranty
The limited warranty will NOT cover cases of damages due to
1. Damages caused in Transit
2. Inadequate care and/or neglect
3. Environmental and/or natural elements
4. Immersion in water, unless specified
5. Improper Installation/Storage and/or Maintenance
This warranty is void if the product has been damaged by accident, misuse, negligence, improper
installation and/or modifications have occurred. This includes any and/or all defects arising out of
freezing water damage, hard water damage, failure to keep the unit clean and free of harmful
additives such as bleach, chlorine, etc…. which affects the paint and/or parts. This warranty also
does not cover any additional charges or installation, removal, disposal and/or shipping costs or
consequential damage associated with any warranty claim

3
V2.0
Assembling & Using Your Product
Unpack all components carefully. Please check to ensure all parts have been removed
from the packaging.
Components:
A. Top Blade Spinner
B. Middle Blade Spinner
C. Bottom Blade Spinner
D. Curved Ring Piece 1
E. Curved Ring Piece 2
F. Curved Ring Piece 3
G. Curved Ring Piece 4
H. Small Outer Rod (x2)
I. Small Center Rod (x2)
J. Top Orb Lock
K. Long Inner Rod
L. Capped Nut (x6)
M. Upper Stake Connector
N. Lower Stake Connector
O. n-stake
P. h-stake
Q. Wrench
Assembling:
Assembling & Using Your Product (Cont’d)
1 Align and insert the screw holes on the Curved Ring Piece 1 (D) to an
available two-pronged connector on both ends of the curved ring piece 3
(F). Use a capped nut (L) and secure both ends of the two pieces
clockwise tightly using the provided wrench (Q). Repeat this step to
connect the Curved Ring Piece 2 (E) and Curved Ring Piece 4 (G). (See
diagram step 1 on previous page)
2 Insert a small outer rod (H) to the bottom of the assembled curved ring
(D+E+F+G) and then insert the bottom blade spinner (C) on top of the
outer rod. (See diagram step 2 on previous page)
3 Insert a small center rod (I) on top of the bottom blade spinner (C). Then
insert the middle blade spinner (B) on top of the newly inserted center rod.
(See diagram step 2 on previous page)
4 Insert a small center rod (I) on top of the middle blade spinner (C). Then
insert the top blade spinner (A) on top of the newly inserted center rod.
(See diagram step 2 on previous page)
5 Insert a small outer rod (H) on top of the top blade spinner (A) The rod
should connect to the top of the assembled curved ring (D+E+F+G). Once
done, you can then insert the long inner rod (K) from the bottom and
through the previously connected small rods all the way to the top end.
(See diagram step 2 on previous page)
6 Take the top orb lock (J) and connect it to the long inner rod (K) that went
through all the way up from the bottom of the assembled curved rings
(D+E+F+G). (See diagram step 3 on previous page)
7 Insert the upper stake connector (M) to the bottom of the assembled
curved ring (D+E+F+G) where you previously inserted the long inner rod
(K). (See diagram step 4 on previous page)
8 Insert the lower stake connector (N) to the bottom of the upper stake
connector (M). Then Insert the n-stake (O) to the bottom of the lower
stake connector. And lastly, insert the h-stake (P) to the bottom of the n-
stake. (See diagram step 4 on previous page)
Your garden stake is now completely assembled. (See diagram step 5 on
previous page)
1
2

Other Alpine Lawn And Garden Equipment manuals

Alpine BVF264 User manual

Alpine

Alpine BVF264 User manual

Alpine KIY102MC User manual

Alpine

Alpine KIY102MC User manual

Alpine GXT270 User manual

Alpine

Alpine GXT270 User manual

Alpine SLL1872 User manual

Alpine

Alpine SLL1872 User manual

Alpine BAR254S User manual

Alpine

Alpine BAR254S User manual

Alpine ORS112RD User manual

Alpine

Alpine ORS112RD User manual

Alpine HEH208 User manual

Alpine

Alpine HEH208 User manual

Alpine X-2551 User manual

Alpine

Alpine X-2551 User manual

Alpine NCY324 User manual

Alpine

Alpine NCY324 User manual

Alpine QFC100 User manual

Alpine

Alpine QFC100 User manual

Alpine GXT484 User manual

Alpine

Alpine GXT484 User manual

Alpine YHL166HH-S User manual

Alpine

Alpine YHL166HH-S User manual

Alpine WAC200 User manual

Alpine

Alpine WAC200 User manual

Alpine QFC104 User manual

Alpine

Alpine QFC104 User manual

Popular Lawn And Garden Equipment manuals by other brands

Poulan Pro PPB3000B instruction manual

Poulan Pro

Poulan Pro PPB3000B instruction manual

AL-KO MH360 Instructions for use

AL-KO

AL-KO MH360 Instructions for use

Stihl SPA 65 instruction manual

Stihl

Stihl SPA 65 instruction manual

Gardenline SL-2750 user guide

Gardenline

Gardenline SL-2750 user guide

EINHELL GE-SC 35/1 Li Original operating instructions

EINHELL

EINHELL GE-SC 35/1 Li Original operating instructions

Coopers of Stortford 9106 Instructions for use

Coopers of Stortford

Coopers of Stortford 9106 Instructions for use

Linn Aqua Wheel AW252B20 instruction manual

Linn

Linn Aqua Wheel AW252B20 instruction manual

SNOWJOE Sunjoe AJ798E-RM Operator's manual

SNOWJOE

SNOWJOE Sunjoe AJ798E-RM Operator's manual

Fieldmann FVC 8510 EC user manual

Fieldmann

Fieldmann FVC 8510 EC user manual

Costway HZ10112CF manual

Costway

Costway HZ10112CF manual

Weed Eater 3000B instruction manual

Weed Eater

Weed Eater 3000B instruction manual

Bush Hog TOUGH 406 Series Specification sheet

Bush Hog

Bush Hog TOUGH 406 Series Specification sheet

TrenchBadger Pro 12 owner's manual

TrenchBadger

TrenchBadger Pro 12 owner's manual

Premier designs WndGarden 26825 Assembly instructions

Premier designs

Premier designs WndGarden 26825 Assembly instructions

Simplicity 552 owner's manual

Simplicity

Simplicity 552 owner's manual

DR Premier Safety & Operating Instructions

DR

DR Premier Safety & Operating Instructions

Texas El-Tex 750 user manual

Texas

Texas El-Tex 750 user manual

North Star 296020 owner's manual

North Star

North Star 296020 owner's manual

manuals.online logo
manuals.online logoBrands
  • About & Mission
  • Contact us
  • Privacy Policy
  • Terms and Conditions

Copyright 2025 Manuals.Online. All Rights Reserved.