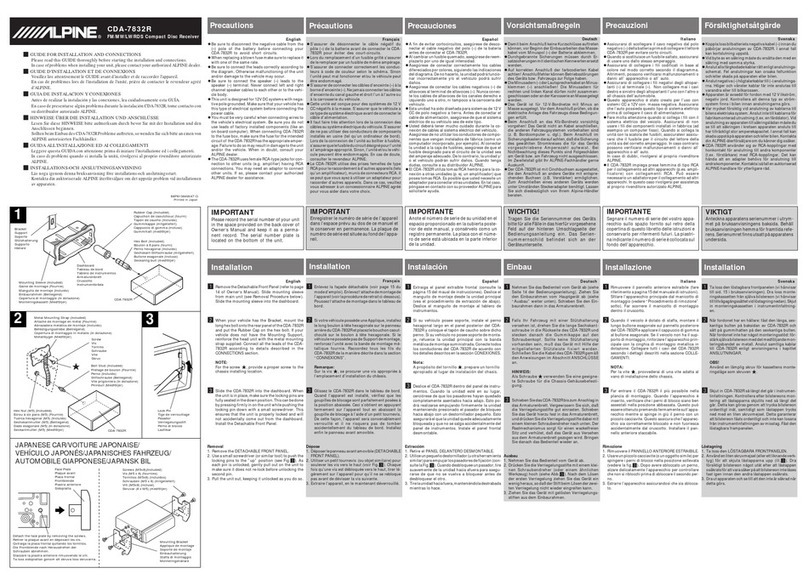
Alpine CDA-7939R User manual

VLLLLL
A
ds
=
CDA-7939R
FM/MW/LW/RDS
Compact
Disc
Receiver
OWNER'S
MANUAL
Please
read
before
using
this
equipment.
MODE
D'EMPLOI
Veuillez
lire
ce
mode
d'emploi
avant
la
mise
en
service
de
l'appareil.
MANUAL
DE
OPERACION
Lea
antes
de
utilizar
este
equipo.
BEDIENUNGSANLEITUNG
Lesen
Sie
diese
Anleitung
bitte
vor
der
Inbetriebnahme.
LIBRETTO
DELLE
ISTRUZIONI
Leggere
questo
manuale
prima
di
usare
l'apparecchio.
BRUKSANVISNING
Las
igenom
bruksanvisningen
innan
bilstereon
tas
i
bruk.
COMPACT
DIGITAL
AUDIO
Wal-NET

DETACHABLE
FRONT
PANEL.
BASIC
OPERATION
.........02
12
RADIO
OPERATION
.
24
CD
OPERATION...........2+:+++
..
36
CD
SHUTTLE
OPERATION...........
54
AUDIO
PROCESSOR
OPERATION
.
68
VCR
OPERATION
.........:csceseeeesseeeees
..
70
REMOTE
CONTROL
OPERATION
.
72
REMOTE
CONTROL
......ccsssssssssseersensereessensereecneaeanceneees
78
DISC
CARE
ou...
.csecsssssecenreeessseenseeseesenseesneesasenesseeasenaeees
..
80
IN
CASE
OF
DIFFICULTY
..
..
82
SPECIFICATIONS
........cccsssssssscsssssrscereesseenensennseersneaenee
90
PANNEAU
AVANT
DETACHABLE
.
FONCTIONNEMENT
DE
BASE
...
RECEPTION
RADIO
............000
.25
LECTURE
CD........:ccscstestesesessenesnsensneennenees
=
37
FONCTIONNEMENT
DU
CHANGEUR
CD.........c0:c00
55
FONCTIONNEMENT
DU
PROCESSEUR
DE
SON...
69
FONCTIONNEMENT
DU
MAGNETOSCOBPE
...............
71
FONCTIONNEMENT
DE
LA
TELECOMMANDE
..........
73
TELECOMMAN
DE
.........:cccesesseetseesenseesteerseeeneeee
«79
ENTRETIEN
DU
DISQUE...
EN
CAS
DE
PROBLEME
...
”
SPECIFICATIONS
......cccssssscsesteressressmeeseneenensensaneeenaties
91
HDA
Aten
PRECAUCIONES
.......:.::scccessstesrssessenssnseesecnteseenseesennenaee
PANEL
FRONTAL
DESMONTABLE..
ans
1
OPERACION
BASICA
......ccccssesesees
«13
OPERACION
DE
LA
RADIO..........22scssse
wa
25
OPERACION
DEL
REPRODUCTOR
DE
C
OT
OPERACION
DEL
CAMBIADOR
DE
CD
............
55
OPERACION
DEL
PROCESADOR
DE
AUDIO
.
69
OPERACION
DEL
VCR
.....ccsssseserseseesesenecticeense
ww
71
OPERACION
DEL
CONTROLADOR
REMOTO............
73
CONTROLADOR
REMOTO
.........sscsseseeseretoess
ww
TD
CUIDADO
DE
LOS
DISCOS...
EN
CASO
DE
DIFICULTAD
... fee
ESPECIFICACIONES
........sccseccsecceessssseeseeseesepesseeeneeaes
91

Precautions
English
Thermal
Protection
Circuit
Be
sure
the
temperature
inside
the
vehicle
is
between
+60°C
(+140°F)
and
-10°C
(+14°F)
before
attempting
to
play
a
disc.
If
the
temperature
is
over
+60°C
(+140°F),
the
protection
circuit
functions
to
stop
the
CD
player,
and
“--
-
H"
is
displayed.
Moisture
Condensation
You
may
notice
the
CD
playback
sound
wavering
due
to
condensation.
If
this
happens,
remove
the
disc
from
the
player
and
wait
about
an
hour
for
the
moisture
to
evaporate.
Damaged
Disc
Do
not
attempt
to
play
cracked,
warped,
or
damaged
discs.
Playing
a
bad
disc
could
severely
damage
the
playback
mechanism.
Never
attempt
the
Follow-
ing
Do
not
grip
or
pull
out
the
disc
while
it
is
being
pulled
back
into
the
player
by
the
automatic
reloading
mechanism.
Do
not
attempt
io
insert
a
disc
into
the
unit
when
the
unit
power
is
off.

Center
Hole
Orifice
central
Orificio
central
aes
Bumps
Résidus
Abultamientos
Center
Hole
Orifice
central
Orificio
central
New
Disc
Disque
neuf
Disco
nuevo
Outside
(Bumps)
Périférie
(résidus)
Borde
exterior
{abultamientos)
ak=yere
[Ui
iceyaty
English
Inserting
Discs
Your
player
accepts
only
one
disc
at
a
time
for
playback.
Do
not
attempt
to
load
more
than
one
disc.
Make
sure
the
label
side
is
facing
up
when
you
insert
the
disc.
Your
player
will
automati-
cally
eject
any
disc
that
is
inserted
incor-
rectly.
If
the
player
continues
to
eject
a
correctly
inserted
disc,
push
the
Reset
switch
(located
behind
the
detachable
front
panel)
with
a
pointed
object
such
as
a
ball-point
pen.
Playing
a
disc
while
driving
on
a
very
bumpy
road
may
result
in
skips,
but
this
will
not
scratch
the
disc
or
damage
the
player.
New
Discs
As
a
protective
measure,
the
CD
player
will
automatically
eject
discs
that
have
either
been
inserted
incorrectly
or
have
irregular
surfaces.
When
a
new
disc
is
inserted
into
the
player
and
ejected
after
initial
loading,
using
your
finger,
feel
around
the
inside
of
the
centre
hole
and
outside
edge
of
the
disc.
If
you
feel
any
smali
bumps
or
irregularities,
this
could
inhibit
proper
loading
of
the
disc.
To
remove
the
bumps,
rub
the
inside
edge
of
the
hole
and
outside
edge
of
the
disc
with
a
ball-point
pen
or
other
such
instrument,
then
insert
the
disc
again.

a
t=xere
eli
le)
als
English
Installation
Location
Make
sure
the
CDA-7939R
player/receiver
will
not
be
exposed
to:
Direct
sun
and
heat
High
humidity
Excessive
dust
Excessive
vibrations
Handling
the
Detachable
Front
Panel
*
Do
not
expose
to
rain
or
water.
*
Do
not
drop
or
apply
shock.
Maintenance
If
you
have
problems,
do
not
attempt
to
repair
the
unit
yourself.
Return
it
to
your
Alpine
dealer
or
the
nearest
Alpine
Service
Station
for
servicing.

PY=\
(eel
ave|e)i-s
aceyali
ae
lat=)|
English
Detaching
the
Front
Panel
Press
the
PWR
button
to
turn
off
the
power.
Press
the
release
button
until
the
front
panel
pops
out.
Grasp
the
left
side
of
the
front
pane!
and
pull
it
out.
Note:
To
protect
the
front
panel,
piace
it
in
the
supplied
carrying
case.
Attaching
the
Front
Panel
First
insert
the
right
side
of
the
front
panel
into
the
main
unit
by
aligning
the
groove
‘on
the
front
panel
with
the
2
projections
on
the
main
unit.
Then
push
the
left
side
of
the
front
panel
until
it
locks
firmly
in
the
main
unit
and
a
click
sound
is
heard.
Note:
Before
attaching
the
front
panel,
make
sure
that
there
is
no
dirt
or
dust
on
the
connector
terminals
and
no
foreign
objects
between
the
front
panel
and
main
unit.

sfe
ly
for
@)
ef=\cel
sell
English
Initial
System
Start-Up
When
operating
the
unit
for
the
first
time
after
installation
or
after
the
vehicle's
battery
has
been
disconnected
and
reconnected,
set
the
volume
level
to
its
minimum,
then
remove
the
detachable
front
panel.
Press
the
Reset
switch
with
a
ball-point
pen
or
any
other
pointed
object.
Turning
Power
On
and
Off
Press
the
PWR
button
to
turn
on
the
unit.
Note:
The
unit
can
be
turned
on
by
pressing
any
button
except
the
eject
4
button
or
by
inserting
a
compact
disc.
Press
the
PWR
button
again
to
turn
off
the
unit.
Note:
The
operation
indicator
blinks
when
any
operational
button
is
pressed
to
indicate
that
the
unit
has
recognized
the
pressing
of
the
button.

MODE/LOUD
VOLUME
4
BASS
L
[TREBLE
v
BALANCE
FADER
fe
tl
[om
@)
of-]
ce]
fo)
a)
English
Adjusting
Volume/Bass/
Treble/Balance/Fader
Press
the
MODE/LOUD
button
repeatedly
to
choose
the
desired
mode.
Note:
If
the
level
control
is
not
rotated
in
5
seconds
after
selecting
the
BASS,
TREBLE,
BALANCE
and
FADER
modes,
the
unit
automatically
returns
to
the
VOLUME
mode.
Rotate
the
level
control
clockwise
or
counterclockwise
to
increase
or
decrease
the
level
until
the
desired
sound
is
obtained
in
each
mode.
Note:
When
this
contro!
is
rotated
to
its
extreme
end,
the
level
changes
quickly.
The
settings
of
the
Bass
and
Treble
will
be
individually
memorized
for
each
source
(FM,
MW,
LW
and
CD)
until
the
settings
are
changed.

MODE/LOUD
Xo
tj
(om
®)
of-1
fe]
i(e)a)
English
Turning
Loudness
On/Off
Loudness
introduces
a
special
low-
and
high-
frequency
emphasis
at
low
listening
levels
to
compensate
for
the
ear's
decreased
sensitiv-
ity
to
bass
and
treble
sound.
Press
the
MODE/LOUD
button
for
at
least
2
seconds
to
activate
or
deactivate
the
joudness
mode.
Note:
When
an
optional
Alpine
Audio
Processor
(Equalizer
or
Divider)
is
connected
to
the
CDA-7939R,
the
Loudness
mode
is
unfunctional.
Digital
Output
ON/OFF
Switching
In
combination
with
products
using
optical
digital
system,
set
the
digital
output
switch
to
ON
position.
In
combination
with
products
not
using
optical
digital
system,
set
the
switch
to
OFF.
Press
the
PWR
button
for
at
least
3
seconds.
Each
press
of
the
DISC
»/11
button
switches
the
digital
output
ON/OFF.
Note:
Initial
mode
is
OPT
OFF.
Press
the
PWR
button
to
activate
the
normal
mode.

sfok
(em
@)
el-lcelife)a
English
Adjusting
FM
Signal
Level
If
the
difference
in
volume
levels
between
the
FM
station
and
the
CD
player
is
great,
you
can
adjust
the
FM
signal
level
to
make
the
difference
smaller.
Press
the
PWR
button
for
at
least
3
seconds.
Press
the
Preset
1
button
to
select
the
desired
signal
level.
Press
the
PWR
button
to
preset
the
FM
signal
level
in
memory
and
deactivate
the
adjusting
mode.

Xe
Lj
(om
@)
o1-1vel
{fe}
a)
English
Changing
Lighting
Colour
Press
the
PWR
button
for
at
least
3
seconds.
Press
the
Preset
6
button
to
change
the
lighting
colour
between
green
and
amber.
Press
the
PWR
button
to
set
the
lighting
colour.

22
BEEP
ON
BEEP
OFF
Ye
lj(e
@)
ef-1rel
ile)
a
English
Sound
Guide
Function
Very
convenient
function
that
informs
operating
conditions
with
sound
tones
when
you
press
buttons.
Press
the
PWR
button
for
more
than
3
seconds.
Press
the
TUNER/BAND/VCR
button
and
the
display
shows
"BEEP
ON".
Pressing
the
button
again
shows
"BEEP
OFF"
and
the
sound
tone
does
not
emit
if
buttons
are
pressed.
Press
the
PWR
button
to
activate
the
normal
mode.

i
SEEK-LOC
Y
MANUAL
(SEEKDX-
Xo
fe
[fo
@)
oy-1ce)i(e)
4]
English
Manual
Tuning
Press
the
TUNER/BAND/VCR
button
repeatedly
until
the
desired
radio
band
is
displayed.
Press
the
TUNE/A.ME
button
repeatedly
until
“MANUAL*
is
displayed.
Note:
Initial
mode
is
SEEK-DX.
Press
the
DN
1«<
or
UP
p>
button
to
move
downward
or
upward
one
step
respectively
until
the
desired
station
frequency
is
displayed.

SEEK-LOC
J
MANUAL
[SEEKDH
26
<a
(e|(ey(@]
e}=1
ce)
[[e)
a)
English
Automatic
Seek
Tuning
Press
the
TUNER/BAND/VCR
button
repeatedly
until
the
desired
radio
band
is
displayed.
Press
the
TUNE/A.ME
button
to
itluminate
the
DX
indicator
in
the
display.
With
the
DX
mode
activated,
both
strong
and
weak
stations
will
be
tuned
in
the
Auto-Seek
operation.
Press
the
TUNE/A.ME
button
again
to
return
to
the
local
mode.
The
DX
indicator
will
turn
off
and
only
strong
radio
stations
will
be
tuned.
Press
the
DN
<<
or
UP
p>»
button
to
auto-
matically
seek
a
station
downward
or
upward
respectively.

Fi
ST
101.50
Fi
_
MONO
101.50
Xo
fe
[(oM@)
of-)reli(eyn)
Mono/Stereo
Switching
Press
the
FUNC
button.
The
function
indicator
will
be
off.
"ST"
indicator
appears
when
a
stereo
station
is
tuned
in.
Press
the
MONO
button
to
switch
from
the
stereo
mode
to
the
monaural
mode
to
reduce
the
noise
level
of
noisy
stereo
broadcast
due
to
weak
signal.
in
the
monaural
mode,
the
MONO
indicator
appears.
Press
the
MONO
button
again
to
return
to
the
stereo
mode.
Press
the
FUNC
button
to
activate
the
normal
mode.
The
function
indicator
will
illuminate.

Xo
fe|[s),@)
oy-Irelifoja
English
Manual
Storing
of
Station
Presets
.
Tune
in
the
desired
radio
station
you
wish
to
store
in
the
preset
memory.
2.
Make
sure
that
the
FUNC
indicator
illuminates,
and
press
any
one
of
the
preset
buttons
(1
through
6)
for
at
least
2
seconds
until
the
frequency
display
blinks.
3.
Press
the
preset
button
into
which
you
wish
to
store
the
station
while
the
display
is
blinking
(within
5
seconds).
The
display
changes
from
blinking
to
steady
lighting
indicating
that
the
station
has
been
memorized.
The
preset
number
is
also
displayed.
4.
Repeat
the
procedure
to
store
5
other
stations
onto
the
same
band.
Use
this
procedure
for
other
bands.
A
total
of
30
stations
can
be
stored
in
the
preset
memory
(6
stations
for
each
band;
FM1,
FM2,
FM3,
MW,
LW).
The
RDS
stations
can
be
preset
in
the
FM1,
FM2
and
FMS
bands
only.
Note:
If
a
preset
memory
has
already
been
set
in
the
same
preset
location,
it
wilt
be
cleared
and
the
new
station
will
be
memorized.

A-MEMORY
efel(o)
@)
el-\relileyal
Automatic
Memory
of
Sta-
tion
Presets
Press
the
TUNER/BAND/VCR
bution
until
the
desired
radio
band
is
displayed.
Press
the
TUNE/A.ME
button
for
at
least
2
seconds,
The
display
shows
“A-
MEMORY"
for
a
second
then
changes
the
radio
frequency
during
the
auto
memory
operation.
The
tuner
will
automatically
seek
and
store
6
strong
stations
in
the
selected
band
in
order
of
signal
strength.
When
the
automatic
storing
has
been
completed,
the
tuner
goes
to
the
station
stored
in
the
preset
location
No.
1.
Note:
If
no
siations
are
stored,
the
tuner
will
return
to
the
original
station
you
were
listening
to
before
the
auto
storing
procedure
began.

w
=
|e
[e
[oe
@)
ef-)ce
ji
(0)
a]
English
Tuning
to
Preset
Stations
Press
the
TUNER/BAND/VCR
button
repeatedly
until
the
desired
band
is
dis-
played.
Make
sure
that
the
FUNC
indicator
illumi-
nates,
and
press
the
station
preset
button
that
has
your
desired
radio
station
in
memory.
The
display
shows
the
preset
number,
band
and
frequency
of
the
station.

|
TO1
0'45
To2
PAU
(oe
DR
@)
<=)
eliceyal
English
Inserting/Ejecting
Disc
Insert
a
disc
half
way
into
the
slot
with
the
label
side
facing
up.
The
player
automatically
draws
the
disc
into
the
disc
compartment.
The
Disc
indicator
appears
to
show
that
a
disc
is
loaded.
Note:
You
can
insert
a
3-inch
CD
without
using
an
adaptor
ring.
Press
the
eject
4
button
when
you
want
to
eject
the
CD.
Normal
Play
and
Pause
Insert
a
CD.
The
CD
player
begins
playback
from
the
first
track
on
the
disc.
The
display
shows
the
track
number
and
elapsed
time
of
the
track
being
played.
When
the
last
track
is
played
back
the
player
returns
to
the
first
track
and
begins
playback
from
that
point.
Press
the
DISC
>
button
to
start
CD
play.
Press
the
DISC
pv
button
to
temporarily
stop
CD
playback.
To
resume
playback,
press
the
DISC
»1
button
again.

|
TO04
2°35
y
|
T04
0'00
T03
0'00
T04
2'35
y
|
TO5
0'00
CD
Operation
English
Music
Sensor
(Skip)
Momentarily
press
the
DN
<<
button
once
to
return
to
the
beginning
of
the
current
track.
If
you
wish
to
access
a
track
further
back,
repeatedly
press
until
you
reach
the
desired
track.
(The
example
shows
the
Music
Sensor
operation
starting
from
track
No.
4.)
Press
the
UP
»»1
button
once
to
advance
to
the
beginning
of
the
next
track.
If
you
wish
to
access
a
track
further
ahead,
press
repeat-
edly
until
the
desired
track
is
reached.
Note:
The
music
sensor
feature
is
functional
in
the
play
or
pause
mode.
Fast
Forward
and
Backward
Press
and
hold
the
DN
«or
UP
>»
button
to
quickly
move
backward
or
forward
until
you
reach
the
desired
section
of
the
track.
itn
Other Alpine Receiver manuals

Alpine
Alpine CDE-W203RI User manual

Alpine
Alpine INE-W920R User manual

Alpine
Alpine CDE-193BT User manual

Alpine
Alpine CDE-9882RSi User manual

Alpine
Alpine CDA-9883R User manual

Alpine
Alpine CDE-163EBT User manual

Alpine
Alpine iLX-407 User manual

Alpine
Alpine CDM-7874RB User manual

Alpine
Alpine INE-W611D User manual

Alpine
Alpine iLX-407A User manual
Alpine
Alpine iLX-507E User manual

Alpine
Alpine CDE-196DAB User manual

Alpine
Alpine i209 User manual

Alpine
Alpine HALO iLX-F411 User manual

Alpine
Alpine HALO9 User manual

Alpine
Alpine IVE-W530 User manual

Alpine
Alpine 3DE-7886R User manual

Alpine
Alpine UTE-80B User manual
Alpine
Alpine iLX-F309 User manual

Alpine
Alpine CDA-9835R User manual