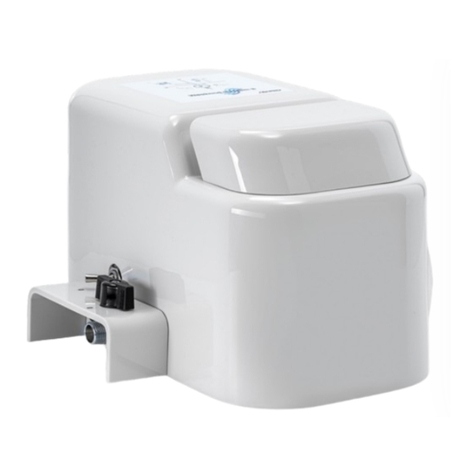
alpro Weekend-System II Product guide

ALPRO
Weekend-System II
I. Operating instructions
II. Installation instructions
820011GB-02 Rev. 3 – 04/2015
ALPRO MEDICAL GMBH, Mooswiesenstraße 9, D-78112 ST. GEORGEN / SCHWARZWALD

Operating instructions ALPRO Weekend-System II
2
LIST OF CONTENTS
I. Operating instructions
Paragraph..........................................................................................................................................................................Page
1 Directions for use..............................................................................................................4
2 Operating conditions of the Weekend-System..................................................................5
3 Operation..........................................................................................................................6
3.1 Switching the Weekend-System on and off............................................................................................6
3.2 Filling the tank.........................................................................................................................................6
3.3 Chronological procedure of application ..................................................................................................7
4 Maintenance.....................................................................................................................9
5 Troubleshooting................................................................................................................9
II. Installation instructions
Paragraph..........................................................................................................................................................................Page
1 Initial thorough cleaning of the water pipes.....................................................................10
2 Position with respect to the treatment unit......................................................................11
2.1 Delivery contents ..................................................................................................................................11
2.2 Position with respect to the treatment unit............................................................................................11
2.3 Connection to the treatment unit...........................................................................................................11
2.4 Connection diagram..............................................................................................................................12
2.5 Instructions for installation ....................................................................................................................13
3 Specifications..................................................................................................................14
3.1 Technical values...................................................................................................................................14
3.2 Diagram of the device...........................................................................................................................15
3.3 Spare parts ...........................................................................................................................................16
3.4 Circuit diagram......................................................................................................................................16

Operating instructions ALPRO Weekend-System II
3

Operating instructions ALPRO Weekend-System II
4
I. Operating instructions
These operating instructions must always be available
near the device. They have to be read and used by
each person who is instructed to the works at the
device (Installation, operation and maintenance).
This danger symbol describes safety instructions which
can lead to endangerings of persons in case of non-
observance.
Apart from the information in these operating instructions
you have to bear in mind the generally applicable safety
and accident prevention regulations!
This attention symbol identifies any security advice of
which the disregard might lead to dangers for the device
and its function!
This information symbol identifies particularities of which
the observance is necessary for the perfect function of the
device!
1 Directions for use
The Weekend-System must only be used for the injection
of BILPRON into the water pipes of dental treatment units.
The device is designed to be operated by skilled and
qualified personnel and not by the patient.
The Weekend-System must only be used within the
pressure areas indicated (see paragraph “Specifications”).
BILPRON must only be used in suitable devices (not in the
ALPRON-TEC!) and has to be rinsed out of the lines after
the intended time of effect!
Danger!
Attention!
Information
Danger!

Operating instructions ALPRO Weekend-System II
5
2 Operating conditions of the
Weekend-System
1 Non-operation
(during the week)
Weekend-System is
switched off:
Water flows through without any
hindrance.
Tank is not under pressure as the
pressure valve closes the way of
the air.
2 Injection of BILPRON
(on Fridays)
Weekend-System is
switched on:
Water is stopped.
Tank is put under pressure.
BILPRON is injected.
3 Reaction time
(over the weekend)
Weekend-System is
switched off again:
Water remains in a stopped
position.
BILPRON still remains in the lines
and has to be rinsed out after the
time of effect.
4 Rinsing/ Non-operation
(
on Monda
y
s
)
(same picture as no. 1)
Water supply
A
ir suppl
y
Water stop
Pressure valve
Water exit
Hand part
Tumbler
Bowl rinsing
Pressure tank
Water supply
A
ir suppl
y
Water stop
Pressure valve
Water exit
Hand part
Tumbler
Bowl rinsing
Pressure tank
Water supply
A
ir suppl
y
Water stop
Pressure valve
Water exit
Hand part
Tumbler
Bowl rinsing
Pressure tank

Operating instructions ALPRO Weekend-System II
6
3 Operation
3.1 Switchin
g
the Weekend-S
y
stem on and off
The operating agents are on the side of the device, above
the cover for the supplies.
You can switch the compressed air for the tank on and off
using the toggle switch of the pressure valve. The
compressed air must only be switched on when BILPRON
shall be injected into the treatment unit.
During the injection of BILPRON the water has to be
stopped with the turning knob of the water stop.
These operating instructions show the supplies in the top
view so that the positions of both switches can be made out
in a better way.
The required positions for switching on and off are identified
by the marks „I“ and „0“ on the cover. In the non-operation
of the Weekend-System all switches have to be at “0” as
shown on the left.
The toggle switch for the compressed air has always to be
set on „0“ after having finished the injection of BILPRON!
The water stop should always be closed in the evening!
3.2 Fillin
g
the tank
When the liquid level in the tank has dropped to „Min.“, the
tank has to be refilled again! The level indicator is at the
side of the casing.
Only fill the tank so that the liquid covers the mark “Max.”!
When refilling the tank, the toggle switch of the pressure
valve has to be on “0”. While opening the tank, you hear a
sibilance. This is normal as the compressed air escapes
from the tank.
Remove spilt BILPRON immediately with a damp cloth.
Only fill the tank so that the liquid does not cover more than
up to the bottom of the filter.
If the fill level is too high, liquid might enter the Weekend-System via the
air-relief valve!
Water stop
Pressure
valve for air
Air
Water
Attention!
Information
Max.
Min.

Operating instructions ALPRO Weekend-System II
7
3.3 Chronological procedure of application
“On Fridays” (or before downtimes of several days’ duration): Inject BILPRON
Procedure Remarks
a)
Check if enough
BILPRON is in the tank:
The level indicator at the
side has to show a liquid
level at „Max.“.
Filling of the tank: see Chapter 3.2
b) Switch on the Weekend-System:
1. First turn off the water:
Set the water stop (ball valve) on
“I”.
2. Then pressurize the tank:
Set the toggle switch of the
pressure valve on “I”.
The operating agents are on the side
cover.
c) Adjust all instruments to maximum flow and remove
them:
d) Rinse each line until the blue decontamination
agent “BILPRON” comes out:
1.
2.
1. You should start with the tumbler
filler in order to flood the main lines
as soon as possible. Operate the
tumbler several times.
2. Then continue with the
multifunctional syringes and finally
rinse the lines with the smallest flow.
3. All instruments which are additionally
connected to the dental unit (scaler,
powder jet devices etc.) have also to
be rinsed.
4. If the tank is empty, BILPRON has to
be refilled as described in Chapter
3.2.
5 x
2.
1. Decontamination:
Set all levers on
I
Max.
Min.

Operating instructions ALPRO Weekend-System II
8
e) Switch off the treatment unit (if necessary at the main
switch)!
f) Depressurize the tank:
Set the toggle switch of the
pressure valve on “0”
Keep the water stop closed!
The operating agents are on the side
cover.
“On Mondays” (or after downtimes of several days’ duration): Rinse out BILPRON
Procedure Remarks
g) Switch on the
treatment unit:
h) Turn the water on again:
Set the water stop (ball valve) on
The operating agents are on the side
cover.
i) Rinse each line until clear water comes out:
1.
2.
Start with the tumbler filler and the
multifunctional syringes in order to rinse
the main lines as soon as possible.
Rinse all instruments one after another
for approx. 3 minutes.
j)
Record the decontamination with
BILPRON in the device record book.
10 x
OFF
x
min. 24 h
OFF
Normal operation:
Set all levers on
0

Operating instructions ALPRO Weekend-System II
9
4 Maintenance
Filter The water filter should be examined by a dental engineer
at least once a year and changed if necessary.
Tank cap The threads of the tank cap and tank neck should be
cleaned from time to time and should be slightly greased
with vaseline.
Cleaning Please use a clean cloth and cleaning agents which are
free of aldehydes and alcohol. We recommend PlastiSept
or DesNet.
5 Troubleshooting
Before contacting your technical engineer, first please refer
to this list of faults. Many problems can be solved easily
and without calling in an engineer.
Problem Possible cause and solution
Liquid overflows out of the
Weekend-S
y
stem Possibly the tank has been overfilled
No water flows Perhaps the water stop is still closed. Open the valve (see
Chapter 3.1
)
Too little water flows
The filters in the treatment unit and in the Weekend-
S
y
stem mi
g
ht have to be cleaned b
y
a dental en
g
inee
r
.
It is difficult to open the tank Slightly grease the thread in the tank cap with vaseline and
do not overtighten the cap. However, the black sealing ring
must be covered at least two thirds.
Information

Installation instructions ALPRO Weekend-System II
10
II. Installation instructions
(for qualified technical staff only)
The procedures described below must only be carried out by suitably qualified
technicians for dental devices in accordance with the valid instructions for electrical
safety and the drinking water decree.
Directive 93/42/EEC for medical devices, annex I; paragraph 9.1
If a product is meant for use in combination with other products or equipments, the combination
including the connections must be safe and it must not affect the intended function of the products.
Each restriction of use must be stated on the label or in the operating instructions.
BIOFILM-REMOVING-SET
1 Initial thorough cleaning of the water lines
The initial thorough cleaning of the water lines with the
Biofilm-Removing-Set must not be carried out through the
Weekend-System!
Application of the BIOFILM-REMOVING-SET
The Biofilm-Removing-Set serves for the removal of biofilm in the
water lines of the treatment unit.
An application is required for treatment units which have
been in use for more than one year when the Weekend-
System is installed and must be carried out by a
technician.
The Biofilm-Removing-Set contains step-by-step
instructions which explain its use in detail.
All hand and angle parts, instruments for the removal of
dental tartar, multifunctional syringes and so on must be
removed completely so that the water lines within these
instruments are not blocked due to the cleaning process.
5 ltr. pressure tank system with
connection for tube 6/4
ALPRO article no. 8589
The initial thorough cleaning of the water lines with the
Biofilm-Removing-Set must not be carried out through the
Weekend-System!
For the initial cleaning of the water lines an external
pressure tank system must always be used by means of
which the BRS liquids can be injected into the water lines
of the treatment unit with at least 2 bar.
A garden spray device with pump mechanism and pressure storage
function in which a tube connection instead of a syringe can be
screwed would be ver
y
suitable.
Attention!
Information
Attention!

Installation instructions ALPRO Weekend-System II
11
2 Position and connection of the
Weekend-System
2.1 Deliver
y
contents
Weekend-System
Lead wires
Operating instructions
Device records
2.2 Position with respect to the treatment unit
The position of the device with respect to the treatment unit
should be chosen with care so that it cannot cause an
obstruction to movement within the surgery but after
installation the Weekend-System must be accessible as it
is important that the tank can be filled easily.
2.3 Connection to the treatment unit
The Weekend-System must only be connected by an expert
authorized by ALPRO in accordance with the valid
instructions for the drinking water decree. Caution:
Unauthorised interference to the treatment unit can
invalidate the manufacturers guarantee. Please check the
conditions of the guarantee.
For the connection of the air and water pipes please use the
the pipes, T-pieces and couplings included in the delivery
contents.
a
)
Water suppl
y
As a rule the supply is connected with a flexible metal tube
(armoured tube included in delivery) directly at the angle
valve in the connection box of the treatment unit. It can also
be connected behind the valve so that the Weekend-
System becomes depressurised when switching off the
treatment unit!
If the water pressure in the incoming pipe is higher than
6 bar, an appropriate pressure control has to be assembled
in front of the Weekend-S
y
stem!
b
)
Water exit
The outgoing pipe of the Weekend-System has to be
connected with the pipe of the treatment unit to the
instruments, to the tumbler filler and to the bowl rinsing. If
possible, this should be done with a flexible metal tube
Attention!
Attention!

Installation instructions ALPRO Weekend-System II
12
(included in delivery) which has to be connected to the
central water supply of the treatment unit.
If necessary, the pipes of the treatment unit to the instruments, to the
tumbler filler and to the bowl rinsing are to change so that they are
connected together to one pipe.
c
)
Compressed air entrance
The compressed air pipe (blue) of the Weekend-System
should be connected into the treatment unit. To do so, the
compressed air pipe in the treatment unit must be
separated behind the pressure control and a T-piece must
be installed. The pressure in this pipe must be at least
2 ba
r
.
2.4 Connection diagram
Bowl rinsin
g
Tumbler filler Hand pieces
Connection box
= Connection with T-piece or coupling
If the water pressure in the
supply line is higher than 6 bar,
an addtional pressure regulator
must be installed in front of the
Weekend-System!
(blue) compressed air
Water entrance
Water exit
A
LPRO Weekend-S
y
stem

Installation instructions ALPRO Weekend-System II
13
2.5 Instructions for installation
a) Switch off power supply of the treatment unit using the
main switch!
b) Close angle valve in the connection box and relieve the
water pipe system of the treatment unit of pressure, e.g.
by operating the multifunctional syringe.
c) Fix a position for the Weekend-System (see paragraph
2.2)
d) Seek a suitable entrance into connection box of the
treatment unit or prepare it yourself (diameter approx.
30 mm).
e) Connect the connecting lines of the Weekend-System to
the treatment unit as described in Chapter 2.3 and 2.4.
f) Unscrew the screw in the turning knob of the water stop
and remove the turning knob.
Remember the position of the turning knob!
Remove the cover.
g) Fit the pipes for water and compressed air at the
Weekend-System:
1. First screw the outgoing pipe on the middle supply.
2. Afterwards fit the incoming pipe to the water stop.
3. Last insert the plastic tube into the quick coupling.
When installing the device in the practice, secure with a flat
wrench (SW 21) when screwing the water tubes to the
device in order to prevent the connections in the casing
from being damaged.
h) Fit the cover and the turning knob again. Put the turning
knob into the same position as it was before the disman-
tling (f)!
i) Open the angle in the connection box again and switch
on the main switch of the treatment unit.
Attention!
3.
1.
2.

Installation instructions ALPRO Weekend-System II
14
3 Specifications
3.1 Technical values
Operatin
g
data
Filling amount: Min.: 200 ml, Max.: 900 ml
Microfilter: 80 µm (Filter F2)
Connection data
Media: Compressed air: without oil, drained and filtered
Water : filtered (80 µm)
Maximum admissible
pressures: Air pressure in incoming pipes: 8 bar
Air pressure in the tank: 2 bar
Pressure of incoming water: 6 bar
Connection lines: Incoming air pipe: blue PE-/PA-tube 6/4x1
Water pipes: metalized tubes
Measures and weight
Measurements (without
tubes): width x length x height: 20 cm x 29 cm x 18,5 cm
Weight (empty): approx. 2,5 kg
Material: Chassis: sheet steel, galvanized
Casing: plastics (ABS)
Tank: plastics (HDPE)
Screwed connections: plastics (POM), brass
Tubes: polyamide polyethylene, high-grade steel

Installation instructions ALPRO Weekend-System II
15
3.2 Diagram of the device
(without casing)

Installation instructions ALPRO Weekend-System II
16
3.3 Spare parts
Article Art. no.
Tank cap 80770020
Seal for tank cap 80770023
Filter for tank 80770021
Filte
r
insert 80µ 80770316
Installation kit 8220
3.4 Circuit diagram
Water supply
A
ir supply
Pressure control
Check valve
Water stop
Water exit
(Hand piece)
(Tumbler + bowl rinsing)
Filter
Strainer
Pressure valve
Level indicator
Filler
neck
Pressure tank
Check valve
Throttle valve
Other manuals for Weekend-System II
1
Table of contents
Other alpro Medical Equipment manuals
Popular Medical Equipment manuals by other brands

COOK Medical
COOK Medical I-IGTCFS-426-08 Instructions for use

brewer
brewer Brewer FLEX Installation & operation manual

Integra
Integra Cadence Total Ankle System manual

TOOLCRAFT
TOOLCRAFT 1277257 operating instructions

GE
GE Healthcare Portascan Service manual

Kiwi
Kiwi ProCup VAC-6000S Instructions for use