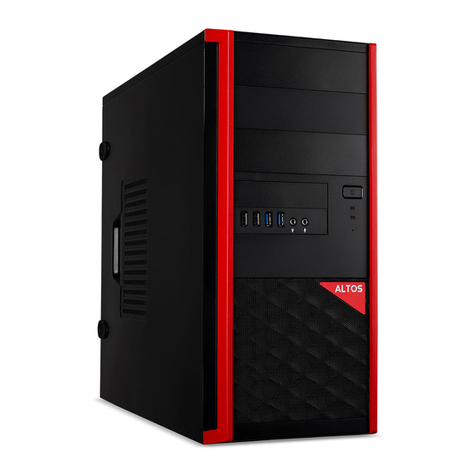
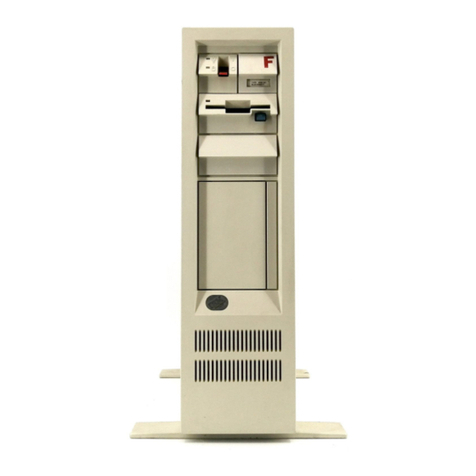
Altos 986T User instructions

~--
ALTOS
-:
586
T/986
T
SETTiNG
Up

5861/9861
Setting Up
Guide

Federal Communication
Commission Notice
WARNING
This
equipment
can
radiate
radio
frequency
and
energy
and,
if
not
installed
and
used
in
accordance
with
the
instructions
manual,
may
cause
interference
to
radio
communications.
It
has
been
tested
and
found
to
comply
with
the
limits
for
a
Class
A
computing
device
pursuant
to
Subpart
J
of
Part
15
of
FCC
Rules,
which
are
designed
to
provide
reasonable
protection
against
such
interference
when
operated
in
a
commercial
environment.
Operation
of
this
equipment
in
a
residential
area
is
likely
to
cause
inter-
ference
in
which
case
the
user,
at
the
user's
own
expense,
will
be
required
to
take
whatever
measures
may
be
required
to
correct
the
interference.
ACKNOWLEDGEMENTS
ALTOS
is
a
registered
trademark
and
WorkNet
is
a
trademark
of
Altos
Computer
Systems.
XENIX
is
a
trademark
of
Microsoft.
Concurrent
CP/M
is
a
trademark
of
Digital
Research.
CAUTION
If
you
have
to
send
your
system
for
repair,
procedure
erases
the
data
on
the
hard
disk.
the
contents
of
the
disk.
SAFETY
WARNING
part
of
the
test
Therefore,
copy
all
Disconnect
the
AC
power
cord
before
installing
any
option
boards
and
before
replacing
the
fuse.
Do
not
attempt
to
service
any
parts
of
the
586T/986T
system.

Introduction
This
guide
introduces
you
to
the
Altos
586T
and
986T
computer
systems.
It
shows
you
how
to
choose
an
appropriate
site
for
your
system,
connect
the
various
parts,
and
start
it
up.
You
will
also
run
confidence
tests
that
will
confirm
that
your
system
is
running
properly.
Should
you
experience
any
difficulty
with
the
instal-
lation,
a
checklist
helps
you
locate
the
source
of
the
problem
and
suggests
possible
remedies.
After
you
have
finished
setting
up
your
system,
you
are
directed
you
where
to
go
next.
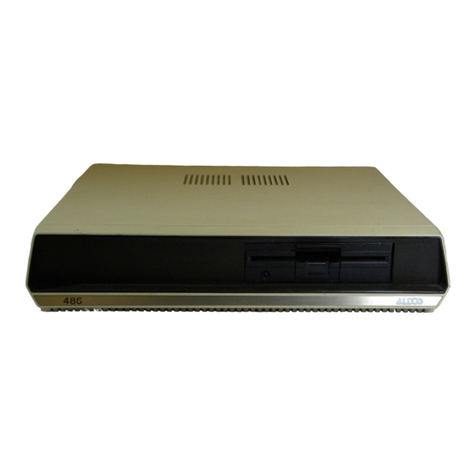
A
586T/986T
system
is
shown
below.
DISK
SELECT
INDICATOR
TAPE
UNIT
Figure
1.
Altos
586T/986T
System
iii
FLOPPY
DRIVE


Contents
Chapter
1
Choosing
a
Location.
• •
1-1
Chapter
2
Setting
Up
Your
System
• •
2-1
Before
You
Begin
• • • • • •
••
• • •
2-1
Connecting
a
Terminal
to
the
System.
• • •
2-2
Connecting
a Power Cord
to
the
System.
• •
2-3
Chapter
3
Starting
Your
System
•
Before
You
Begin
• • • • •
Turning
the
Terminal
On. • • • •
Turning
the
System
On. • • • •
Problem
Checkl
ist.
• • • • • • •
•
3-1
• •
3-1
• • •
3-1
3-1
•
3-2
Chapter
4
Using
and
Backing
Up
Diskettes
• •
4-1
Handling
Diskettes
• • • •
••
••••
4-1
Protecting
Data
on
Diskettes
• •
4-2
Inserting
a
Diskette
• • • • •
4-3
Copying
Original
Diskettes
• • • •
4-4
Chapter
5
Running
the
System
Confidence
Tests.
. . . . . . . . . . . . . . . . . . .
5-1
How
to
Begin
• • • • • • • • • • • • • • •
5-2
Running
the
Tests.
• • • • • • • • •
5-3
Chapter
6
Using
the
Utility
Programs
•
The
Floppy
Disk
Format
Program
• •
6-1
• •
6-2
The
Floppy
Copy
Program.
• • • •
The
Display
Hard
Disk
Bad
Sector
The
Flag
Bad
Sector
Program.
• •
Leaving
the
Utilities
Program.
• •
6-3
Program
•
6-6
. . . . •
6-7
• • •
6-8
Chapter
7 Where
Do
You
Go
Next?
•••
7-1
Operating
Systems.
• • • • • • • • • • • •
7-1
Related
Altos
Manuals
•••••••••••
7-1
Chapter
8
Using
Tape
Cartridges.
••••
8-1
Handling
Tape
Cartridges
• • • • • •
8-1
Protecting
Your
Data
• • • • • • • • • • •
8-1
Inserting
and
Removing a Tape
Cartridge
••
8-2
Chapter
9
Preventive
Maintenance
•
Cleaning
the
Head
Assembly
• • •
Chapter
IS
Connecting
a
Printer.
v
• • •
9-1
•
9-1
• • •
1"'-1

Appendix A -
Physical
Specifications.
Index
• • • •
Illustrations
Figure
I
2
3
4
5
6
7
8
9
Title
Altos
586T/986T
System
Choosing
a
Location.
• •
The 586T
Backpanel
• • •
The 986T
Backpanel
• • • •
A
Write-Protected
Diskette
•
Inserting
a
Diskette
•
Protecting
Your
Tape
Cartridge
Data
••••••
Inserting
and
Removing a
Tape
Cartridge
•••••••
Cleaning
the
Head
Assembly
•
vi
•
A-I
• •
I-I
• •
iii
• •
1-2
• •
2-1
•
2-2
4-2
•
4-3
•
8-2
• •
8-3
9-1

Chapter 1
Choosing a Location
After
unpacking
your
586T/986T,
decide
where
you
want
to
use
your
system.
When
choosing
a
location,
consider
these
suggestions:
1.
Choose
a
stable
surface
to
hold
your
system.
If
you
are
going
to
place
your
terminal
next
to
the
system,
make
sure
that
the
surface
is
large
enough
to
provide
12"
of
space
between
the
system
and
the
terminal.
2.
Place
your
system
and
terminal
near
a 3 way
power
outlet.
3.
Orient
your
terminal
away
from
direct
sunlight
or
strong
room
lights.
4.
Provide
enough
space
to
route
the
cables
and
power
cords.
5.
Be
sure
the
cooling
vents
for
the
terminal
and
system
are
not
be
blocked.
See
the
following
illustration.
1-1

Choosing a
Location
ORIENT
TERMINAL
AWAY
FROM
WINDOWS
OR
BRIGHT LIGHTS
PLACE TERMINAL
AND
SYSTEM
AT
LEAST
12"
APART
PROVIDE ENOUGH
SPACE
TO ROUTE
CABLES AND
POWER
CORDS
Figure
2.
Choosing
a
Location
1-2
PLACE YOUR
SYSTEM AND
TERMINAL NEAR A
3-WA
Y OUTLET

Chapter 2
Setting
Up
Your
System
Read
this
chapter
to
find
out
how
to
connect
the
various
parts
of
your
system.
Before
You
Begin
Before
you
begin
make
sure
that
you
can
easily
reach
the
backpanels
on
both
the
System
and
the
Terminal.
POWER
SWITCH
CONNECT
CONNECT POWER
CORD HERE
TERMINAL
CONNECT
SERIAL
HERE PRINTER HERE
O(
H.D.
EXPANSION)O
oE3o
@
TAPE I
I
Figure
3.
The
586T
Backpanel
2-1

Setting Up Your System
CONNECT POWER
CORD HERE
01.
P
L--H.O.eXPANSlON=-:J
~
°L,.,,~
IWORKNET I
PORT'
0
O~O
O~O O~O O~O
O~O
CONNECT
TERMINAL
HERE
Figure
4.
The 986T
Backpanel
Connecting a Terminal to the
System
A
wide
variety
of
terminals
can
be
used
with
the
Altos
586T/986T.
Most
terminals
use
a RS232C
cable
to
connect
the
terminal
to
the
system.
This
is
an
industry
standard
cable
and
is
readily
available.
The
cable
from
the
terminal
must
be
connected
to
PORT
1
on
the
586T
or
the
986T.
See
the
manual
that
came
with
your
terminal
for
where
to
connect
the
cable
at
the
terminal.
Connect
additional
terminals
to
ports
2
through
5 on
the
586T
and
2
through
9
on
the
986T.
2-2

Setting Up Your System
Your
terminal
must
be
set
to
communicate
with
your
system
according
to
the
specifications
below:
o 9600
baud
asynchronous
transmission.
o
Eight
bit
word
length,
one
start
bit
and
one
stop
bit.
o
No
parity.
o
Data-Terminal-Ready
(DTR)
handshaking
enabled.*
o
Request-to-send
(RTS)
and
clear-to-send
(CTS)
handshaking
is
disabled.
Refer
to
your
operating
system
manual
(Introduction
to
Xenix
or
the
Introduction
to
Concurrent
CP/M)
and
the
manual
that
came
with
your
terminal
for
how
set
these
parameters.
*As
an
alternative
to
DTR
handshaking,
you
may
use
X/ON-X/OFF.
In
this
case
DTR
must
be
on
at
all
times
as
opposed
to
operating
in
the
"handshaking"
(back
and
forth
signaling)
mode.
Connecting the Power
Cord
to the
System
Plug
the
power
cord
into
the
AC
INPUT
receptacle
at
the
rear
of
your
system.
Do
not
plug
the
power
cord
into
the
wall
outlet.
2-3


Chapter 3
Starting
Your
System
Before
You
Begin
1.
Make
sure
that
the
power
switches
for
both
the
system
and
the
terminal
are
in
the
OFF
position.
2.
Plug
the
power
cords
for
the
system
and
the
terminal
into
the
wall
outlets.
Turning
the Terminal On
1.
Turn
the
terminal
on.
2.
Watch
for
the
cursor
(small
rectangular
block)
to
appear
in
the
upper
left-hand
corner
of
the
screen.
After
about
30
seconds,
if
the
cursor
does
not
appear,
try
adjusting
the
brightness.
Turning
the
System
On
To
turn
the
system
on,
set
the
Power
Switch
on
the
system
to
ON.
The
following
message
appears
on
the
screen
in
approximately
15
seconds:
POWER
UP
TEST
PASSED
Monitor
Version
n.nn
Press
any
key
to
interrupt
boot
3-1

Starting YourSystem
Within
four
seconds
press
the
Space
Bar.
The
screen
message
changes
to
read:
PASSED
POWER-UP
TEST
Monitor
Version
n.nn
Press
any
key
to
interrupt
boot
Enter
[1]
to
Boot
from
Hard
Disk
Enter
[2]
to
Boot
from
Floppy
Disk
Enter
[3]
to
Enter
Monitor
At
this
point,
do
not
select
any
of
the
options.
If
the
system
does
not
pass
the
Power
Up
test,
the
following
message
appears
on
the
screen:
POWER
UP
TEST
FAILED
Problem Checklist
If
your
system
does
not
display
a power up
test
message,
check
the
following
list.
1.
If
the
fan
on
the
system
is
not
running,
check
the
following:
Is
the
Power
Cord
plugged
into
the
rear
of
the
system
and
into
the
wall
outlet?
Check
the
wall
outlet
by
plugging
in
a
lamp.
3-2

Starting Your System
Check
the
fuse
by
doing
the
following:
Set
the
Power
Switch
to
OFF.
Unplug
the
power
cord
from
the
wall
outlet.
Remove
the
fuse
holder
by
inserting
a
screwdriver
into
the
fuse
holder
slot
and
turning
it
counterclockwise.
Inspect
the
fuse.
It
is
defective
if
the
wire
between
the
two
metal
caps
is
broken
or
no
longer
visible.
Replace
the
fuse
if
necessary.
Otherwise,
reinsert
the
fuse
holder
into
the
rear
panel
and
using
the
screwdriver,
turn
it
clockwise.
2.
If
nothing
appears
on
the
screen,
check
the
following:
Is
the
the
keyboard
plugged
into
the
Monitor?
Is
the
cable
between
the
terminal
and
the
system
secure
at
both
ends?
Is
the
brightness
control
on
the
terminal
turned
up
all
the
way?
If
none
of
these
suggestions
has
helped
contact
YOUr
Altos
dealer.
CAUTION
IF
YOUR
SYSTEM
HAS
TO
BE
SENT
IN
FOR
REPAIR,
PART
OF
THE
TEST
PROCEDURE
ERASES
THE
DATA
ON
THE
HARD
DISK.
THEREFORE,
COpy
ALL
THE
CONTENTS
OF
THE
HARD
DISK,
AS
ALTOS
DOES
NOT
GUARANTEE
DATA
INTOORITY
UPON
RETURN
OF
YOUR
SYSTEM.
3-3


Chapter
4
Using
and
Backing Up Diskettes
With
the
586T
and
986T
systems,
you
should
use
double-sided,
double
density
floppy
diskettes.
Handling
DiskeHes
o Use a
felt
pen
to
label
your
diskette.
Do
not
use
a
ball
point
pen.
o Keep
your
diskettes
away
from
any
magnetized
objects.
This
includes
putting
a
diskette
on
top
of
your
system
or
close
to
the
telephone.
o
Do
not
bend
your
diskette.
o Keep
your
diskette
away
from
direct
sunlight
or
excessive
heat.
o
Do
not
touch
or
clean
the
exposed
surfaces
on
the
diskette.
o
When
not
in
use,
store
your
diskettes
in
their
protective
jackets.
4-1

Using
and
Backing
Up Diskettes
Protecting
Data
On
Diskettes
The 5
1/4
inch
diskettes
that
you
use
with
your
system
have
a
notch
cut
into
the
side.
You
also
receive
silver
pieces
of
tape
for
covering
this
notch.
When
the
notch
is
covered,
you
cannot
write
or
erase
data
on
the
diskette.
This
is
known
as
write
protecting
a
disk.
When
the
notch
is
not
covered,
you
can
write
or
erase
data
on
the
diskette.
This
is
known
as
write
enabling
a
disk.
1.
AVOID
TOUCHING
2.
DO
NOT BEND
3.
DO
NOT DROP
4.
KEEP
IN
JACKET COVER
WHEN NOT
IN
USE.
Figure
5.
A
Write-Protected
Diskette
4-2

Inserting a Diskette
Using
and
Backing Up Diskettes
1 )
QJ2.e.n
.tILe
Fl
0I#2PY
~
.elQ.t...
Press
the
rectangular
area
below
the
slot
as
shown.
2)
Insert
the
diskette.
With
the
label
side
facing
up
and
toward
you,
carefully
insert
the
diskette
until
it
locks
in
place.
3)
Close
the
drive
door
Slide
the
door
latch
down
until
it
locks
in
place.
Figure
6.
Loading
a
Diskette
4-3
This manual suits for next models
1
Table of contents
Other Altos Desktop manuals

Altos
Altos P550 F4 User manual

Altos
Altos 586T User manual

Altos
Altos P30 F6 User manual

Altos
Altos BrainSphere P555 F5 User manual

Altos
Altos 586 User manual

Altos
Altos 580 Manual

Altos
Altos BrainSphere P330 F6 User manual

Altos
Altos BrainSphere P15 F7 User manual

Altos
Altos BrainSphere P10 F7 User manual
Altos
Altos BrainSphere P130 F5 User manual
Popular Desktop manuals by other brands

Matrox
Matrox 4Sight GPm user guide

Compaq
Compaq 219700-001 - ProLiant - 1500 Installation and user guide

Compaq
Compaq Presario All-in-One SG2-200 - Desktop PC Setup poster

Beckhoff
Beckhoff CX5110-01 9020 Series manual

Panasonic
Panasonic CF-T2 Series Reference manual

Lenovo
Lenovo ThinkCentre M77 1990 user guide